2016 CHEVROLET MALIBU LIMITED window
[x] Cancel search: windowPage 198 of 360
Chevrolet Malibu Limited Owner Manual (GMNA-Localizing-U.S/Canada-
9086425) - 2016 - crc - 7/30/15
Driving and Operating 197
Warning (Continued)
.There are holes or openings
in the vehicle body from
damage or aftermarket
modifications that are not
completely sealed.
If unusual fumes are detected or
if it is suspected that exhaust is
coming into the vehicle: . Drive it only with the
windows completely down.
. Have the vehicle repaired
immediately.
Never park the vehicle with the
engine running in an enclosed
area such as a garage or a
building that has no fresh air
ventilation.
Running the Vehicle
While Parked
It is better not to park with the
engine running.
If the vehicle is left with the engine
running, follow the proper steps to
be sure the vehicle will not move.
See Shifting Into Park 0194 and
Engine Exhaust 0196.
If parking on a hill and pulling a
trailer, see Driving Characteristics
and Towing Tips 0218.
Automatic
Transmission
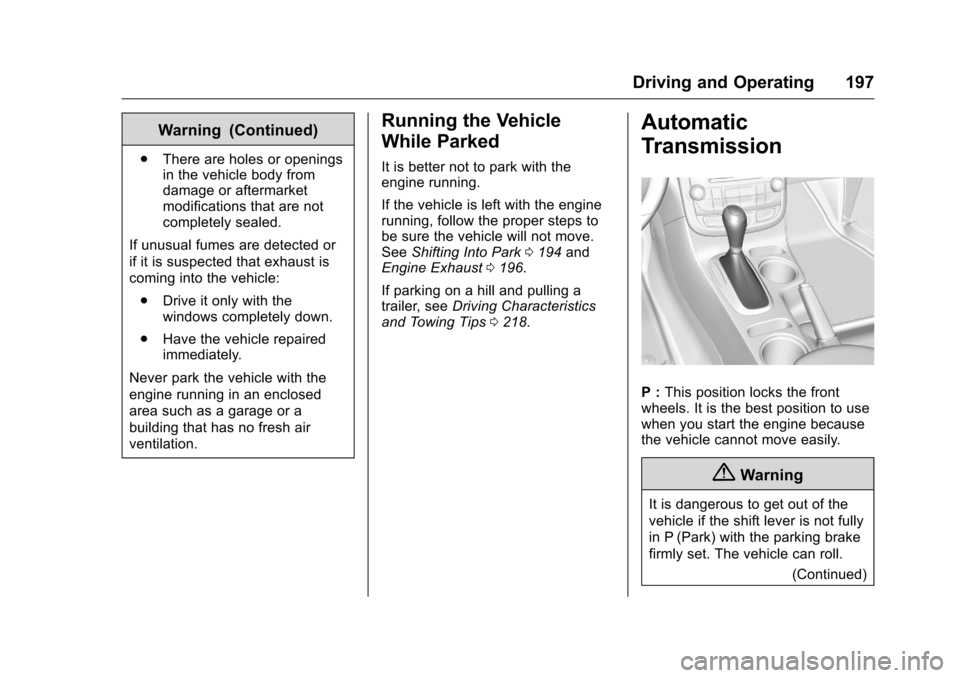
P : This position locks the front
wheels. It is the best position to use
when you start the engine because
the vehicle cannot move easily.
{Warning
It is dangerous to get out of the
vehicle if the shift lever is not fully
in P (Park) with the parking brake
firmly set. The vehicle can roll.
(Continued)
Page 220 of 360
Chevrolet Malibu Limited Owner Manual (GMNA-Localizing-U.S/Canada-
9086425) - 2016 - crc - 7/30/15
Driving and Operating 219
.Do not tow a trailer during the
first 800 km (500 mi), to prevent
damage to the engine, axle,
or other parts.
. Then, during the first 800 km
(500 mi) of trailer towing, do not
drive over 80 km/h (50 mph) and
do not make starts at full throttle.
. The vehicle can tow in D (Drive)
but M (Manual Mode) is
recommended. See Manual
Mode 0199. Use a lower gear if
the transmission shifts too often.
. Turn off Park Assist when
towing.
{Warning
When towing a trailer, exhaust
gases may collect at the rear of
the vehicle and enter if the
liftgate, trunk/hatch, or rear-most
window is open.
When towing a trailer:
(Continued)
Warning (Continued)
.Do not drive with the
liftgate, trunk/hatch,
or rear-most window open.
. Fully open the air outlets on
or under the instrument
panel.
. Also adjust the Climate
Control system to a setting
that brings in only outside
air. See “Climate Control
Systems” in the Index.
For information about carbon
monoxide, see Engine Exhaust
0 196.
Towing a trailer requires a certain
amount of experience. The
combination you are driving is
longer and not as responsive as the
vehicle itself. Get acquainted with
the handling and braking of the rig
before setting out for the open road.
Before starting, check all trailer hitch
parts and attachments, safety
chains, electrical connectors, lamps,
tires, and mirrors. If the trailer has electric brakes, start the
combination moving and then apply
the trailer brake controller by hand
to be sure the brakes work.
During the trip, check occasionally
to be sure that the load is secure
and the lamps and any trailer
brakes still work.
Towing with a Stability Control
System
When towing, the sound of the
stability control system might be
heard. The system is reacting to the
vehicle movement caused by the
trailer, which mainly occurs during
cornering. This is normal when
towing heavier trailers.
Following Distance
Stay at least twice as far behind the
vehicle ahead as you would when
driving the vehicle without a trailer.
This can help to avoid situations
that require heavy braking and
sudden turns.
Page 240 of 360
Chevrolet Malibu Limited Owner Manual (GMNA-Localizing-U.S/Canada-
9086425) - 2016 - crc - 7/30/15
Vehicle Care 239
2. Turn the heater on to thehighest temperature and to the
highest fan speed. Open the
windows as necessary.
3. When it is safe to do so, pull off the road, shift to P (Park) or
N (Neutral), and let the
engine idle.
If the engine coolant temperature
gauge is no longer in the overheat
zone, the vehicle can be driven.
Continue to drive the vehicle slowly
for about 10 minutes. Keep a safe
distance from the vehicle in front.
If the warning does not come back
on, continue to drive normally and
have the cooling system checked
for proper fill and function.
If the warning continues, pull over,
stop, and park the vehicle
right away.
If there is no sign of steam, idle the
engine for three minutes while
parked. If the warning is still
displayed, turn off the engine until it
cools down.Washer Fluid
What to Use
When windshield washer fluid is
needed, be sure to read the
manufacturer's instructions before
use. If operating the vehicle in an
area where the temperature may fall
below freezing, use a fluid that has
sufficient protection against
freezing.
Adding Washer Fluid
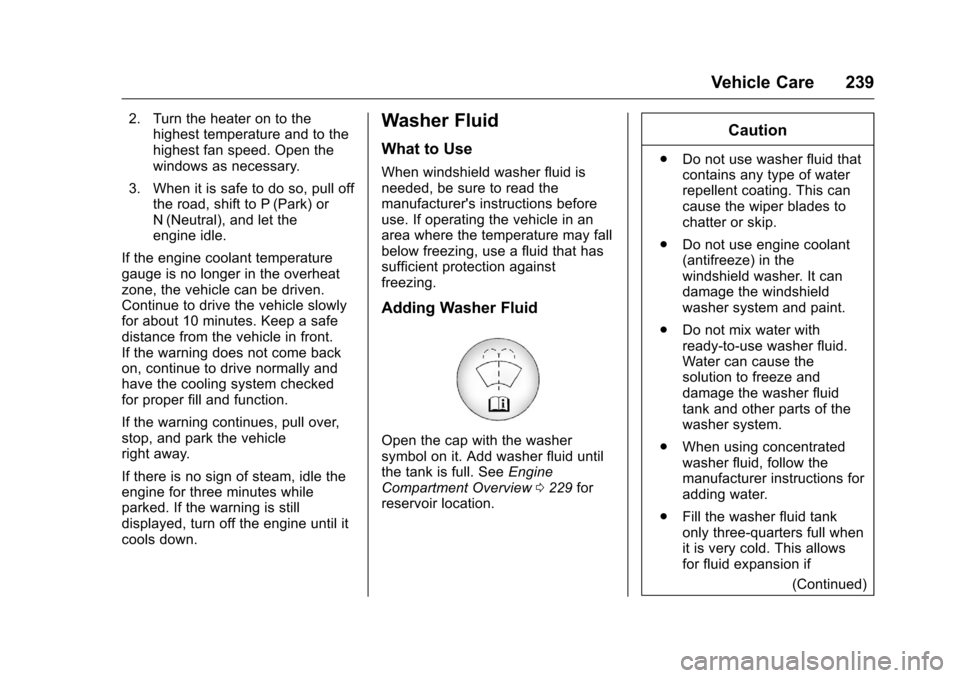
Open the cap with the washer
symbol on it. Add washer fluid until
the tank is full. See Engine
Compartment Overview 0229 for
reservoir location.
Caution
. Do not use washer fluid that
contains any type of water
repellent coating. This can
cause the wiper blades to
chatter or skip.
. Do not use engine coolant
(antifreeze) in the
windshield washer. It can
damage the windshield
washer system and paint.
. Do not mix water with
ready-to-use washer fluid.
Water can cause the
solution to freeze and
damage the washer fluid
tank and other parts of the
washer system.
. When using concentrated
washer fluid, follow the
manufacturer instructions for
adding water.
. Fill the washer fluid tank
only three-quarters full when
it is very cold. This allows
for fluid expansion if
(Continued)
Page 258 of 360
Chevrolet Malibu Limited Owner Manual (GMNA-Localizing-U.S/Canada-
9086425) - 2016 - crc - 7/30/15
Vehicle Care 257
Mini
Fuses Usage
55 Front Power Windows/Mirrors
56 Windshield Washer
57 Spare
60 Heated Mirror
62 Canister Vent Solenoid
66 Spare
67 Fuel Module
69 Battery Voltage Sensor
70 Lane Departure/Rear Parking Aid/Side
Blind Zone Assist
71 PEPS BATT
J-Case Fuses Usage
6 Front Wiper
12 Starter 1
21 Rear Power Window J-Case
Fuses Usage
22 Sunroof
24 Front Power Window
25 PEPS MTR
26 Antilock Brake System Pump
27 Not Used
28 Rear Defogger
41 Brake Vacuum Pump
42 Cooling Fan K2
44 Starter 2
45 Cooling Fan K1
59 Air Pump Emissions
Mini
Relays Usage
7 Powertrain
9 Cooling Fan K2
13 Cooling Fan K1
15 Run/Crank
16 Spare Mini
Relays Usage
17 Window/Mirror Defogger
Micro
Relays Usage
1 Air Conditioning Compressor Clutch
2 Starter Solenoid
4 Front Wiper Speed
5 Front Wiper On
6 Spare
8 Transmission Auxiliary Oil
Pump (LKW)
10 Cooling Fan K3 11 Starter 2 Solenoid (LKW)
14 Headlamp Low Beam/DRL
Page 266 of 360
Chevrolet Malibu Limited Owner Manual (GMNA-Localizing-U.S/Canada-
9086425) - 2016 - crc - 7/30/15
Vehicle Care 265
the tire. Air pressure is
expressed in kPa (kilopascal)
or psi (pounds per square inch).
Accessory Weight
:The
combined weight of optional
accessories. Some examples of
optional accessories are
automatic transmission, power
windows, power seats, and air
conditioning.
Aspect Ratio
:The relationship
of a tire's height to its width.
Belt
:A rubber coated layer of
cords between the plies and the
tread. Cords may be made from
steel or other reinforcing
materials.
Bead
:The tire bead contains
steel wires wrapped by steel
cords that hold the tire onto
the rim.
Bias Ply Tire
:A pneumatic tire
in which the plies are laid at
alternate angles less than
90 degrees to the centerline of
the tread. Cold Tire Pressure
:The
amount of air pressure in a tire,
measured in kPa (kilopascal)
or psi (pounds per square inch)
before a tire has built up heat
from driving. See Tire Pressure
0 267.
Curb Weight
:The weight of a
motor vehicle with standard and
optional equipment including the
maximum capacity of fuel, oil,
and coolant, but without
passengers and cargo.
DOT Markings
:A code molded
into the sidewall of a tire
signifying that the tire is in
compliance with the U.S.
Department of Transportation
(DOT) Motor Vehicle Safety
Standards. The DOT code
includes the Tire Identification
Number (TIN), an alphanumeric
designator which can also
identify the tire manufacturer,
production plant, brand, and
date of production. GVWR
:Gross Vehicle Weight
Rating. See Vehicle Load Limits
0 183.
GAWR FRT
:Gross Axle Weight
Rating for the front axle. See
Vehicle Load Limits 0183.
GAWR RR
:Gross Axle Weight
Rating for the rear axle. See
Vehicle Load Limits 0183.
Intended Outboard Sidewall
:
The side of an asymmetrical tire
that must always face outward
when mounted on a vehicle.
Kilopascal (kPa)
:The metric
unit for air pressure.
Light Truck (LT-Metric) Tire
:A
tire used on light duty trucks and
some multipurpose passenger
vehicles.
Load Index
:An assigned
number ranging from 1 to 279
that corresponds to the load
carrying capacity of a tire.
Page 284 of 360
Chevrolet Malibu Limited Owner Manual (GMNA-Localizing-U.S/Canada-
9086425) - 2016 - crc - 7/30/15
Vehicle Care 283
When using the tire sealant and
compressor kit during cold
temperatures, warm the kit in a
heated environment for five minutes.
This will help to inflate the tire
faster.
If a tire goes flat, avoid further tire
and wheel damage by driving slowly
to a level place. Turn on the hazard
warning flashers. SeeHazard
Warning Flashers 0134.
See If a Tire Goes Flat 0280 for
other important safety warnings.
Do not remove any objects that
have penetrated the tire. 1. Remove the tire sealant and
compressor kit from its storage
location. See Storing the Tire
Sealant and Compressor Kit
0 287.
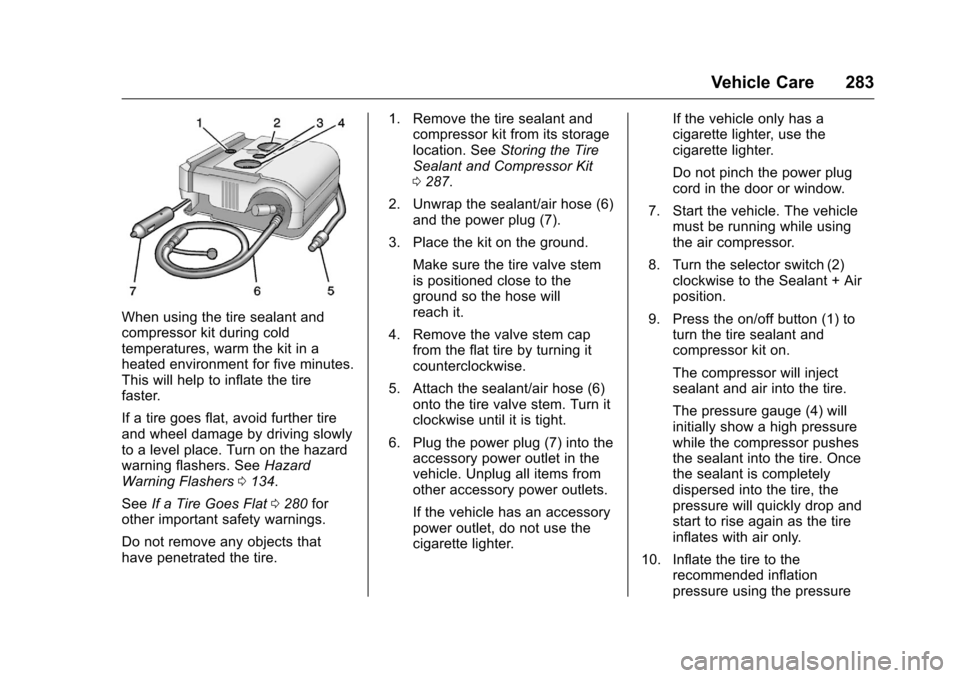
2. Unwrap the sealant/air hose (6) and the power plug (7).
3. Place the kit on the ground. Make sure the tire valve stem
is positioned close to the
ground so the hose will
reach it.
4. Remove the valve stem cap from the flat tire by turning it
counterclockwise.
5. Attach the sealant/air hose (6) onto the tire valve stem. Turn it
clockwise until it is tight.
6. Plug the power plug (7) into the accessory power outlet in the
vehicle. Unplug all items from
other accessory power outlets.
If the vehicle has an accessory
power outlet, do not use the
cigarette lighter. If the vehicle only has a
cigarette lighter, use the
cigarette lighter.
Do not pinch the power plug
cord in the door or window.
7. Start the vehicle. The vehicle must be running while using
the air compressor.
8. Turn the selector switch (2) clockwise to the Sealant + Air
position.
9. Press the on/off button (1) to turn the tire sealant and
compressor kit on.
The compressor will inject
sealant and air into the tire.
The pressure gauge (4) will
initially show a high pressure
while the compressor pushes
the sealant into the tire. Once
the sealant is completely
dispersed into the tire, the
pressure will quickly drop and
start to rise again as the tire
inflates with air only.
10. Inflate the tire to the recommended inflation
pressure using the pressure
Page 287 of 360
Chevrolet Malibu Limited Owner Manual (GMNA-Localizing-U.S/Canada-
9086425) - 2016 - crc - 7/30/15
286 Vehicle Care
If the vehicle has an accessory
power outlet, do not use the
cigarette lighter.
If the vehicle only has a
cigarette lighter, use the
cigarette lighter.
Do not pinch the power plug
cord in the door or window.
7. Start the vehicle. The vehicle must be running while using
the air compressor.
8. Turn the selector switch (2) counterclockwise to the Air
Only position.
9. Press the on/off button (1) to turn the compressor on.
The compressor will inflate the
tire with air only.
10. Inflate the tire to the recommended inflation
pressure using the pressure
gauge (4). The recommended
inflation pressure can be found
on the Tire and Loading
Information label. See Tire
Pressure 0267. The pressure gauge (4) may
read higher than the actual tire
pressure while the compressor
is on. Turn the compressor off
to get an accurate reading. The
compressor may be turned on/
off until the correct pressure is
reached. If the tire is inflated
higher than the recommended
pressure, press the pressure
relief button (3), if equipped,
until the proper pressure
reading is reached. This option
is only functional when using
the air only hose (5).
11. Press the on/off button (1) to turn the tire sealant and
compressor kit off.
Be careful while handling the
tire sealant and compressor kit
as it could be warm after
usage.
12. Unplug the power plug (7) from the accessory power outlet in
the vehicle. 13. Disconnect the air only
hose (5) from the tire valve
stem, by turning it
counterclockwise, and replace
the tire valve stem cap.
14. Return the air only hose (5) and the power plug (7) back to
their original locations.
15. Return the equipment to its original storage location in the
vehicle.
Removal and Installation of the
Sealant Canister
To remove the sealant canister:
1. Remove the plastic cover.
Page 300 of 360
Chevrolet Malibu Limited Owner Manual (GMNA-Localizing-U.S/Canada-
9086425) - 2016 - crc - 7/30/15
Vehicle Care 299
Caution (Continued)
your dealer. Follow all
manufacturer directions regarding
correct product usage, necessary
safety precautions, and
appropriate disposal of any
vehicle care product.
Caution
Avoid using high-pressure
washes closer than 30 cm (12 in)
to the surface of the vehicle. Use
of power washers exceeding
8,274 kPa (1,200 psi) can result
in damage or removal of paint
and decals.
The
esymbol is on any
underhood compartment electrical
center that should not be power
washed. This could cause damage
that would not be covered by the
vehicle warranty. If using an automatic car wash,
follow the car wash instructions. The
windshield wiper and rear window
wiper, if equipped, must be off.
Remove any accessories that may
be damaged or interfere with the car
wash equipment.
Rinse the vehicle well, before
washing and after, to remove all
cleaning agents completely. If they
are allowed to dry on the surface,
they could stain.
Dry the finish with a soft, clean
chamois or an all-cotton towel to
avoid surface scratches and water
spotting.
Finish Care
Application of aftermarket clearcoat
sealant/wax materials is not
recommended. If painted surfaces
are damaged, see your dealer to
have the damage assessed and
repaired. Foreign materials such as
calcium chloride and other salts, ice
melting agents, road oil and tar, tree
sap, bird droppings, chemicals from
industrial chimneys, etc., can
damage the vehicle's finish if they
remain on painted surfaces. Washthe vehicle as soon as possible.
If necessary, use non-abrasive
cleaners that are marked safe for
painted surfaces to remove foreign
matter.
Occasional hand waxing or mild
polishing should be done to remove
residue from the paint finish. See
your dealer for approved cleaning
products.
Do not apply waxes or polishes to
uncoated plastic, vinyl, rubber,
decals, simulated wood, or flat paint
as damage can occur.
Caution
Machine compounding or
aggressive polishing on a
basecoat/clearcoat paint finish
may damage it. Use only
non-abrasive waxes and polishes
that are made for a basecoat/
clearcoat paint finish on the
vehicle.
To keep the paint finish looking new,
keep the vehicle garaged or
covered whenever possible.