2016 CHEVROLET MALIBU LIMITED remote control
[x] Cancel search: remote controlPage 128 of 360
Chevrolet Malibu Limited Owner Manual (GMNA-Localizing-U.S/Canada-
9086425) - 2016 - crc - 7/30/15
Instruments and Controls 127
Remote Unlock Feedback or
Unlock Feedback (Lights)
When on, the exterior lamps will
flash when unlocking the vehicle
with the RKE transmitter.
Select On or Off. Press TUNE/
MENU to confirm and go back to the
last menu.
Remote Lock Feedback or
Locking Feedback
This allows selection of what type of
feedback is given when locking the
vehicle with the RKE transmitter.
Press TUNE/MENU when Locking
Feedback is highlighted. Turn the
TUNE/MENU knob to select Lights
and Horn, Lights Only, Horn Only,
or Off. Press TUNE/MENU to
confirm and go back to the
last menu.
Remote Door Unlock or Door
Unlock Options
This allows selection of which doors
will unlock when pressing
Kon the
RKE transmitter. Press TUNE/MENU when Door
Unlock Options is highlighted. Turn
the TUNE/MENU knob to select All
Doors or Driver Door Only. When
set to Driver Door Only, the driver
door will unlock the first time
Kis
pressed and all doors will unlock
when
Kis pressed a second time.
When set to All Doors, all of the
doors will unlock at the first press
of
K. Press TUNE/MENU to confirm
and go back to the last menu.
Memory Remote Recall
This allows the Memory Remote
Recall feature to be turned on or off.
When on, this feature will recall the
current driver's last seat and outside
mirror positions upon unlocking the
driver door with the RKE transmitter,
and opening that door. The current
driver is identified when the RKE
transmitter is used to unlock the
driver door. If equipped with Keyless
Access, the recall will occur upon
opening the driver door. See
“Recalling RKE Memory Positions”
under Memory Seats 052. Press TUNE/MENU when Memory
Remote Recall is highlighted. Turn
the TUNE/MENU knob to select On
or Off. Press TUNE/MENU to
confirm and go back to the
last menu.
Remote Left in Vehicle Reminder
This allows the Remote Left in
Vehicle Reminder feature to be
turned on or off. If on, the horn will
chirp if a remote is left in the
vehicle.
Press TUNE/MENU when Remote
Left in Vehicle Reminder is
highlighted. Turn the TUNE/MENU
knob to select On or Off. Press
TUNE/MENU to confirm and go
back to the last menu.
Relock Remote Door
When on, the doors will
automatically lock after a period of
time if the vehicle is not entered or
exited.
Press TUNE/MENU when Relock
Remote Door is highlighted. Turn
the TUNE/MENU knob to select On
Page 129 of 360
Chevrolet Malibu Limited Owner Manual (GMNA-Localizing-U.S/Canada-
9086425) - 2016 - crc - 7/30/15
128 Instruments and Controls
or Off. Press TUNE/MENU to
confirm and go back to the
last menu.
Passive Door Unlock
This allows selection of which doors
are unlocked by pressing the button
on the outside door handle.
Press TUNE/MENU when Passive
Door Unlock is highlighted. Turn the
TUNE/MENU knob to select All
Doors or Driver Door. Press TUNE/
MENU to confirm and go back to the
last menu.
Passive Door Lock
This allows for turning Passive
Locking off, on, or on with feedback.Press TUNE/MENU when Passive
Door Lock is highlighted. Turn the
TUNE/MENU knob to select Off, On,
or On with Active Horn Chirp. Press
TUNE/MENU to confirm and go
back to the last menu.
Return to Factory Settings?
Select Return to Factory Settings?
for the option to return all vehicle
personalization to the default
settings. Turn the TUNE/MENU
knob to select Yes or No. Press
TUNE/MENU to confirm and go
back to the last menu.
Universal Remote
System
See
Radio Frequency Statement
0 335.
Universal Remote System
Programming
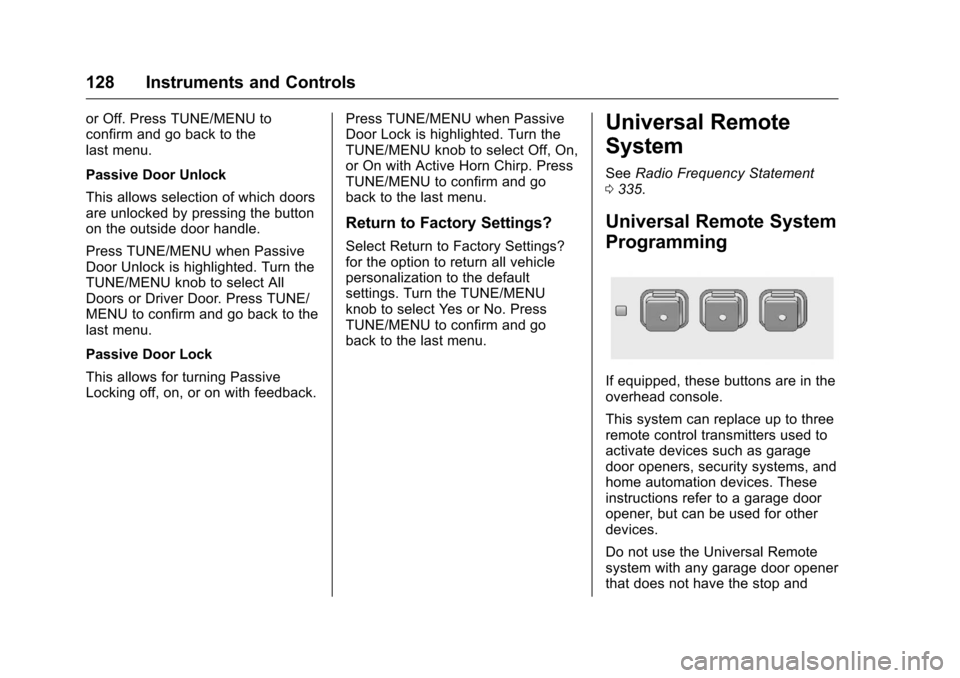
If equipped, these buttons are in the
overhead console.
This system can replace up to three
remote control transmitters used to
activate devices such as garage
door openers, security systems, and
home automation devices. These
instructions refer to a garage door
opener, but can be used for other
devices.
Do not use the Universal Remote
system with any garage door opener
that does not have the stop and
Page 130 of 360
Chevrolet Malibu Limited Owner Manual (GMNA-Localizing-U.S/Canada-
9086425) - 2016 - crc - 7/30/15
Instruments and Controls 129
reverse feature. This includes any
garage door opener model
manufactured before April 1, 1982.
Read these instructions completely
before programming the Universal
Remote system. It may help to have
another person assist with the
programming process.
Keep the original hand-held
transmitter for use in other vehicles
as well as for future programming.
Erase the programming when
vehicle ownership is terminated.
See“Erasing Universal Remote
System Buttons” later in this
section.
To program a garage door opener,
park outside directly in line with and
facing the garage door opener
receiver. Clear all people and
objects near the garage door.
Make sure the hand-held transmitter
has a new battery for quick and
accurate transmission of the
radio-frequency signal.Programming the Universal
Remote System
For questions or help programming
the Universal Remote system, call
1-800-355-3515 or see
www.homelink.com.
Programming involves
time-sensitive actions, and may time
out causing the procedure to be
repeated.
To program up to three devices:
1. Hold the end of the hand-held transmitter about 3 to 8 cm (1
to 3 in) away from the
Universal Remote system
buttons with the indicator light
in view. The hand-held
transmitter was supplied by the
manufacturer of the garage
door opener receiver.
2. At the same time, press and hold both the hand-held
transmitter button and one of
the three Universal Remote
system buttons to be used to
operate the garage door. Do
not release either button until the indicator light changes from
a slow to a rapid flash. Then
release both buttons.
Some garage door openers
may require substitution of
Step 2 with the procedure
under
“Radio Signals for
Canada and Some Gate
Operators” later in this section.
3. Press and hold the newly programmed Universal Remote
system button for five seconds
while watching the indicator
light and garage door
activation.
.If the indicator light stays on
continuously or the garage
door moves when the
button is pressed, then
programming is complete.
There is no need to
complete Steps 4–6.
. If the indicator light does
not come on or the garage
door does not move, a
second button press may
be required. For a second
time, press and hold the
newly programmed button
Page 131 of 360
Chevrolet Malibu Limited Owner Manual (GMNA-Localizing-U.S/Canada-
9086425) - 2016 - crc - 7/30/15
130 Instruments and Controls
for five seconds. If the light
stays on or the garage door
moves, programming is
complete.
. If the indicator light blinks
rapidly for two seconds,
then changes to a solid light
and the garage door does
not move, continue with
programming Steps 4–6.
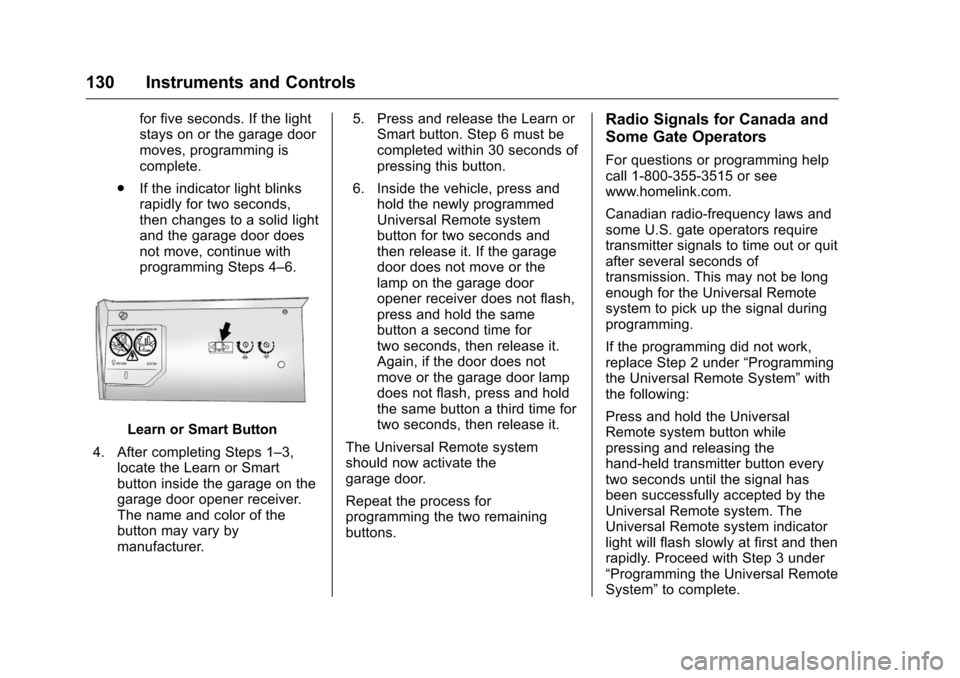
Learn or Smart Button
4. After completing Steps 1–3, locate the Learn or Smart
button inside the garage on the
garage door opener receiver.
The name and color of the
button may vary by
manufacturer. 5. Press and release the Learn or
Smart button. Step 6 must be
completed within 30 seconds of
pressing this button.
6. Inside the vehicle, press and hold the newly programmed
Universal Remote system
button for two seconds and
then release it. If the garage
door does not move or the
lamp on the garage door
opener receiver does not flash,
press and hold the same
button a second time for
two seconds, then release it.
Again, if the door does not
move or the garage door lamp
does not flash, press and hold
the same button a third time for
two seconds, then release it.
The Universal Remote system
should now activate the
garage door.
Repeat the process for
programming the two remaining
buttons.
Radio Signals for Canada and
Some Gate Operators
For questions or programming help
call 1-800-355-3515 or see
www.homelink.com.
Canadian radio-frequency laws and
some U.S. gate operators require
transmitter signals to time out or quit
after several seconds of
transmission. This may not be long
enough for the Universal Remote
system to pick up the signal during
programming.
If the programming did not work,
replace Step 2 under “Programming
the Universal Remote System” with
the following:
Press and hold the Universal
Remote system button while
pressing and releasing the
hand-held transmitter button every
two seconds until the signal has
been successfully accepted by the
Universal Remote system. The
Universal Remote system indicator
light will flash slowly at first and then
rapidly. Proceed with Step 3 under
“Programming the Universal Remote
System” to complete.
Page 132 of 360
Chevrolet Malibu Limited Owner Manual (GMNA-Localizing-U.S/Canada-
9086425) - 2016 - crc - 7/30/15
Instruments and Controls 131
Universal Remote System
Operation
Using the Universal Remote
System
Press and hold the appropriate
Universal Remote system button for
at least one-half second. The
indicator light will come on while the
signal is being transmitted.
Erasing Universal Remote
System Buttons
Erase all programmed buttons when
vehicle ownership is terminated.
To erase:1. Press and hold the two outside buttons until the indicator light
begins to flash. This should
take about 10 seconds.
2. Release both buttons.
Reprogramming a Single
Universal Remote System
Button
To reprogram any of the system
buttons: 1. Press and hold any one of the buttons. Do not release the
button.
2. The indicator light will begin to flash after 20 seconds. Without
releasing the button, proceed
with Step 1 under
“Programming the Universal
Remote System.”
Page 138 of 360
Chevrolet Malibu Limited Owner Manual (GMNA-Localizing-U.S/Canada-
9086425) - 2016 - crc - 7/30/15
Lighting 137
Lighting Features
Entry Lighting
Some exterior lamps and most of
the interior lights turn on briefly
when the Remote Keyless Entry
(RKE) transmitter
Kbutton is
pressed. After about 30 seconds the
exterior lamps turn off, then the
dome lamps and remaining interior
lights dim to off. Entry lighting can
be disabled manually by changing
the ignition out of the OFF position,
or by pressing the RKE transmitter
Qbutton.
This feature can be changed. See
Vehicle Personalization 0122.
Exit Lighting
Some exterior lamps come on at
night, or in areas with limited
lighting, when the key is removed
from the ignition. The dome lamps
also come on when the key is
removed from the ignition. The
exterior lamps and dome lamps remain on after the door is closed
for a set amount of time, then
automatically turn off.
For vehicles with Keyless Access,
the exterior lamps automatically turn
on when a door is opened after the
ignition is changed to the OFF
position. The dome lamps also
come on after the ignition is
changed to the OFF position. See
Ignition Positions (Keyless Access)
0
187 orIgnition Positions (Key
Access) 0189.
The exterior lamps turn off
immediately by turning the exterior
lamps control off.
This feature can be changed. See
Vehicle Personalization 0122.
Battery Load
Management
The vehicle has Electric Power
Management (EPM), which
estimates the battery's temperature
and state of charge. It then adjusts
the voltage for best performance
and extended life of the battery. When the battery's state of charge
is low, the voltage is raised slightly
to quickly bring the charge back up.
When the state of charge is high,
the voltage is lowered slightly to
prevent overcharging. If the vehicle
has a voltage display on the Driver
Information Center (DIC), you may
see the voltage move up or down.
This is normal. If there is a problem,
an alert will be displayed.
The battery can be discharged at
idle if the electrical loads are very
high. This is true for all vehicles.
This is because the generator
(alternator) may not be spinning fast
enough at idle to produce all the
power that is needed for very high
electrical loads.
A high electrical load occurs when
several of the following are on, such
as: headlamps, high beams, fog
lamps, rear window defogger,
climate control fan at high speed,
heated seats, engine cooling fans,
trailer loads, and loads plugged into
accessory power outlets.
Page 156 of 360
Chevrolet Malibu Limited Owner Manual (GMNA-Localizing-U.S/Canada-
9086425) - 2016 - crc - 7/30/15
Infotainment System 155
3. After the system determineswhat type of Bluetooth device
is being paired, the Bluetooth
device will need to be put into
discovery mode.
4. Some devices may require a Personal Identification Number
(PIN) in order to complete the
pairing process. Locate the
device named
“GMusicConnect” in the list on
the Bluetooth device and follow
the instructions on the device
to enter the four-digit PIN
provided by the infotainment
system.
Connecting to a Device
Once a device is paired to the
infotainment system, it can be
connected to the infotainment
system.
To connect a paired device when no
other device is connected to the
infotainment system: 1. Select the Select Device option from the Bluetooth Music
Setup menu.
2. Select the new device. To connect a paired device when
another device is connected to the
infotainment system:
1. Select the Select Device option from the Bluetooth Music
Setup menu.
2. Select the new device.
3. The active device is disconnected from the system
and the new device is
connected.
Removing a Device 1. Select Remove Device from the Bluetooth Music
Setup menu.
2. Select the device.
3. The device is removed from the system.
Before connecting to the removed
device again, it will need to paired
to the infotainment system.
Changing the Default PIN
To change the default PIN: 1. Select Change Default PIN from the Bluetooth Music
Setup menu. 2. Select one of the pre-defined
PINs, or select Other to create
a PIN.
To create a PIN: 1. Select the length of the PIN.
2. Enter the character sequence.
Messages
The following messages may
appear on the infotainment screen.
Poor Bluetooth Signal Quality :
This message displays when the
Bluetooth signal strength is low.
This Feature is Unavailable While
Vehicle is Moving : This message
displays when an action is not
allowed while the vehicle is moving.
Controlling a Bluetooth Device
Bluetooth devices that support
AVRCP (Audio/Video Remote
Control Profile) version 1.0 may be
able to be controlled by the
infotainment system. Control of a
Bluetooth device by the infotainment
system may not be supported in all
vehicles.
Page 174 of 360
Chevrolet Malibu Limited Owner Manual (GMNA-Localizing-U.S/Canada-
9086425) - 2016 - crc - 7/30/15
Climate Controls 173
Caution
Using a razor blade or sharp
object on the inside rear window
can damage the antenna or
defogger. Repairs would not be
covered by the vehicle warranty.
Do not stick anything to the rear
window.
Remote Start Climate Control
Operation : If equipped with the
remote start, the climate control
system may run when the vehicle is
started remotely. The system uses
the driver ’s previous settings to heat
or cool the inside of the vehicle. The
rear defog may come on during
remote start based on cold ambient
conditions. The rear defog indicator
light does not come on during a
remote start. The front heated seats
will turn on if it is cold outside. The
heated seat indicator lights do not
come on during a remote start.
Sensors
The solar sensor on top of the
instrument panel near the
windshield monitors the solar heat.
The climate control system uses the
sensor information to adjust the
temperature, fan speed,
recirculation, and air delivery mode
for best comfort.
If the sensor is covered, the
automatic climate control system
may not work properly.
Air Vents
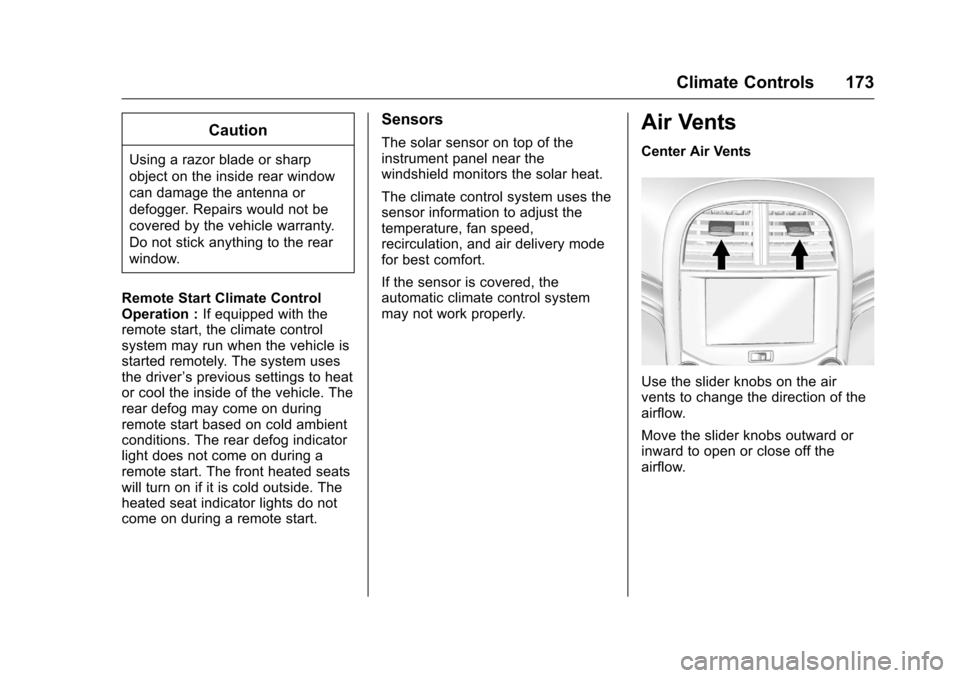
Center Air Vents
Use the slider knobs on the air
vents to change the direction of the
airflow.
Move the slider knobs outward or
inward to open or close off the
airflow.