2016 CHEVROLET CRUZE change time
[x] Cancel search: change timePage 27 of 377
Chevrolet Cruze Owner Manual (GMNA-Localizing-U.S./Canada/Mexico-
9234744) - 2016 - CRC - 3/9/16
26 In Brief
The low tire pressure warning light
may come on in cool weather when
the vehicle is first started, and then
turn off as the vehicle is driven. This
may be an early indicator that the
tire pressures are getting low and
the tires need to be inflated to the
proper pressure.
The TPMS does not replace normal
monthly tire maintenance. Maintain
the correct tire pressures.
SeeTire Pressure Monitor
System 0284.
Engine Oil Life System
The engine oil life system calculates
engine oil life based on vehicle use
and displays the CHANGE ENGINE
OIL SOON message when it is time
to change the engine oil and filter.
The oil life system should be reset
to 100% only following an oil
change. Resetting the Oil Life System
(Base Level Cluster)
1. Display the REMAINING OIL LIFE on the DIC. See Driver
Information Center (DIC)
(Uplevel Cluster) 0133 or
Driver Information Center (DIC)
(Base Level Cluster) 0130.
2. Press and hold SET/CLR on the turn signal lever while the
Oil Life display is active. The
oil life will change to 100%.
Resetting the Oil Life System
(Uplevel Cluster) 1. Display the REMAINING OIL LIFE on the DIC. See Driver
Information Center (DIC)
(Uplevel Cluster) 0133 or
Driver Information Center (DIC)
(Base Level Cluster) 0130.
2. Press and hold
Von the DIC
while the Oil Life display is
active. The oil life will change
to 100%. The oil life system can also be reset
as follows:
1. Turn the ignition to ON/RUN with the engine off.
2. Fully press and release the accelerator pedal three times
within five seconds.
See Engine Oil Life System 0248.
Driving for Better Fuel
Economy
Driving habits can affect fuel
mileage. Here are some driving tips
to get the best fuel economy
possible.
.
Avoid fast starts and accelerate
smoothly.
. Brake gradually and avoid
abrupt stops.
. Avoid idling the engine for long
periods of time.
. When road and weather
conditions are appropriate, use
cruise control.
Page 61 of 377
Chevrolet Cruze Owner Manual (GMNA-Localizing-U.S./Canada/Mexico-
9234744) - 2016 - CRC - 3/9/16
60 Seats and Restraints
Heated Front Seats
{Warning
If you cannot feel temperature
change or pain to the skin, the
seat heater may cause burns. To
reduce the risk of burns, people
with such a condition should use
care when using the seat heater,
especially for long periods of
time. Do not place anything on
the seat that insulates against
heat, such as a blanket, cushion,
cover, or similar item. This may
cause the seat heater to
overheat. An overheated seat
heater may cause a burn or may
damage the seat.
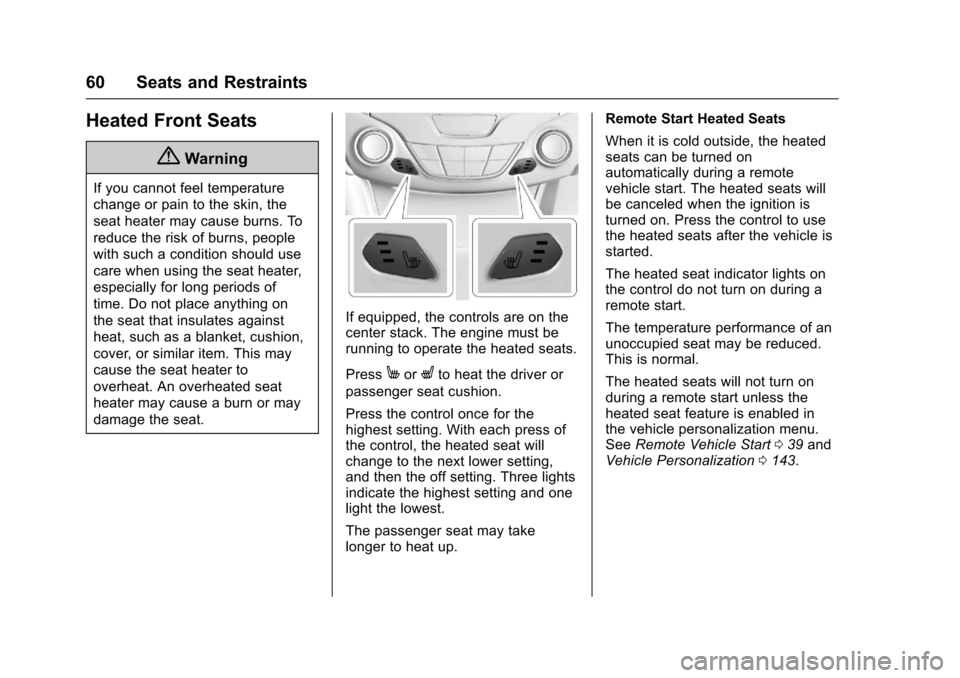
If equipped, the controls are on the
center stack. The engine must be
running to operate the heated seats.
Press
MorLto heat the driver or
passenger seat cushion.
Press the control once for the
highest setting. With each press of
the control, the heated seat will
change to the next lower setting,
and then the off setting. Three lights
indicate the highest setting and one
light the lowest.
The passenger seat may take
longer to heat up. Remote Start Heated Seats
When it is cold outside, the heated
seats can be turned on
automatically during a remote
vehicle start. The heated seats will
be canceled when the ignition is
turned on. Press the control to use
the heated seats after the vehicle is
started.
The heated seat indicator lights on
the control do not turn on during a
remote start.
The temperature performance of an
unoccupied seat may be reduced.
This is normal.
The heated seats will not turn on
during a remote start unless the
heated seat feature is enabled in
the vehicle personalization menu.
See
Remote Vehicle Start 039 and
Vehicle Personalization 0143.
Page 85 of 377
Chevrolet Cruze Owner Manual (GMNA-Localizing-U.S./Canada/Mexico-
9234744) - 2016 - CRC - 3/9/16
84 Seats and Restraints
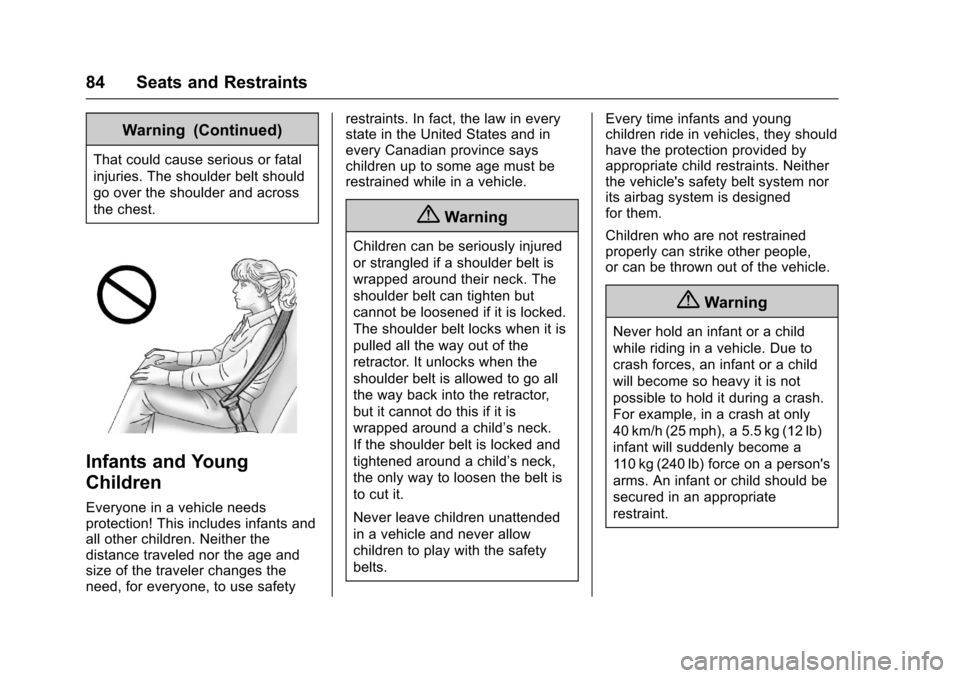
Warning (Continued)
That could cause serious or fatal
injuries. The shoulder belt should
go over the shoulder and across
the chest.
Infants and Young
Children
Everyone in a vehicle needs
protection! This includes infants and
all other children. Neither the
distance traveled nor the age and
size of the traveler changes the
need, for everyone, to use safetyrestraints. In fact, the law in every
state in the United States and in
every Canadian province says
children up to some age must be
restrained while in a vehicle.
{Warning
Children can be seriously injured
or strangled if a shoulder belt is
wrapped around their neck. The
shoulder belt can tighten but
cannot be loosened if it is locked.
The shoulder belt locks when it is
pulled all the way out of the
retractor. It unlocks when the
shoulder belt is allowed to go all
the way back into the retractor,
but it cannot do this if it is
wrapped around a child’s neck.
If the shoulder belt is locked and
tightened around a child’s neck,
the only way to loosen the belt is
to cut it.
Never leave children unattended
in a vehicle and never allow
children to play with the safety
belts.
Every time infants and young
children ride in vehicles, they should
have the protection provided by
appropriate child restraints. Neither
the vehicle's safety belt system nor
its airbag system is designed
for them.
Children who are not restrained
properly can strike other people,
or can be thrown out of the vehicle.
{Warning
Never hold an infant or a child
while riding in a vehicle. Due to
crash forces, an infant or a child
will become so heavy it is not
possible to hold it during a crash.
For example, in a crash at only
40 km/h (25 mph), a 5.5 kg (12 lb)
infant will suddenly become a
110 kg (240 lb) force on a person's
arms. An infant or child should be
secured in an appropriate
restraint.
Page 108 of 377
Chevrolet Cruze Owner Manual (GMNA-Localizing-U.S./Canada/Mexico-
9234744) - 2016 - CRC - 3/9/16
Instruments and Controls 107
open area where it can receive a
GPS signal. The compass system
will automatically determine when
the GPS signal is restored and
provide a heading again. See
Compass Messages0136 for more
information on the messages that
may be displayed for the compass.
Clock
Base Radio
The infotainment system controls
are used to access the time and
date settings through the menu
system. See Operation0162 on
how to use the menu system.
Setting the Time and Date
When Auto Set is enabled the time
cannot be manually set.
1. Press
{, then touch
SETTINGS.
2. Touch Time and Date, then Set Time or Set Date.
3. Touch + or −to adjust the
value. 4. Touch
RorQto adjust AM or
PM for 12 hour format.
5. Touch
0.
Auto Set
1. Press{, then touch
SETTINGS.
2. Touch Time and Date, then Auto Set.
3. Select from the available selections.
4. Touch
0.
Setting the 12/24 Hour Format
1. Press{, then touch
SETTINGS.
2. Touch Time and Date, then select 12h or 24h format.
3. Touch
0.
Setting the Month and Day
Format
1. Press{, then touch
SETTINGS. 2. Touch Time and Date, then Set
Date Format.
3. Select DD/MM/YYYY (day/ month/year), MM/DD/YYYY
(month/day/year), or YYYY/
MM/DD (year/month/day)
format.
4. Touch
0.
Uplevel Radio Using Faceplate
Controls
To set the time or date: 1. Select Home Page, then select SETTINGS.
2. Select Time and Date, then the desired function.
3. Turn the MENU knob to increase or decrease the value.
4. Press the MENU knob to go to the next value. After the last
value is selected, the system
will update and return to the
Settings menu. Press
oBACK
to go to the last menu and
save the changes.
Auto Set requires OnStar
subscription.
Page 109 of 377
Chevrolet Cruze Owner Manual (GMNA-Localizing-U.S./Canada/Mexico-
9234744) - 2016 - CRC - 3/9/16
108 Instruments and Controls
If auto timing is set, the time
displayed on the clock may not
update immediately when driving
into a new time zone.
To set the clock display:1. Select SETTINGS from the Home Page, then select Time
and Date.
2. Select Clock Display.
3. Turn the MENU knob to Off or On.
4. Press the MENU knob to select.
Press
oBACK to go to the last
menu and save the changes.
Uplevel Radio Using
Touchscreen Controls
The infotainment system controls
are used to access the time and
date settings through the menu
system. See “Using the System”
under “Introduction” in the
infotainment manual. To set the time:
1. Touch SETTINGS from the Home Page, then touch Time
and Date.
2. Touch Set Time and touch
«
orªto increase or decrease
hours, minutes, and AM or PM.
Touch 12–24 Hr for 12 or
24 hour clock.
3. Touch
}to go back to the
previous menu.
Auto Set requires OnStar
subscription.
If auto timing is set, the time
displayed on the clock may not
update immediately when driving
into a new time zone.
To set the date: 1. Touch SETTINGS from the Home Page, then touch Time
and Date.
2. Touch Set Date and touch
«
orªto increase or decrease
month, day, or year. 3. Touch
}to go back to the
previous menu.
To set the clock display: 1. Touch SETTINGS and touch Time and Date.
2. Touch Clock Display and touch OFF or ON to turn the clock
display off or on.
3. Touch
}to go back to the
previous menu.
The clock settings can also be
accessed by touching the time
display, then touching Set.
Power Outlets
Power Outlet 12-Volt Direct
Current
The accessory power outlet can be
used to plug in electrical equipment,
such as a cell phone or MP3 player.
There is an accessory power outlet
on the center floor console in front
of the shift lever. This outlet is
powered when the ignition is in the
ON/RUN or ACC/ACCESSORY
position, or until the driver door is
Page 131 of 377
Chevrolet Cruze Owner Manual (GMNA-Localizing-U.S./Canada/Mexico-
9234744) - 2016 - CRC - 3/9/16
130 Instruments and Controls
Information Displays
Driver Information Center
(DIC) (Base Level Cluster)
The DIC displays information about
your vehicle. It also displays
warning messages if a system
problem is detected. SeeVehicle
Messages 0136. All messages
appear in the DIC display in the
center of the instrument cluster.
DIC Operation and Displays
The DIC has different displays
which can be accessed by using the
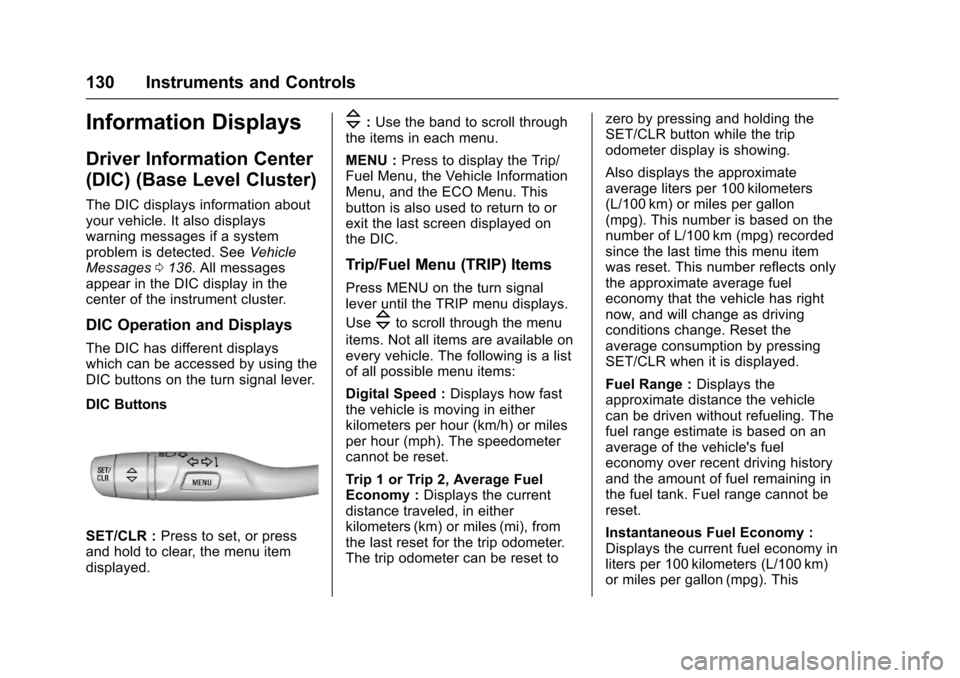
DIC buttons on the turn signal lever.
DIC Buttons
SET/CLR : Press to set, or press
and hold to clear, the menu item
displayed.
\: Use the band to scroll through
the items in each menu.
MENU : Press to display the Trip/
Fuel Menu, the Vehicle Information
Menu, and the ECO Menu. This
button is also used to return to or
exit the last screen displayed on
the DIC.
Trip/Fuel Menu (TRIP) Items
Press MENU on the turn signal
lever until the TRIP menu displays.
Use
\to scroll through the menu
items. Not all items are available on
every vehicle. The following is a list
of all possible menu items:
Digital Speed : Displays how fast
the vehicle is moving in either
kilometers per hour (km/h) or miles
per hour (mph). The speedometer
cannot be reset.
Trip 1 or Trip 2, Average Fuel
Economy : Displays the current
distance traveled, in either
kilometers (km) or miles (mi), from
the last reset for the trip odometer.
The trip odometer can be reset to zero by pressing and holding the
SET/CLR button while the trip
odometer display is showing.
Also displays the approximate
average liters per 100 kilometers
(L/100 km) or miles per gallon
(mpg). This number is based on the
number of L/100 km (mpg) recorded
since the last time this menu item
was reset. This number reflects only
the approximate average fuel
economy that the vehicle has right
now, and will change as driving
conditions change. Reset the
average consumption by pressing
SET/CLR when it is displayed.
Fuel Range :
Displays the
approximate distance the vehicle
can be driven without refueling. The
fuel range estimate is based on an
average of the vehicle's fuel
economy over recent driving history
and the amount of fuel remaining in
the fuel tank. Fuel range cannot be
reset.
Instantaneous Fuel Economy :
Displays the current fuel economy in
liters per 100 kilometers (L/100 km)
or miles per gallon (mpg). This
Page 132 of 377
Chevrolet Cruze Owner Manual (GMNA-Localizing-U.S./Canada/Mexico-
9234744) - 2016 - CRC - 3/9/16
Instruments and Controls 131
number reflects only the
approximate fuel economy that the
vehicle has right now and changes
frequently as driving conditions
change. This display cannot be
reset.
Average Vehicle Speed :Displays
the average vehicle speed of the
vehicle in kilometers per hour (km/h)
or miles per hour (mph). This
average is based on the various
vehicle speeds recorded since the
last reset. Reset the average speed
by pressing SET/CLR when it is
displayed.
Timer : To start the timer, press
SET/CLR while Timer is displayed.
The display will show the amount of
time that has passed since the timer
was last reset, not including time the
ignition is off. Time will continue to
be counted as long as the ignition is
on, even if another display is being
shown on the DIC. The timer will
record up to 99 hours, 59 minutes,
and 59 seconds (99:59:59) after
which the display will return to zero. To stop the timer, press SET/CLR
briefly while Timer is displayed. To
reset the timer to zero, press and
hold SET/CLR.
Navigation :
Used for the OnStar
Turn-by-Turn guidance. See OnStar
Overview 0356.
Blank Display : Displays no
information.
Vehicle Information Menu
(VEHICLE) Items
Press MENU on the turn signal
lever until the VEHICLE menu is
displayed. Use
\to scroll through
the menu items. Not all items are
available on every vehicle. The
following is a list of all possible
menu items:
Remaining Oil Life : Displays an
estimate of the oil's remaining useful
life. If REMAINING OIL LIFE 99% is
displayed, that means 99% of the
current oil life remains. When the remaining oil life is low,
the CHANGE ENGINE OIL SOON
message will appear on the display.
See
Engine Oil Messages 0138.
The oil should be changed as soon
as possible. See Engine Oil0246.
In addition to the engine oil life
system monitoring the oil life,
additional maintenance is
recommended in the Maintenance
Schedule in this manual. See
Maintenance Schedule 0326.
The Oil Life display must be reset
after each oil change. Do not reset
the Oil Life display accidentally at
any time other than when the oil has
just been changed. It cannot be
reset accurately until the next oil
change. To reset the engine oil life
system, see Engine Oil Life
System 0248.
Oil Pressure : Oil pressure is
displayed in either kilopascal (kPa)
or in pounds per square inch (psi).
Page 135 of 377
Chevrolet Cruze Owner Manual (GMNA-Localizing-U.S./Canada/Mexico-
9234744) - 2016 - CRC - 3/9/16
134 Instruments and Controls
This number reflects only the
approximate average fuel economy
that the vehicle has right now, and
will change as driving conditions
change.
Press and hold
Vwhile this display
is active to reset the trip odometer
and the average fuel economy.
Trip A and Trip B can also be reset
by pressing
pand choosing reset.
Fuel Range : Shows the
approximate distance the vehicle
can be driven without refueling.
LOW will be displayed when the
vehicle is low on fuel. The fuel
range estimate is based on an
average of the vehicle's fuel
economy over recent driving history
and the amount of fuel remaining in
the fuel tank.
Oil Life : Shows an estimate of the
oil's remaining useful life.
If REMAINING OIL LIFE 99% is
displayed, that means 99% of the
current oil life remains. When the remaining oil life is low,
the CHANGE ENGINE OIL SOON
message will appear on the display.
See
Engine Oil Messages 0138.
The oil should be changed as soon
as possible. See Engine Oil0246.
In addition to the engine oil life
system monitoring the oil life,
additional maintenance is
recommended in the Maintenance
Schedule. See Maintenance
Schedule 0326.
The Oil Life display must be reset
after each oil change. It will not
reset itself. Do not to reset the Oil
Life display at any time other than
when the oil has just been changed.
It cannot be reset accurately until
the next oil change. To reset the
engine oil life system, press and
hold
Vfor several seconds while
the Oil Life display is active. See
Engine Oil Life System 0248. Tire Pressure :
Shows the
approximate pressures of all four
tires. Tire pressure is displayed in
either kilopascal (kPa) or in pounds
per square inch (psi). If the pressure
is low, the value for that tire is
shown in amber. See Tire Pressure
Monitor System 0284 andTire
Pressure Monitor Operation 0285.
Instantaneous Fuel Economy :
Displays the current fuel economy in
liters per 100 kilometers (L/100 km)
or miles per gallon (mpg). This
number reflects only the
approximate fuel economy that the
vehicle has right now and changes
frequently as driving conditions
change. This display cannot be
reset.
Average Vehicle Speed : Displays
the average vehicle speed of the
vehicle in kilometers per hour (km/h)
or miles per hour (mph). This
average is based on the various
vehicle speeds recorded since the
last reset. Reset the average speed
by pressing
Vwhen it is displayed.