2016 CHEVROLET CRUZE LIMITED buttons
[x] Cancel search: buttonsPage 8 of 357
Chevrolet Cruze Limited Owner Manual (GMNA-Localizing-U.S./Canada-
9282844) - 2016 - crc - 9/3/15
In Brief 7
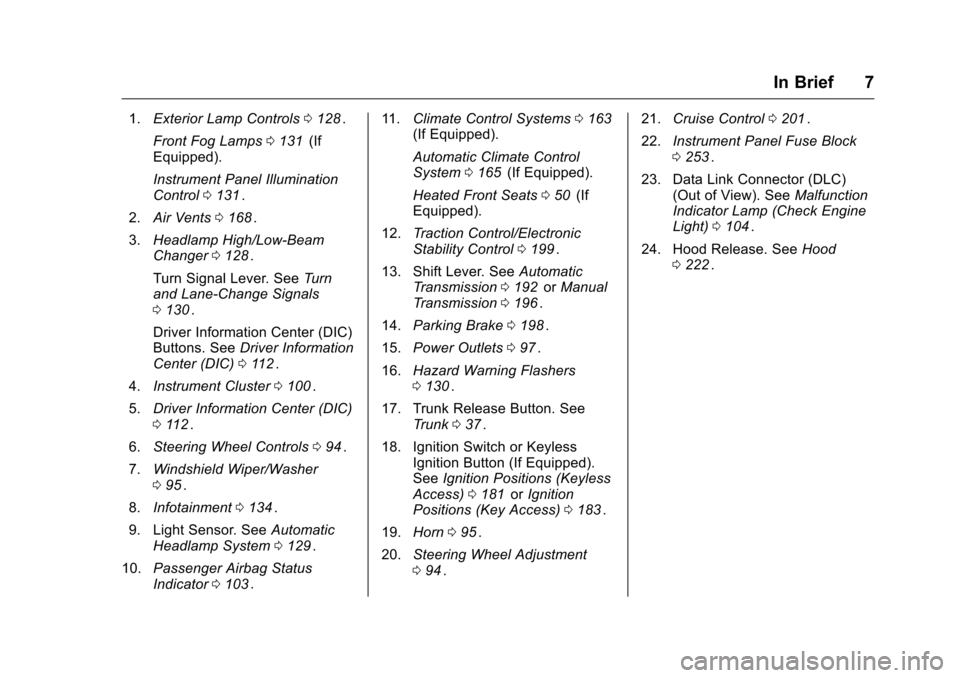
1.Exterior Lamp Controls 0128ii.
Front Fog Lamps 0131
ii(If
Equipped).
Instrument Panel Illumination
Control 0131
ii.
2. Air Vents 0168
ii.
3. Headlamp High/Low-Beam
Changer 0128
ii.
Turn Signal Lever. See Turn
and Lane-Change Signals
0 130
ii.
Driver Information Center (DIC)
Buttons. See Driver Information
Center (DIC) 0112
ii.
4. Instrument Cluster 0100
ii.
5. Driver Information Center (DIC)
0112
ii.
6. Steering Wheel Controls 094
ii.
7. Windshield Wiper/Washer
095
ii.
8. Infotainment 0134
ii.
9. Light Sensor. See Automatic
Headlamp System 0129
ii.
10. Passenger Airbag Status
Indicator 0103
ii. 11.
Climate Control Systems 0163
ii(If Equipped).
Automatic Climate Control
System 0165
ii(If Equipped).
Heated Front Seats 050
ii(If
Equipped).
12. Traction Control/Electronic
Stability Control 0199
ii.
13. Shift Lever. See Automatic
Transmission 0192
iior Manual
Transmission 0196ii.
14. Parking Brake 0198
ii.
15. Power Outlets 097
ii.
16. Hazard Warning Flashers
0130
ii.
17. Trunk Release Button. See Trunk 037
ii.
18. Ignition Switch or Keyless Ignition Button (If Equipped).
SeeIgnition Positions (Keyless
Access) 0181
iior Ignition
Positions (Key Access) 0183ii.
19. Horn 095
ii.
20. Steering Wheel Adjustment
094
ii. 21.
Cruise Control 0201
ii.
22. Instrument Panel Fuse Block
0253
ii.
23. Data Link Connector (DLC) (Out of View). See Malfunction
Indicator Lamp (Check Engine
Light) 0104
ii.
24. Hood Release. See Hood
0 222
ii.
Page 18 of 357
Chevrolet Cruze Limited Owner Manual (GMNA-Localizing-U.S./Canada-
9282844) - 2016 - crc - 9/3/15
In Brief 17
SeeClimate Control Systems 0163iior Automatic Climate Control
System 0165ii(If Equipped).
Transmission
Manual Mode
Driver Shift Control (DSC) allows
the automatic transmission to be
shifted similar to a manual
transmission.
Electronic Range Select (ERS)
allows for the selection of a range of
gears.
See Manual Mode 0194
ii.
Up‐Shift Light
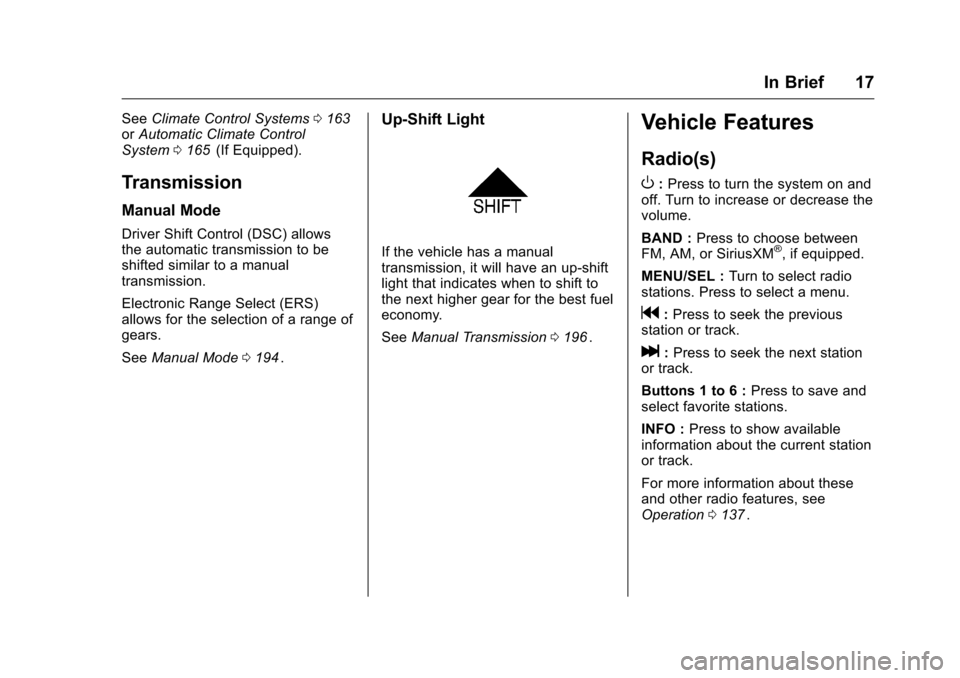
If the vehicle has a manual
transmission, it will have an up-shift
light that indicates when to shift to
the next higher gear for the best fuel
economy.
See Manual Transmission 0196
ii.
Vehicle Features
Radio(s)
O
:Press to turn the system on and
off. Turn to increase or decrease the
volume.
BAND : Press to choose between
FM, AM, or SiriusXM
®, if equipped.
MENU/SEL : Turn to select radio
stations. Press to select a menu.
g: Press to seek the previous
station or track.
l: Press to seek the next station
or track.
Buttons 1 to 6 : Press to save and
select favorite stations.
INFO : Press to show available
information about the current station
or track.
For more information about these
and other radio features, see
Operation 0137
ii.
Page 28 of 357
Chevrolet Cruze Limited Owner Manual (GMNA-Localizing-U.S./Canada-
9282844) - 2016 - crc - 9/3/15
Keys, Doors, and Windows 27
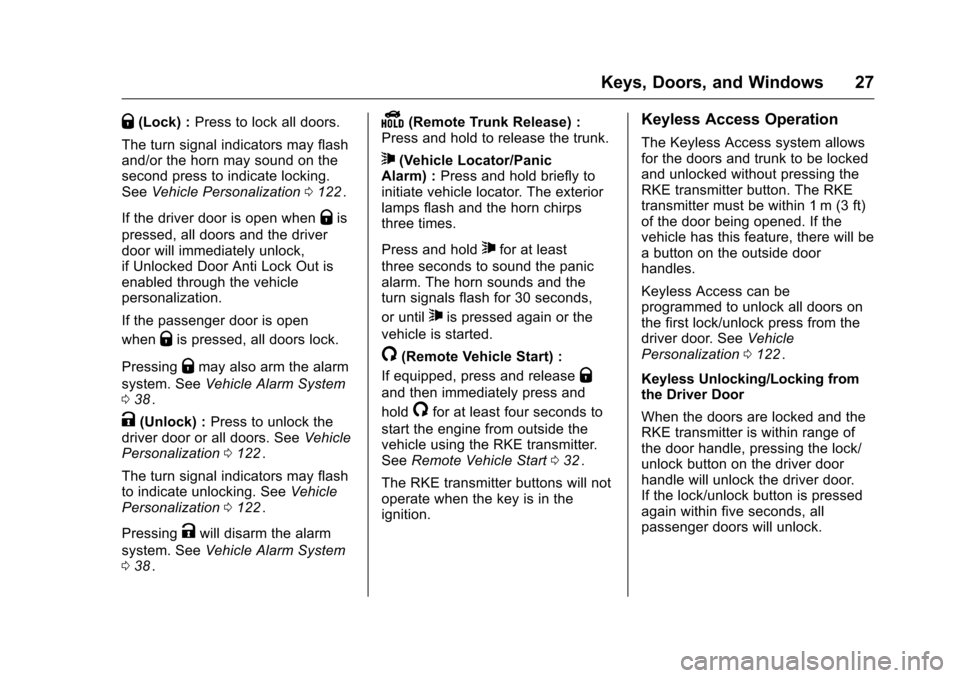
Q(Lock) :Press to lock all doors.
The turn signal indicators may flash
and/or the horn may sound on the
second press to indicate locking.
See Vehicle Personalization 0122
ii.
If the driver door is open when
Qis
pressed, all doors and the driver
door will immediately unlock,
if Unlocked Door Anti Lock Out is
enabled through the vehicle
personalization.
If the passenger door is open
when
Qis pressed, all doors lock.
Pressing
Qmay also arm the alarm
system. See Vehicle Alarm System
0 38
ii.
K(Unlock) : Press to unlock the
driver door or all doors. See Vehicle
Personalization 0122
ii.
The turn signal indicators may flash
to indicate unlocking. See Vehicle
Personalization 0122
ii.
Pressing
Kwill disarm the alarm
system. See Vehicle Alarm System
0 38
ii.
Y(Remote Trunk Release) :
Press and hold to release the trunk.
7(Vehicle Locator/Panic
Alarm) : Press and hold briefly to
initiate vehicle locator. The exterior
lamps flash and the horn chirps
three times.
Press and hold
7for at least
three seconds to sound the panic
alarm. The horn sounds and the
turn signals flash for 30 seconds,
or until
7is pressed again or the
vehicle is started.
/(Remote Vehicle Start) :
If equipped, press and release
Q
and then immediately press and
hold
/for at least four seconds to
start the engine from outside the
vehicle using the RKE transmitter.
See Remote Vehicle Start 032
ii.
The RKE transmitter buttons will not
operate when the key is in the
ignition.
Keyless Access Operation
The Keyless Access system allows
for the doors and trunk to be locked
and unlocked without pressing the
RKE transmitter button. The RKE
transmitter must be within 1 m (3 ft)
of the door being opened. If the
vehicle has this feature, there will be
a button on the outside door
handles.
Keyless Access can be
programmed to unlock all doors on
the first lock/unlock press from the
driver door. See Vehicle
Personalization 0122
ii.
Keyless Unlocking/Locking from
the Driver Door
When the doors are locked and the
RKE transmitter is within range of
the door handle, pressing the lock/
unlock button on the driver door
handle will unlock the driver door.
If the lock/unlock button is pressed
again within five seconds, all
passenger doors will unlock.
Page 43 of 357
Chevrolet Cruze Limited Owner Manual (GMNA-Localizing-U.S./Canada-
9282844) - 2016 - crc - 9/3/15
42 Keys, Doors, and Windows
Folding Mirrors
Manual Folding Mirrors
The vehicle has manual folding
mirrors. These mirrors can be folded
inward to prevent damage when
going through an automatic car
wash. To fold, pull the mirror toward
the vehicle. Push the mirror outward
to return it to the original position.
Heated Mirrors
The rear window defogger also
heats the outside mirrors,
if equipped.
=:Press to heat the outside
rearview mirrors. See “Rear Window
Defogger” underAutomatic Climate
Control System 0165
ii.
Interior Mirrors
Interior Rearview Mirrors
Adjust the rearview mirror for a clear
view of the area behind your
vehicle.
If equipped with OnStar, the vehicle
may have three control buttons at
the bottom of the mirror. See your
dealer for more information about
OnStar and how to subscribe to it.
See OnStar Overview 0336
ii.
Do not spray glass cleaner directly
on the mirror. Use a soft towel
dampened with water.
Manual Rearview Mirror
If equipped with a manual rearview
mirror, push the tab forward for
daytime use and pull it for nighttime
use to avoid glare from the
headlamps from behind.
Automatic Dimming
Rearview Mirror
If equipped, automatic dimming
reduces the glare of headlamps
from behind. The dimming feature
comes on when the vehicle is
started.
Page 85 of 357
Chevrolet Cruze Limited Owner Manual (GMNA-Localizing-U.S./Canada-
9282844) - 2016 - crc - 9/3/15
84 Seats and Restraints
restraint has been
removed, route the dual
tether over the seatback.
3. Before placing a child in the child restraint, make sure it is
securely held in place. To
check, grasp the child restraint
at the LATCH path and attempt
to move it side to side and
back and forth. There should
be no more than 2.5 cm (1 in) of
movement, for proper
installation.
Head Restraint Removal and
Reinstallation
The rear outboard head restraints
can be removed if they interfere with
the proper installation of the child
restraint.
To remove the head restraint:
1. Partially fold the seatback forward. See Rear Seats052
iifor additional information.
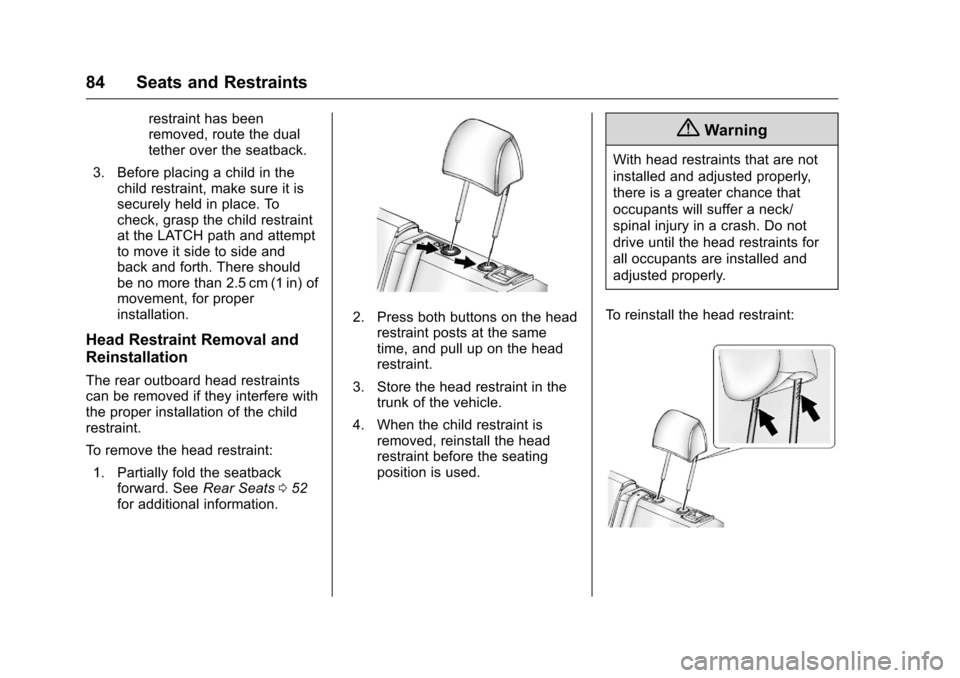
2. Press both buttons on the head
restraint posts at the same
time, and pull up on the head
restraint.
3. Store the head restraint in the trunk of the vehicle.
4. When the child restraint is removed, reinstall the head
restraint before the seating
position is used.
{Warning
With head restraints that are not
installed and adjusted properly,
there is a greater chance that
occupants will suffer a neck/
spinal injury in a crash. Do not
drive until the head restraints for
all occupants are installed and
adjusted properly.
To reinstall the head restraint:
Page 113 of 357
Chevrolet Cruze Limited Owner Manual (GMNA-Localizing-U.S./Canada-
9282844) - 2016 - crc - 9/3/15
112 Instruments and Controls
Information Displays
Driver Information
Center (DIC)
The DIC displays information about
your vehicle. It also displays
warning messages if a system
problem is detected. SeeVehicle
Messages 0115
ii. All messages
appear in the DIC display in the
center of the instrument cluster.
DIC Operation and Displays
The DIC has different displays
which can be accessed by using the
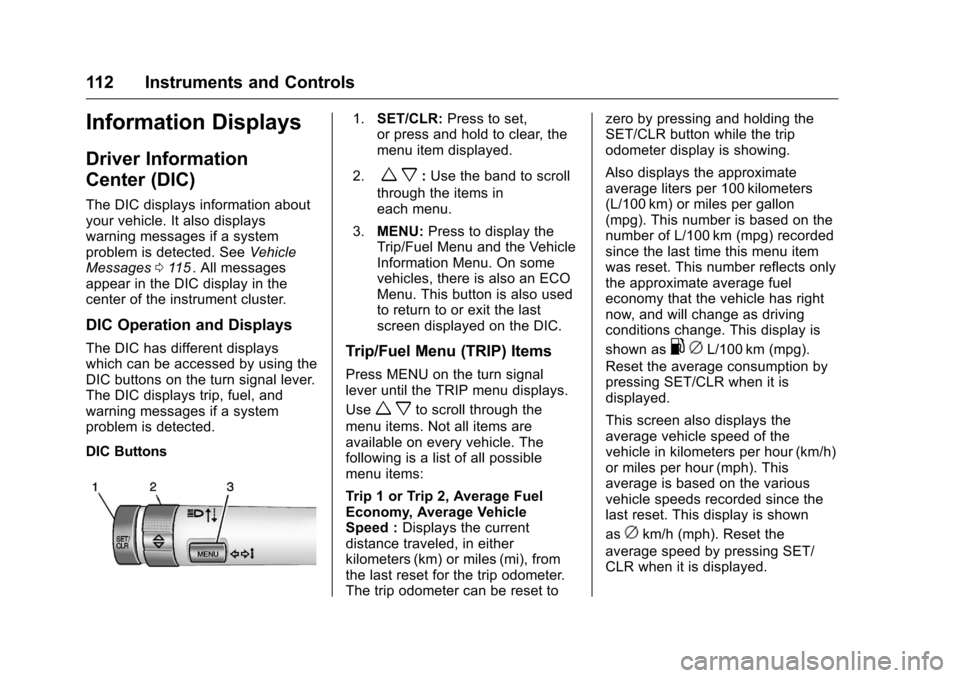
DIC buttons on the turn signal lever.
The DIC displays trip, fuel, and
warning messages if a system
problem is detected.
DIC Buttons
1. SET/CLR: Press to set,
or press and hold to clear, the
menu item displayed.
2.
w x: Use the band to scroll
through the items in
each menu.
3. MENU: Press to display the
Trip/Fuel Menu and the Vehicle
Information Menu. On some
vehicles, there is also an ECO
Menu. This button is also used
to return to or exit the last
screen displayed on the DIC.
Trip/Fuel Menu (TRIP) Items
Press MENU on the turn signal
lever until the TRIP menu displays.
Use
w xto scroll through the
menu items. Not all items are
available on every vehicle. The
following is a list of all possible
menu items:
Trip 1 or Trip 2, Average Fuel
Economy, Average Vehicle
Speed : Displays the current
distance traveled, in either
kilometers (km) or miles (mi), from
the last reset for the trip odometer.
The trip odometer can be reset to zero by pressing and holding the
SET/CLR button while the trip
odometer display is showing.
Also displays the approximate
average liters per 100 kilometers
(L/100 km) or miles per gallon
(mpg). This number is based on the
number of L/100 km (mpg) recorded
since the last time this menu item
was reset. This number reflects only
the approximate average fuel
economy that the vehicle has right
now, and will change as driving
conditions change. This display is
shown as
.
cL/100 km (mpg).
Reset the average consumption by
pressing SET/CLR when it is
displayed.
This screen also displays the
average vehicle speed of the
vehicle in kilometers per hour (km/h)
or miles per hour (mph). This
average is based on the various
vehicle speeds recorded since the
last reset. This display is shown
as
ckm/h (mph). Reset the
average speed by pressing SET/
CLR when it is displayed.
Page 125 of 357
Chevrolet Cruze Limited Owner Manual (GMNA-Localizing-U.S./Canada-
9282844) - 2016 - crc - 9/3/15
124 Instruments and Controls
Phone Settings
Select and depending on the radio
the following may display:
.Device List
. Pair Device
. Pair Device (Phone)
. Pair Device (GPS)
Device List
Select to connect to a different
phone source, disconnect a phone,
or delete a phone.
Pair Device
Select to pair a new device. See
“Pairing a Phone/Device” in
“Bluetooth” in the infotainment
manual.
Pair Device (Phone) or Pair
Device (GPS)
Select to pair a new phone. See
“Pairing a Phone” in“Bluetooth
(Infotainment Controls)” inBluetooth
(Infotainment Controls) 0151
iior
Bluetooth (Voice Recognition) 0154iior Bluetooth (Overview) 0149iior “Pairing a Phone/Device”
“Bluetooth”
in the infotainment
manual.
Navigation Settings
See “Navigation Settings” under
“Configure Menu” in the
infotainment manual.
Display Settings
Press and the following may
display:
. Home Page Menu
. Rear Camera Options
. Display Off
. Map Settings
Home Page Menu
Select and the following may
display:
. Customize
. Sort
. Restore Home Page Defaults Customize
This feature allows the selection of
what icons will be on the first
Home Page.
Select and follow the screen
prompts.
Sort
This feature allows the icons on the
Home Page to be moved.
Select and follow the screen
prompts.
Restore Home Page Defaults
This feature will restore the Home
Page to the factory settings.
Select and follow the screen
prompts.
Rear Camera Options
For more information on Rear
Camera Options, see
Rear Vision
Camera (RVC) 0203
ii.
Display Off
Press to turn the display off. The
display will return when any radio
buttons are pressed or the screen is
touched (if equipped).
Page 137 of 357
Chevrolet Cruze Limited Owner Manual (GMNA-Localizing-U.S./Canada-
9282844) - 2016 - crc - 9/3/15
136 Infotainment System
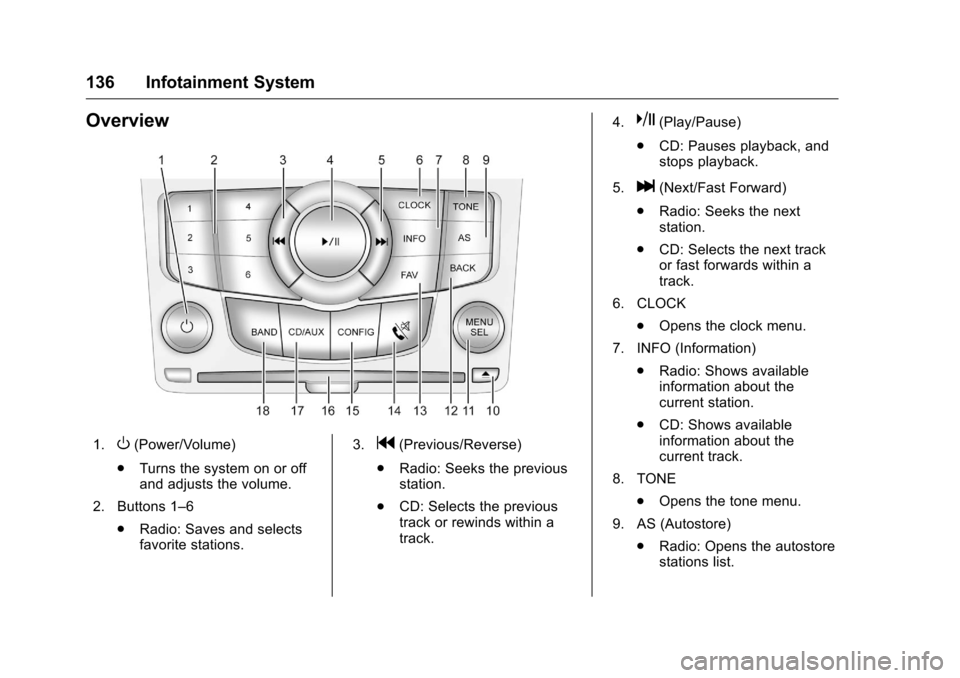
Overview
1.O(Power/Volume)
. Turns the system on or off
and adjusts the volume.
2. Buttons 1–6 .Radio: Saves and selects
favorite stations. 3.g(Previous/Reverse)
. Radio: Seeks the previous
station.
. CD: Selects the previous
track or rewinds within a
track. 4.
k(Play/Pause)
. CD: Pauses playback, and
stops playback.
5.
l(Next/Fast Forward)
. Radio: Seeks the next
station.
. CD: Selects the next track
or fast forwards within a
track.
6. CLOCK .Opens the clock menu.
7. INFO (Information) .Radio: Shows available
information about the
current station.
. CD: Shows available
information about the
current track.
8. TONE .Opens the tone menu.
9. AS (Autostore) .Radio: Opens the autostore
stations list.