2016 CHEVROLET CORVETTE display
[x] Cancel search: displayPage 134 of 351
Chevrolet Corvette Owner Manual (GMNA-Localizing-U.S./Canada/Mexico-
9085364) - 2016 - crc - 9/15/15
Instruments and Controls 133
Auto Memory Recall
This feature automatically recalls
the current driver’s previously stored
1 or 2 button positions when
entering the vehicle. See Memory
Seats 057.
Select Off or On.
Easy Exit Options
This feature automatically recalls
the current driver ’s previously stored
Exit button position when exiting the
vehicle. See Memory Seats 057.
Select Off or On.
Chime Volume
This allows the selection of the
chime volume level.
Press + or −to adjust the volume.
Reverse Tilt Mirror
This allows the feature to be turned
on or off.
Select Off, On - Driver and
Passenger, On - Driver, or On -
Passenger. Lighting
Select and the following may
display:
.
Vehicle Locator Lights
. Exit Lighting
Vehicle Locator Lights
This feature will flash the turn signal
lamps and turn on some of the
exterior lamps when
Kon the
Remote Keyless Entry (RKE)
transmitter is pressed to locate the
vehicle.
Select Off or On.
Exit Lighting
This allows the selection of how
long the exterior lamps stay on
when leaving the vehicle when it is
dark outside.
Select Off, 30 Seconds, 60
Seconds, or 120 Seconds.
Power Door Locks
Select and the following may
display:
. Unlocked Door Anti-Lockout .
Auto Door Unlock
. Delayed Door Lock
Unlocked Door Anti-Lockout
When on, this feature will keep the
driver door from locking when the
door is open. If Off is selected, the
Delayed Door Lock menu will be
available.
Select Off or On.
Auto Door Unlock
This allows selection of which of the
doors will automatically unlock when
the vehicle is shifted into P (Park)
with an automatic transmission or
when the vehicle is turned off with a
manual transmission.
Select Off, All Doors, or Driver Door.
Delayed Door Lock
When on, this feature will delay the
locking of the doors. To override the
delay, press the power door lock
switch on the door.
Select Off or On.
Page 135 of 351
Chevrolet Corvette Owner Manual (GMNA-Localizing-U.S./Canada/Mexico-
9085364) - 2016 - crc - 9/15/15
134 Instruments and Controls
Remote Lock, Unlock, Start
Select and the following may
display:
.Remote Unlock Light Feedback
. Remote Lock Feedback
. Remote Door Unlock
. Remote Start Auto Cool Seats
. Remote Start Auto Heat Seats
. Passive Door Unlock
. Passive Door Lock
. Remote Left in Vehicle Alert
Remote Unlock Light Feedback
When on, the exterior lamps will
flash when unlocking the vehicle
with the RKE transmitter.
Select Off or Flash Lights.
Remote Lock Feedback
This allows selection of what type of
feedback is given when locking the
vehicle with the RKE transmitter.
Select Off, Lights and Horn, Lights
Only, or Horn Only. Remote Door Unlock
This allows selection of which doors
will unlock when pressing
Kon the
RKE transmitter.
Select All Doors or Driver Door.
Remote Start Auto Cool Seats
If equipped and turned on, this
feature will turn the ventilated seats
on when using remote start on
warm days.
Select Off or On.
Remote Start Auto Heat Seats
If equipped and turned on, this
feature will turn the heated seats on
when using remote start on
cold days.
Select Off or On.
Passive Door Unlock
This allows the selection of what
doors will unlock when using the
door handle sensor on the driver
door to unlock the vehicle.
Select All Doors or Driver Door. Passive Door Lock
This feature can be turned on, off,
or select feedback. See
Remote
Keyless Entry (RKE) System
Operation 026.
Select Off, On with Horn
Chirp, or On.
Remote Left in Vehicle Alert
This feature sounds an alert when
the RKE transmitter is left in the
vehicle.
Select Off or On.
Bluetooth
Select and the following may
display:
. Pair New Device
. Device Management
. Ringtones
. Voice Mail Numbers
Pair New Device
Select to pair a new device. See
“Pairing” in“Infotainment Controls”
under “Bluetooth” in the infotainment
manual.
Page 136 of 351

Chevrolet Corvette Owner Manual (GMNA-Localizing-U.S./Canada/Mexico-
9085364) - 2016 - crc - 9/15/15
Instruments and Controls 135
Device Management
Select to connect to a different
phone source, disconnect a phone,
or delete a phone.
Ringtones
Press to change the ring tone for
the specific phone. The phone does
not need to be connected to change
the ring.
Voice Mail Numbers
This feature displays the voice mail
number for all connected phones.
To change the voice mail number,
select EDIT or press the EDIT
button. Type a new number, then
select SAVE or press the SAVE
button.
Apple CarPlay™
Select and the following may
display:
.Apple CarPlay
. Manage Apple CarPlay Devices Apple CarPlay
This feature allows Apple devices to
be connected to the infotainment
system through a USB port. See
“Apple CarPlay and Android Auto”
under
“Phone” in the infotainment
manual.
Select Off or On.
Manage Apple CarPlay Devices
Select to manage Apple devices.
Apple CarPlay must be on for this
feature to be accessed. See “Apple
CarPlay and Android Auto” under
“Phone” in the infotainment manual.
Android Auto™
Select and the following may
display:
.
Android Auto
. Manage Android Auto Devices
Android Auto
This feature allows Android devices
to be connected to the infotainment
system through a USB port. See
“Apple CarPlay and Android Auto”
under “Phone” in the infotainment
manual. Select Off or On.
Manage Android Auto Devices
Select to manage Android devices.
Android Auto must be on for this
feature to be accessed. See
“Apple
CarPlay and Android Auto” under
“Phone” in the infotainment manual.
Voice
Select and the following may
display:
.
Confidence Threshold
. Prompt Length
. Audio Feedback Speed
Confidence Threshold
This feature allows the adjustment
of the sensitivity of the speech
recognition system.
Select Confirm More or
Confirm Less.
Prompt Length
This feature adjusts the voice
prompt length.
Select Short or Long.
Page 137 of 351
Chevrolet Corvette Owner Manual (GMNA-Localizing-U.S./Canada/Mexico-
9085364) - 2016 - crc - 9/15/15
136 Instruments and Controls
Audio Feedback Speed
This feature adjusts the audio
feedback speed.
Select Slow, Medium, or Fast.
Display
Select and the following may
display:
.Mode
. Calibrate Touchscreen
. Turn Display Off
Mode
Select to change the display screen
for day or night driving.
Select Auto, Day, or Night.
Calibrate Touchscreen
Select to calibrate the touchscreen,
then follow the prompts.
Turn Display Off
Select to turn the display off. Press
anywhere on the display area or any
faceplate button to turn the
display on.
Rear Camera
Select and the following may
display:
. Guidance Lines
Guidance Lines
Select to turn Off or On. See
“Guidance Lines” inAssistance
Systems for Parking or
Backing 0205.
Return to Factory Settings
Select and the following may
display:
.
Restore Vehicle Settings
. Clear All Private Data
. Restore Radio Settings
Restore Vehicle Settings
This allows selection of restoring
vehicle settings.
Select Restore or Cancel. Clear All Private Data
This allows selection to clear all
private information from the vehicle.
Select Delete or Cancel.
Restore Radio Settings
This allows selection to restore
radio settings.
Select Restore or Cancel.
Software Information
Select to view the infotainment
system current software information.
Page 142 of 351
Chevrolet Corvette Owner Manual (GMNA-Localizing-U.S./Canada/Mexico-
9085364) - 2016 - crc - 9/15/15
Lighting 141
Headlamp High/
Low-Beam Changer
Push the turn signal lever away
from you and release to turn the
high beams on. To return to low
beams, push the lever again or pull
it toward you and release.
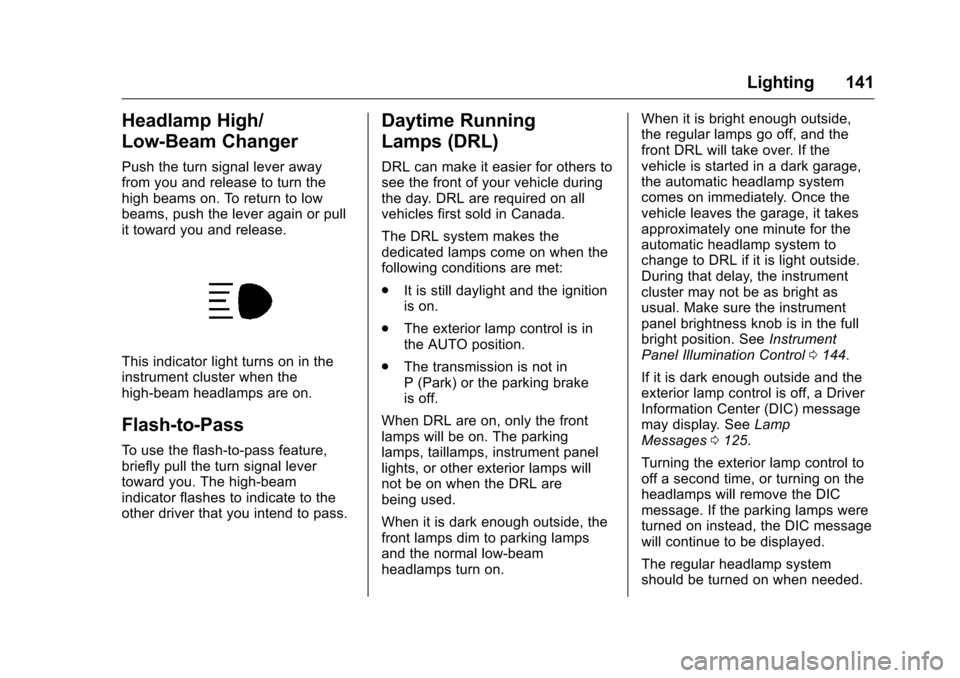
This indicator light turns on in the
instrument cluster when the
high-beam headlamps are on.
Flash-to-Pass
To use the flash-to-pass feature,
briefly pull the turn signal lever
toward you. The high-beam
indicator flashes to indicate to the
other driver that you intend to pass.
Daytime Running
Lamps (DRL)
DRL can make it easier for others to
see the front of your vehicle during
the day. DRL are required on all
vehicles first sold in Canada.
The DRL system makes the
dedicated lamps come on when the
following conditions are met:
.It is still daylight and the ignition
is on.
. The exterior lamp control is in
the AUTO position.
. The transmission is not in
P (Park) or the parking brake
is off.
When DRL are on, only the front
lamps will be on. The parking
lamps, taillamps, instrument panel
lights, or other exterior lamps will
not be on when the DRL are
being used.
When it is dark enough outside, the
front lamps dim to parking lamps
and the normal low-beam
headlamps turn on. When it is bright enough outside,
the regular lamps go off, and the
front DRL will take over. If the
vehicle is started in a dark garage,
the automatic headlamp system
comes on immediately. Once the
vehicle leaves the garage, it takes
approximately one minute for the
automatic headlamp system to
change to DRL if it is light outside.
During that delay, the instrument
cluster may not be as bright as
usual. Make sure the instrument
panel brightness knob is in the full
bright position. See
Instrument
Panel Illumination Control 0144.
If it is dark enough outside and the
exterior lamp control is off, a Driver
Information Center (DIC) message
may display. See Lamp
Messages 0125.
Turning the exterior lamp control to
off a second time, or turning on the
headlamps will remove the DIC
message. If the parking lamps were
turned on instead, the DIC message
will continue to be displayed.
The regular headlamp system
should be turned on when needed.
Page 147 of 351
Chevrolet Corvette Owner Manual (GMNA-Localizing-U.S./Canada/Mexico-
9085364) - 2016 - crc - 9/15/15
146 Infotainment System
Infotainment
System
Introduction
Infotainment . . . . . . . . . . . . . . . . . . 146
Performance Data
Recorder (PDR)
Performance DataRecorder (PDR) . . . . . . . . . . . . . 146
Introduction
Infotainment
See the infotainment manual for
information on the radio, audio
players, phone, navigation system,
and voice or speech recognition.
It also includes information on
settings.
Performance Data
Recorder (PDR)
If equipped, the PDR icon displays
on the Home screen.
The PDR records video, audio, and
vehicle data. This data is stored on
a removable SD card in the
glove box.
The recorded data is not stored
anywhere else and is only
accessible from the SD card.
To begin, insert a FAT32 formatted
SD card, Class 10 required, 8, 16,
or 32 GB recommended, into the
glove box SD card reader.
Page 148 of 351
Chevrolet Corvette Owner Manual (GMNA-Localizing-U.S./Canada/Mexico-
9085364) - 2016 - crc - 9/15/15
Infotainment System 147
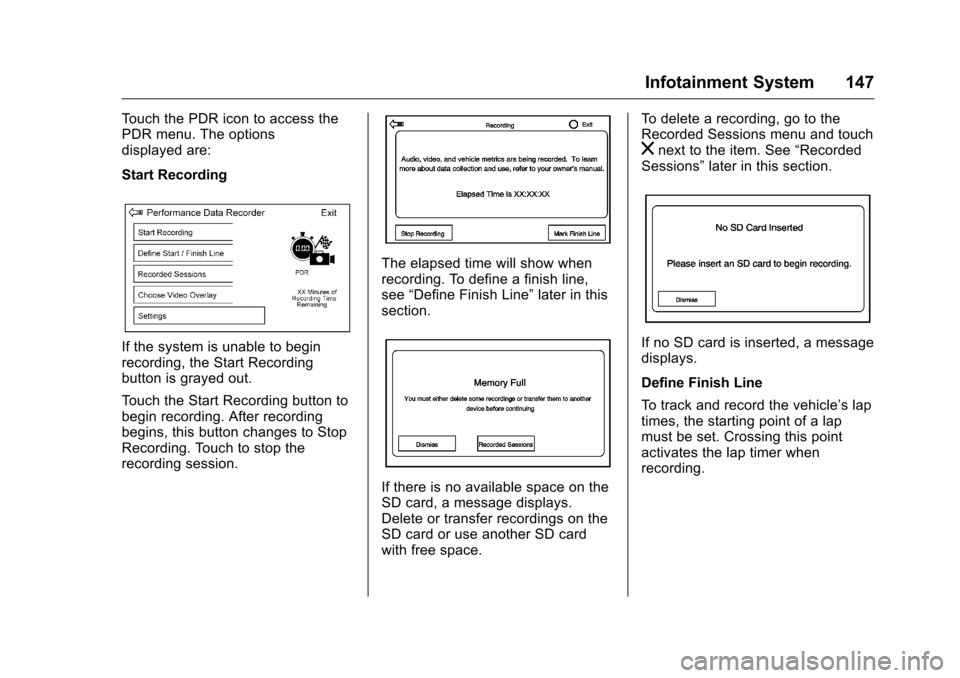
Touch the PDR icon to access the
PDR menu. The options
displayed are:
Start Recording
If the system is unable to begin
recording, the Start Recording
button is grayed out.
Touch the Start Recording button to
begin recording. After recording
begins, this button changes to Stop
Recording. Touch to stop the
recording session.
The elapsed time will show when
recording. To define a finish line,
see“Define Finish Line” later in this
section.
If there is no available space on the
SD card, a message displays.
Delete or transfer recordings on the
SD card or use another SD card
with free space. To delete a recording, go to the
Recorded Sessions menu and touch
znext to the item. See
“Recorded
Sessions” later in this section.
If no SD card is inserted, a message
displays.
Define Finish Line
To track and record the vehicle’s lap
times, the starting point of a lap
must be set. Crossing this point
activates the lap timer when
recording.
Page 149 of 351
Chevrolet Corvette Owner Manual (GMNA-Localizing-U.S./Canada/Mexico-
9085364) - 2016 - crc - 9/15/15
148 Infotainment System
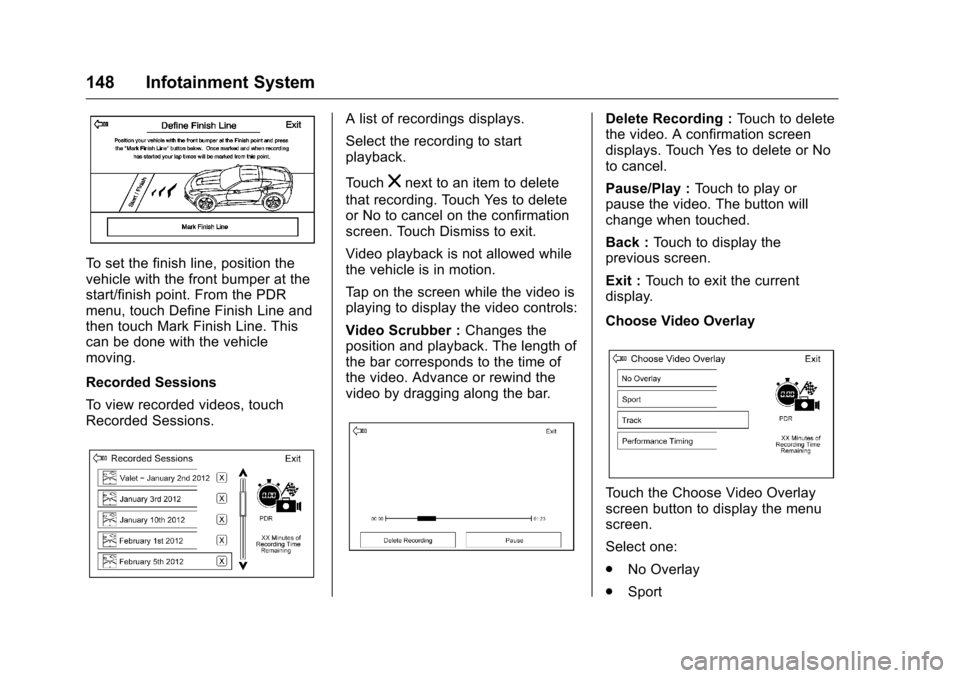
To set the finish line, position the
vehicle with the front bumper at the
start/finish point. From the PDR
menu, touch Define Finish Line and
then touch Mark Finish Line. This
can be done with the vehicle
moving.
Recorded Sessions
To view recorded videos, touch
Recorded Sessions.
A list of recordings displays.
Select the recording to start
playback.
Touch
znext to an item to delete
that recording. Touch Yes to delete
or No to cancel on the confirmation
screen. Touch Dismiss to exit.
Video playback is not allowed while
the vehicle is in motion.
Tap on the screen while the video is
playing to display the video controls:
Video Scrubber : Changes the
position and playback. The length of
the bar corresponds to the time of
the video. Advance or rewind the
video by dragging along the bar.
Delete Recording : Touch to delete
the video. A confirmation screen
displays. Touch Yes to delete or No
to cancel.
Pause/Play : Touch to play or
pause the video. The button will
change when touched.
Back : Touch to display the
previous screen.
Exit : Touch to exit the current
display.
Choose Video Overlay
Touch the Choose Video Overlay
screen button to display the menu
screen.
Select one:
. No Overlay
. Sport