2016 CHEVROLET CORVETTE display
[x] Cancel search: displayPage 200 of 351
Chevrolet Corvette Owner Manual (GMNA-Localizing-U.S./Canada/Mexico-
9085364) - 2016 - crc - 9/15/15
Driving and Operating 199
MODE displays in the Driver
Information Center (DIC). SeeRide
Control System Messages 0125.
When the
gbutton is pressed
again, the traction off light
iand
StabiliTrak OFF light
gwill go out.
Performance Traction
Management (Z51 and Z06 with
Magnetic Ride Control)
Performance Traction Management
(PTM) integrates the Traction
Control, StabiliTrak, and Magnetic
Ride Control systems to provide
improved and consistent
performance when cornering. The
amount of available engine power is
based on the mode selected, track
conditions, driver skill, and the
radius of each corner.
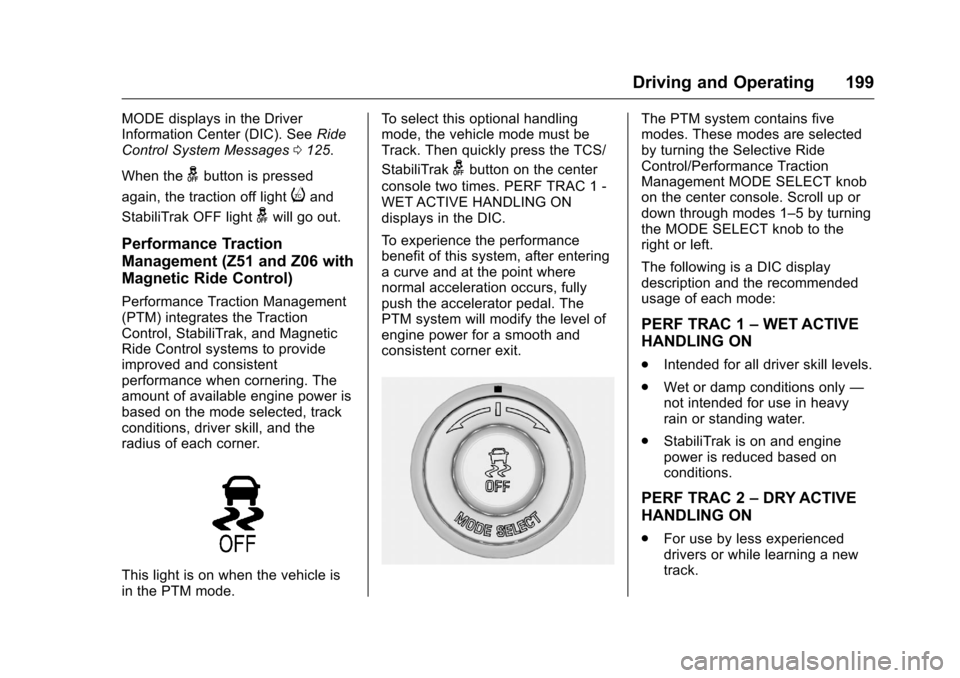
This light is on when the vehicle is
in the PTM mode. To select this optional handling
mode, the vehicle mode must be
Track. Then quickly press the TCS/
StabiliTrak
gbutton on the center
console two times. PERF TRAC 1 -
WET ACTIVE HANDLING ON
displays in the DIC.
To experience the performance
benefit of this system, after entering
a curve and at the point where
normal acceleration occurs, fully
push the accelerator pedal. The
PTM system will modify the level of
engine power for a smooth and
consistent corner exit.
The PTM system contains five
modes. These modes are selected
by turning the Selective Ride
Control/Performance Traction
Management MODE SELECT knob
on the center console. Scroll up or
down through modes 1–5 by turning
the MODE SELECT knob to the
right or left.
The following is a DIC display
description and the recommended
usage of each mode:
PERF TRAC 1 –WET ACTIVE
HANDLING ON
. Intended for all driver skill levels.
. Wet or damp conditions only —
not intended for use in heavy
rain or standing water.
. StabiliTrak is on and engine
power is reduced based on
conditions.
PERF TRAC 2 –DRY ACTIVE
HANDLING ON
. For use by less experienced
drivers or while learning a new
track.
Page 201 of 351
Chevrolet Corvette Owner Manual (GMNA-Localizing-U.S./Canada/Mexico-
9085364) - 2016 - crc - 9/15/15
200 Driving and Operating
.Dry conditions only.
. StabiliTrak is on and engine
power is slightly reduced.
PERF TRAC 3 –SPORT
ACTIVE HANDLING ON
. For use by drivers who are
familiar with the track.
. Dry conditions only.
. Requires more driving skill than
mode 2.
. StabiliTrak is on and more
engine power is available than in
mode 2.
PERF TRAC 4 –SPORT
ACTIVE HANDLING OFF
. For use by drivers who are
familiar with the track.
. Dry conditions only.
. Requires more driving skill than
modes 2 or 3.
. StabiliTrak is off and available
engine power is the same as
mode 3.
PERF TRAC 5 –RACE ACTIVE
HANDLING OFF
. For use by experienced drivers
who are familiar with the track.
. Dry conditions only.
. Requires more driving skill than
in other modes.
. StabiliTrak is off and engine
power is available for maximum
cornering speed.
Press and release the TCS/
StabiliTrak
gbutton to turn off PTM
and return to the traction control and
StabiliTrak systems. The traction off
light
iand StabiliTrak OFF lightg
will go out.
Launch Control (Track
Mode Only)
A Launch Control feature is
available, within Competitive Driving
Mode (except Z51 and Z06 with
Magnetic Ride Control) or
Performance Traction Management
(Z51 and Z06 with Magnetic Ride
Control), on all vehicles to allow the
driver to achieve high levels of vehicle acceleration in a straight
line. Launch Control is a form of
traction control that manages tire
spin while launching the vehicle.
This feature is intended for use
during closed course race events
where consistent zero to
60 and quarter mile times are
desirable.
Launch Control is only available
when the following criteria are met:
.
Competitive Driving Mode is
selected (except Z51 and Z06
with Magnetic Ride Control) or
any of the Performance Traction
Management modes are
selected (Z51 and Z06 with
Magnetic Ride Control). The
TCS light comes on the
instrument cluster and the
appropriate DIC message
displays.
. The vehicle is not moving.
. The steering wheel is pointing
straight.
Page 204 of 351
Chevrolet Corvette Owner Manual (GMNA-Localizing-U.S./Canada/Mexico-
9085364) - 2016 - crc - 9/15/15
Driving and Operating 203
RES/+ (Resume/Accelerate) :If
there is a set speed in memory,
press briefly to resume to that
speed or press and hold to
accelerate. If cruise control is
already active, use to increase
vehicle speed.
SET/– (Set/Coast) : Press briefly to
set the speed and activate cruise
control. If cruise control is already
active, use to decrease vehicle
speed.
*(Cancel) : Press to disengage
cruise control without erasing the
set speed from memory.
Setting Cruise Control
If
1is on when not in use, SET/– or
RES/+ could get pressed and go
into cruise when not desired. Keep
1off when cruise is not
being used.
1. Press
1to turn the cruise
system on.
2. Get up to the desired speed.
3. Press and release SET/– on
the steering wheel. 4. Remove foot from the
accelerator.
The cruise control indicator on the
instrument cluster turns green after
cruise control has been set to the
desired speed. See Instrument
Cluster 096.
Resuming a Set Speed
If the cruise control is set at a
desired speed and then the brakes
are applied or
*is pressed, the
cruise control is disengaged without
erasing the set speed from memory.
Once the vehicle reaches about
40 km/h (25 mph) or more, briefly
press RES/+. The vehicle returns to
the previous set speed.
Increasing Speed While Using
Cruise Control
If the cruise control system is
already activated,
. Press and hold RES/+ until the
desired speed is reached, then
release it. .
To increase vehicle speed in
small increments, briefly press
RES/+. For each press, the
vehicle goes about 1.6 km/h
(1 mph) faster.
The speedometer reading can be
displayed in either English or metric
units. See Instrument Cluster 096.
The increment value used depends
on the units displayed.
Reducing Speed While Using
Cruise Control
If the cruise control system is
already activated:
. Press and hold SET/– until the
desired lower speed is reached,
then release it.
. To decrease the vehicle speed in
small increments, briefly press
SET/–. For each press, the
vehicle goes about 1.6 km/h
(1 mph) slower.
The speedometer reading can be
displayed in either English or metric
units. See Instrument Cluster 096.
The increment value used depends
on the units displayed.
Page 206 of 351
Chevrolet Corvette Owner Manual (GMNA-Localizing-U.S./Canada/Mexico-
9085364) - 2016 - crc - 9/15/15
Driving and Operating 205
Driver Assistance
Systems
Assistance Systems for
Parking or Backing
If equipped, the Rear Vision Camera
(RVC) and Curb View Camera may
help the driver park or avoid objects.
Always check around the vehicle
when parking or backing.
Rear Vision Camera (RVC)
When the vehicle is shifted into
R (Reverse), the RVC displays an
image of the area behind the vehicle
in the center stack display. The
previous screen displays when the
vehicle is shifted out of R (Reverse)
after a short delay. To return to the
previous screen sooner, press a
button on the infotainment system,
shift into P (Park), or reach a vehicle
speed of 8 km/h (5 mph).
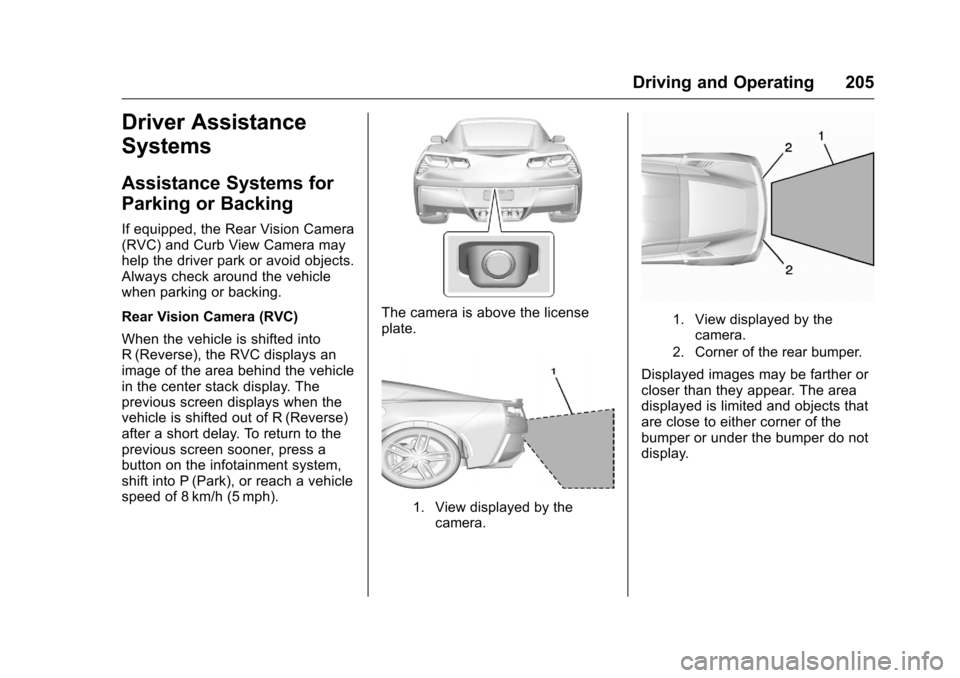
The camera is above the license
plate.
1. View displayed by thecamera.
1. View displayed by thecamera.
2. Corner of the rear bumper.
Displayed images may be farther or
closer than they appear. The area
displayed is limited and objects that
are close to either corner of the
bumper or under the bumper do not
display.
Page 207 of 351
Chevrolet Corvette Owner Manual (GMNA-Localizing-U.S./Canada/Mexico-
9085364) - 2016 - crc - 9/15/15
206 Driving and Operating
Curb View Camera
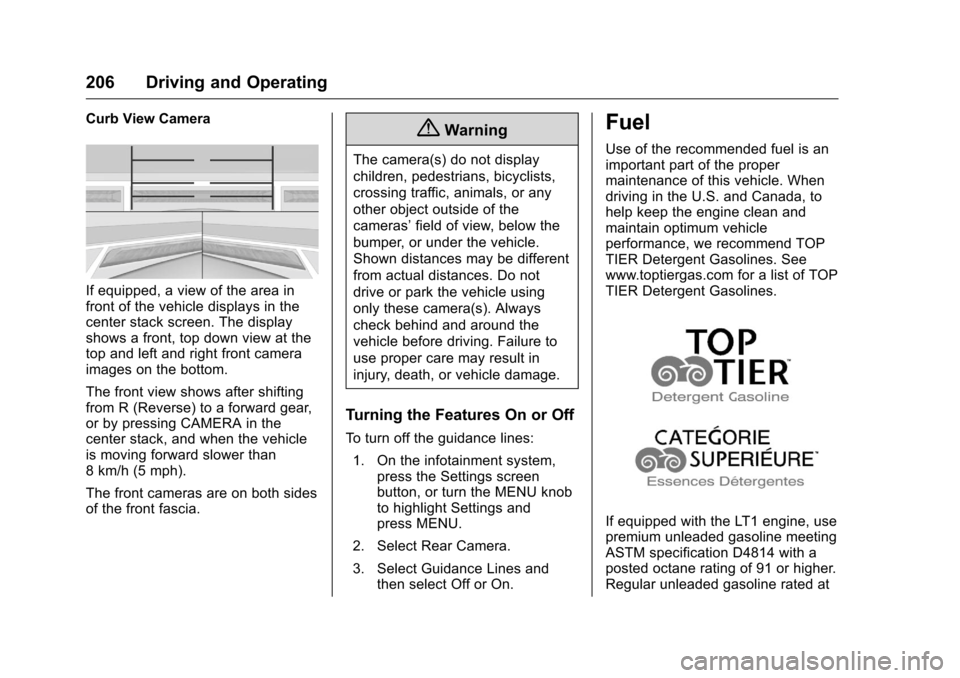
If equipped, a view of the area in
front of the vehicle displays in the
center stack screen. The display
shows a front, top down view at the
top and left and right front camera
images on the bottom.
The front view shows after shifting
from R (Reverse) to a forward gear,
or by pressing CAMERA in the
center stack, and when the vehicle
is moving forward slower than
8 km/h (5 mph).
The front cameras are on both sides
of the front fascia.
{Warning
The camera(s) do not display
children, pedestrians, bicyclists,
crossing traffic, animals, or any
other object outside of the
cameras’field of view, below the
bumper, or under the vehicle.
Shown distances may be different
from actual distances. Do not
drive or park the vehicle using
only these camera(s). Always
check behind and around the
vehicle before driving. Failure to
use proper care may result in
injury, death, or vehicle damage.
Turning the Features On or Off
To turn off the guidance lines:
1. On the infotainment system, press the Settings screen
button, or turn the MENU knob
to highlight Settings and
press MENU.
2. Select Rear Camera.
3. Select Guidance Lines and then select Off or On.
Fuel
Use of the recommended fuel is an
important part of the proper
maintenance of this vehicle. When
driving in the U.S. and Canada, to
help keep the engine clean and
maintain optimum vehicle
performance, we recommend TOP
TIER Detergent Gasolines. See
www.toptiergas.com for a list of TOP
TIER Detergent Gasolines.
If equipped with the LT1 engine, use
premium unleaded gasoline meeting
ASTM specification D4814 with a
posted octane rating of 91 or higher.
Regular unleaded gasoline rated at
Page 224 of 351
Chevrolet Corvette Owner Manual (GMNA-Localizing-U.S./Canada/Mexico-
9085364) - 2016 - crc - 9/15/15
Vehicle Care 223
1. Engine Oil Dipstick. See“Checking Engine Oil” under
Engine Oil 0223.
2. Dry Sump Engine Oil Tank Fill Cap. See “Changing Engine Oil
and Filter” Engine Oil 0223.
3. Passenger Compartment Air
Filter 0156 (Out of View). See
Passenger Compartment Air
Filter 0156.
4. Coolant Surge Tank and Pressure Cap. See Engine
Coolant 0235.
5. Engine Compartment Fuse
Block 0247.
6. Engine Air Cleaner/Filter 0230.
7. Engine Cooling Fan (Out of View). See Cooling System
(Engine) 0232 orCooling
System (Aero Panel) 0234.
8. Brake Fluid Reservoir. See Brake Fluid 0240.
9. Clutch Master Cylinder Reservoir (If Equipped). See
Hydraulic Clutch 0230. 10. Windshield Washer Fluid
Reservoir. See “Adding Washer
Fluid” under Washer
Fluid 0238.
Engine Oil
To ensure proper engine
performance and long life, careful
attention must be paid to engine oil.
Following these simple, but
important steps will help protect
your investment:
.
Use engine oil approved to the
proper specification and of the
proper viscosity grade. See
“Selecting the Right Engine Oil”
in this section.
. Check the engine oil level
regularly and maintain the
proper oil level. See “Checking
Engine Oil” and“When to Add
Engine Oil” in this section.
. Change the engine oil at the
appropriate time. See Engine Oil
Life System 0228.
. Always dispose of engine oil
properly. See “What to Do with
Used Oil” in this section.
Checking Engine Oil (Except
Stingray with Z51 and Z06)
If the ENGINE OIL LOW–ADD OIL
message displays on the Driver
Information Center (DIC), check the
engine oil level right away. See
Engine Oil Messages 0123. Check
the engine oil level regularly.
It is a good idea to check the engine
oil level at each fuel fill. In order to
get an accurate reading, the vehicle
must be on level ground. The
engine oil dipstick handle is a loop.
See Engine Compartment Overview
0 218 for the location of the engine
oil dipstick.
Obtaining an accurate oil level
reading is essential:
1. If the engine has been running recently, turn off the engine and
check within five and
10 minutes of shutoff.
Checking the oil level too soon
after engine shutoff will not
provide an accurate oil level
reading.
Page 230 of 351

Chevrolet Corvette Owner Manual (GMNA-Localizing-U.S./Canada/Mexico-
9085364) - 2016 - crc - 9/15/15
Vehicle Care 229
If the system is ever reset
accidentally, the oil must be
changed at 5 000 km (3,000 mi)
since the last oil change.
Remember to reset the oil life
system whenever the oil is changed.
Dry Sump Engine Break-In Oil
Change
If equipped with a dry sump engine,
the initial oil and filter change must
be performed at 800 km/500 mi.
Follow the engine oil life system for
every oil change thereafter.
How to Reset the Engine Oil
Life System
Reset the system whenever the
engine oil is changed so that the
system can calculate the next
engine oil change. To reset the
system:1. Scroll through the DIC Info Pages menu until the
REMAINING OIL LIFE
percentage is displayed. See
Driver Information Center
(DIC) 0113. 2. Press and hold the SEL button
on the DIC while the Oil Life
display is active. The oil life will
change to 100%.
If the CHANGE ENGINE OIL SOON
message comes back on when the
vehicle is started, the engine oil life
system has not reset. Repeat the
procedure.
Automatic Transmission
Fluid
How to Check Automatic
Transmission Fluid
It is not necessary to check the
transmission fluid level.
A transmission fluid leak is the only
reason for fluid loss. If a leak
occurs, take the vehicle to the
dealer and have it repaired as soon
as possible.
The vehicle is not equipped with a
transmission fluid level dipstick.
There is a special procedure for
checking and changing the
transmission fluid. Because this
procedure is difficult, this should be
done at the dealer. Contact the dealer for additional information or
the procedure can be found in the
service manual. To purchase a
service manual, see
Service
Publications Ordering
Information 0324.
Caution
Use of the incorrect automatic
transmission fluid may damage
the vehicle, and the damage may
not be covered by the vehicle
warranty. Always use the
automatic transmission fluid listed
in Recommended Fluids and
Lubricants 0307.
Change the fluid and filter at the
intervals listed in Maintenance
Schedule 0298, and be sure to use
the fluid listed in Recommended
Fluids and Lubricants 0307.
Manual Transmission
Fluid
It is not necessary to check the
manual transmission fluid level.
A transmission fluid leak is the only
Page 238 of 351
Chevrolet Corvette Owner Manual (GMNA-Localizing-U.S./Canada/Mexico-
9085364) - 2016 - crc - 9/15/15
Vehicle Care 237
2. Keep turning the pressure capslowly, and remove it.
3. Fill the coolant surge tank with the proper DEX-COOL coolant
mixture until the level inside
stabilizes at the cold fill line on
the front of the surge tank.
4. With the coolant surge tank pressure cap off, start the
engine and let it run until the
upper radiator hose can be felt
getting hot. Any time during
this procedure, watch out for
the engine cooling fan.
By this time, the coolant level
inside the coolant surge tank
may be lower. If the level is
lower, add more of the proper
mixture to the coolant surge
tank until the level stabilizes at
the cold fill line on the coolant
surge tank.
5. Replace the pressure cap tightly.
Check the level in the surge
tank when the system has
cooled down. If the coolant is
not at the proper level, repeat Steps 1−4, then reinstall the
pressure cap. If the coolant is
not at the proper level when
the system cools down again,
see your dealer.
Caution
If the pressure cap is not tightly
installed, coolant loss and
possible engine damage may
occur. Be sure the cap is properly
and tightly secured.
Engine Overheating
The vehicle has several indicators
to warn of engine overheating.
There is an engine coolant
temperature gauge on the
instrument cluster. See
Engine
Coolant Temperature Gauge 0103.
The vehicle may also display a
message on the Driver Information
Center (DIC). See Engine Cooling
System Messages 0123. If the decision is made not to lift the
hood but to get service help right
away, see
Roadside Assistance
Program 0319.
If the decision is made to lift the
hood, make sure the vehicle is
parked on a level surface.
Then check to see if the engine
cooling fan is running. If the engine
is overheating, the fan should be
running. If it is not, do not continue
to run the engine and have the
vehicle serviced.
Caution
Running the engine without
coolant may cause damage or a
fire. Vehicle damage would not be
covered by the vehicle warranty.