2016 CHEVROLET CORVETTE warning
[x] Cancel search: warningPage 43 of 351

Chevrolet Corvette Owner Manual (GMNA-Localizing-U.S./Canada/Mexico-
9085364) - 2016 - crc - 9/15/15
42 Keys, Doors, and Windows
Exterior Mirrors
Convex Mirrors
{Warning
A convex mirror can make things,
like other vehicles, look farther
away than they really are. If you
cut too sharply into the right lane,
you could hit a vehicle on the
right. Check the inside mirror or
glance over your shoulder before
changing lanes.
The passenger side mirror is convex
shaped. A convex mirror's surface is
curved so more can be seen from
the driver seat.
Power Mirrors
To adjust the mirrors: 1. Press L (Left) or R (Right) to select a mirror.
2. Press the control pad to adjust the mirror.
3. Return the switch to the center to deselect the mirror.
If the vehicle has the memory
feature, a preferred mirror position
can be stored. See Memory
Seats 057.
Folding Mirrors
To fold, pull the mirror toward the
vehicle. Push the mirror outward to
return it to the original position.
Heated Mirrors
1
(Rear Window Defogger) :
Press to heat the mirrors.
See “Rear Window Defogger” under
Dual Automatic Climate Control
System 0152.
Automatic Dimming
Mirror
The driver outside mirror
automatically adjusts for the glare of
headlamps from behind.
Reverse Tilt Mirrors
If equipped with memory seats, the
passenger and/or driver mirror tilts
to a preselected position when the
vehicle is in R (Reverse). This
allows the curb to be seen when
parallel parking.
Page 45 of 351

Chevrolet Corvette Owner Manual (GMNA-Localizing-U.S./Canada/Mexico-
9085364) - 2016 - crc - 9/15/15
44 Keys, Doors, and Windows
Windows
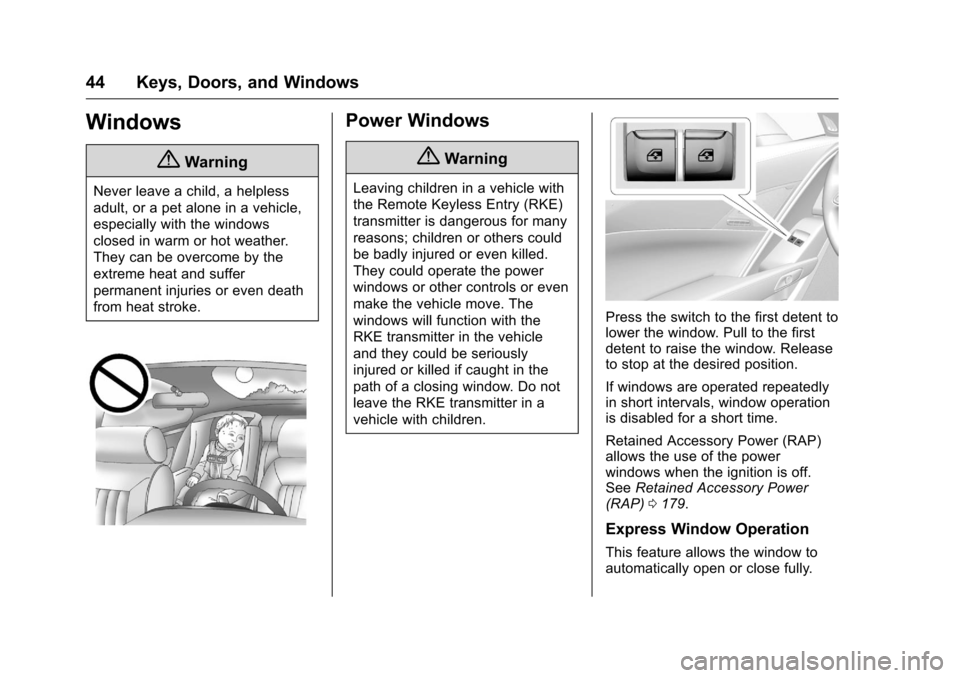
{Warning
Never leave a child, a helpless
adult, or a pet alone in a vehicle,
especially with the windows
closed in warm or hot weather.
They can be overcome by the
extreme heat and suffer
permanent injuries or even death
from heat stroke.
Power Windows
{Warning
Leaving children in a vehicle with
the Remote Keyless Entry (RKE)
transmitter is dangerous for many
reasons; children or others could
be badly injured or even killed.
They could operate the power
windows or other controls or even
make the vehicle move. The
windows will function with the
RKE transmitter in the vehicle
and they could be seriously
injured or killed if caught in the
path of a closing window. Do not
leave the RKE transmitter in a
vehicle with children.
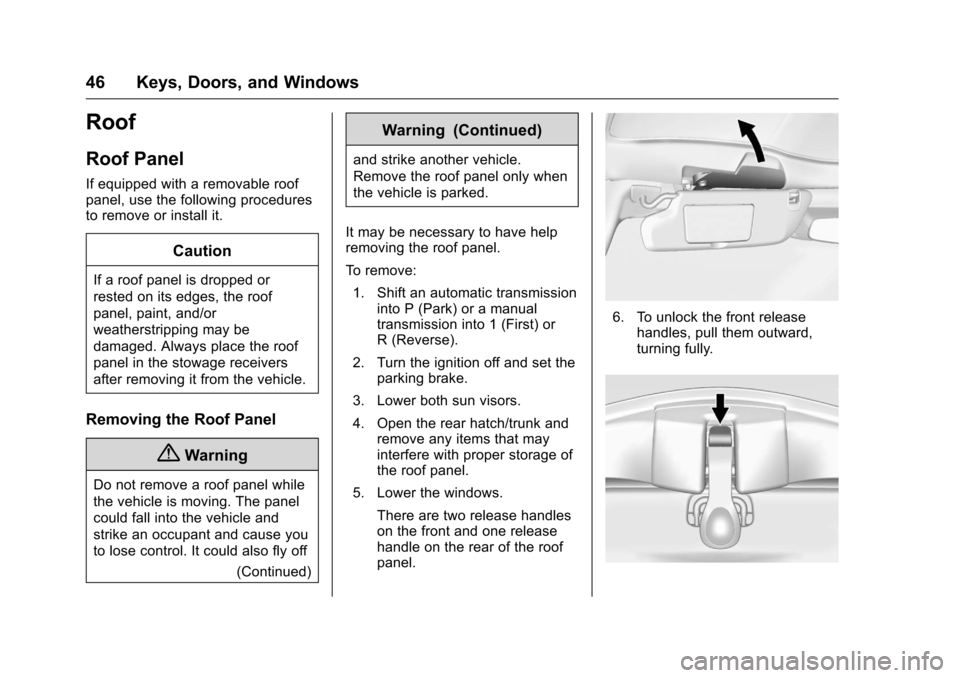
Press the switch to the first detent to
lower the window. Pull to the first
detent to raise the window. Release
to stop at the desired position.
If windows are operated repeatedly
in short intervals, window operation
is disabled for a short time.
Retained Accessory Power (RAP)
allows the use of the power
windows when the ignition is off.
SeeRetained Accessory Power
(RAP) 0179.
Express Window Operation
This feature allows the window to
automatically open or close fully.
Page 47 of 351

Chevrolet Corvette Owner Manual (GMNA-Localizing-U.S./Canada/Mexico-
9085364) - 2016 - crc - 9/15/15
46 Keys, Doors, and Windows
Roof
Roof Panel
If equipped with a removable roof
panel, use the following procedures
to remove or install it.
Caution
If a roof panel is dropped or
rested on its edges, the roof
panel, paint, and/or
weatherstripping may be
damaged. Always place the roof
panel in the stowage receivers
after removing it from the vehicle.
Removing the Roof Panel
{Warning
Do not remove a roof panel while
the vehicle is moving. The panel
could fall into the vehicle and
strike an occupant and cause you
to lose control. It could also fly off(Continued)
Warning (Continued)
and strike another vehicle.
Remove the roof panel only when
the vehicle is parked.
It may be necessary to have help
removing the roof panel.
To remove: 1. Shift an automatic transmission into P (Park) or a manual
transmission into 1 (First) or
R (Reverse).
2. Turn the ignition off and set the parking brake.
3. Lower both sun visors.
4. Open the rear hatch/trunk and remove any items that may
interfere with proper storage of
the roof panel.
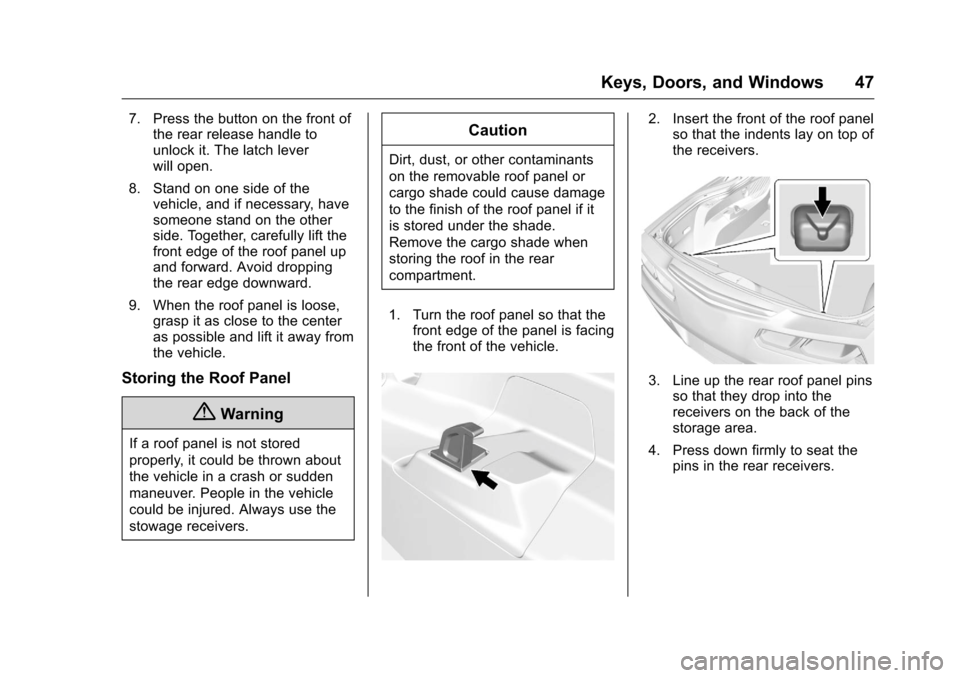
5. Lower the windows. There are two release handles
on the front and one release
handle on the rear of the roof
panel.
6. To unlock the front releasehandles, pull them outward,
turning fully.
Page 48 of 351

Chevrolet Corvette Owner Manual (GMNA-Localizing-U.S./Canada/Mexico-
9085364) - 2016 - crc - 9/15/15
Keys, Doors, and Windows 47
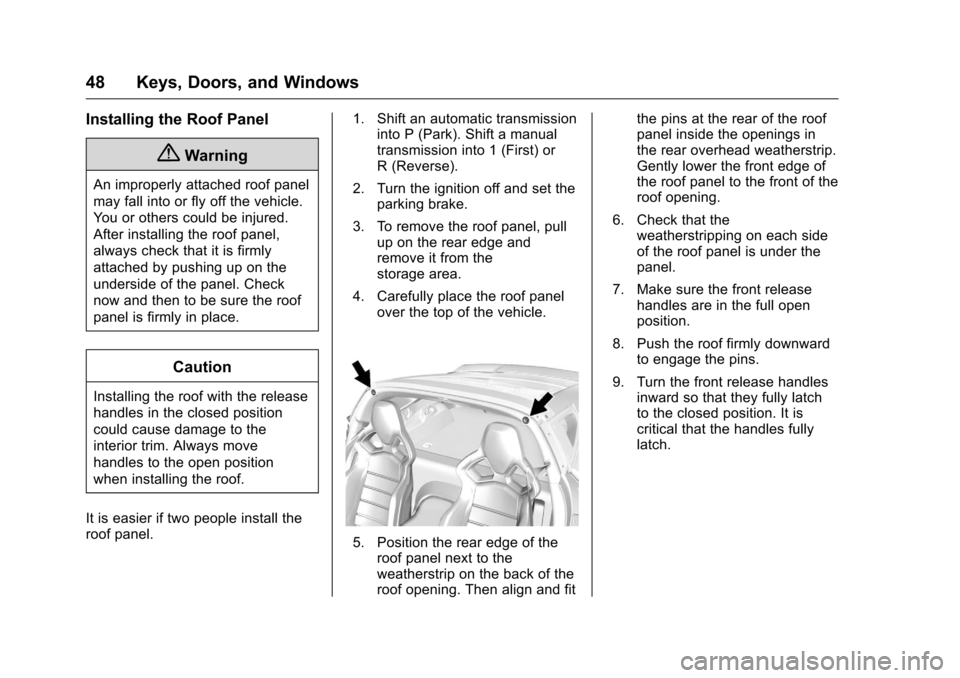
7. Press the button on the front ofthe rear release handle to
unlock it. The latch lever
will open.
8. Stand on one side of the vehicle, and if necessary, have
someone stand on the other
side. Together, carefully lift the
front edge of the roof panel up
and forward. Avoid dropping
the rear edge downward.
9. When the roof panel is loose, grasp it as close to the center
as possible and lift it away from
the vehicle.
Storing the Roof Panel
{Warning
If a roof panel is not stored
properly, it could be thrown about
the vehicle in a crash or sudden
maneuver. People in the vehicle
could be injured. Always use the
stowage receivers.
Caution
Dirt, dust, or other contaminants
on the removable roof panel or
cargo shade could cause damage
to the finish of the roof panel if it
is stored under the shade.
Remove the cargo shade when
storing the roof in the rear
compartment.
1. Turn the roof panel so that the front edge of the panel is facing
the front of the vehicle.
2. Insert the front of the roof panelso that the indents lay on top of
the receivers.
3. Line up the rear roof panel pins
so that they drop into the
receivers on the back of the
storage area.
4. Press down firmly to seat the pins in the rear receivers.
Page 49 of 351

Chevrolet Corvette Owner Manual (GMNA-Localizing-U.S./Canada/Mexico-
9085364) - 2016 - crc - 9/15/15
48 Keys, Doors, and Windows
Installing the Roof Panel
{Warning
An improperly attached roof panel
may fall into or fly off the vehicle.
You or others could be injured.
After installing the roof panel,
always check that it is firmly
attached by pushing up on the
underside of the panel. Check
now and then to be sure the roof
panel is firmly in place.
Caution
Installing the roof with the release
handles in the closed position
could cause damage to the
interior trim. Always move
handles to the open position
when installing the roof.
It is easier if two people install the
roof panel. 1. Shift an automatic transmission
into P (Park). Shift a manual
transmission into 1 (First) or
R (Reverse).
2. Turn the ignition off and set the parking brake.
3. To remove the roof panel, pull up on the rear edge and
remove it from the
storage area.
4. Carefully place the roof panel over the top of the vehicle.
5. Position the rear edge of theroof panel next to the
weatherstrip on the back of the
roof opening. Then align and fit the pins at the rear of the roof
panel inside the openings in
the rear overhead weatherstrip.
Gently lower the front edge of
the roof panel to the front of the
roof opening.
6. Check that the weatherstripping on each side
of the roof panel is under the
panel.
7. Make sure the front release handles are in the full open
position.
8. Push the roof firmly downward to engage the pins.
9. Turn the front release handles inward so that they fully latch
to the closed position. It is
critical that the handles fully
latch.
Page 50 of 351

Chevrolet Corvette Owner Manual (GMNA-Localizing-U.S./Canada/Mexico-
9085364) - 2016 - crc - 9/15/15
Keys, Doors, and Windows 49
10. Push back and up on the rearrelease handle to insert the
hook in the loop.
11. Push and pull the roof panel up and down and side to side to
ensure the roof panel is
securely installed.
Maintaining the Roof Panel
Caution
Using glass cleaner on a painted
roof panel could damage the
panel. The repairs would not be (Continued)
Caution (Continued)
covered by the vehicle warranty.
Do not use glass cleaner on the
painted roof panel.
When cleaning, removing, and/or
storing the roof panel:
. Flush with water to remove dust
and dirt, then dry the panel.
. Do not use abrasive cleaning
materials on the panel.
Convertible Top
If equipped with a convertible top,
review the following before
operating:
{Warning
While opening or closing the
convertible top, people can be
injured by the moving parts of the
tonneau cover or convertible top.
Maintain visual contact with the
top while it is being operated.
Caution
Follow these guidelines when
operating the convertible top or
damage can occur:
. Remove all items from the
roof, trunk lid, or tonneau
cover before operating.
. Remove all objects from the
trunk that may contact the
convertible top when it is
operated.
. Do not leave the vehicle
with the convertible
top open.
. Do not exceed 50 km/h
(31 mph) until the top has
completely closed or
opened.
. Do not open or close the top
while driving in high wind
conditions.
. Do not operate the
convertible top multiple
times in a short period of
(Continued)
Page 57 of 351

Chevrolet Corvette Owner Manual (GMNA-Localizing-U.S./Canada/Mexico-
9085364) - 2016 - crc - 9/15/15
56 Seats and Restraints
Front Seats
Power Seat Adjustment
{Warning
You can lose control of the
vehicle if you try to adjust a driver
seat while the vehicle is moving.
Adjust the driver seat only when
the vehicle is not moving.
To adjust the seat:
.Move the seat forward or
rearward by sliding the control
forward or rearward.
. Raise or lower the front part of
the seat cushion by moving the
front of the control up or down.
. Raise or lower the seat by
moving the rear of the control up
or down.
To adjust the seatback, see
Reclining Seatbacks 057.
To adjust the lumbar support, see
Lumbar Adjustment 056.
Seat Travel Limit
If a seat is moved all the way to the
rear and/or the seatback is reclined
so that it makes contact with the
carpet, all rearward seat movement
will stop. Normal operation of the
seat will resume when the seatback
is no longer in contact with the
carpet. This is normal. If a seat is folded forward, all
rearward or downward seat
movement will stop. Normal
operation will resume when the seat
is returned to an upright position.
Lumbar Adjustment
To adjust the lumbar and bolster
support (if equipped):
.
Press and hold the control
forward to increase or rearward
to decrease lumbar support.
. If equipped, press and hold the
control upward to increase or
downward to decrease the side
bolster support.
Page 58 of 351

Chevrolet Corvette Owner Manual (GMNA-Localizing-U.S./Canada/Mexico-
9085364) - 2016 - crc - 9/15/15
Seats and Restraints 57
Reclining Seatbacks
To adjust the seatback:
.Tilt the top of the control
rearward to recline.
. Tilt the top of the control forward
to raise.
{Warning
Sitting in a reclined position when
the vehicle is in motion can be
dangerous. Even when buckled
up, the safety belts cannot do
their job.
(Continued)
Warning (Continued)
For proper protection when the
vehicle is in motion, have the
seatback upright. Then sit well
back in the seat and wear the
safety belt properly.
Memory Seats
If memory equipped, the 1, 2, SET,
and
S(Exit) buttons on the driver
door are used to manually store and
recall memory settings for the driver
seat, outside mirrors, and power tilt
and telescoping steering column. Storing Memory Positions
To store positions to the 1 and 2
buttons:
1. Place the ignition in ON/RUN/ START or ACC/ACCESSORY.
2. Adjust the driver seat, outside mirrors, and the power tilt and
telescoping steering column to
the desired driving positions.
3. Press and release SET. A beep will sound.
4. Immediately press and hold 1 until two beeps sound.
5. Repeat Steps 1–4 for a second driver using 2.
To store exit positions and easy exit
features, repeat Steps 1–4 using
S
(Exit) to store your positions for
getting out of the vehicle.
Manually Recalling Memory
Positions
Press and hold 1, 2, or
Sto
manually recall the previously
stored memory positions. Releasing