2016 BUICK ENVISION instrument cluster
[x] Cancel search: instrument clusterPage 3 of 20

3
Refer to your Owner Manual
to learn about the information
being relayed by the lights,
gauges and indicators on the
instrument cluster.
See In Brief in your Owner Manual.
Infotainment
System Touch Screen Infotainment
System
Controls Parking
Assist
Button
Lane Keep
Assist
Button
Electric Parking Brake Switch
Driver’s Heated/
Cooled Seat Buttons
F
Traction Control and StabiliTrak button Passenger’s
Heated/Cooled Seat Buttons
F
Automatic
Parking Assist Button
F
Climate
Controls
F Optional equipment
Adaptive Forward
Lighting
Lights On Reminder
Antilock Brake
System Warning
Low Tire Pressure
Door Ajar
Vehicle Ahead
StabiliTrak Off
Driver Safety Belt Reminder
2 Passenger Safety Belt
Reminder
Page 8 of 20

8
Driver Information Center
The Driver Information Center (DIC) on the instrument cluster displays a variety of vehicle
system information and warning messages.
DIC Controls
Use the controls on the right side of the
steering wheel to view and move through
the DIC menus.
Press the or button to move
between the display zones. Press the
left
to go back to the previous menu.
Press the or button to scroll
through the menus.
Press the button to open a menu or
select a setting. Press and hold to reset
a value.
Menus
• Info – display trip odometers and fuel
information
• Audio – browse music and change the
audio source
• Phone – view the active call and scroll
through contacts
• Navigation
F – view the active route
and change prompts
• Settings – change display information
Info Pages Menu
1. Use the controls to display Settings and
then press
.
2. Scroll to Info Pages. Press the
to enter
the menu.
3. Scroll through the list of items.
4. Press the
button to select or
deselect an item to display.
See Instruments and Controls in your Owner Manual.
F Optional equipment
Page 15 of 20

15
Lighting
IntelliBeam SystemF
The IntelliBeam system automatically turns the high-beam headlamps on/off based on
traffic conditions. A green
indicator displays on the instrument cluster when the sys-tem is on; a blue indicator displays when the high-beam headlamps are on.
Press the button on the turn signal lever with the lamp control in the AUTO or
Headlamps position to turn the automatic high-beam system on or off.
Note: IntelliBeam activates the high-beam headlamps only when driving over 25 mph. The system is
turned off if the high/low-beam changer or the flash-to-pass feature is used. Press the lever button
again to turn on the system.
Adaptive Forward LightingF
The Adaptive Forward Lighting system pivots the headlamps left or right in the direction
of travel.
Note: The system operates only when the exterior lamps control knob is in the AUTO position,
at speeds greater than 2 mph, and after driving a short distance to calibrate the system.
Instrument Panel Lighting
Instrument Panel Brightness
Rotate and hold the thumbwheel to adjust the instrument panel lighting.
See Lighting in your Owner Manual.
F Optional equipment
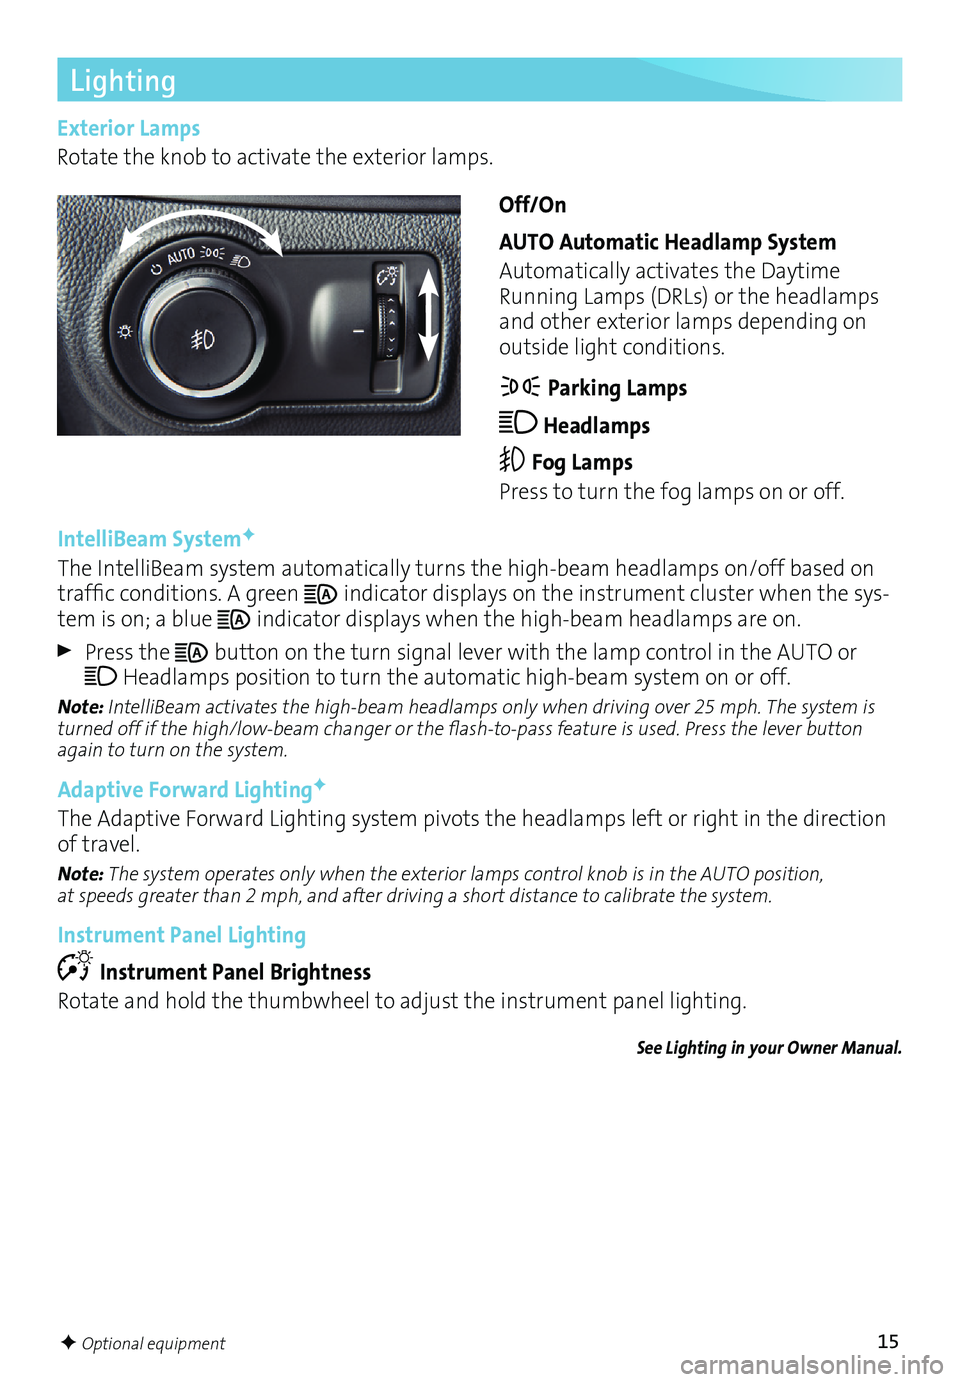
Exterior Lamps
Rotate the knob to activate the exterior lamps.
Off/On
AUTO Automatic Headlamp System
Automatically activates the Daytime
Running Lamps (DRLs) or the headlamps
and other exterior lamps depending on
outside light conditions.
Parking Lamps
Headlamps
Fog Lamps
Press to turn the fog lamps on or off.
Page 16 of 20

16F Optional equipment
Cruise Control
Traction Control and StabiliTrak Systems
Setting Cruise Control
1. Press the
On/Off button. The Cruise Control symbol will illuminate in white on
the instrument cluster.
2. When traveling at the desired speed, press the SET– button to set the speed. The
symbol will illuminate in green on the instrument cluster.
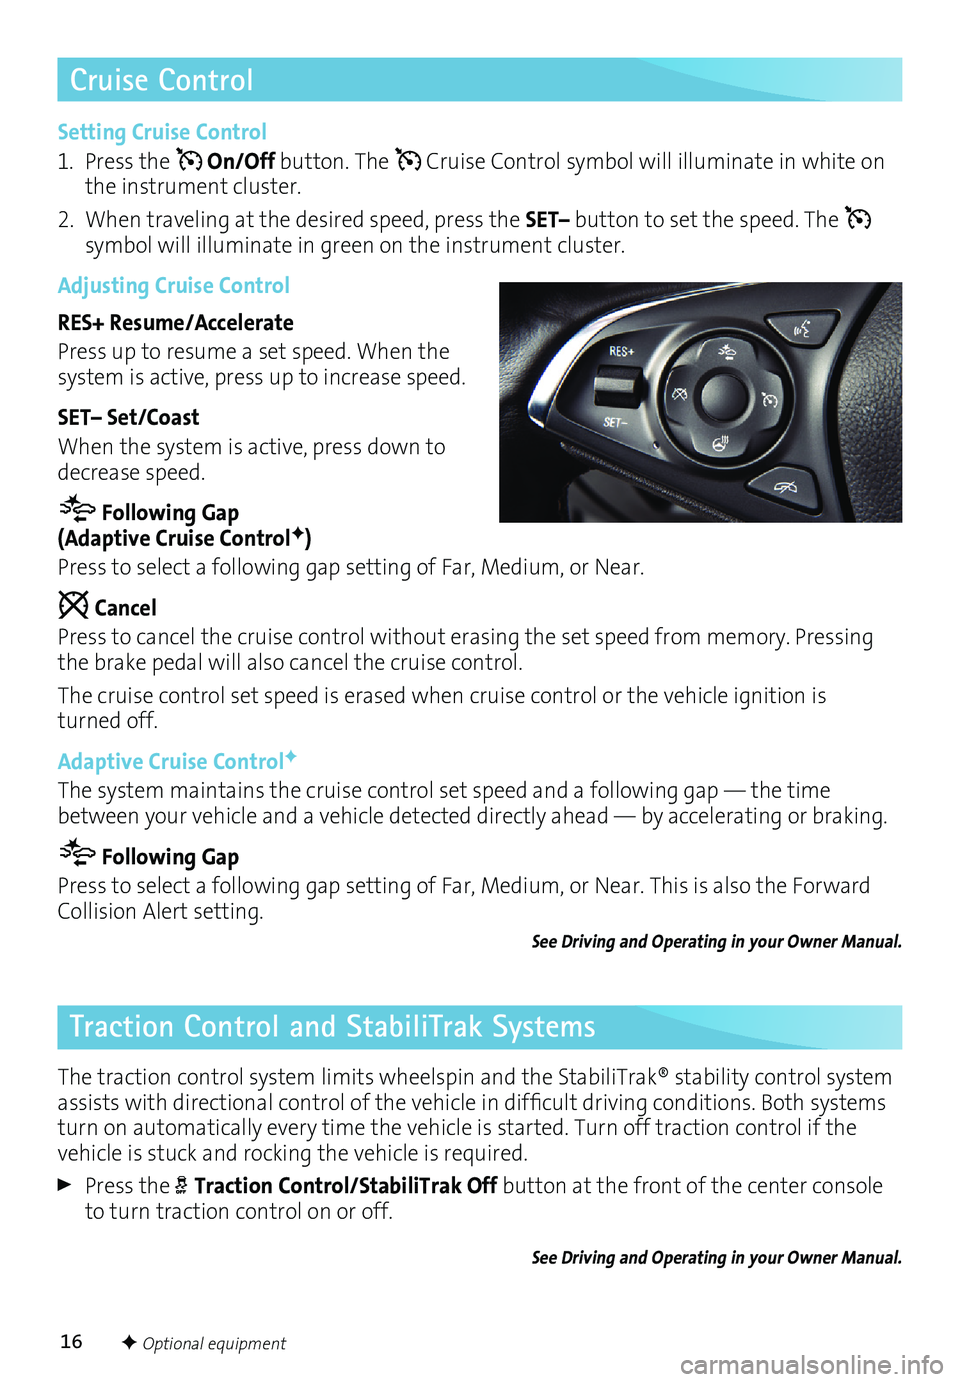
Adjusting Cruise Control
RES+ Resume/Accelerate
Press up to resume a set speed. When the
system is active, press up to increase speed.
SET– Set/Coast
When the system is active, press down to
decrease speed.
Following Gap (Adaptive Cruise ControlF)
Press to select a following gap setting of Far, Medium, or Near.
Cancel
Press to cancel the cruise control without erasing the set speed from memory. Pressing
the brake pedal will also cancel the cruise control.
The cruise control set speed is erased when cruise control or the vehicle ignition is
turned off.
Adaptive Cruise Control
F
The system maintains the cruise control set speed and a following gap — the time
between your vehicle and a vehicle detected directly ahead — by accelerating or braking.
Following Gap
Press to select a following gap setting of Far, Medium, or Near. This is also the Forward
Collision Alert setting.
See Driving and Operating in your Owner Manual.
The traction control system limits wheelspin and the StabiliTrak® stability control system
assists with directional control of the vehicle in difficult driving conditions. Both systems
turn on automatically every time the vehicle is started. Turn off traction control if the
vehicle is stuck and rocking the vehicle is required.
Press the Traction Control/StabiliTrak Off button at the front of the center console
to turn traction control on or off.
See Driving and Operating in your Owner Manual.
Page 17 of 20

17
Automatic Transmission
Electric Parking Brake
Driver Shift Control
Driver Shift Control is a manual mode that
allows the driver to shift gears manually.
This feature can be used to limit the top
gear and vehicle speed or to downshift
when driving on a downhill grade to provide
engine braking.
1. Move the shift lever left to the L (Low)
position.
2. Press the + (plus) or – (minus) button on
the shift lever to upshift or downshift.
The current gear will be displayed on the Driver Information Center.
If vehicle speed is too high or too low for the requested gear, the shift will not occur.
See Driving and Operating in your Owner Manual.
To apply the parking brake, pull the
Parking Brake switch.
To release the parking brake, turn on the
ignition, press the brake pedal, and then
press the
switch.
Note: The parking brake will release automatically
if the vehicle is running, placed into gear and an
attempt is made to drive.
See Driving and Operating in your Owner Manual.
Tire Pressure Monitor
The Low Tire Pressure warning light on the instrument cluster illuminates when one
or more of the vehicle’s tires is significantly underinflated. Fill the tires to the proper tire
pressures listed on the Tire and Loading Information label located below the driver’s door
latch. Current tire pressures can be viewed in the Driver Information Center.
See Vehicle Care in your Owner Manual.
Page 18 of 20

18
Driving Assistance Systems
Safety Alert Seat
The driver’s seat pulses — left side, right side or simultaneously — to alert the driver of
potential hazards.
Audible alerts or seat pulsing alerts may be selected. To change the alert settings, go to
Settings > Vehicle > Collision/Detection > Alert Type.
Lane Change Alert with Side Blind Zone Alert
While driving, the system displays a
warning symbol on the left or right side mirror
when a vehicle is detected in that side blind zone area or rapidly approaching that area.
The warning symbol flashes if a turn signal is activated when a vehicle has been detected.
To turn the system on or off, go to Settings > Vehicle > Collision/Detection > Lane
Change Alert.
Lane Keep Assist with Lane Departure Warning
The
Lane Keep Assist indicator illumi-nates in green on the instrument cluster
when a lane marking is detected. If your
vehicle approaches a detected lane marking
without using a turn signal in that direc
-tion, the system may assist by gently turn-ing the steering wheel and provide a Lane
Departure Warning alert by flashing an
amber
and pulsing the Safety Alert Seat.
To turn the system on or off, press the Lane Keep Assist button on the
center of the instrument panel.
Forward Collision Alert
The
Vehicle Ahead indicator illuminates in green on the instrument cluster when a
vehicle is detected and illuminates in amber when following a vehicle ahead too closely.
If your vehicle approaches another vehicle
too rapidly, the
flashes, a visual alert
flashes on the windshield and the Safety
Alert Seat pulses.
Press the Collision Alert button on
the steering wheel to set the alert timing
to Far, Medium, or Near. This is also the
Adaptive Cruise Control Following Gap
setting.
See Driving and Operating in your Owner Manual.