2016 BMW Z4 SDRIVE35I tow
[x] Cancel search: towPage 236 of 289

If necessary, have the vehicle towed.◀Repair of tire damage
For safety reasons, the manufacturer of
your vehicle recommends that you do not have
damaged tires repaired; they should be re‐
placed. Otherwise, damage can occur as a re‐
sult.◀
Run-flat tires
Label
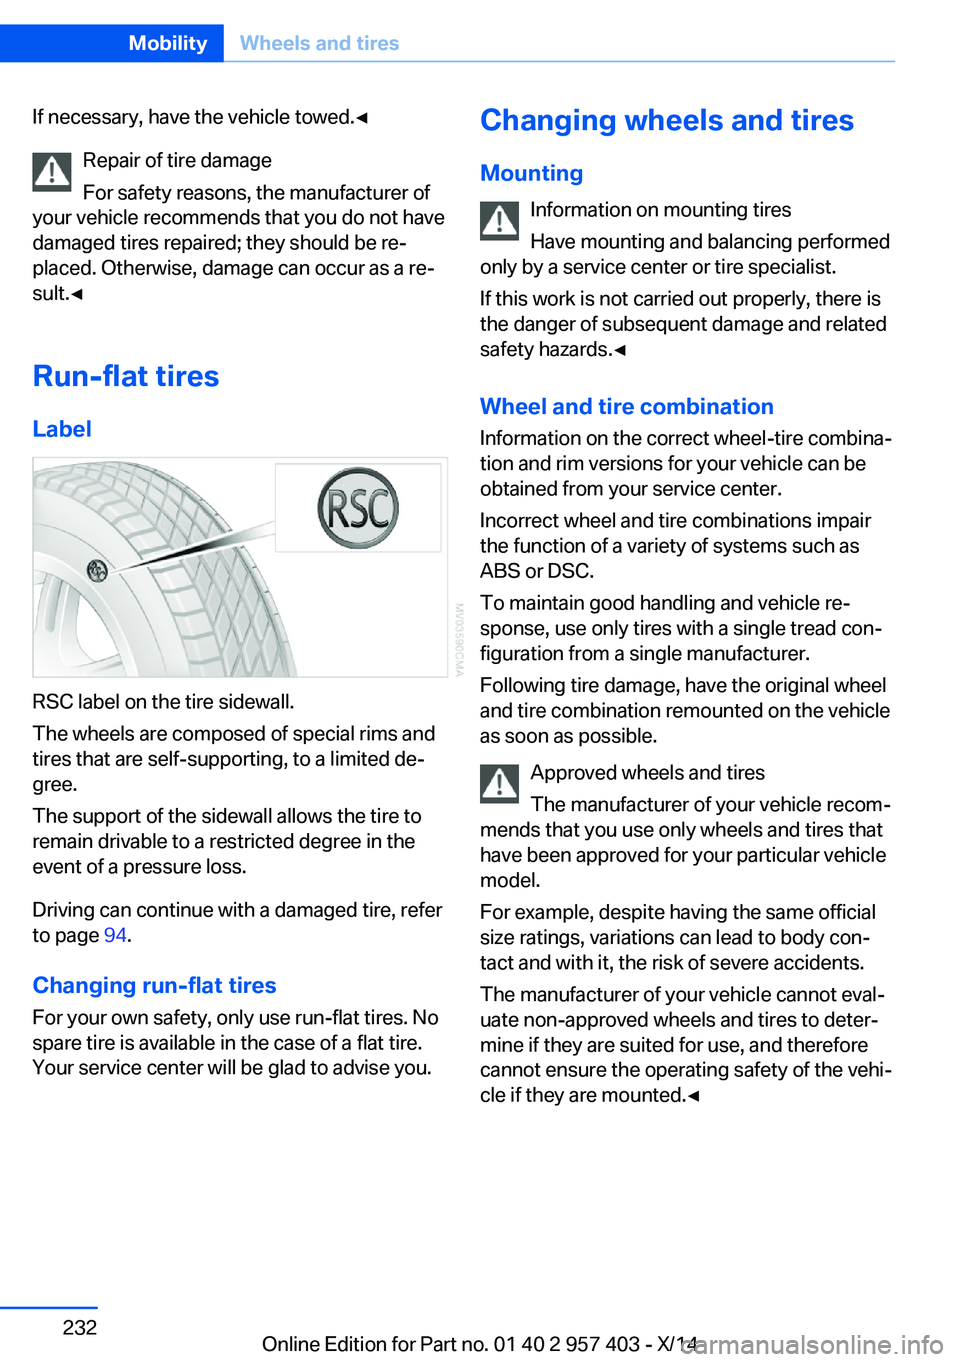
RSC label on the tire sidewall.
The wheels are composed of special rims and
tires that are self-supporting, to a limited de‐
gree.
The support of the sidewall allows the tire to
remain drivable to a restricted degree in the
event of a pressure loss.
Driving can continue with a damaged tire, refer
to page 94.
Changing run-flat tires
For your own safety, only use run-flat tires. No
spare tire is available in the case of a flat tire.
Your service center will be glad to advise you.
Changing wheels and tires
Mounting Information on mounting tires
Have mounting and balancing performed
only by a service center or tire specialist.
If this work is not carried out properly, there is
the danger of subsequent damage and related
safety hazards.◀
Wheel and tire combination
Information on the correct wheel-tire combina‐
tion and rim versions for your vehicle can be
obtained from your service center.
Incorrect wheel and tire combinations impair
the function of a variety of systems such as
ABS or DSC.
To maintain good handling and vehicle re‐
sponse, use only tires with a single tread con‐ figuration from a single manufacturer.
Following tire damage, have the original wheel
and tire combination remounted on the vehicle
as soon as possible.
Approved wheels and tires
The manufacturer of your vehicle recom‐
mends that you use only wheels and tires that have been approved for your particular vehicle
model.
For example, despite having the same official
size ratings, variations can lead to body con‐
tact and with it, the risk of severe accidents.
The manufacturer of your vehicle cannot eval‐
uate non-approved wheels and tires to deter‐
mine if they are suited for use, and therefore
cannot ensure the operating safety of the vehi‐
cle if they are mounted.◀Seite 232MobilityWheels and tires232
Online Edition for Part no. 01 40 2 957 403 - X/14
Page 247 of 289

Replacing componentsVehicle equipmentThis chapter describes all series equipment as
well as country-specific and special equipment
offered for this model series. Therefore, it also
describes equipment that may not be found in
your vehicle, for instance due to the selected
special equipment or the country version. This
also applies to safety-related functions and
systems.
When using the features and systems descri‐
bed here, adhere to local regulations.
Tool kit
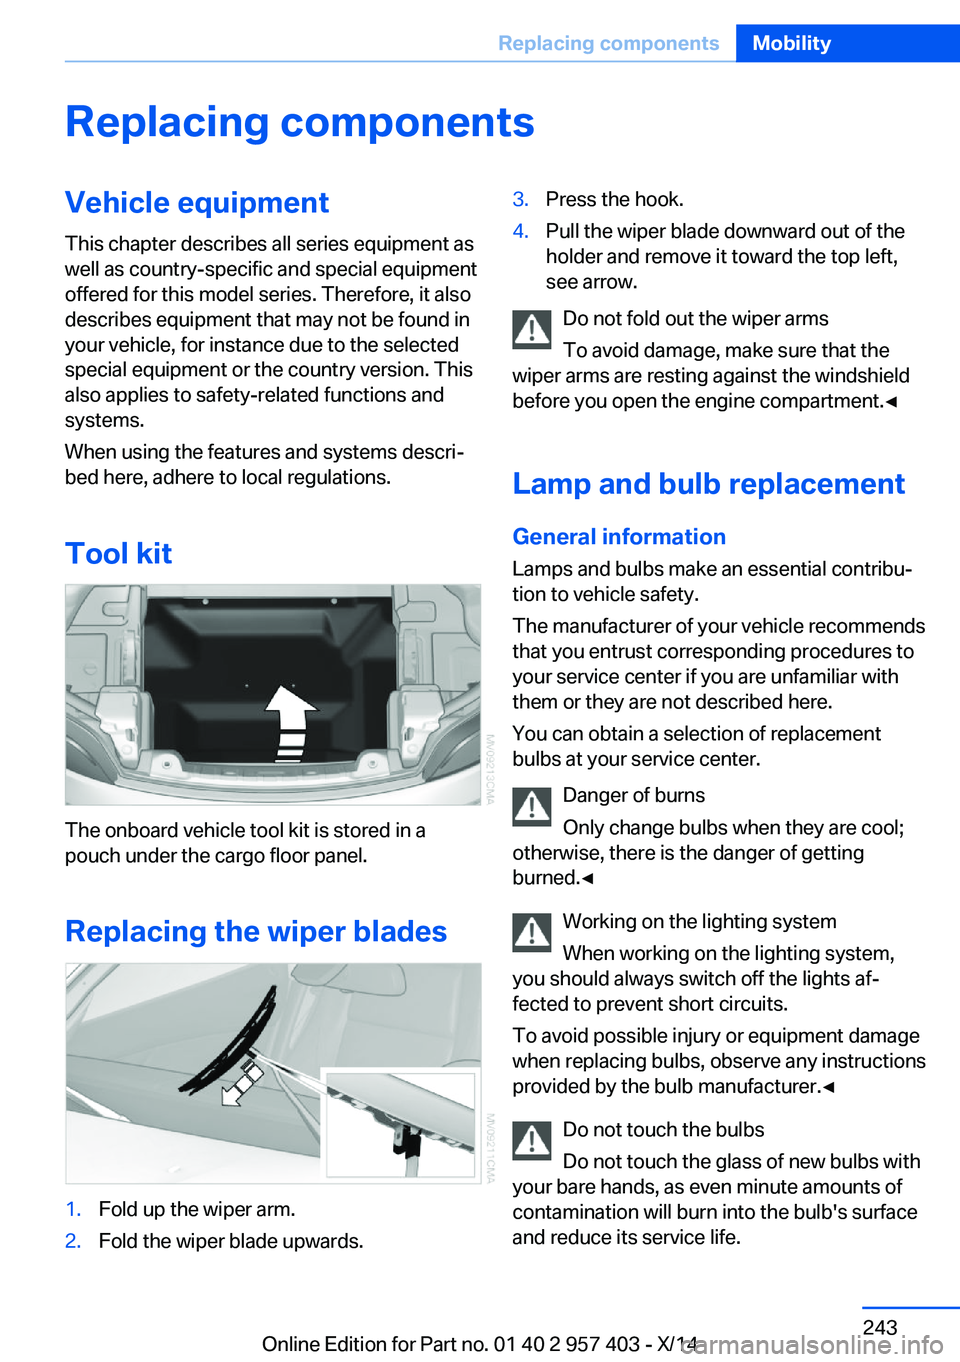
The onboard vehicle tool kit is stored in a
pouch under the cargo floor panel.
Replacing the wiper blades
1.Fold up the wiper arm.2.Fold the wiper blade upwards.3.Press the hook.4.Pull the wiper blade downward out of the
holder and remove it toward the top left,
see arrow.
Do not fold out the wiper arms
To avoid damage, make sure that the
wiper arms are resting against the windshield
before you open the engine compartment.◀
Lamp and bulb replacement
General information Lamps and bulbs make an essential contribu‐
tion to vehicle safety.
The manufacturer of your vehicle recommends
that you entrust corresponding procedures to
your service center if you are unfamiliar with
them or they are not described here.
You can obtain a selection of replacement
bulbs at your service center.
Danger of burns
Only change bulbs when they are cool;
otherwise, there is the danger of getting
burned.◀
Working on the lighting system
When working on the lighting system,
you should always switch off the lights af‐
fected to prevent short circuits.
To avoid possible injury or equipment damage
when replacing bulbs, observe any instructions
provided by the bulb manufacturer.◀
Do not touch the bulbs
Do not touch the glass of new bulbs with
your bare hands, as even minute amounts of
contamination will burn into the bulb's surface
and reduce its service life.
Seite 243Replacing componentsMobility243
Online Edition for Part no. 01 40 2 957 403 - X/14
Page 249 of 289

Turn signals, frontPY24W bulb, 24 watt1.Turn the wheel outwards.2.Turn both locks in the wheel house to the
left and remove the cover.3.Turn the bulb holder to the left and remove
it.4.Turn the bulb to the right, see arrow, and
remove it.5.Change the bulb and screw it into the bulb
holder toward the left.6.Insert the bulb holder and turn it to the
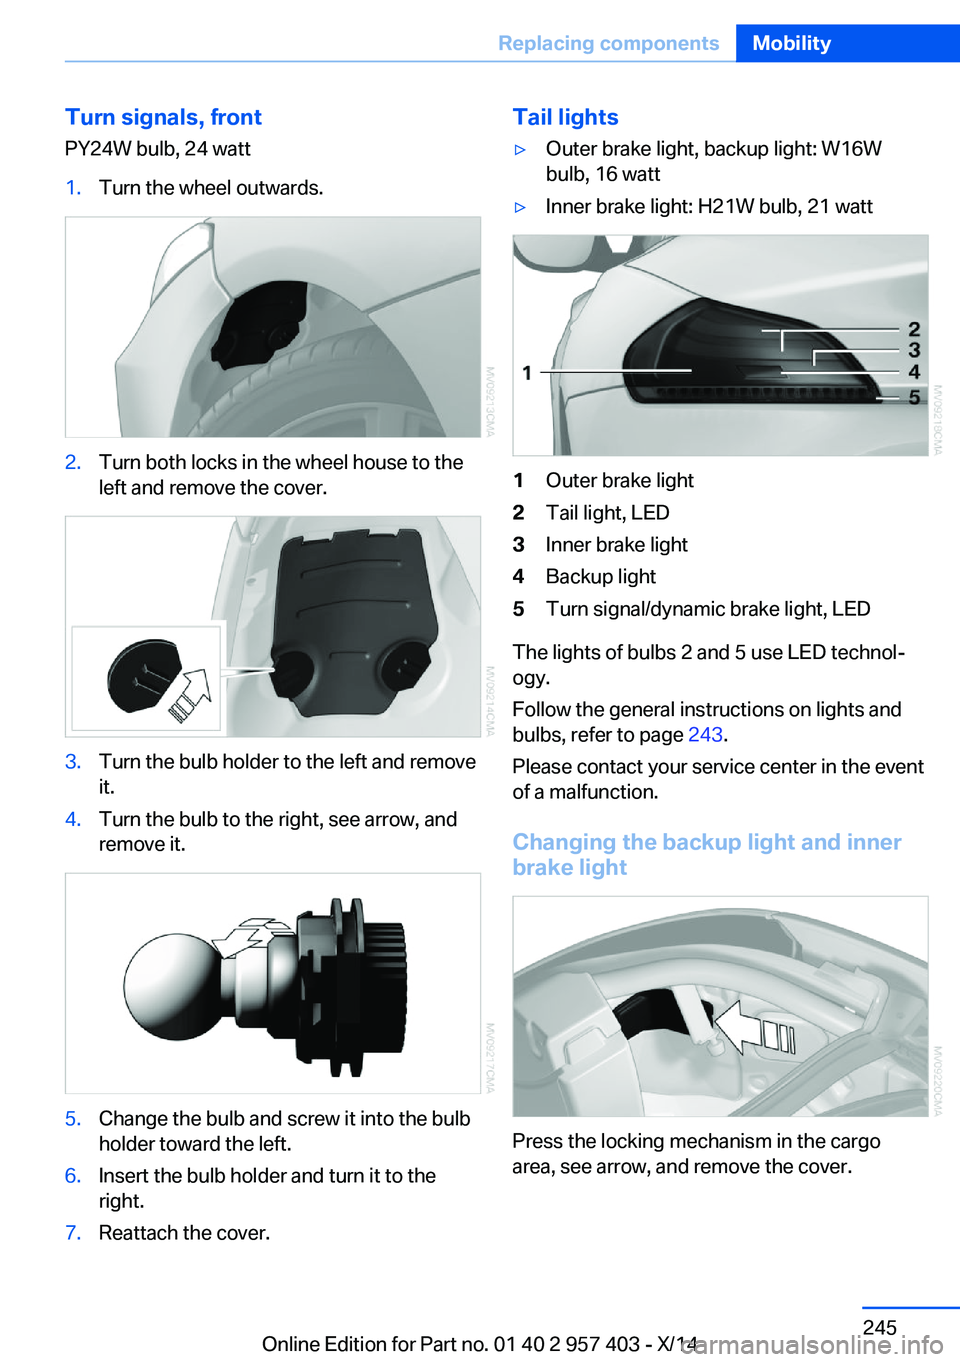
right.7.Reattach the cover.Tail lights▷Outer brake light, backup light: W16W
bulb, 16 watt▷Inner brake light: H21W bulb, 21 watt1Outer brake light2Tail light, LED3Inner brake light4Backup light5Turn signal/dynamic brake light, LED
The lights of bulbs 2 and 5 use LED technol‐
ogy.
Follow the general instructions on lights and
bulbs, refer to page 243.
Please contact your service center in the event
of a malfunction.
Changing the backup light and inner brake light
Press the locking mechanism in the cargo
area, see arrow, and remove the cover.
Seite 245Replacing componentsMobility245
Online Edition for Part no. 01 40 2 957 403 - X/14
Page 255 of 289

The so-called starting aid terminal in the en‐
gine compartment acts as the battery's posi‐
tive terminal.
The body ground or a special nut acts as the
negative terminal.
Connecting jumper cables
1.Pull off the cap of the BMW starting aid ter‐
minal.2.Attach one terminal clamp of the positive
jumper cable to the positive terminal of the
battery, or to the corresponding starting
aid terminal of the vehicle providing assis‐
tance.3.Attach the other end of the cable to the
positive terminal of the battery, or to the
corresponding starting aid terminal of the
vehicle to be started.4.Attach one terminal clamp of the negative
jumper cable to the negative terminal of
the battery, or to the corresponding engine
or body ground of the vehicle providing as‐
sistance.5.Attach the other end of the cable to the
negative terminal of the battery, or to thecorresponding engine or body ground of
the vehicle to be started.
Starting the engine
Never use spray fluids to start the engine.
1.Start the engine of the assisting vehicle
and let it run for several minutes at an in‐
creased idle speed.
If the vehicle being started has a diesel en‐
gine: let the engine of the assisting vehicle
run for approx. 10 minutes.2.Start the engine of the vehicle being
started in the usual way.
If the first starting attempt is not success‐
ful, wait a few minutes before making an‐
other attempt in order to allow the dis‐
charged battery to recharge.3.Let both engines run for several minutes.4.Disconnect the jumper cables in the re‐
verse order.
Check the battery and recharge if necessary.
Tow-starting and towing Sport automatic transmission:
transporting your vehicle
Note
Your vehicle is not permitted to be towed.
Therefore, contact a service center in the
event of a breakdown.
Observe in the event of a breakdown
Have the vehicle transported on a load‐
ing platform only, or damage may occur.◀
Seite 251Breakdown assistanceMobility251
Online Edition for Part no. 01 40 2 957 403 - X/14
Page 256 of 289

Tow truck
Do not lift the vehicle
Do not lift the vehicle by the tow fitting or
body and chassis parts; otherwise, damage
may result.◀
Use the tow fitting screwed in at the front for
maneuvering the vehicle only.
7-gear Sport automatic transmission
Vehicles with a 7-gear Sport automatic trans‐
mission with a dual clutch can be towed for
short distances if the following instructions are
adhered to.
Manually release the transmission lock, refer to
page 69.
Manually release the transmission lock
Manually release the transmission lock,
even if there is no malfunction involving the
transmission. Otherwise, there is the danger
that the transmission lock will be engaged au‐
tomatically during towing.◀
Adhere to the towing speed and distance
Do not exceed a towing speed of
30 mph/50 km/h and a towing distance of
30 miles/50 km or damage to the transmission
can occur.◀
Blocked parking brake
The parking brake cannot be released
manually.
When the parking brake is blocked, do not tow
the vehicle or else it may be damaged.
Contact your service center.◀
Follow the towing instructions
Follow all towing instructions, or vehicle
damage or accidents may occur.◀▷Make sure that the ignition is switched on;
otherwise, the low beams, tail lights, turn
signals, and windshield wipers may be un‐
available.▷Do not tow the vehicle with the rear axle
tilted, as the front wheels could turn.▷When the engine is stopped, there is no
power assist. Consequently, more force
needs to be applied when braking and
steering.▷Larger steering wheel movements are re‐
quired.▷The towing vehicle must not be lighter
than the vehicle being towed; otherwise,
it will not be possible to control the vehicle
response.
Secure the vehicle against rolling off
Apply the parking brake after towing and
secure the vehicle against rolling off if neces‐
sary.
Have the operability of transmission position P
checked by the service center.◀
Manual transmission
Observe before towing your vehicle Gearshift lever in neutral position.
Being towed Blocked parking brake
The parking brake cannot be released
manually.
When the parking brake is blocked, do not tow
the vehicle or else it may be damaged.
Contact your service center.◀
Seite 252MobilityBreakdown assistance252
Online Edition for Part no. 01 40 2 957 403 - X/14
Page 257 of 289

Follow the towing instructions
Follow all towing instructions, or vehicle
damage or accidents may occur.◀▷Make sure that the ignition is switched on;
otherwise, the low beams, tail lights, turn
signals, and windshield wipers may be un‐
available.▷Do not tow the vehicle with the rear axle
tilted, as the front wheels could turn.▷When the engine is stopped, there is no
power assist. Consequently, more force
needs to be applied when braking and
steering.▷Larger steering wheel movements are re‐
quired.▷The towing vehicle must not be lighter
than the vehicle being towed; otherwise,
it will not be possible to control the vehicle
response.
Tow truck
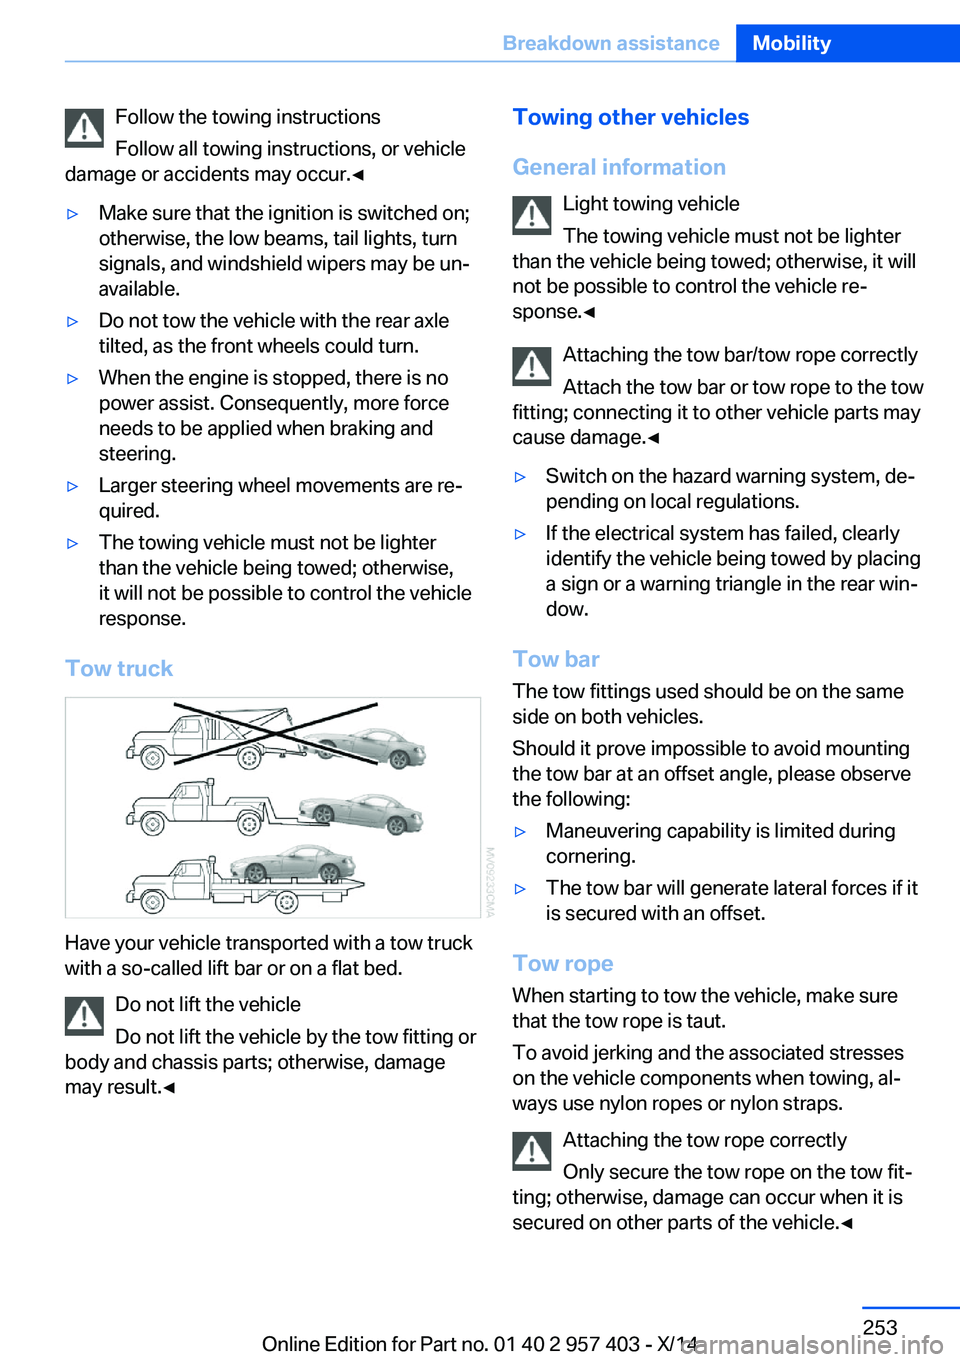
Have your vehicle transported with a tow truck
with a so-called lift bar or on a flat bed.
Do not lift the vehicle
Do not lift the vehicle by the tow fitting or
body and chassis parts; otherwise, damage
may result.◀
Towing other vehicles
General information Light towing vehicle
The towing vehicle must not be lighter
than the vehicle being towed; otherwise, it will
not be possible to control the vehicle re‐
sponse.◀
Attaching the tow bar/tow rope correctly
Attach the tow bar or tow rope to the tow
fitting; connecting it to other vehicle parts may
cause damage.◀▷Switch on the hazard warning system, de‐
pending on local regulations.▷If the electrical system has failed, clearly
identify the vehicle being towed by placing
a sign or a warning triangle in the rear win‐
dow.
Tow bar
The tow fittings used should be on the same
side on both vehicles.
Should it prove impossible to avoid mounting
the tow bar at an offset angle, please observe
the following:
▷Maneuvering capability is limited during
cornering.▷The tow bar will generate lateral forces if it
is secured with an offset.
Tow rope
When starting to tow the vehicle, make sure
that the tow rope is taut.
To avoid jerking and the associated stresses
on the vehicle components when towing, al‐
ways use nylon ropes or nylon straps.
Attaching the tow rope correctly
Only secure the tow rope on the tow fit‐
ting; otherwise, damage can occur when it is
secured on other parts of the vehicle.◀
Seite 253Breakdown assistanceMobility253
Online Edition for Part no. 01 40 2 957 403 - X/14
Page 258 of 289

Tow fitting
The screw-in tow fitting should always be car‐
ried in the vehicle. It can be screwed in at the
front or rear of the BMW.
It is stored in the onboard vehicle tool kit under
the cargo floor panel, refer to page 243.
Tow fitting, information on use▷Use only the tow fitting provided with
the vehicle and screw it all the way in.▷Use the tow fitting for towing on paved
roads only.▷Avoid lateral loading of the tow fitting, e.g.,
do not lift the vehicle by the tow fitting.
Otherwise, damage to the tow fitting and the
vehicle can occur.◀
Screw thread
Front
Release the cover panel in the bumper:
Press on the recess at the bottom left in the
cover panel.
Rear
Release the cover panel in the bumper:
Press on the recess at the bottom center in the
cover panel.
Tow-starting
Sport automatic transmission Do not tow-start the vehicle.
Due to the Sport automatic transmission, the
engine cannot be started by tow-starting.
Have the cause of the starting difficulties rem‐
edied.
Manual transmission If possible, do not tow-start the vehicle but
start the engine by jump-starting, refer to
page 250, it. If the vehicle is equipped with a
catalytic converter, only tow-start while the en‐
gine is cold.
1.Switch on the hazard warning system; .2.Switch on the ignition, refer to page 55.3.Shift into 3rd gear.4.Have the vehicle tow-started with the
clutch pressed and slowly release the
clutch. After the engine starts, immediately
depress the clutch completely again.5.Stop at a suitable location, remove the tow
bar or rope, and switch off the hazard
warning system.6.Have the vehicle checked.Seite 254MobilityBreakdown assistance254
Online Edition for Part no. 01 40 2 957 403 - X/14
Page 269 of 289

Vehicle information
Computer FunctionCommandOpen the computer.›Onboard info‹Open the trip computer.›Trip computer‹
Vehicle
FunctionCommandOpen the vehicle information.›Vehicle info‹Open the vehicle status.›Vehicle status‹
Navigation
General information
FunctionCommandNavigation menu.›Navigation‹Open the destination entry.›Enter address‹Enter the address.›Enter address‹Enter the town/city.›City‹Enter the country.›State‹Enter the postal code.›Postal Code‹Open destination guidance.›Guidance‹Start destination guidance.›Start guidance‹Terminate destination guidance.›Stop guidance‹Open the home address.›Home address‹Open the route criteria.›Route preference‹Open the route.›Route information‹Switch on the spoken instruction.›Switch on voice instructions‹Seite 265Short commands of the voice activation systemReference265
Online Edition for Part no. 01 40 2 957 403 - X/14