2016 BMW X4 Cigaret
[x] Cancel search: CigaretPage 165 of 253

4.Likewise, press and hold the button of the
desired function on the hand-held trans‐
mitter.5.Release both buttons as soon as the inte‐
rior rearview mirror LED flashes more rap‐
idly. The LED flashing faster indicates that
the button on the interior rearview mirror
has been programmed. The system can
then be controlled by the button on the in‐
terior rearview mirror.
If the LED does not flash faster after at
least 60 seconds, change the distance and
repeat the step. Several more attempts at
different distances may be necessary. Wait
at least 15 seconds between attempts.
Canada: if programming with the hand-
held transmitter was interrupted, hold
down the interior rearview mirror button
and repeatedly press and release the
hand-held transmitter button for 2 sec‐
onds.
Controls
WARNING
Body parts can be jammed when operat‐
ing remote-controlled systems, e.g. the garage
door, using the universal garage door opener. There is risk of injuries or risk of property dam‐
age. Make sure that the area of movement of
the respective system is clear during program‐
ming and operation. Also follow the safety in‐
structions of the hand-held transmitter.◀
The system, such as the garage door, can be
operated using the button on the interior rear‐
view mirror while the engine is running or when
the ignition is started. To do this, hold down
the button within receiving range of the system
until the function is activated. The interior rear‐
view mirror LED stays lit while the wireless sig‐
nal is being transmitted.
Deleting stored functions Press and hold the left and right button on the
interior rearview mirror simultaneously for ap‐
proximately 20 seconds until the LED flashes
rapidly. All stored functions are deleted. The
functions cannot be deleted individually.
Sun visor Glare shieldFold the sun visor down or up.
Glare shield from the side
Folding out1.Fold the sun visor down.2.Unhook it from the holder and swing it to
the side.3.Move it back to the desired position.
Folding up
Proceed in the reverse order to close the sun
visor.
Vanity mirror A vanity mirror is located in the sun visor be‐
hind a cover. When the cover is opened, the
mirror lighting switches on.
Ashtray/cigarette lighter
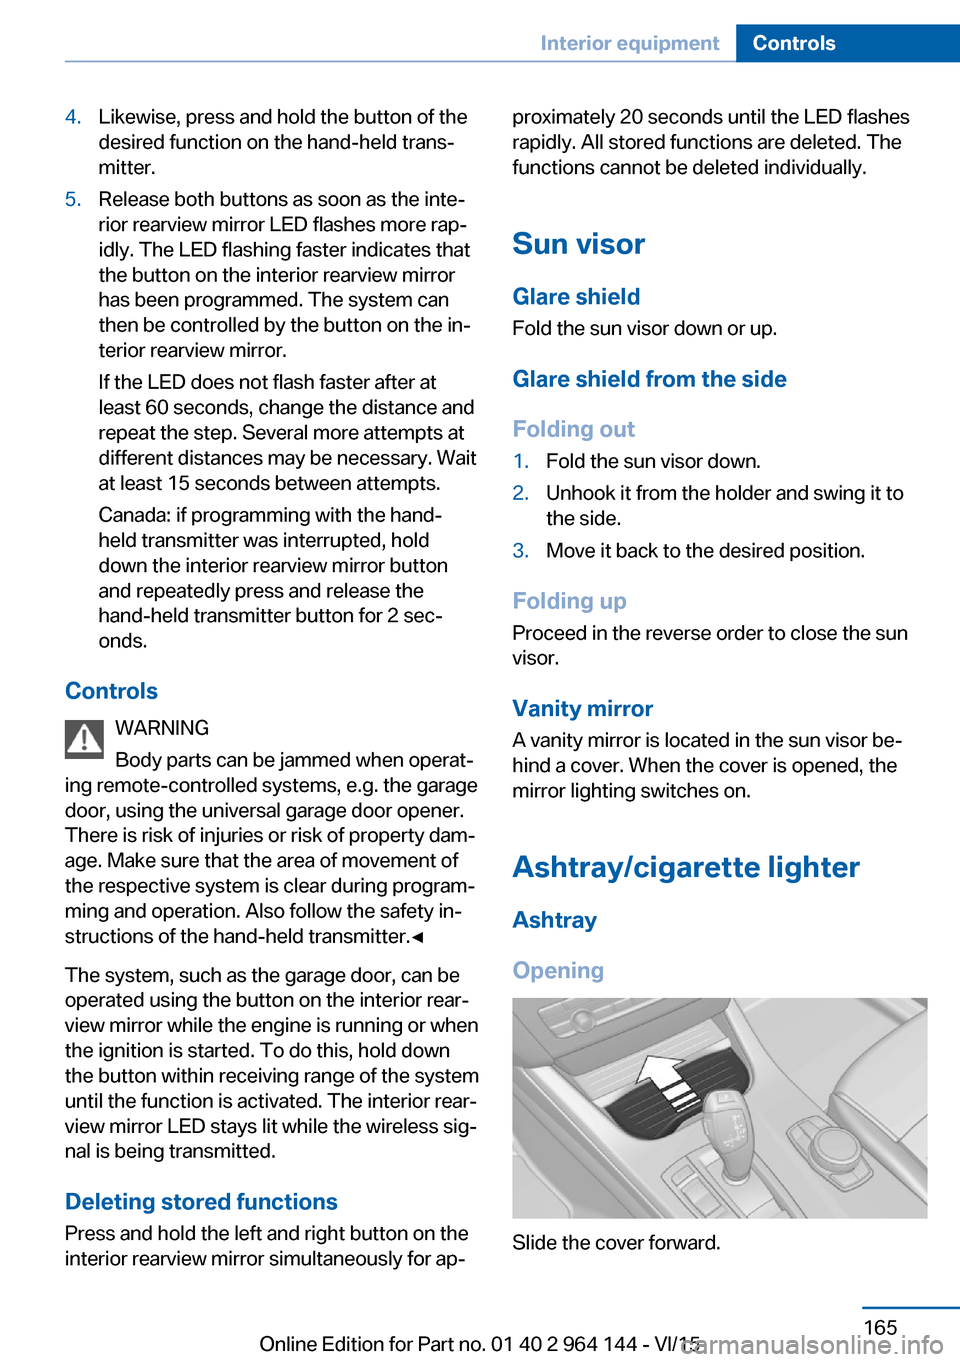
Ashtray
Opening
Slide the cover forward.
Seite 165Interior equipmentControls165
Online Edition for Part no. 01 40 2 964 144 - VI/15
Page 166 of 253

The ashtray can be inserted in the cupholder.
Emptying Take out the insert.
Lighter WARNING
Contact with hot heating elements or the
hot socket of the cigarette lighter can cause
burns. Flammable materials can ignite if the
cigarette lighter falls down or is held against
the respective objects. There is risk of fire and
injuries. Hold the cigarette lighter on its handle.
Make sure that children do not use the ciga‐
rette lighter and do not burn themselves, e.g.
by carrying the remote control along when ex‐
iting the vehicle.◀
CAUTION
If metal objects fall into the socket, they
can cause a short circuit. There is risk of prop‐
erty damage. Replace the cigarette lighter or
socket cover again after using the socket.◀
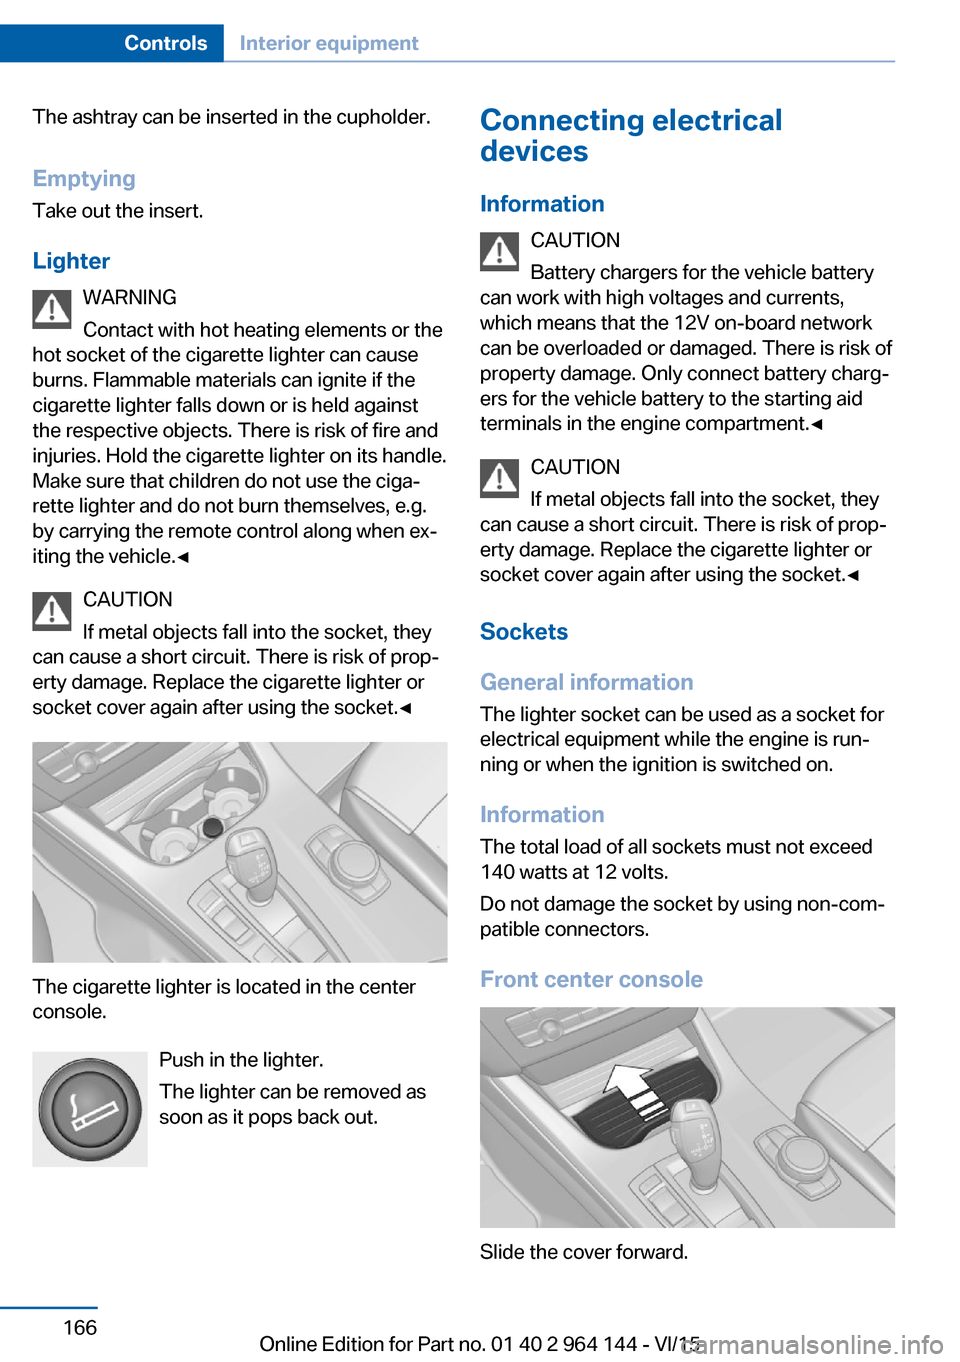
The cigarette lighter is located in the center
console.
Push in the lighter.
The lighter can be removed as
soon as it pops back out.
Connecting electrical
devices
Information CAUTION
Battery chargers for the vehicle battery
can work with high voltages and currents,
which means that the 12V on-board network
can be overloaded or damaged. There is risk of
property damage. Only connect battery charg‐
ers for the vehicle battery to the starting aid
terminals in the engine compartment.◀
CAUTION
If metal objects fall into the socket, they
can cause a short circuit. There is risk of prop‐
erty damage. Replace the cigarette lighter or socket cover again after using the socket.◀
Sockets
General information The lighter socket can be used as a socket for
electrical equipment while the engine is run‐
ning or when the ignition is switched on.
Information The total load of all sockets must not exceed
140 watts at 12 volts.
Do not damage the socket by using non-com‐
patible connectors.
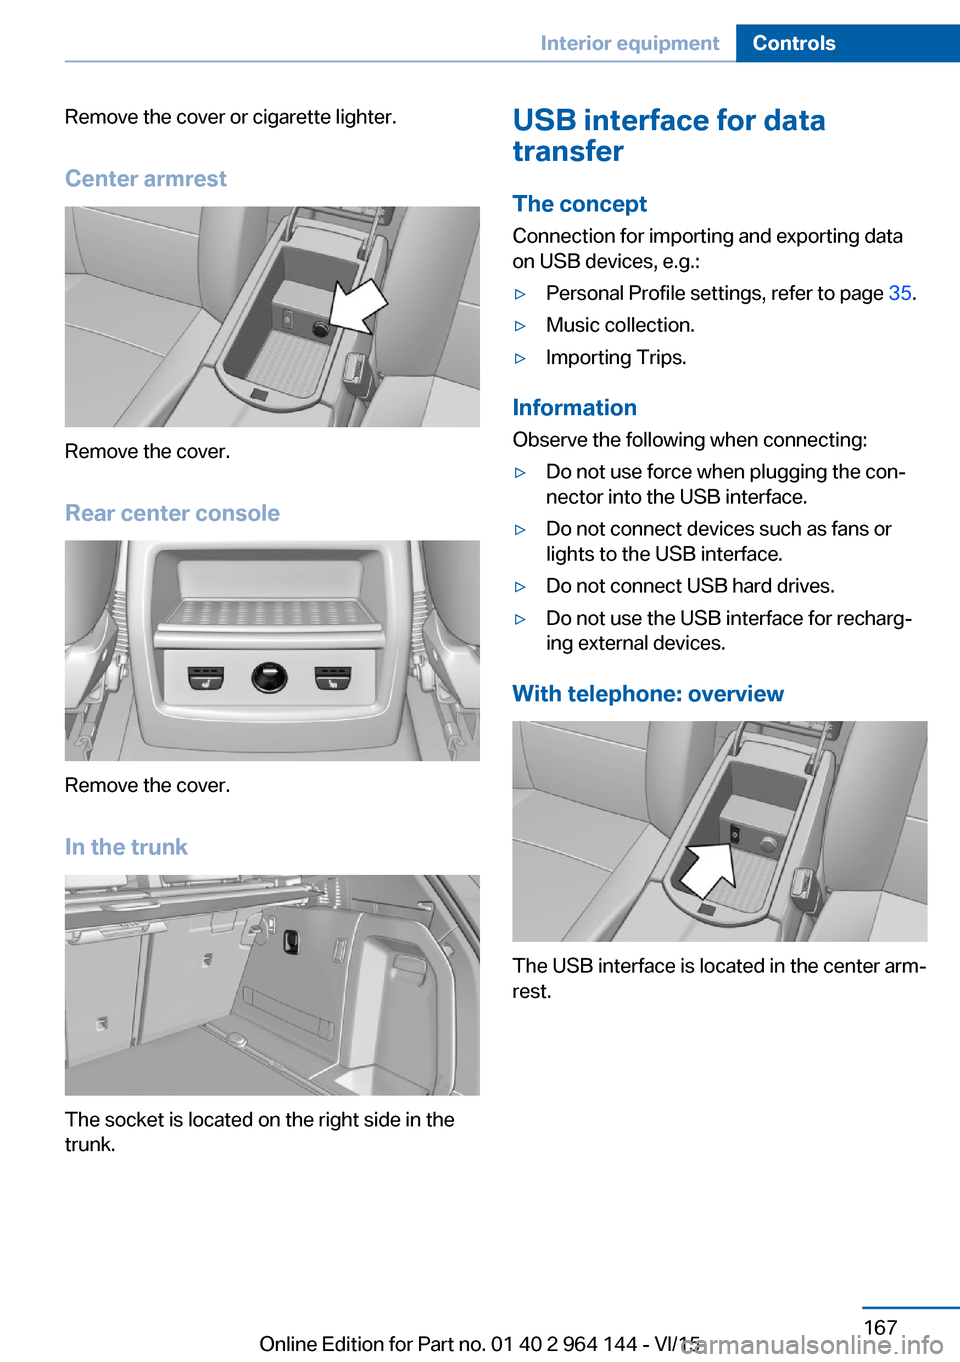
Front center console
Slide the cover forward.
Seite 166ControlsInterior equipment166
Online Edition for Part no. 01 40 2 964 144 - VI/15
Page 167 of 253

Remove the cover or cigarette lighter.
Center armrest
Remove the cover.
Rear center console
Remove the cover.
In the trunk
The socket is located on the right side in the
trunk.
USB interface for data
transfer
The concept Connection for importing and exporting data
on USB devices, e.g.:▷Personal Profile settings, refer to page 35.▷Music collection.▷Importing Trips.
Information
Observe the following when connecting:
▷Do not use force when plugging the con‐
nector into the USB interface.▷Do not connect devices such as fans or
lights to the USB interface.▷Do not connect USB hard drives.▷Do not use the USB interface for recharg‐
ing external devices.
With telephone: overview
The USB interface is located in the center arm‐
rest.
Seite 167Interior equipmentControls167
Online Edition for Part no. 01 40 2 964 144 - VI/15
Page 243 of 253

BMW maintenance sys‐tem 215
Bonus range, ECO PRO 185
Bottle holder, see Cu‐ pholder 171
Brake assistant 126
Brake discs, break-in 176
Brake force display 125
Brake lights, adaptive 125
Brake lights, brake force dis‐ play 125
Brake pads, break-in 176
Braking, hints 178
Breakdown assistance 226
Break-in 176
Brightness of Control Dis‐ play 95
Bulb replacement 217
Bulb replacement, front 218
Bulb replacement, rear 221
Bulbs and lights 217
Button, RES 136
Button, Start/Stop 67
Bypassing, see Jump-start‐ ing 227
C
California Proposition 65 Warning 8
Camera lenses, care 234
Camera, rearview cam‐ era 145
Camera, Side View 149
Camera, Top View 148
Can holder, see Cu‐ pholder 171
Car battery 224
Car care products 232
Care, displays 234
Care, vehicle 232
Cargo 180
Cargo area 168
Cargo area, enlarging 168
Cargo area, storage compart‐ ments 172 Cargo cover 168
Cargo, securing 181
Cargo straps, securing cargo 181
Car key, see Remote con‐ trol 34
Carpet, care 234
Car wash 231
Catalytic converter, see Hot exhaust system 177
CBS Condition Based Serv‐ ice 215
CD/Multimedia, see user's manual for Navigation, En‐
tertainment and Communi‐
cation
Center armrest 171
Center console 16
Central locking system 40
Central screen, see Control Display 18
Changes, technical, see Own Safety 7
Changing parts 217
Changing wheels 223
Changing wheels/tires 201
Chassis number, see vehicle identification number 10
Check Control 83
Checking the oil level elec‐ tronically 209
Children, seating position 63
Children, transporting safely 63
Child restraint fixing sys‐ tem 63
Child restraint fixing system LATCH 65
Child restraint fixing systems, mounting 64
Child safety locks 66
Child seat, mounting 64
Child seats 63
Chrome parts, care 233
Cigarette lighter 165
Cleaning displays 234 Climate control 155, 158
Clock 87
Closing/opening via door lock 39
Closing/opening with remote control 37
Closing the tailgate with no- touch activation 44
Clothes hooks 172
Coasting 187
Coasting with engine decou‐ pled, coasting 187
Coasting with idling en‐ gine 187
Cockpit 14
Combination switch, see Turn signals 73
Combination switch, see Wiper system 74
Comfort Access 42
COMFORT program, Dy‐ namic Driving Control 131
Compartments in the doors 171
Compass 93
Compressor 203
Condensation on win‐ dows 157, 160
Condensation under the vehi‐ cle 179
Condition Based Service CBS 215
Confirmation signal 45
ConnectedDrive, see user's manual for Navigation, En‐
tertainment and Communi‐
cation
ConnectedDrive Services
Connecting electrical devi‐ ces 166
Continued driving with a flat tire 108 , 111
Control Display 18
Control Display, settings 94
Controller 19 Seite 243Everything from A to ZReference243
Online Edition for Part no. 01 40 2 964 144 - VI/15