2016 BMW X4 Parking
[x] Cancel search: ParkingPage 151 of 253

Parking assistantThe concept
This system assists the driver in parking paral‐
lel to the road.
Ultrasound sensors measure parking spaces
on both sides of the vehicle.
The parking assistant calculates the best pos‐
sible parking line and takes control of steering
during the parking procedure.
When parking, also take note of the visual and
acoustic information and instructions issued
by the PDC, the parking assistant and the rear‐
view camera and react accordingly.
A component of the parking assistant is the
PDC Park Distance Control, refer to page 142.
Information WARNING
The system does not relieve from the
personal responsibility to correctly assess the
traffic situation. Based on the limits of the sys‐
tem, it cannot independently react to all traffic
situations. There is risk of an accident. Adjust
the driving style to the traffic conditions. Watch
traffic closely and actively interfere in the re‐
spective situations.◀
CAUTION
The parking assistant can steer the vehi‐
cle over or onto curbs. There is risk of property
damage. Watch traffic closely and actively in‐
terfere in the respective situations.◀
An engine that has been switched off by the
Auto Start Stop function is restarted automati‐
cally when the parking assistant is activated.
Overview
Button in the vehicle
Parking assistant
Ultrasound sensors
The ultrasound sensors for measuring parking
spaces are located on the side of the vehicle.
To ensure full functionality:
▷Keep the sensors clean and free of ice.▷When using high-pressure washers, do not
spray the sensors for long periods and
maintain a distance of at least 12 in/30 cm.▷Do not put stickers over sensors.
Requirements
For measuring parking spaces
▷Maximum speed while driving forward ap‐
prox. 22 mph/35 km/h.Seite 151Driving comfortControls151
Online Edition for Part no. 01 40 2 964 144 - VI/15
Page 152 of 253

▷Maximum distance to row of parked vehi‐
cles: 5 ft/1.5 m.
Suitable parking space
▷Gaps behind an object that has a min.
length of 5 ft/1.5 m.▷Gap between two objects with a minimum
length of approx. 5 ft/1.5 m.▷Min. length of gap between two objects:
your vehicle's length plus approx.
3.3 ft/1.0 m.▷Minimum depth: approx. 5 ft/1.5 m.
Regarding the parking procedure
▷Doors and tailgate closed.▷Parking brake released.▷When parking in parking spaces on the
driver's side, the corresponding turn signal
must be set where applicable.
Switching on/off
Switching on with the button Press button.
The LED lights up.
The current status of the parking space search
is indicated on the Control Display.
Parking assistant is activated automatically.
Switching on with the reverse gear
Shift into reverse.
The current status of the parking space search
is indicated on the Control Display.
To activate:
"Parking Assistant"
Switch off
The system can be deactivated as follows:
▷Press button.▷Switch off the ignition.Display on the Control Display
System activated/deactivatedSymbolMeaning Gray: the system is not available.
White: the system is available but
not activated. The system is activated.
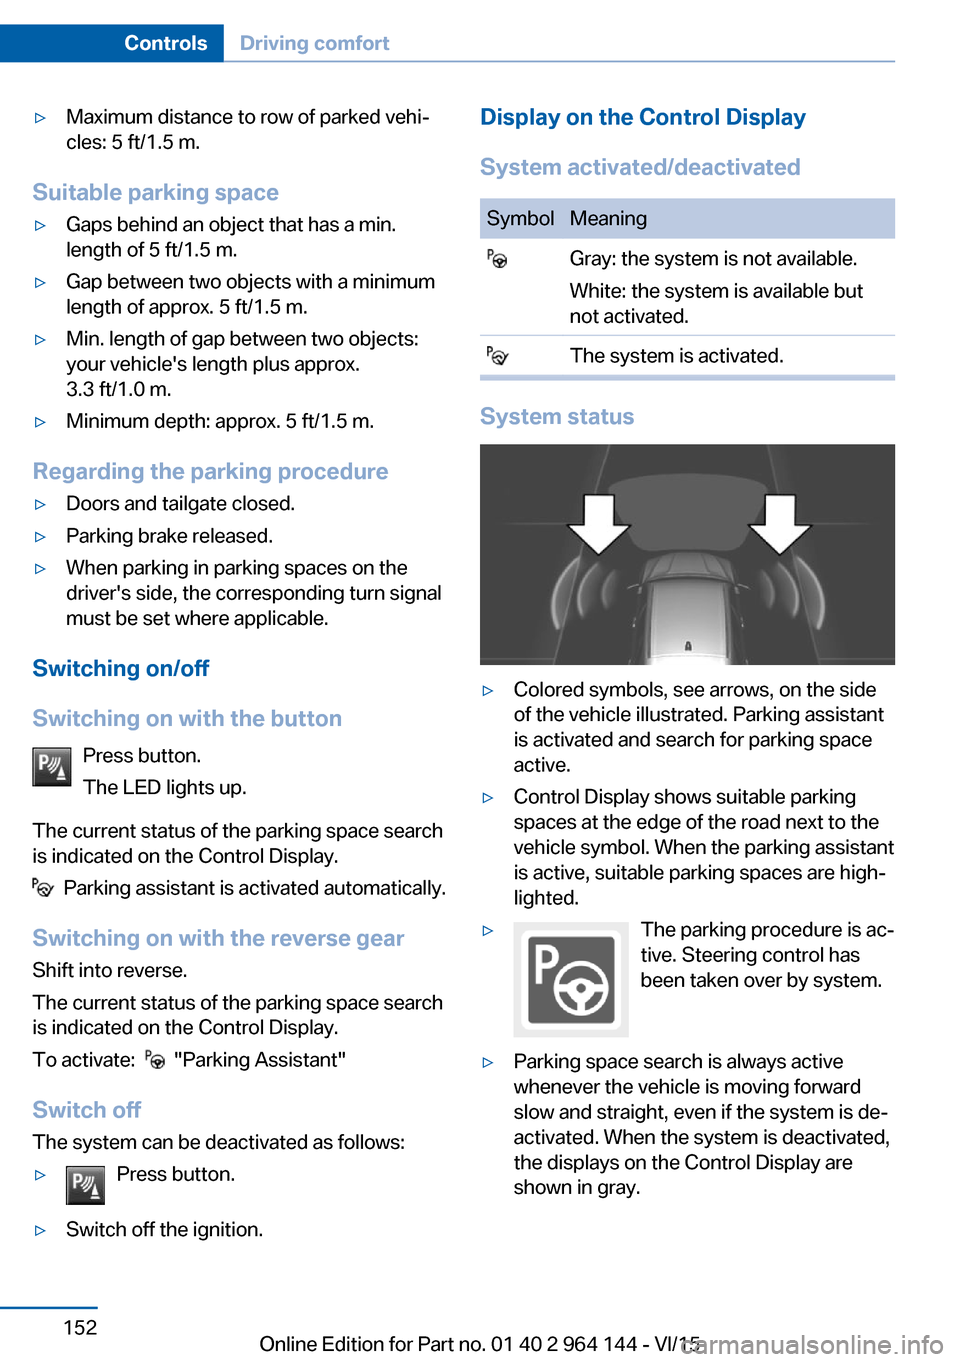
System status
▷Colored symbols, see arrows, on the side
of the vehicle illustrated. Parking assistant
is activated and search for parking space
active.▷Control Display shows suitable parking
spaces at the edge of the road next to the
vehicle symbol. When the parking assistant
is active, suitable parking spaces are high‐
lighted.▷The parking procedure is ac‐
tive. Steering control has
been taken over by system.▷Parking space search is always active
whenever the vehicle is moving forward
slow and straight, even if the system is de‐
activated. When the system is deactivated,
the displays on the Control Display are
shown in gray.Seite 152ControlsDriving comfort152
Online Edition for Part no. 01 40 2 964 144 - VI/15
Page 153 of 253

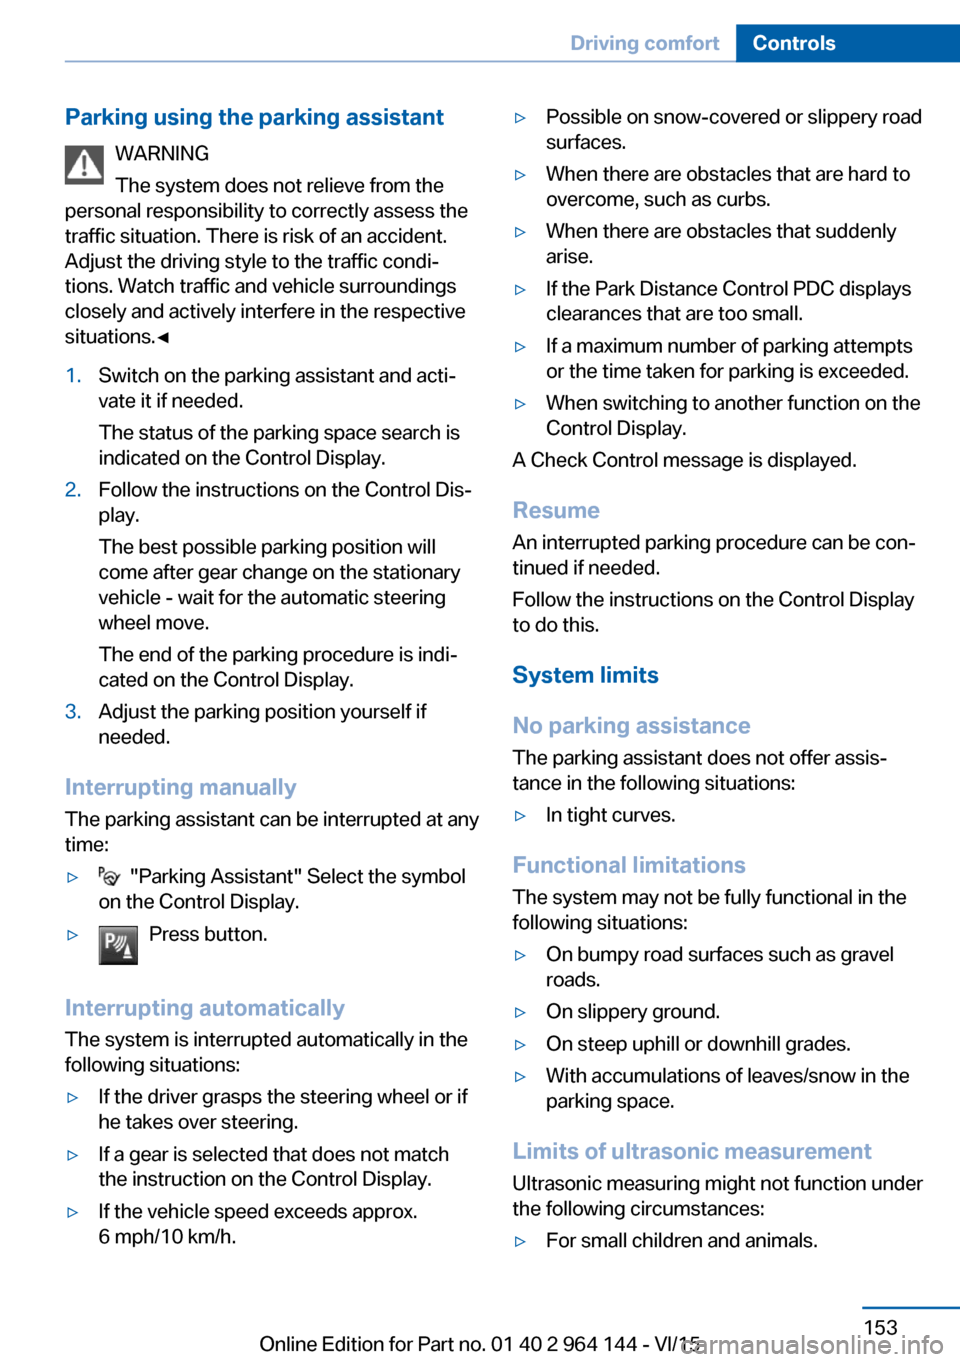
Parking using the parking assistantWARNING
The system does not relieve from the
personal responsibility to correctly assess the
traffic situation. There is risk of an accident.
Adjust the driving style to the traffic condi‐
tions. Watch traffic and vehicle surroundings
closely and actively interfere in the respective
situations.◀1.Switch on the parking assistant and acti‐
vate it if needed.
The status of the parking space search is
indicated on the Control Display.2.Follow the instructions on the Control Dis‐
play.
The best possible parking position will
come after gear change on the stationary
vehicle - wait for the automatic steering
wheel move.
The end of the parking procedure is indi‐
cated on the Control Display.3.Adjust the parking position yourself if
needed.
Interrupting manually
The parking assistant can be interrupted at any
time:
▷ "Parking Assistant" Select the symbol
on the Control Display.▷Press button.
Interrupting automatically
The system is interrupted automatically in the
following situations:
▷If the driver grasps the steering wheel or if
he takes over steering.▷If a gear is selected that does not match
the instruction on the Control Display.▷If the vehicle speed exceeds approx.
6 mph/10 km/h.▷Possible on snow-covered or slippery road
surfaces.▷When there are obstacles that are hard to
overcome, such as curbs.▷When there are obstacles that suddenly
arise.▷If the Park Distance Control PDC displays
clearances that are too small.▷If a maximum number of parking attempts
or the time taken for parking is exceeded.▷When switching to another function on the
Control Display.
A Check Control message is displayed.
Resume An interrupted parking procedure can be con‐
tinued if needed.
Follow the instructions on the Control Display
to do this.
System limits
No parking assistance
The parking assistant does not offer assis‐
tance in the following situations:
▷In tight curves.
Functional limitations
The system may not be fully functional in the
following situations:
▷On bumpy road surfaces such as gravel
roads.▷On slippery ground.▷On steep uphill or downhill grades.▷With accumulations of leaves/snow in the
parking space.
Limits of ultrasonic measurement
Ultrasonic measuring might not function under
the following circumstances:
▷For small children and animals.Seite 153Driving comfortControls153
Online Edition for Part no. 01 40 2 964 144 - VI/15
Page 154 of 253

▷For persons with certain clothing, e.g.
coats.▷With external interference of the ultra‐
sound, e.g. from passing vehicles or loud
machines.▷When sensors are dirty, iced over, dam‐
aged or out of position.▷Under certain weather conditions such as
high relative humidity, rain, snowfall, ex‐
treme heat or strong wind.▷With tow bars and trailer couplings of other
vehicles.▷With thin or wedge-shaped objects.▷With moving objects.▷With elevated, protruding objects such as
ledges or cargo.▷With objects with corners and sharp edges.▷With objects with a fine surface structure
such as fences.▷For objects with porous surfaces.
Low objects already displayed, e.g., curbs, can
move into the blind area of the sensors before
or after a continuous tone sounds.
It can happen that parking spaces are detected
that are not suitable or suitable parking spaces
are not detected.
Malfunction
A Check Control message is displayed.
The parking assistant failed. Have the system
checked.
Seite 154ControlsDriving comfort154
Online Edition for Part no. 01 40 2 964 144 - VI/15
Page 177 of 253

grades can be traveled up to no more than
50 %.▷On steep downhill grades, use Hill Descent
Control HDC, refer to page 128.
Starting out is possible on uphill grades up
to 30 %. The permissible side tilt is 30 %.▷Avoid that the chassis bottom coming in
contact with the ground.
The ground clearance is no more than 7.8
inches/20 cm and can vary according to
the vehicle's load.▷When wheels continue to spin, depress the
accelerator so that driving stability control
systems can distribute the driving force to
the wheels. Activate DTC Dynamic Trac‐
tion Control if available.
After a trip on poor roads
After a trip on poor roads, check wheels and
tires for damage to maintain driving safety.
Clear heavy soiling from the body.
General driving notes
Closing the tailgate WARNING
An open tailgate protrudes from the vehi‐
cle and can endanger occupants and other
traffic participants or damage the vehicle in the
event of an accident, braking or evasive ma‐
neuvers. In addition, exhaust fumes may enter
the vehicle interior. There is risk of injuries or
risk of property damage. Do not drive with the
tailgate open.◀
If driving with the tailgate open cannot be
avoided:
▷Close all windows and the glass sunroof.▷Greatly increase the air flow from the vents.▷Drive moderately.Hot exhaust system
WARNING
During driving operation, high tempera‐
tures can occur underneath the body, e.g.
caused by the exhaust gas system. If combus‐
tible materials, such as leaves or grass, come
in contact with hot parts of the exhaust gas
system, these materials can ignite. There is
risk of injuries or risk of property damage.
Do not remove the heat shields installed and
never apply undercoating to them. Make sure
that no combustible materials can come in
contact with hot vehicle parts in driving opera‐
tion, idle or during parking. Do not touch the
hot exhaust system.◀
Mobile communication devices in the
vehicle
WARNING
Vehicle electronics and mobile phones
can influence one another. There is radiation
due to the send operations of mobile phones.
There is risk of injuries or risk of property dam‐
age. If possible, in the car's interior use only
mobile phones with direct connections to an
exterior antenna in order to exclude mutual
disturbance and deflect the radiation from the
car's interior.◀
Hydroplaning
On wet or slushy roads, a wedge of water can
form between the tires and road surface.
This phenomenon is referred to as hydroplan‐
ing. It is characterized by a partial or complete
loss of contact between the tires and the road
surface, ultimately undermining your ability to
steer and brake the vehicle.
Driving through water CAUTION
When driving too quickly through too
deep water, water can enter into the engine
compartment, the electrical system or theSeite 177Things to remember when drivingDriving tips177
Online Edition for Part no. 01 40 2 964 144 - VI/15
Page 219 of 253

3Turn signal/side marker light4Parking lights5Daytime running lights
Accessing the low beams and parking
lights
Follow general instructions, refer to page 217.
1.Open the hood, refer to page 207.2.Turn the cover counterclockwise and re‐
move.3.The upper bulb is the low beam and the
lower bulb is the parking lamp.
Low beams
55-watt bulb, H7.
1.Tip the connector with the bulb down
slightly and pull out carefully.2.Pull the bulb off the connector and insert
the new bulb.3.Install the new bulb in reverse order of re‐
moval.4.Place the cover according to the arrow
markings on the headlight housing.5.Close the headlight housing with the lid.
Parking lights
5-watt bulb, W5W.
1.Remove the bulb holder.2.Carefully remove the bulb from the socket.3.Install the new bulb in reverse order of re‐
moval.4.Place the cover according to the arrow
markings on the headlight housing.5.Close the headlight housing with the lid.
Accessing the high beams/headlight
flasher and daytime running lights
Follow general instructions, refer to page 217.
1.Open the hood, refer to page 207.2.Turn the cover counterclockwise and re‐
move.3.The upper bulb is the high beam/headlight
flasher and the lower bulb is the daytime
running lights.
High beams/headlight flasher
55-watt bulb, H7.
1.Tip the connector with the bulb up slightly
and pull out carefully.2.Pull the bulb off the connector and insert
the new bulb.3.Install the new bulb in reverse order of re‐
moval.4.Place the cover according to the arrow
markings on the headlight housing.5.Close the headlight housing with the lid.
Daytime running lights
21-watt bulb, W21W.
1.Turn the bulb holder counterclockwise and
remove.2.Carefully remove the bulb from the socket.Seite 219Replacing componentsMobility219
Online Edition for Part no. 01 40 2 964 144 - VI/15
Page 220 of 253

3.Install the new bulb in reverse order of re‐
moval.4.Place the cover according to the arrow
markings on the headlight housing.5.Close the headlight housing with the lid.
Xenon headlights
Information
Because of the long service life of these bulbs,
the likelihood of failure is very low. Switching
the lights on and off frequently shortens their
service life.
If a bulb fails, turn on the front fog lights and
continue the trip with great care. Comply with
local regulations.
DANGER
There can be high voltage in the lighting
system. There is danger to life. The manufac‐
turer of your vehicle recommends that the
work on the lighting system including bulb re‐
placement be performed by a dealer’s service
center or another qualified service center or re‐
pair shop.◀
For checking and adjusting headlamp aim,
contact a dealer’s service center or another
qualified service center or repair shop.
Overview
1Parking lights / daytime running lights2Low beams/high beams/headlight flasher3Turn signal/side marker lightXenon headlights
Low beams and high beams are designed with
xenon technology.
The parking lights and daylight running lights
are made using LED technology.
Contact a dealer’s service center or another
qualified service center or repair shop in the
event of a malfunction.
LED headlights Light-emitting diodes (LEDs)
With LED headlights, all front lights and side
indicators are designed with LED technology.
If an LED fails, switch on the front fog lamps
and continue the trip with great care. Comply with local regulations.
Contact a dealer’s service center or another
qualified service center or repair shop in the
event of a malfunction.
Front fog lights
Follow general instructions, refer to page 217.
35-watt bulb, H8.1.Insert the screwdriver from the onboard
vehicle tool kit, with the flat side on the clip,
arrow 1.2.Turn the screwdriver by 90°, arrow 2.3.Remove the front fog lamp toward the
front.Seite 220MobilityReplacing components220
Online Edition for Part no. 01 40 2 964 144 - VI/15
Page 231 of 253

CareVehicle features and optionsThis chapter describes all standard, country-
specific and optional features offered with the
series. It also describes features that are not
necessarily available in your car, e. g., due to
the selected options or country versions. This
also applies to safety-related functions and
systems. The respectively applicable country
provisions must be observed when using the
respective features and systems.
Car washes General information
Regularly remove foreign objects such as
leaves in the area below the windshield when
the hood is raised.
Wash your vehicle frequently, particularly in
winter. Intense soiling and road salt can dam‐
age the vehicle.
Steam blaster and high-pressure
washer
Information CAUTION
When cleaning with high-pressure wash‐
ers, components can be damaged due to the
pressure or temperatures being too high.
There is risk of property damage. Maintain suf‐
ficient distance and do not spray too long con‐
tinuously. Follow the user's manual for the
high-pressure washer.◀
Distances and temperature▷Maximum temperature: 140 ℉/60 ℃.▷Minimum distance from sensors, cameras,
seals: 12 in/30 cm.▷Minimum distance from glass sunroof:
31.5 inches/80 cm.
Automatic car washes
Information
▷Give preference to cloth car washes or
those that use soft brushes in order to
avoid paint damage.▷Make sure that the wheels and tires are not
damaged by the transport mechanisms.▷Fold in the exterior mirrors; otherwise, they
may be damaged, depending on the width
of the vehicle.▷Deactivate the rain sensor, refer to
page 75, to avoid unintentional wiper acti‐
vation.▷In some cases, an unintentional alarm can
be triggered by the interior motion sensor
of the alarm system. Follow the instruc‐
tions on avoiding an unintentional alarm,
refer to page 47.
CAUTION
Too high guide rails in car washes can
damage body parts. There is risk of property
damage. Avoid car washes with guide rails
higher than 4 in/10 cm.◀
Before driving into a car wash In order to ensure that the vehicle can roll in a
car wash, take the following steps:
Steptronic transmission:
1.Drive into the car wash.2.Engage selector lever position N.3.Deactivating Automatic Hold, refer to
page 72.4.Release the parking brake.5.Switch the engine off.Seite 231CareMobility231
Online Edition for Part no. 01 40 2 964 144 - VI/15