2016 BMW M4 CONVERTIBLE turn signal bulb
[x] Cancel search: turn signal bulbPage 72 of 226

The brake lights will not light up if the parking
brake is set.
Turn signal, high beams,
headlight flasher
Turn signal
Hints Do not adjust the exterior mirrors
Do not adjust the exterior mirror while
driving and when turn signals/hazard warning
flashers are on, or else the additional turn sig‐
nal lights in the exterior mirror are out of posi‐
tion and can't be seen.◀
Using turn signals
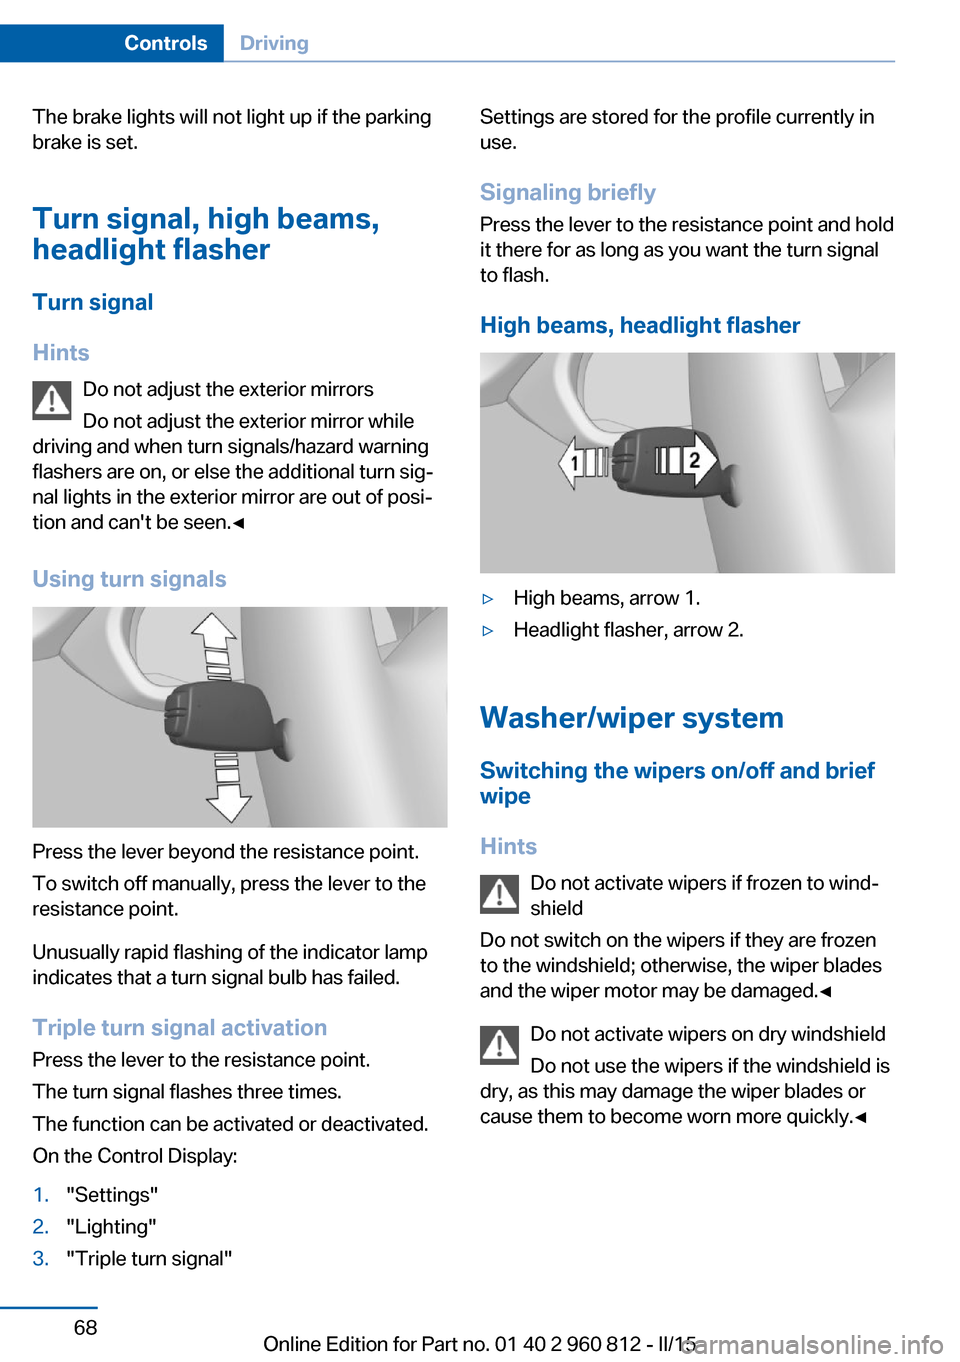
Press the lever beyond the resistance point.
To switch off manually, press the lever to the
resistance point.
Unusually rapid flashing of the indicator lamp
indicates that a turn signal bulb has failed.
Triple turn signal activation Press the lever to the resistance point.
The turn signal flashes three times.
The function can be activated or deactivated.
On the Control Display:
1."Settings"2."Lighting"3."Triple turn signal"Settings are stored for the profile currently in
use.
Signaling briefly
Press the lever to the resistance point and hold
it there for as long as you want the turn signal
to flash.
High beams, headlight flasher▷High beams, arrow 1.▷Headlight flasher, arrow 2.
Washer/wiper system Switching the wipers on/off and brief
wipe
Hints Do not activate wipers if frozen to wind‐
shield
Do not switch on the wipers if they are frozen
to the windshield; otherwise, the wiper blades
and the wiper motor may be damaged.◀
Do not activate wipers on dry windshield
Do not use the wipers if the windshield is
dry, as this may damage the wiper blades or
cause them to become worn more quickly.◀
Seite 68ControlsDriving68
Online Edition for Part no. 01 40 2 960 812 - II/15
Page 84 of 226

Lane departure warningSystem is switched on and under cer‐
tain circumstances warns if a detected
lane is left without flashing beforehand.
For additional information, refer to Lane depar‐
ture warning, refer to page 112.
Green lights Turn signal Turn signal on.
Unusually rapid flashing of the indicator
lamp indicates that a turn signal bulb
has failed.
For additional information, refer to Turn signal,
refer to page 68.
Parking lights, headlight control Parking lights or headlights are acti‐
vated.
For additional information, refer to
Parking lights/low beams, headlight control, re‐
fer to page 94.
High-beam Assistant High-beam Assistant is switched on.
High beams are activated and off auto‐
matically as a function of the traffic sit‐
uation.
For additional information, refer to High-beam
Assistant, refer to page 96.
Cruise control The system is switched on. It maintains
the speed that was set using the con‐
trol elements on the steering wheel.Blue lights
High beams High beams are activated.
For additional information, refer to High
beams, refer to page 68.
General lamps Check Control At least one Check Control message is
displayed or is stored. The symbol is
shown in the display of the instrument
cluster.
M Drive M Drive 1 is activated.
M Drive 2 is activated.
Text messages
Text messages in combination with a symbol
in the instrument cluster explain a Check Con‐
trol message and the meaning of the indicator
and warning lights.
Supplementary text messages
Additional information, such as on the cause of
an error or the required action, can be called up via Check Control.
With urgent messages the added text will be
automatically displayed on the Control Display.
Symbols
Depending on the Check Control message, the
following functions can be selected.▷ "Owner's Manual"Seite 80ControlsDisplays80
Online Edition for Part no. 01 40 2 960 812 - II/15
Page 196 of 226

Headlights1Parking lights / daytime running lights2Low beams/high beams/headlight flasher3Turn signal
Low beams and high beams are designed with
xenon technology.
The parking lights and daylight running lights
are made using LED technology.
Contact your service center in the event of a
malfunction.
Turn signal
Follow general instructions, refer to page 190.
21-watt bulb, PY21W
1.In the wheel house, unscrew three screws
using the screwdriver from the onboard ve‐
hicle tool kit, arrow 1.2.Lift the wheel house panel and firmly hold
it, arrow 2.3.Turn the bulb socket counterclockwise and
remove.4.Press the bulb gently into the socket, turn
counterclockwise and remove.5.Install the new bulb and bulb holder in re‐
verse order of removal.6.Refasten the wheel house panel.
LED headlights
Light-emitting diodes (LEDs)
With LED headlights, all front lights and side
indicators are designed with LED technology.
Contact your service center in the event of a
malfunction.
Headlights
1Cornering light2Low beams/headlight flasher3High beams/headlight flasher4Parking lights / daytime running lights5Turn signal6Side marker lightsSeite 192MobilityReplacing components192
Online Edition for Part no. 01 40 2 960 812 - II/15
Page 197 of 226

Contact your service center in the event of a
malfunction.
Turn signal in exterior mirrorFollow general instructions, refer to page 190.
The turn signals in the exterior mirrors feature
LED technology. Contact your service center in the event of a malfunction.
Tail lights, bulb replacement
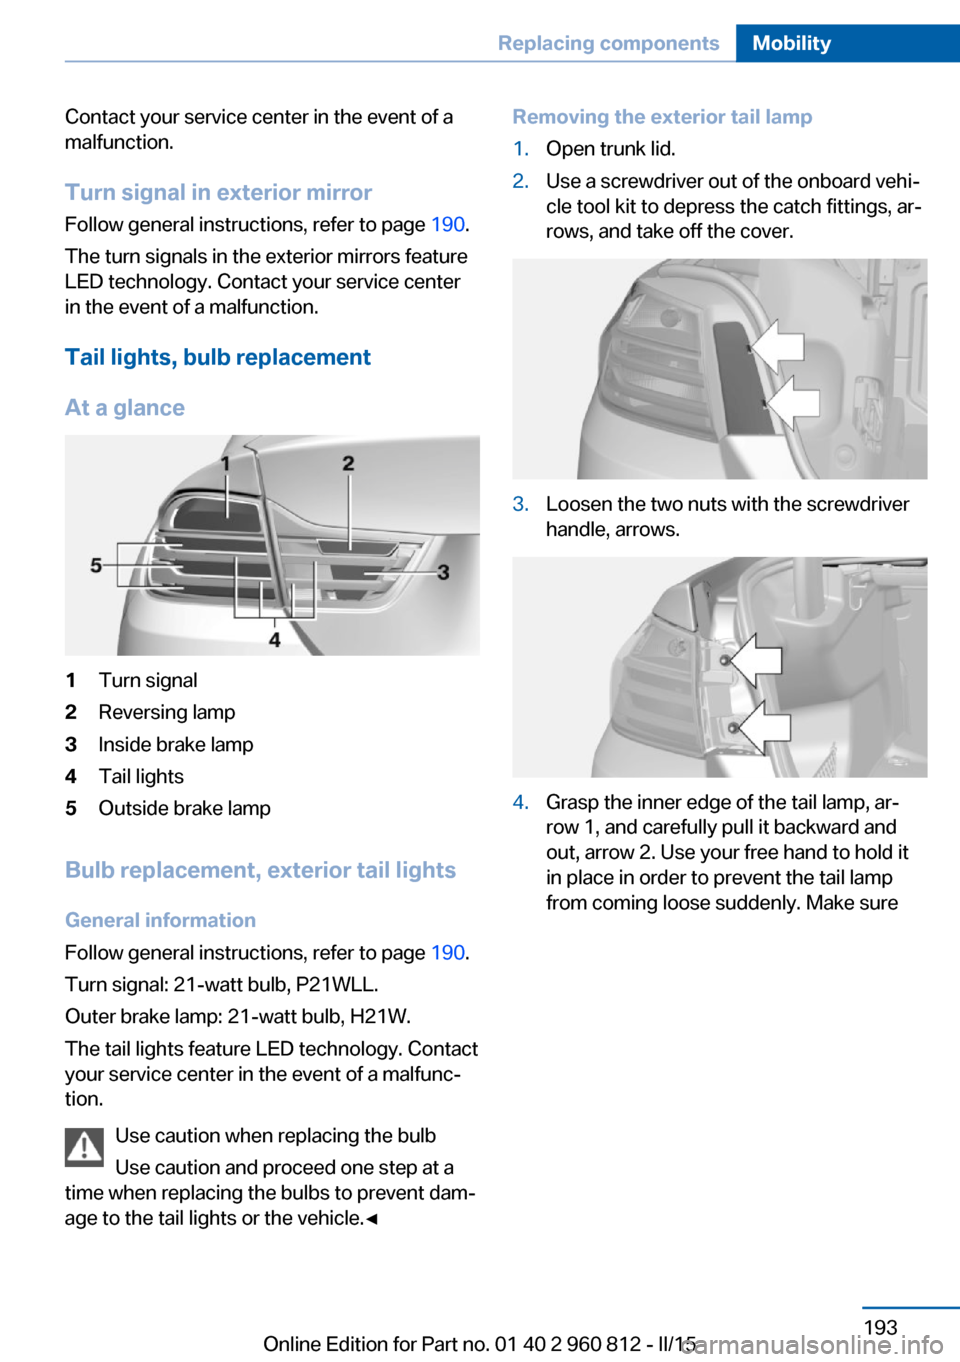
At a glance1Turn signal2Reversing lamp3Inside brake lamp4Tail lights5Outside brake lamp
Bulb replacement, exterior tail lights General information
Follow general instructions, refer to page 190.
Turn signal: 21-watt bulb, P21WLL.
Outer brake lamp: 21-watt bulb, H21W.
The tail lights feature LED technology. Contact
your service center in the event of a malfunc‐
tion.
Use caution when replacing the bulb
Use caution and proceed one step at a
time when replacing the bulbs to prevent dam‐
age to the tail lights or the vehicle.◀
Removing the exterior tail lamp1.Open trunk lid.2.Use a screwdriver out of the onboard vehi‐
cle tool kit to depress the catch fittings, ar‐
rows, and take off the cover.3.Loosen the two nuts with the screwdriver
handle, arrows.4.Grasp the inner edge of the tail lamp, ar‐
row 1, and carefully pull it backward and
out, arrow 2. Use your free hand to hold it
in place in order to prevent the tail lamp
from coming loose suddenly. Make sureSeite 193Replacing componentsMobility193
Online Edition for Part no. 01 40 2 960 812 - II/15
Page 217 of 226

Bulb replacement 190
Bulb replacement, front 191
Bulb replacement, LED head‐ lights 192
Bulb replacement, rear 193
Bulb replacement, xenon headlights 191
Bulbs and lights 190
Button, Start/Stop 63
Bypassing, refer to Jump- starting 199
C
California Proposition 65 Warning 7
Camera lenses, care 207
Camera, rearview cam‐ era 127
Camera, Side View 129
Camera, Top View 131
Can holder, refer to Cuphold‐ ers 153
Car battery 195
Carbon ceramic brake M 156
Car care products 205
Care, displays 207
Care, vehicle 205
Cargo 162
Cargo area, enlarging 149
Cargo area partition 49
Cargo area, storage compart‐ ments 153
Cargo, securing 163
Cargo straps, securing cargo 163
Car key, refer to Remote con‐ trol 34
Carpet, care 207
Car wash 204
Catalytic converter, refer to Hot exhaust system 159
CBS Condition Based Serv‐ ice 188
CD/Multimedia, see user's manual for Navigation, En‐tertainment and Communi‐
cation
Center armrest 152
Center console 16
Central locking system 40
Central screen, refer to Con‐ trol Display 18
Ceramic brake 156
Changes, technical, refer to Safety 7
Changing parts 190
Changing wheels 195
Changing wheels/tires 176
Chassis, electronic 119
Chassis number, see vehicle identification number 9
Check Control 78
Checking the engine oil level electronically 183
Checking the oil level elec‐ tronically 183
Children, seating position 60
Children, transporting safely 60
Child restraint fixing sys‐ tem 60
Child restraint fixing system LATCH 62
Child restraint fixing systems, mounting 60
Child seat, mounting 60
Child seats 60
Chrome parts, care 206
Cigarette lighter 145
Cleaning displays 207
Climate control 136
Clock 82
Closing/opening via door lock 39
Closing/opening with remote control 37
Cockpit 14
Combination reel, refer to Turn signals 68
Combination switch, refer to Wiper system 68 Comfort Access 41
Compartments in the doors 152
Compass 143
Compound brake 156
Compressor 177
Computer, refer to On-board computer 87
Condensation on win‐ dows 138
Condensation under the vehi‐ cle 160
Condition Based Service CBS 188
Confirmation signal 43
ConnectedDrive, see user's manual for Navigation, En‐
tertainment and Communi‐
cation
ConnectedDrive Services
Connecting electrical devi‐ ces 145
Control Display 18
Control Display, settings 90
Controller 18, 19
Control systems, driving sta‐ bility 116
Convenient closing with the remote control 38
Convenient opening with the remote control 37
Convertible, hardtop 46
Convertible mode, automatic climate control 137
Convertible program, auto‐ matic climate control 137
Coolant 186
Coolant temperature 82
Cooling function 137
Cooling, maximum 137
Cooling system 186
Cornering light 95
Corrosion on brake discs 160
Cosmetic mirror 145
Courtesy lamps during un‐ locking 37 Seite 213Everything from A to ZReference213
Online Edition for Part no. 01 40 2 960 812 - II/15
Page 222 of 226

Protective function, win‐dows 46
Push-and-turn switch, refer to Controller 18, 19
R Radiator fluid 186
Radio-operated key, refer to Remote control 34
Radio ready state 63
Radio, see user's manual for Navigation, Entertainment
and Communication
Rain sensor 69
Rear lights 195
Rear socket 146
Rear turn signal, bulb replace‐ ment 193
Rearview camera 126
Rearview mirror 57
Rear window defroster 138
Recirculated-air filter 139
Recirculated-air mode 138
Recommended fuel grade 170
Recommended tire brands 176
Refueling 168
Remaining range 83
Remote control/key 34
Remote control, malfunc‐ tion 39
Remote control, univer‐ sal 141
Replacement fuse 196
Replacing parts 190
Replacing wheels/tires 176
Reporting safety defects 9
RES button, see Cruise con‐ trol 122
Reserve warning, refer to Range 83
Reset, Tire Pressure Monitor TPM 104 Retaining straps, securing
cargo 163
Retreaded tires 176
Roadside parking lights 95
Rollover protection sys‐ tem 102
RON recommended fuel grade 170
Roofliner 17
Roof load capacity 210
Rope for tow-starting/ towing 202
Rubber components, care 206
S
Safe braking 159
Safety 7
Safety belt reminder for driv‐ er's seat and front passen‐
ger seat 56
Safety belts 55
Safety belts, care 207
Safety systems, airbags 99
Saving fuel 164
Screen, refer to Control Dis‐ play 18
Screwdriver, see Onboard ve‐ hicle tool kit 190
Screw thread, see screw thread for tow fitting, screw
thread for tow fitting 203
Sealant 177
Seat and mirror memory 56
Seat belts, refer to Safety belts 55
Seat heating, front 54
Seating position for chil‐ dren 60
Seats 52
Selection list in instrument cluster 87
Selector lever 72
Selector lever position 72
Sensors, care 207 Sequential mode 72
Service and warranty 8
Service requirements, Condi‐ tion Based Service
CBS 188
Service requirements, dis‐ play 84
Services, ConnectedDrive
Servotronic 120
SET button, see Cruise con‐ trol 122
Settings, locking/unlock‐ ing 43
Settings, M Drive 116
Settings on Control Dis‐ play 90
Settings, storing for seat, mir‐ ror 56
Shift point indicator 93
Side airbags 99
Side View 129
Signaling, horn 14
Signals when unlocking 43
Sitting safely 52
Size 210
Smallest turning radius 210
Snow chains 180
Socket 145
Socket, OBD Onboard Diag‐ nostics 189
SOS button 198
Spare fuse 196
Specified engine oil types 185
Speed, average 88
Speed limit detection, on- board computer 89
Speed limiter, display 86
Speed Limit Information 86
Speed warning 89
Split screen 23
Sport displays, torque dis‐ play, performance dis‐
play 89
Stability control systems 116 Seite 218ReferenceEverything from A to Z218
Online Edition for Part no. 01 40 2 960 812 - II/15