2016 BMW M2 fog light
[x] Cancel search: fog lightPage 68 of 220

▷The selector lever is in selector lever posi‐
tion D.▷Brake pedal remains depressed while the
vehicle is stopped.▷The driver's safety belt is buckled or the
driver's door is closed.
Manual transmission:
▷Neutral is engaged and the clutch pedal is
not pressed.▷The driver's safety belt is buckled or the
driver's door is closed.
The air flow from the air conditioner is reduced
when the engine is switched off.
Displays in the instrument cluster The READY display in the tach‐
ometer signals that the Auto
Start/Stop function is ready to
start the engine automatically.
The display indicates that the
conditions for an automatic en‐
gine stop have not been met.
Functional limitations The engine is not switched off automatically in
the following situations:
▷External temperature too low.▷The external temperature is high and auto‐
matic climate control is running.▷The car's interior has not yet been heated
or cooled to the required level.▷The engine is not yet at operating temper‐
ature.▷The wheels are at a sharp angle or the
steering wheel is being turned.▷After driving in reverse.▷Fogging of the windows when the auto‐
matic climate control is switched on.▷Vehicle battery is heavily discharged.▷At higher elevations.▷The engine compartment lid is unlocked.▷Stop-and-go traffic.▷Use of fuel with high ethanol content.
Starting the engine
The engine starts automatically under the fol‐
lowing conditions:
▷M double-clutch transmission: by releasing
the brake pedal.▷Manual transmission: clutch pedal is
pressed.
After the engine starts, accelerate as usual.
Safety mode
After the engine switches off automatically, it
will not start again automatically if any one of
the following conditions are met:
▷The driver's safety belt is unbuckled and
the driver's door is open.▷The hood was unlocked.
Some indicator lights light up for a varied
length of time.
The engine can only be started via the Start/
Stop button.
Functional limitations
Even if driving off was not intended, the deacti‐
vated engine starts up automatically in the fol‐
lowing situations:
▷Excessive warming of the car's interior
when the cooling function is switched on.▷The steering wheel is turned.▷Double-clutch transmission: Change from
selector lever position D to N, R or D/S.▷M double-clutch transmission: Accelerat‐
ing while simultaneously applying the
brake.▷The vehicle begins rolling.Seite 68ControlsDriving68
Online Edition for Part no. 01 40 2 970 518 - II/16
Page 87 of 220

cident. Adjust the driving style to the traffic
conditions. Watch traffic closely and actively
intervene in the respective situations.◀
Overview
Camera
The camera is installed near the interior mirror.
Keep the windshield in the area behind the in‐
terior mirror clean and clear.
Switching on/off On the Control Display:
1."Settings"2."Instrument cluster"3."Speed limit information"
If speed limit detection is switched on, it can
be displayed on the CID (central information
display) in the instrument cluster via the on‐
board computer.
Display
The following is displayed in the instrument
cluster:
Speed limit detection Current speed limit.
Speed limit detection not availa‐
ble.
System limits
The system may not be fully functional and
may provide incorrect information in the fol‐
lowing situations:▷In heavy fog, rain or snowfall.▷When signs are fully or partially concealed
by objects, stickers or paint.▷When driving very close to the vehicle in
front of you.▷When driving toward bright lights or strong
reflections.▷When the windshield behind the interior
mirror is fogged over, dirty or covered by a
sticker, etc.▷In the event of incorrect detection by the
camera.▷If the speed limits stored in the navigation
system are incorrect.▷In areas not covered by the navigation sys‐
tem.▷When roads differ from the navigation,
such as due to changes in road routing.▷When passing buses or trucks with a
speed sticker.▷If the traffic signs are non-conforming.▷During calibration of the camera immedi‐
ately after vehicle delivery.▷When signs are detected valid for a parallel
road.Seite 87DisplaysControls87
Online Edition for Part no. 01 40 2 970 518 - II/16
Page 95 of 220

E.g. the sensors are unable to detect fog or
hazy weather. To avoid safety risks under
these conditions, you should always switch on
the lights manually.
Daytime running lights General information
Position of switch:
, ,
The daytime running lights light up when the
ignition is switched on. After the ignition is
switched off, the parking lights light up in posi‐
tion
.
Activating/deactivating In some countries, daytime running lights are
mandatory, so it may not be possible to deacti‐
vate the daytime running lights.
On the Control Display:
1."Settings"2."Lighting"3."Daytime running lamps"
Settings are stored for the profile currently
used.
Adaptive Light Control
The concept Adaptive Light Control is a variable headlight
control system that enables dynamic illumina‐
tion of the road surface.
General information
Depending on the steering angle and other pa‐
rameters, the light from the headlamp follows
the course of the road.
To avoid blinding oncoming traffic, the Adap‐
tive Light Control does not swivel to the driv‐
er's side when the vehicle is at a standstill.
Depending on the equipment version, Adap‐
tive Light Control consists of one or several
systems:▷Cornering light, refer to page 95.
Activating
Position of switch
with the ignition
switched on.
Cornering lights
The cornering lights are automatically
switched on depending on the steering angle
or the use of turn signals.
When driving in reverse, the cornering lights
may be automatically switched on regardless
of the steering angle.
Malfunction
A Check Control message is displayed.
Adaptive Light Control is malfunctioning or has
failed. Have the system immediately checked
by a dealer’s service center or another quali‐
fied service center or repair shop.
High-beam Assistant
The concept The high-beam Assistant detects other traffic
participants early on and automatically
switches the high beams on or off depending
on the traffic situation. The assistant ensures
that the high beams are switched on, when‐
ever the traffic situation allows. In the low
speed range, the high beams are not switched
on by the system.
General information The system responds to light from oncoming
traffic and traffic driving ahead of you, and to
adequate illumination, for example, in towns
and cities.
The driver can intervene at any time and switch
the high beams on and off as usual.
Seite 95LightsControls95
Online Edition for Part no. 01 40 2 970 518 - II/16
Page 96 of 220
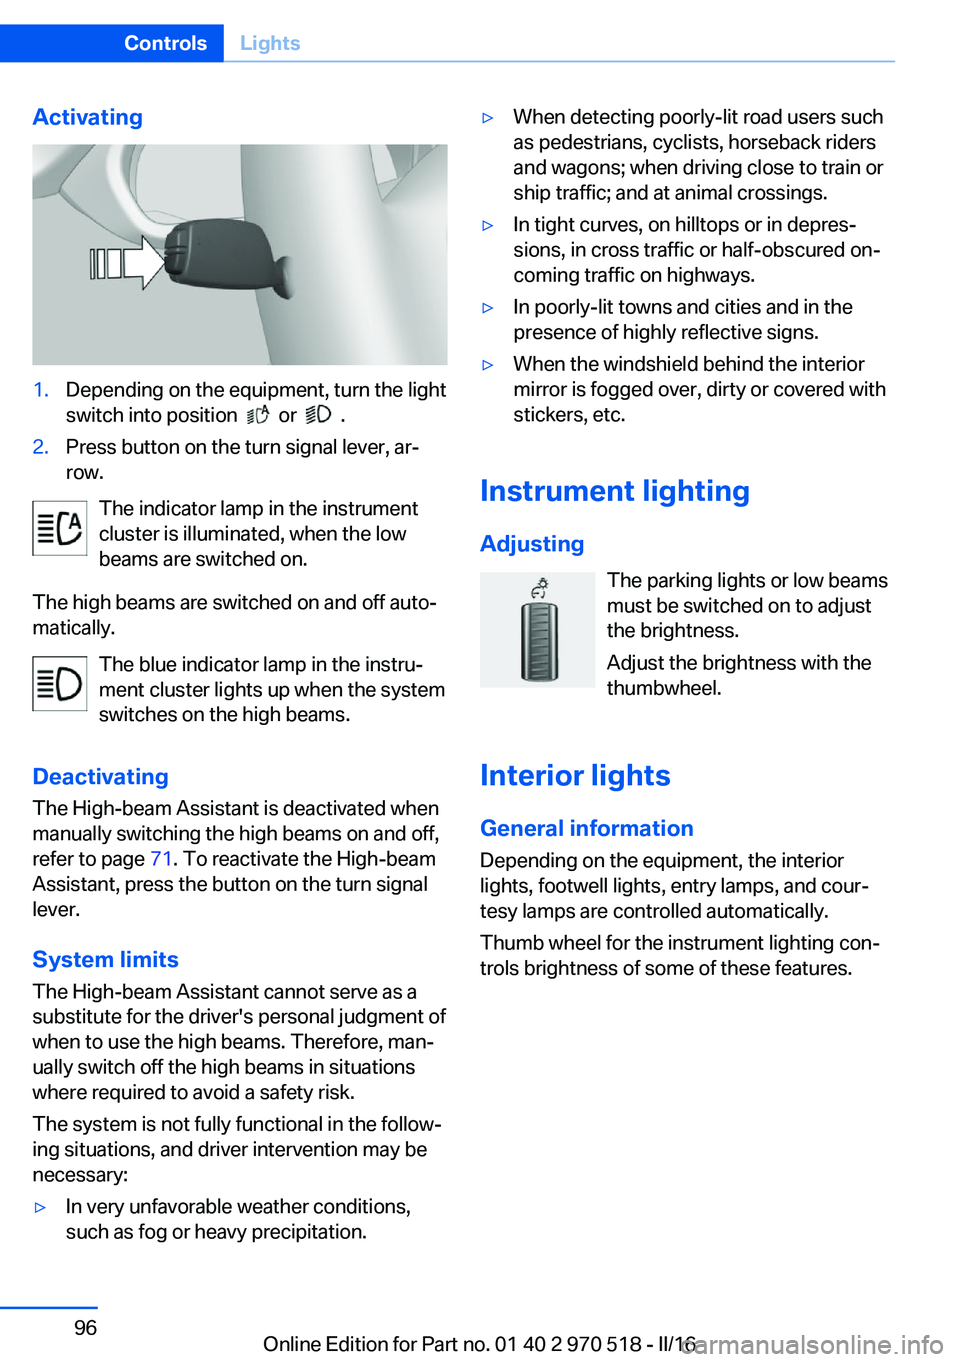
Activating1.Depending on the equipment, turn the light
switch into position
or .
2.Press button on the turn signal lever, ar‐
row.
The indicator lamp in the instrument
cluster is illuminated, when the low
beams are switched on.
The high beams are switched on and off auto‐
matically.
The blue indicator lamp in the instru‐
ment cluster lights up when the system
switches on the high beams.
Deactivating The High-beam Assistant is deactivated when
manually switching the high beams on and off,
refer to page 71. To reactivate the High-beam
Assistant, press the button on the turn signal
lever.
System limits
The High-beam Assistant cannot serve as a
substitute for the driver's personal judgment of
when to use the high beams. Therefore, man‐
ually switch off the high beams in situations
where required to avoid a safety risk.
The system is not fully functional in the follow‐
ing situations, and driver intervention may be
necessary:
▷In very unfavorable weather conditions,
such as fog or heavy precipitation.▷When detecting poorly-lit road users such
as pedestrians, cyclists, horseback riders
and wagons; when driving close to train or
ship traffic; and at animal crossings.▷In tight curves, on hilltops or in depres‐
sions, in cross traffic or half-obscured on‐
coming traffic on highways.▷In poorly-lit towns and cities and in the
presence of highly reflective signs.▷When the windshield behind the interior
mirror is fogged over, dirty or covered with
stickers, etc.
Instrument lighting
Adjusting The parking lights or low beams
must be switched on to adjust
the brightness.
Adjust the brightness with the
thumbwheel.
Interior lights
General information
Depending on the equipment, the interior
lights, footwell lights, entry lamps, and cour‐
tesy lamps are controlled automatically.
Thumb wheel for the instrument lighting con‐
trols brightness of some of these features.
Seite 96ControlsLights96
Online Edition for Part no. 01 40 2 970 518 - II/16
Page 108 of 220
The driver must intervene actively when there
is an acute warning. If necessary, the driver is
assisted by a minor automatic braking inter‐
vention in a possible risk of collision.
Acute warnings can also be triggered without
previous forewarning.
Braking intervention
The warning prompts the driver himself/herself
to react. During a warning, the maximum brak‐
ing force is used. Premise for the brake boos‐
ter is sufficiently quick and hard stepping on
the brake pedal. The system can assist with some braking intervention if there is a risk of a
collision. At low speeds vehicles may thus
come to a complete stop.
Manual transmission: During a braking inter‐
vention up to a complete stop, the engine may
be shut down.
The braking intervention is executed only if ve‐
hicle stability has not been restricted, e.g. by
deactivating the DSC Dynamic Stability Con‐
trol.
The braking intervention can be interrupted by
stepping on the accelerator pedal or by ac‐
tively moving the steering wheel.
Object detection can be restricted. Limitations
of the detection range and functional restric‐
tions are to be considered.
System limits
Information WARNING
The system can react incorrectly or not
at all due to the system limits. There is risk of
accidents or risk of property damage. Observe
the information regarding the system limits
and actively intervene, if needed.◀
Detection range
The system's detection potential is limited.Thus a system reaction might not come or
might come late.
E. g. the following situations may not be de‐
tected:▷Slow moving vehicles when you approach
them at high speed.▷Vehicles that suddenly swerve in front of
you, or sharply decelerating vehicles.▷Vehicles with an unusual rear appearance.▷Two-wheeled vehicles ahead of you.
Functional limitations
The system may not be fully functional in the
following situations:
▷In heavy fog, rain, sprayed water or snow‐
fall.▷In tight curves.▷If the driving stability control systems are
limited or deactivated, for example, DSC
OFF.▷If the field of view of the camera in the mir‐
ror is dirty or obscured.▷Up to 10 seconds after the start of the en‐
gine, via the Start/Stop button.▷During calibration of the camera immedi‐
ately after vehicle delivery.▷If there are constant blinding effects be‐
cause of oncoming light, e. g., from the sun
low in the sky.
Warning sensitivity
The more sensitive the warning settings are,
for example the warning time, the more warn‐
ings are displayed. However, there may also be
an excess of false warnings.
Seite 108ControlsSafety108
Online Edition for Part no. 01 40 2 970 518 - II/16
Page 111 of 220
Functional limitations
The system may not be fully functional or may
not be available in the following situations:▷In heavy fog, rain, sprayed water or snow‐
fall.▷In tight curves.▷If the driving stability control systems are
deactivated, for example DSC OFF.▷If the field of view of the camera or the
windshield are dirty or covered.▷Up to 10 seconds after the start of the en‐
gine, via the Start/Stop button.▷During calibration of the camera immedi‐
ately after vehicle delivery.▷If there are constant blinding effects be‐
cause of oncoming light, e.g., from the sun
low in the sky.▷When it is dark outside.
Lane departure warning
The concept Starting at a specific speed, this system alerts
you when the vehicle on streets with lane
markings is about to leave the lane. This
speed, depending on the country version, is
between 35 mph/55 km/h and
45 mph/70 km/h.
When switching on the system below this
speed, a message is displayed in the instru‐
ment cluster.
The steering wheel begins vibrating gently in
the event of warnings. The time of the warning
may vary depending on the current driving sit‐
uation.
The system does not provide a warning if the
turn signal is set before leaving the lane.
Information
WARNING
The system does not release the driver
from the personal responsibility to correctly
assess route and traffic situation. There is risk
of an accident. Adjust the driving style to the
traffic conditions. Watch traffic closely and ac‐
tively intervene in the respective situations. In
the event of a warning, do not unnecessarily
jerk the steering wheel.◀
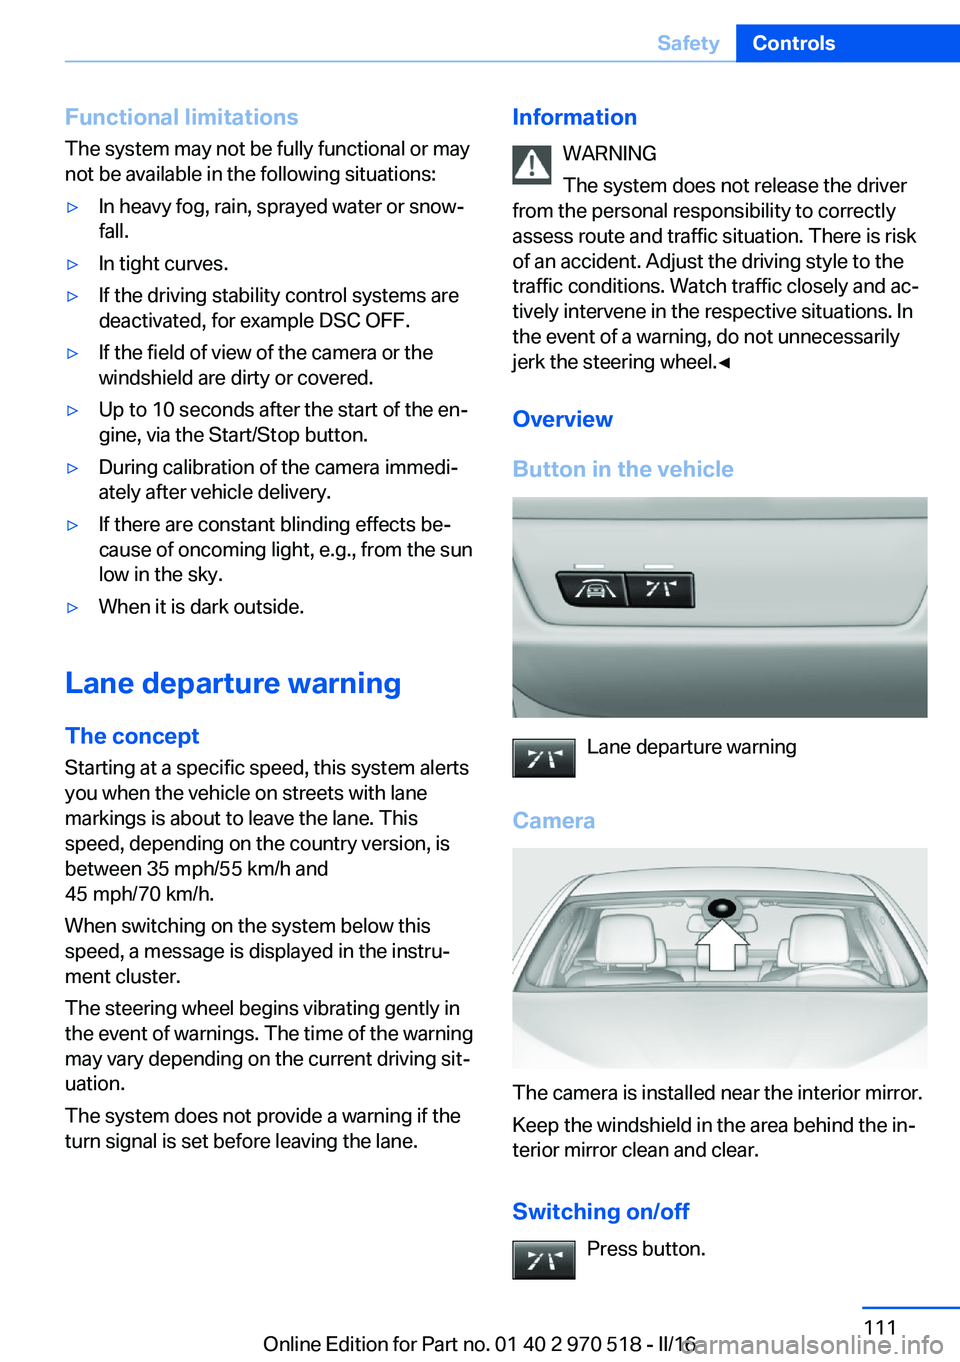
Overview
Button in the vehicle
Lane departure warning
Camera
The camera is installed near the interior mirror.
Keep the windshield in the area behind the in‐
terior mirror clean and clear.
Switching on/off Press button.
Seite 111SafetyControls111
Online Edition for Part no. 01 40 2 970 518 - II/16
Page 112 of 220
▷On: the LED lights up.▷Off: the LED goes out.
Settings are stored for the profile currently
used.
Display in the instrument cluster
▷Lines: system is activated.▷Arrows: at least one lane marking
was detected and warnings can be
issued.
Issued warning
If you leave the lane and if a lane marking has
been detected, the steering wheel begins vi‐
brating.
If the turn signal is set before changing the
lane, a warning is not issued.
End of warning
The warning is canceled in the following situa‐
tions:
▷Automatically after approx. 3 seconds.▷When returning to your own lane.▷When braking hard.▷When using the turn signal.
System limits
Information WARNING
The system can react incorrectly or not
at all due to the system limits. There is risk of
accidents or risk of property damage. Observe
the information regarding the system limits
and actively intervene, if needed.◀
Functional limitations
The system may not be fully functional in the
following situations:
▷In heavy fog, rain or snowfall.▷In the event of missing, worn, poorly visi‐
ble, merging, diverging, or multiple lane
markings such as in construction areas.▷When lane markings are covered in snow,
ice, dirt or water.▷In tight curves or on narrow lanes.▷When the lane markings are covered by
objects.▷When driving very close to the vehicle in
front of you.▷When driving toward bright lights.▷When the windshield in front of the interior
mirror is fogged over, dirty or covered with
stickers, etc.▷During calibration of the camera immedi‐
ately after vehicle delivery.
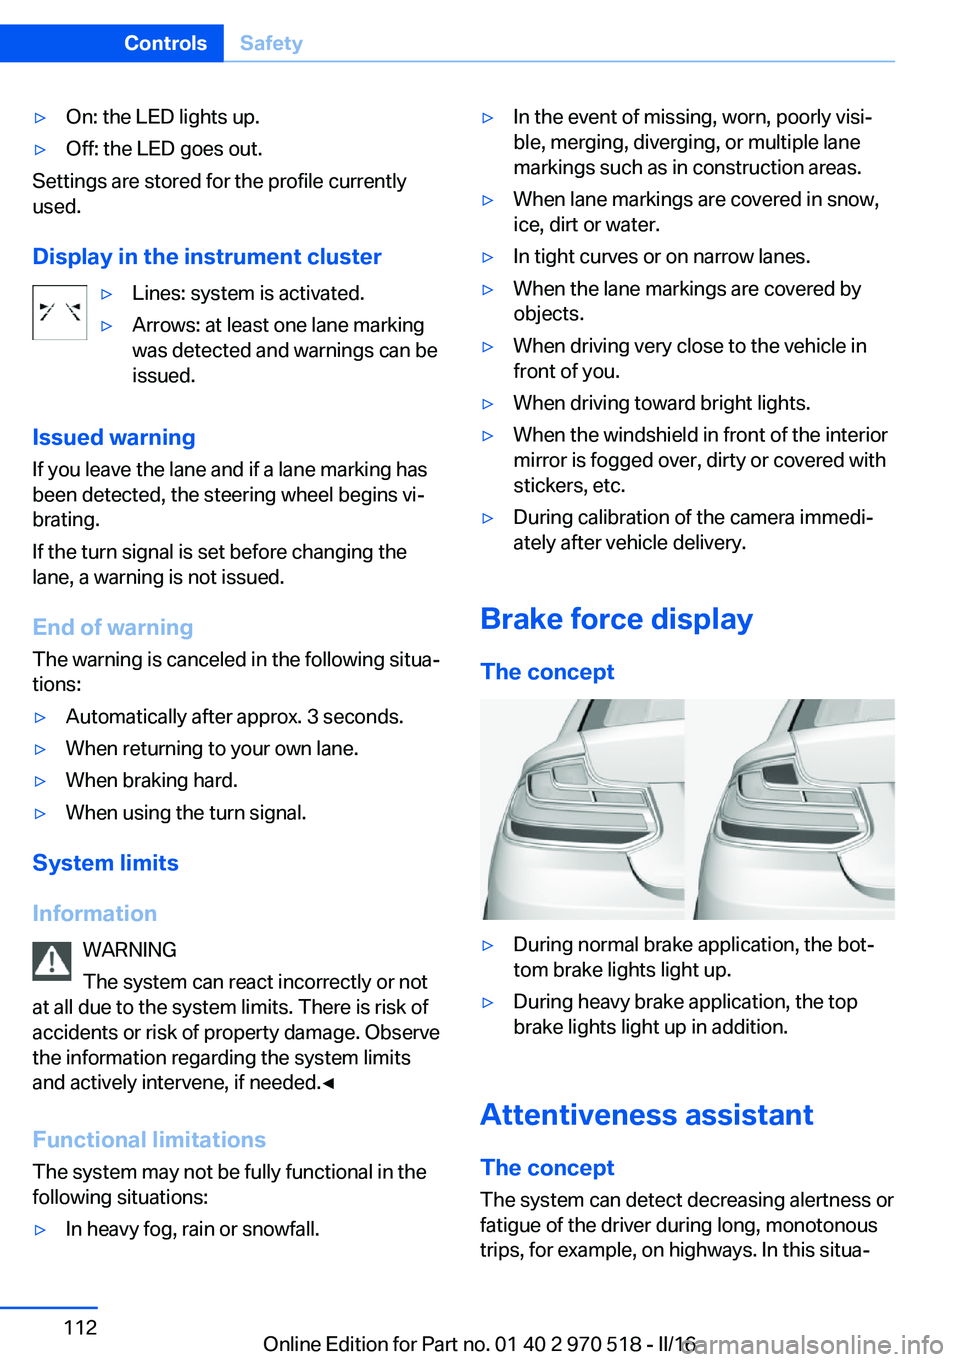
Brake force display
The concept
▷During normal brake application, the bot‐
tom brake lights light up.▷During heavy brake application, the top
brake lights light up in addition.
Attentiveness assistant
The concept The system can detect decreasing alertness or
fatigue of the driver during long, monotonous
trips, for example, on highways. In this situa‐
Seite 112ControlsSafety112
Online Edition for Part no. 01 40 2 970 518 - II/16
Page 189 of 220
Tail lamps, bulb replacement
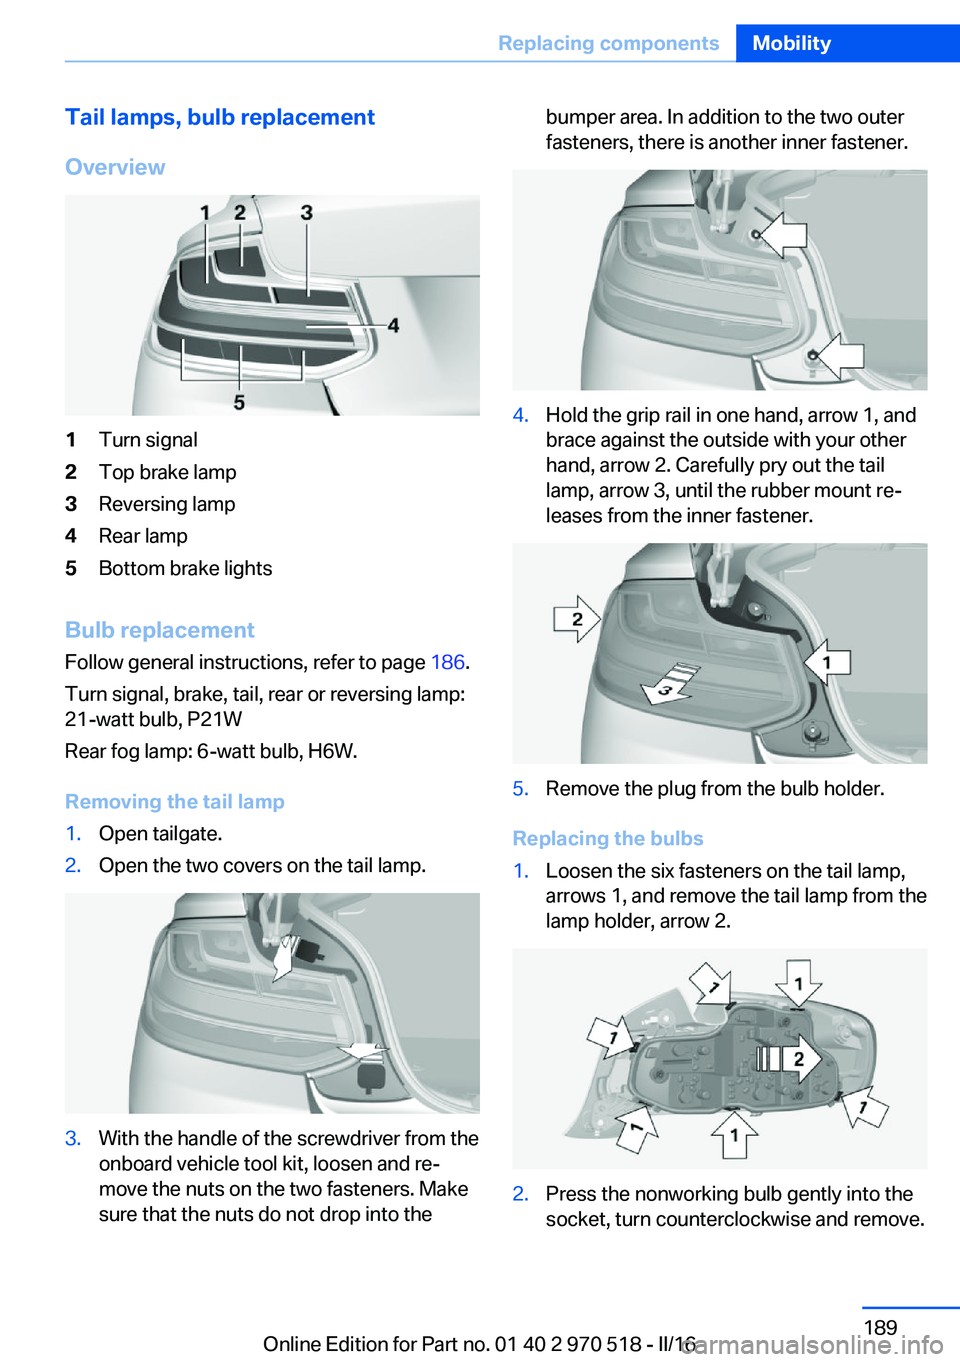
Overview1Turn signal2Top brake lamp3Reversing lamp4Rear lamp5Bottom brake lights
Bulb replacement Follow general instructions, refer to page 186.
Turn signal, brake, tail, rear or reversing lamp:
21-watt bulb, P21W
Rear fog lamp: 6-watt bulb, H6W.
Removing the tail lamp
1.Open tailgate.2.Open the two covers on the tail lamp.3.With the handle of the screwdriver from the
onboard vehicle tool kit, loosen and re‐
move the nuts on the two fasteners. Make
sure that the nuts do not drop into thebumper area. In addition to the two outer
fasteners, there is another inner fastener.4.Hold the grip rail in one hand, arrow 1, and
brace against the outside with your other
hand, arrow 2. Carefully pry out the tail
lamp, arrow 3, until the rubber mount re‐
leases from the inner fastener.5.Remove the plug from the bulb holder.
Replacing the bulbs
1.Loosen the six fasteners on the tail lamp,
arrows 1, and remove the tail lamp from the
lamp holder, arrow 2.2.Press the nonworking bulb gently into the
socket, turn counterclockwise and remove.Seite 189Replacing componentsMobility189
Online Edition for Part no. 01 40 2 970 518 - II/16