2016 BMW M2 COUPE instrument cluster
[x] Cancel search: instrument clusterPage 117 of 220
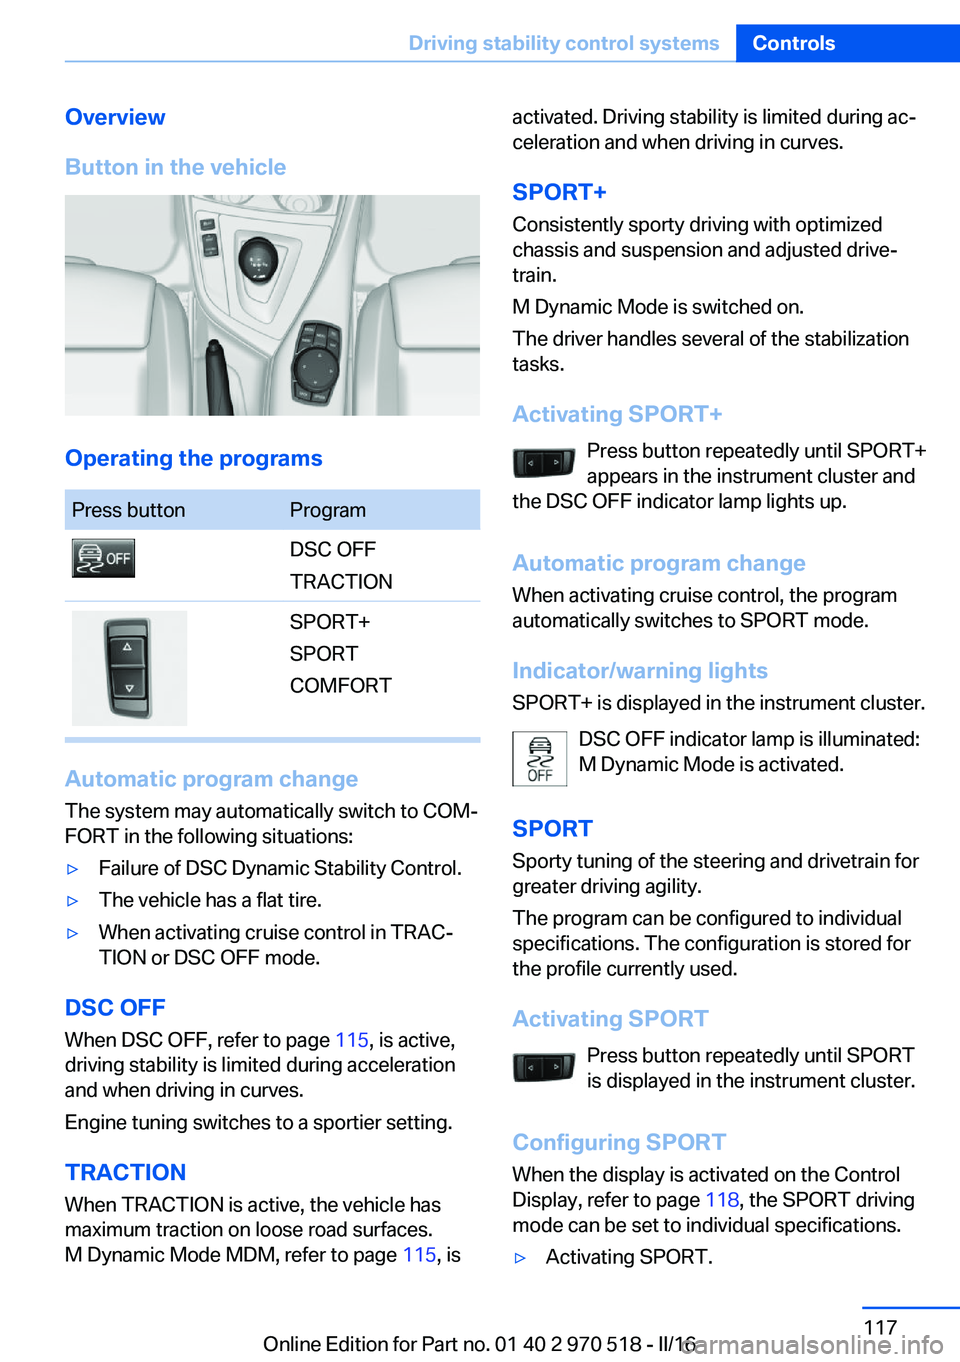
Overview
Button in the vehicle
Operating the programs
Press buttonProgramDSC OFF
TRACTIONSPORT+
SPORT
COMFORT
Automatic program change
The system may automatically switch to COM‐
FORT in the following situations:
▷Failure of DSC Dynamic Stability Control.▷The vehicle has a flat tire.▷When activating cruise control in TRAC‐
TION or DSC OFF mode.
DSC OFF
When DSC OFF, refer to page 115, is active,
driving stability is limited during acceleration
and when driving in curves.
Engine tuning switches to a sportier setting.
TRACTION When TRACTION is active, the vehicle has
maximum traction on loose road surfaces.
M Dynamic Mode MDM, refer to page 115, is
activated. Driving stability is limited during ac‐
celeration and when driving in curves.
SPORT+
Consistently sporty driving with optimized
chassis and suspension and adjusted drive‐
train.
M Dynamic Mode is switched on.
The driver handles several of the stabilization
tasks.
Activating SPORT+ Press button repeatedly until SPORT+
appears in the instrument cluster and
the DSC OFF indicator lamp lights up.
Automatic program change
When activating cruise control, the program
automatically switches to SPORT mode.
Indicator/warning lights
SPORT+ is displayed in the instrument cluster.
DSC OFF indicator lamp is illuminated:
M Dynamic Mode is activated.
SPORT Sporty tuning of the steering and drivetrain for
greater driving agility.
The program can be configured to individual
specifications. The configuration is stored for
the profile currently used.
Activating SPORT Press button repeatedly until SPORT
is displayed in the instrument cluster.
Configuring SPORT When the display is activated on the Control
Display, refer to page 118, the SPORT driving
mode can be set to individual specifications.▷Activating SPORT.Seite 117Driving stability control systemsControls117
Online Edition for Part no. 01 40 2 970 518 - II/16
Page 118 of 220
▷"Configure SPORT"▷Configuring the SPORT driving mode.
SPORT can also be configured before it is acti‐
vated:
1."Settings"2."Driving mode"3."Configure SPORT"4.Configure driving mode.
This configuration is retrieved when the
SPORT driving mode is activated.
COMFORT For a balanced tuning with maximum driving
stabilization.
Activating COMFORT Press button repeatedly until COM‐
FORT is displayed in the instrument
cluster.
In certain situations, the system automatically
changes to the NORMAL program, automatic
program change, refer to page 117.
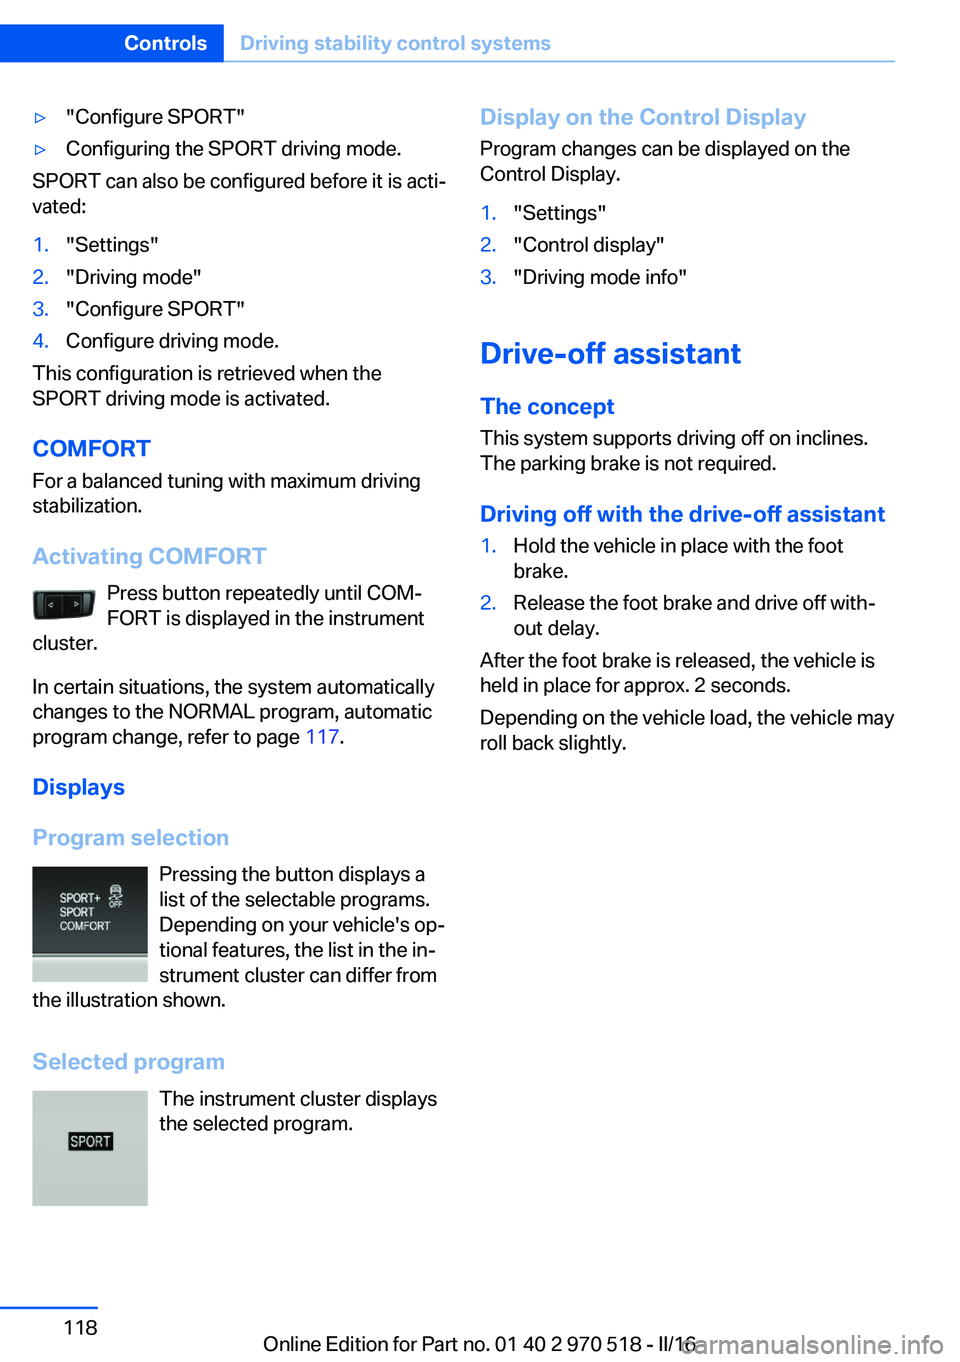
Displays
Program selection Pressing the button displays a
list of the selectable programs.
Depending on your vehicle's op‐
tional features, the list in the in‐ strument cluster can differ from
the illustration shown.
Selected program The instrument cluster displays
the selected program.
Display on the Control Display
Program changes can be displayed on the
Control Display.1."Settings"2."Control display"3."Driving mode info"
Drive-off assistant
The concept This system supports driving off on inclines.
The parking brake is not required.
Driving off with the drive-off assistant
1.Hold the vehicle in place with the foot
brake.2.Release the foot brake and drive off with‐
out delay.
After the foot brake is released, the vehicle is
held in place for approx. 2 seconds.
Depending on the vehicle load, the vehicle may
roll back slightly.
Seite 118ControlsDriving stability control systems118
Online Edition for Part no. 01 40 2 970 518 - II/16
Page 120 of 220
Cruise control can be used.
DSC will be switched on if needed.
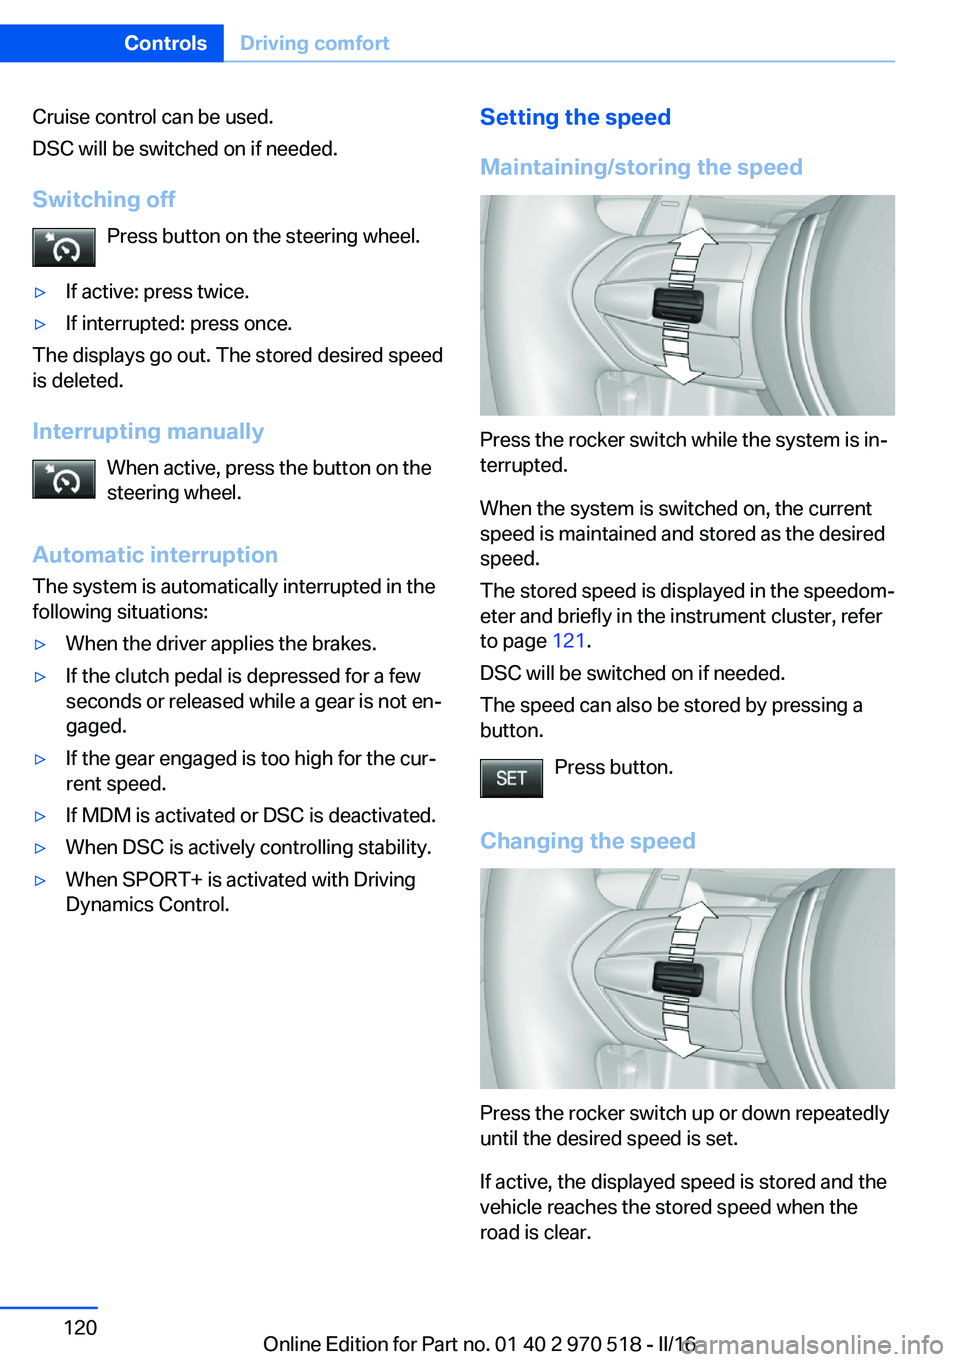
Switching off Press button on the steering wheel.▷If active: press twice.▷If interrupted: press once.
The displays go out. The stored desired speed
is deleted.
Interrupting manually When active, press the button on the
steering wheel.
Automatic interruption The system is automatically interrupted in the
following situations:
▷When the driver applies the brakes.▷If the clutch pedal is depressed for a few
seconds or released while a gear is not en‐
gaged.▷If the gear engaged is too high for the cur‐
rent speed.▷If MDM is activated or DSC is deactivated.▷When DSC is actively controlling stability.▷When SPORT+ is activated with Driving
Dynamics Control.Setting the speed
Maintaining/storing the speed
Press the rocker switch while the system is in‐
terrupted.
When the system is switched on, the current
speed is maintained and stored as the desired
speed.
The stored speed is displayed in the speedom‐
eter and briefly in the instrument cluster, refer
to page 121.
DSC will be switched on if needed.
The speed can also be stored by pressing a
button.
Press button.
Changing the speed
Press the rocker switch up or down repeatedly
until the desired speed is set.
If active, the displayed speed is stored and the
vehicle reaches the stored speed when the
road is clear.
Seite 120ControlsDriving comfort120
Online Edition for Part no. 01 40 2 970 518 - II/16
Page 121 of 220
▷Each time the rocker switch is pressed to
the point of resistance, the desired speed
increases or decreases by approx.
1 mph/1 km/h.▷Each time the rocker switch is pressed
past the point of resistance, the desired
speed increases or decreases by a maxi‐
mum of 5 mph/10 km/h.
The maximum speed that can be set de‐
pends on the vehicle.▷Pressing the rocker switch to the resist‐
ance point and holding it accelerates or de‐
celerates the vehicle without requiring
pressure on the accelerator pedal.
After the rocker switch is released, the ve‐
hicle maintains its final speed. Pressing the
switch beyond the resistance point causes
the vehicle to accelerate more rapidly.
Continuing cruise control
General information
An interrupted cruise control can be continued
by calling up the stored speed.
In the following cases, the stored speed value
is deleted and cannot be called up again:
▷When the system is switched off.▷When the ignition is switched off.
Information
Make sure that the difference between current
speed and stored speed is not too large before
calling up the stored speed. Otherwise, unin‐
tentional braking or accelerating may occur.
Calling up stored speed Press button on the steering wheel.
The stored speed is reached and maintained.
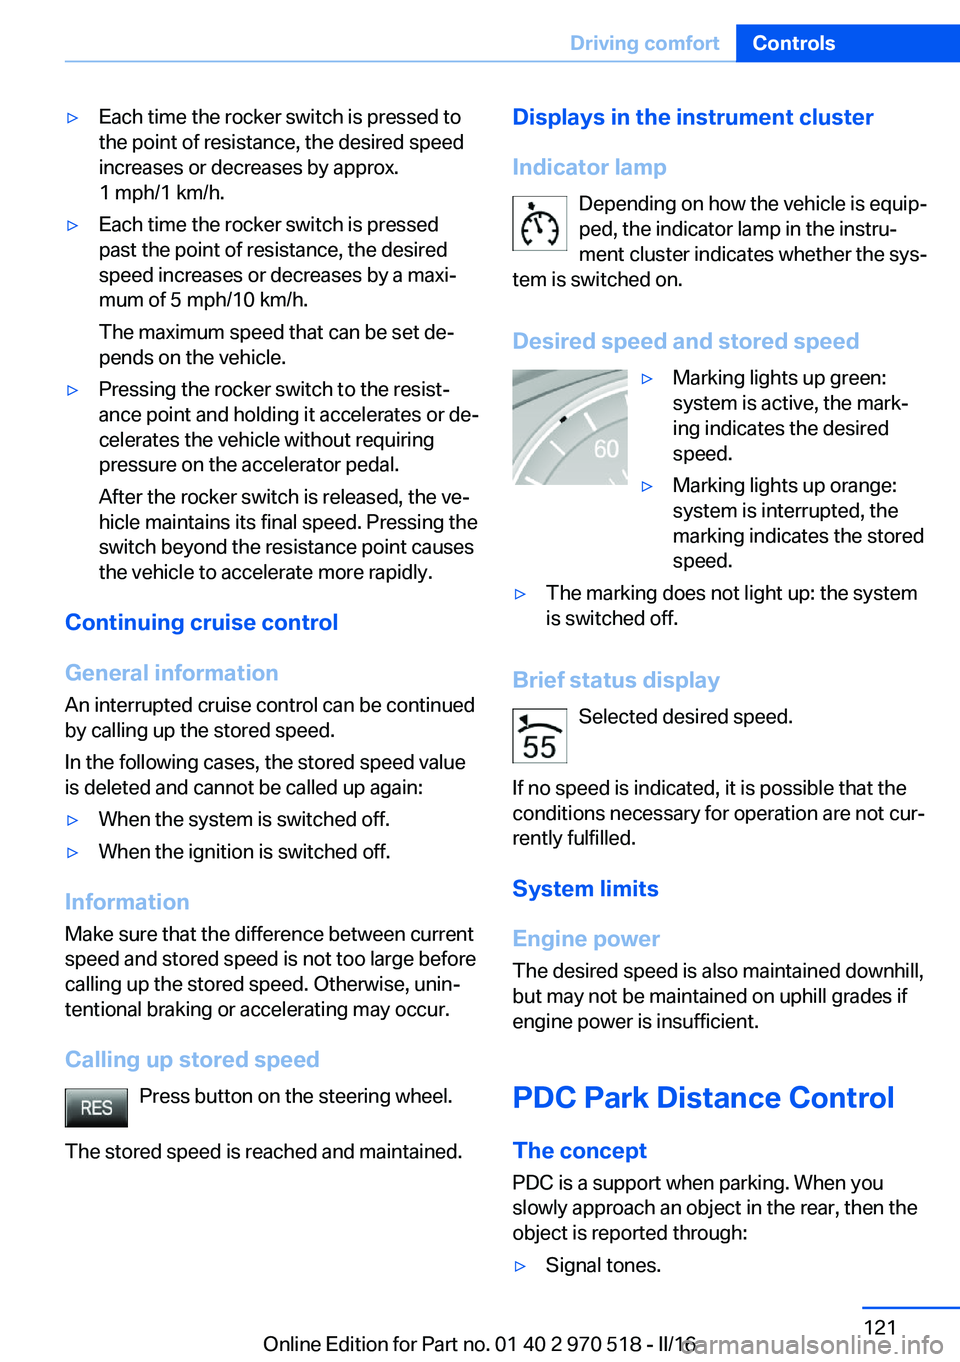
Displays in the instrument cluster
Indicator lamp Depending on how the vehicle is equip‐
ped, the indicator lamp in the instru‐
ment cluster indicates whether the sys‐
tem is switched on.
Desired speed and stored speed▷Marking lights up green:
system is active, the mark‐
ing indicates the desired
speed.▷Marking lights up orange:
system is interrupted, the
marking indicates the stored
speed.▷The marking does not light up: the system
is switched off.
Brief status display
Selected desired speed.
If no speed is indicated, it is possible that the
conditions necessary for operation are not cur‐
rently fulfilled.
System limits
Engine power The desired speed is also maintained downhill,
but may not be maintained on uphill grades if
engine power is insufficient.
PDC Park Distance Control The concept
PDC is a support when parking. When you
slowly approach an object in the rear, then the
object is reported through:
▷Signal tones.Seite 121Driving comfortControls121
Online Edition for Part no. 01 40 2 970 518 - II/16
Page 180 of 220
ATTENTION
Too much engine oil can damage the en‐
gine or the catalytic converter. There is a risk
of damage to property. Do not add too much
engine oil. When too much engine oil is added,
have oil level corrected by a dealer’s service
center or another qualified service center or re‐
pair shop.◀
Detailed measurement
The concept In the detailed measurement the engine oil
level is checked when the vehicle is stationary,
and displayed via a scale.
If the engine oil level reaches the minimum
level, a check control message is displayed.
During the measurement, the idle speed is in‐
creased somewhat.
Requirements▷Vehicle is parked in a horizontal position.▷Manual transmission: shift lever in neutral
position, clutch and accelerator pedals not
depressed.▷M Double clutch transmission: selector
lever in selector lever position N and accel‐
erator pedal not depressed.▷Engine is running and is at operating tem‐
perature.
Performing a detailed measurement
In order to perform a detailed measurement of
the engine oil level:
1."Vehicle info"2."Vehicle status"3. "Measure engine oil level"4."Start measurement"
The engine oil level is checked and displayed
via a scale.
Time: approx. 1 minute.
Adding engine oil
Information WARNING
Operating materials, e.g., oils, greases,
coolants, fuels, can contain harmful ingredi‐
ents. There is a risk of injury or danger to life.
Observe the instructions on the containers.
Avoid the contact of articles of clothing, skin or
eyes with operating materials. Do not refill op‐
erating materials into different bottles. Store
operating materials out of reach of children.◀
ATTENTION
Too low of an engine oil level causes en‐
gine damage. There is a risk of damage to
property.
Add engine oil within the next
125 miles/200 km.◀
ATTENTION
Too much engine oil can damage the en‐
gine or the catalytic converter. There is a risk
of damage to property. Do not add too much
engine oil. When too much engine oil is added,
have oil level corrected by a dealer’s service
center or another qualified service center or re‐
pair shop.◀
General information Only add engine oil when the message is dis‐
played in the instrument cluster. The quantity
to be added is indicated in the message dis‐
played in the instrument cluster.
Switch off the ignition and safely park the vehi‐
cle before engine oil is added.
Take care not to add too much engine oil.
Overview The oil filler neck is located in the engine com‐
partment, refer to page 177.Seite 180MobilityEngine oil180
Online Edition for Part no. 01 40 2 970 518 - II/16
Page 202 of 220
▷Instrument cluster cover.▷Matt black spray-coated components.▷Painted parts in the interior.
Safety belts
Dirty belt straps impede the reeling action and
thus have a negative impact on safety.
WARNING
Chemical cleansers can destroy the
safety belt webbing. Missing protective effect
of the safety belts. There is a risk of injury or
danger to life. Use only a mild soapy solution
for cleaning the safety belts.◀
Use only a mild soapy solution, with the safety
belts clipped into their buckles.
Do not allow the switchs to retract the safety
belts until they are dry.
Carpets and floor mats WARNING
Objects in the driver's floor area can limit
the pedal distance or block a depressed pedal.
There is risk of an accident. Stow objects in
the vehicle such that they are secured and
cannot enter into the driver's floor area. Use
floor mats that are suitable for the vehicle and
can be safely attached to the floor. Do not use
loose floor mats and do not layer several floor
mats. Make sure that there is sufficient clear‐
ance for the pedals. Ensure that the floor mats
are securely fastened again after they were re‐
moved, e.g., for cleaning.◀
Floor mats can be removed from the car's inte‐
rior for cleaning.
If the floor carpets are very dirty, clean with a
microfiber cloth and water or a textile cleaner.
To prevent matting of the carpet, rub back and
forth in the direction of travel only.
Sensor/camera lenses
To clean sensors and camera lenses, use a
cloth moistened with a small amount of glass
detergent.
Displays/screens ATTENTION
Chemical cleansers, moisture or fluids of
any kind can damage the surface of displays
and screens. There is a risk of damage to prop‐
erty. Clean with a clean, antistatic microfiber
cloth.◀
ATTENTION
The surface of displays can be damaged
with improper cleaning. There is a risk of dam‐
age to property. Avoid pressure that is too high
and do not use any scratching materials.◀
Clean with a clean, antistatic microfiber cloth.
Long-term vehicle storage When the vehicle is shut down for longer than
three months, special measures must be
taken. Further information is available from a
dealer’s service center or another qualified
service center or repair shop.Seite 202MobilityCare202
Online Edition for Part no. 01 40 2 970 518 - II/16
Page 213 of 220
Flat Tire Monitor FTM 104
Flat tire, repairing 173
Flat tire, Tire Pressure Moni‐ tor TPM 101
Flat tire, warning lamp 102, 105
Flooding 153
Floor carpet, care 202
Floor mats, care 202
Fogged up windows 129
Fold-away position, wiper 73
Fold down the rear seat back‐ rest, see Though-loading
system 141
Foot brake 153
Front airbags 98
Front-end collision warning with City Braking func‐
tion 106
Front lights 187
Front-seat passenger airbags, automatic deactivation 100
Front-seat passenger airbags, indicator lamp 101
FTM Flat Tire Monitor 104
Fuel 166
Fuel cap 164
Fuel consumption, see Aver‐ age fuel consumption 89
Fuel filler flap 164
Fuel gauge 83
Fuel quality 166
Fuel recommendation 166
Fuel, tank capacity 207
Fuse 191
G
Garage door opener, see Uni‐ versal Integrated Remote
Control 134
Gasoline 166
Gear change 77
Gear shift indicator 86
General driving notes 153
Glare shield 138 Glass sunroof, powered 47
Glove compartment 143
GPS location, vehicle posi‐ tion 92
Gross vehicle weight, ap‐ proved 207
Ground clearance 155
H
Handbrake, see parking brake 70
Hand-held transmitter, alter‐ nating code 135
Hazard warning flashers 193
Head airbags 98
Headlamp control, auto‐ matic 94
Headlight courtesy delay fea‐ ture 94
Headlight flasher 71
Headlight glass 187
Headlights 187
Headlights, care 200
Head restraints 49
Head restraints, front 54
Head restraints, rear 55
Heavy cargo, stowing 157
High-beam Assistant 95
High beams 71
High beams/low beams, see High-beam Assistant 95
High-performance en‐ gine 150
Hills 154
Hill start assistant, see Drive- off assistant 118
Holder for beverages 145
Homepage 6
Hood 177
Horn 14
Hotel function, tailgate 41
Hot exhaust system 153
Hydroplaning 153 I
Ice warning, see External temperature warning 84
Icy roads, see External tem‐ perature warning 84
Identification marks, tires 169
Identification number, see Ve‐ hicle identification num‐
ber 10
iDrive 18
Ignition key, see Remote con‐ trol 34
Ignition off 65
Ignition on 65
Indication of a flat tire 102 , 105
Indicator and alarm lamps, see Check Control 80
Indicator lamp, see Check Control 80
Individual air distribu‐ tion 129, 131
Individual settings, see Per‐ sonal Profile 36
Inflation pressure, tires 168
Inflation pressure warning, tires 104
Info display, see On-Board computer 88
Information 6
Initialize, Tire Pressure Moni‐ tor TPM 102
Initializing, Flat Tire Monitor FTM 104
Instrument cluster 79
Instrument cluster, electronic displays 79
Instrument lighting 96
Integrated key 34
Integrated Owner's Manual in the vehicle 30
Intelligent emergency call 193
Intelligent Safety 105 Seite 213Everything from A to ZReference213
Online Edition for Part no. 01 40 2 970 518 - II/16
Page 216 of 220

Remote control, malfunc‐tion 39
Remote control, univer‐ sal 134
Replacement fuse 191
Replacing parts 186
Replacing wheels/tires 171
Reporting safety malfunc‐ tions 10
RES button, see Cruise con‐ trol 119
Reserve warning, see Range 84
Reset, Tire Pressure Monitor TPM 102
Retreaded tires 172
Roadside parking lights 93
RON recommended fuel grade 167
Roofliner 17
Roof load capacity 207
Roof-mounted luggage rack 158
Rubber components, care 201
S Safe braking 153
Safety belt reminder for driv‐ er's seat and front passen‐
ger seat 54
Safety belts 53
Safety belts, care 202
Safety systems, airbags 98
Saving fuel 159
Screen, see Control Dis‐ play 18
Screwdriver, see Onboard ve‐ hicle tool kit 186
Sealant 173
Seat and mirror memory 56
Seat belts, see Safety belts 53
Seat heating, front 52 Seating position for chil‐
dren 61
Seats 49
Securing cargo 157
Selection list in instrument cluster 88
Selector lever 75
Selector lever position 75
Sensors, care 202
Sequential mode 76
Service and warranty 8
Service requirements, Condi‐ tion Based Service
CBS 184
Service requirements, dis‐ play 85
Service, Roadside Assis‐ tance 194
Services, ConnectedDrive 6
Servotronic 116
SET button, see Cruise con‐ trol 119
Settings, locking/unlock‐ ing 43
Settings on Control Dis‐ play 91
Settings, storing for seat, mir‐ ror 56
Side airbags 98
Signaling, horn 14
Signals when unlocking 43
Sitting safely 49
Size 206
Slide/tilt glass roof 47
Snow chains 176
Socket 138
Socket, OBD Onboard Diag‐ nostics 185
SOS button 193
Spare fuse 191
Speed, average 89
Speed limit detection 86
Speed limit detection, com‐ puter 90
Speed limits, display 86
Speed warning 90 Split screen 24
SPORT+ - program, Dynamic Driving Control 117
Sport displays, torque dis‐ play, performance dis‐
play 90
SPORT program, Dynamic Driving Control 117
Stability control systems 114
Standard equipment 7
Start/stop, automatic func‐ tion 67
Start/Stop button 65
Start function during malfunc‐ tion 35
Starting the engine 66
Status control display, tires 102
Status of Owner's Manual 7
Steering assistance 116
Steering wheel, adjusting 59
Steering wheel heating 60
Stopping the engine 67
Storage compartment in the rear 145
Storage compartments 143
Storage, tires 172
Storing the vehicle 202
Suitable engine oil types 181
Summer tires, tread 171
Sun visor 138
Supplementary text mes‐ sages 82
Switch for Dynamic Driv‐ ing 116
Switch, see Cockpit 14
Symbols 6
Symbols in the status field 23
T Tachometer 83
Tailgate closing 41
Tailgate, emergency unlock‐ ing 41
Tailgate, hotel function 41 Seite 216ReferenceEverything from A to Z216
Online Edition for Part no. 01 40 2 970 518 - II/16