2016 BMW 740I SEDAN jacking
[x] Cancel search: jackingPage 282 of 314

Lights and bulbs
General information
Lights and bulbs make an essential contribu‐
tion to vehicle safety.
All headlights and lights are made using LED
or laser technology.
The vehicle manufacturer recommends that
you let a dealer’s service center or another
qualified service center or repair shop perform
the work in case of a malfunction.
Information
Lights and bulbs DANGER
There can be high voltage in the lighting
system. There is danger to life. The manufac‐
turer of your vehicle recommends that the
work on the lighting system including bulb re‐
placement be performed by a dealer’s service
center or another qualified service center or re‐
pair shop.◀
Light-emitting diodes (LEDs)
Some items of equipment use light-emitting
diodes installed behind a cover as a light
source.
These light-emitting diodes, which are related
to conventional lasers, are officially designated
as Class 1 light-emitting diodes.
WARNING
Too intensive brightness can irritate or
damage the retina of the eye. There is risk of
injuries. Do not look directly into the headlights
or other light sources for an extended period of
time. Do not remove the LED covers.◀
Headlight glass
Condensation can form on the inside of the ex‐
ternal lights in cool or humid weather. When
driving with the lights switched on, the con‐densation evaporates after a short time. The
headlight glass does not need to be changed.
If despite driving with the lights switched on,
increasing humidity forms, e. g. water droplets
in the lamp, the manufacturer of your vehicle
recommends having it checked by a dealer’s
service center or another qualified service cen‐
ter or repair shop.
Changing wheels
Information When using run-flat tires or sealants, a tire
does not need to be changed immediately in
the event of pressure loss due to a flat tire.
The tools for changing wheels are available as
accessories from your dealer’s service center
or another qualified service center or repair
shop.
Jacking points for the vehicle jack
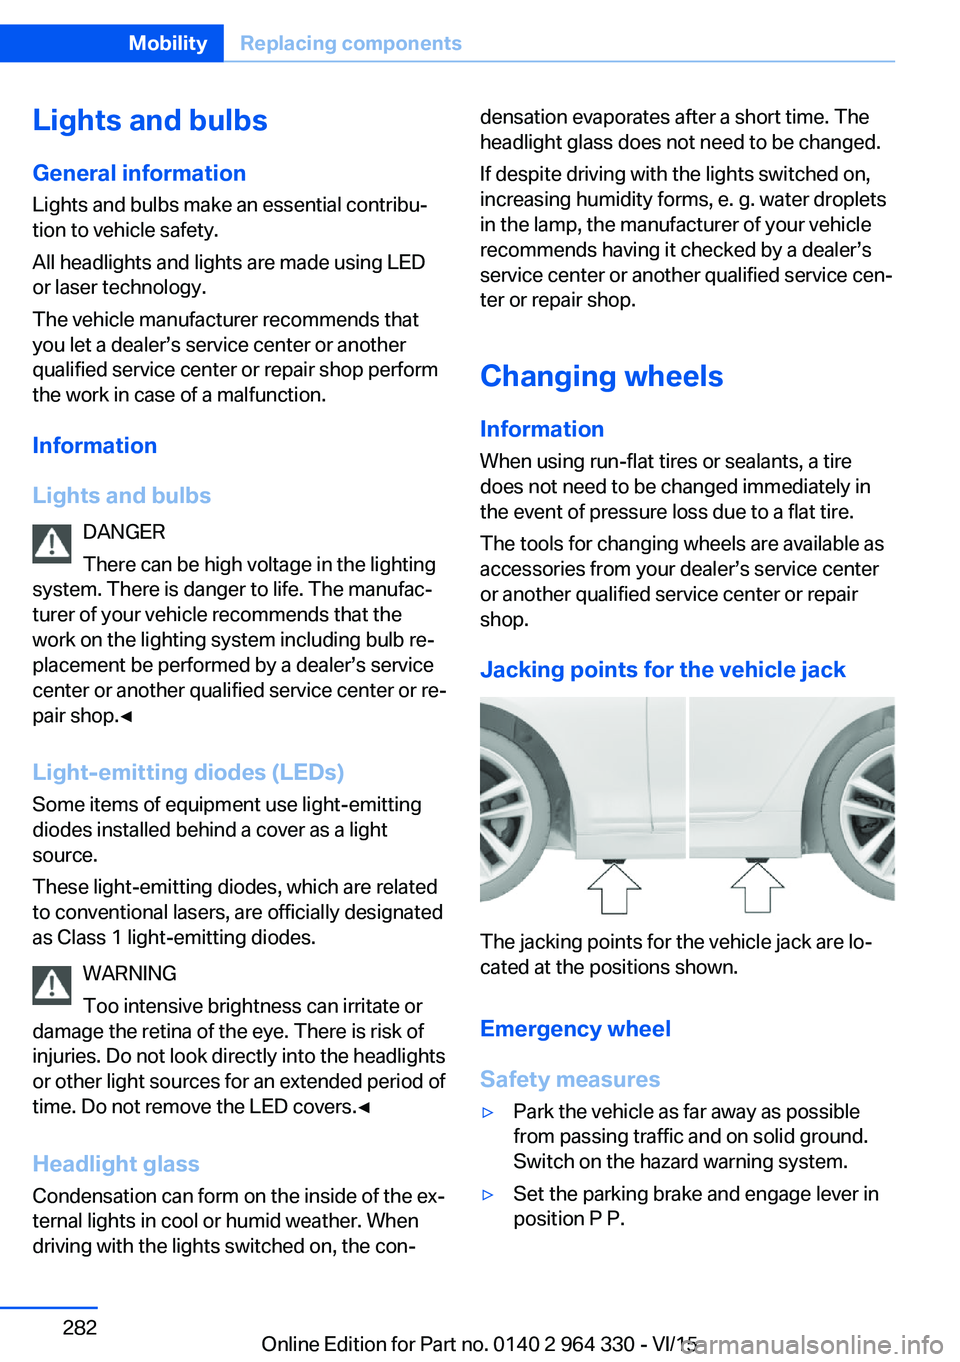
The jacking points for the vehicle jack are lo‐
cated at the positions shown.
Emergency wheel
Safety measures
▷Park the vehicle as far away as possible
from passing traffic and on solid ground.
Switch on the hazard warning system.▷Set the parking brake and engage lever in
position P P.Seite 282MobilityReplacing components282
Online Edition for Part no. 0140 2 964 330 - VI/15
Page 283 of 314

▷Have all vehicle occupants get out of the
vehicle and ensure that they remain out‐
side the immediate area in a safe place,
such as behind a guardrail.▷If necessary, set up a warning triangle or
portable hazard warning lamp at an appro‐
priate distance.▷Perform wheel change only on a flat, solid
and slip-resistant surface. On soft or slip‐
pery ground, e.g., snow, ice, tiles, etc., the
vehicle or vehicle jack can slip away to the
side.▷Do not place wood blocks or similar items
under the vehicle jack; otherwise, it cannot
reach its carrying capacity because of the
restricted height.▷If the vehicle is raised, do not lie under the
vehicle and do not start the engine; other‐
wise, a fatal hazard exists.
Information
WARNING
The vehicle jack is optimized for lifting
the vehicle and for the jacking points on the
vehicle only. There is risk of injuries. Do not lift
any other vehicle or cargo using the vehicle
jack.◀
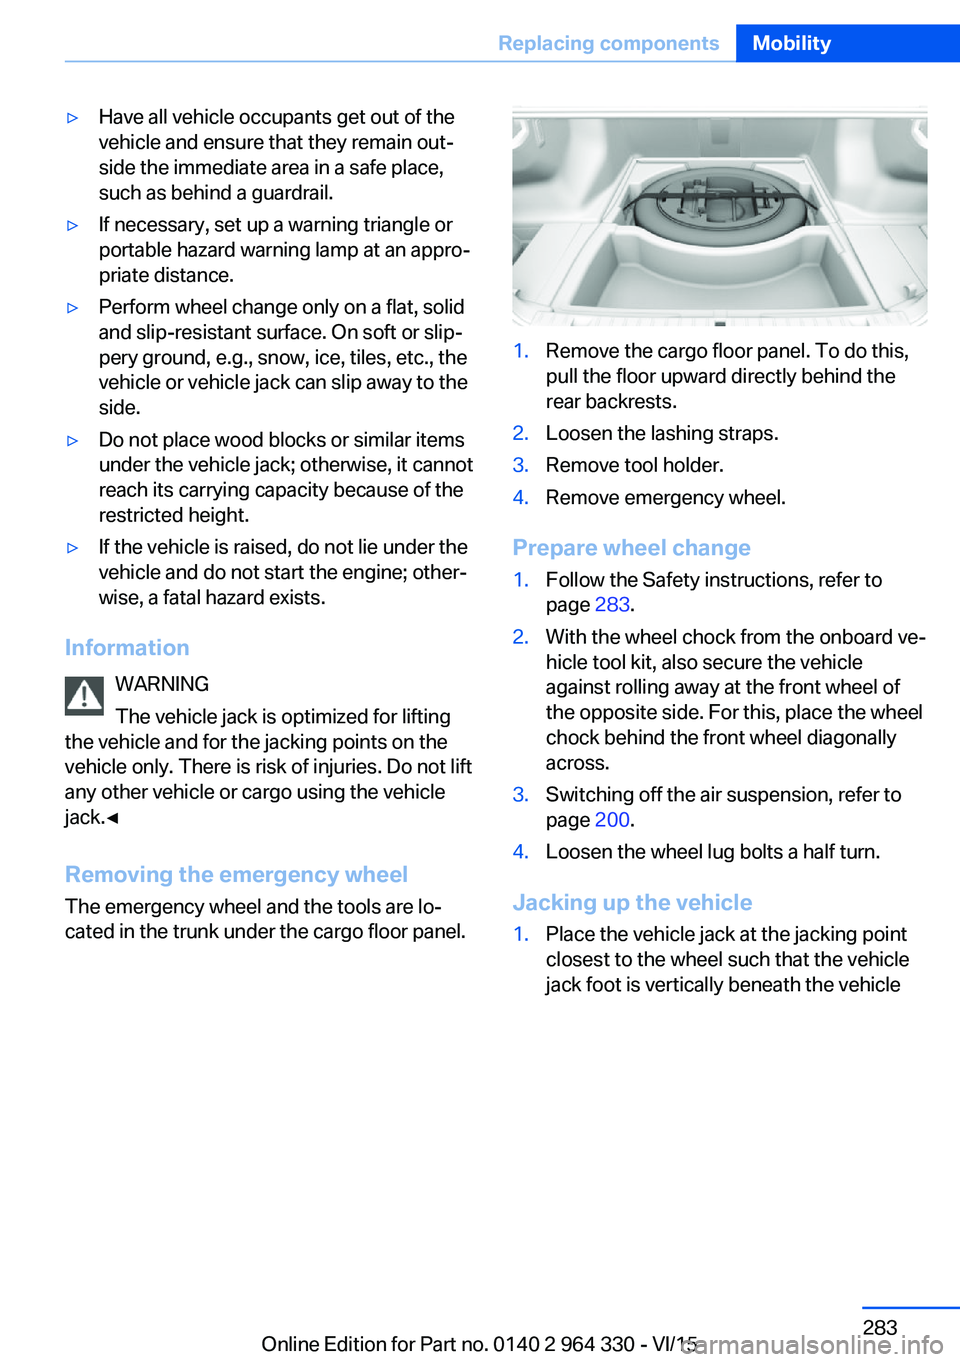
Removing the emergency wheel The emergency wheel and the tools are lo‐
cated in the trunk under the cargo floor panel.
1.Remove the cargo floor panel. To do this,
pull the floor upward directly behind the
rear backrests.2.Loosen the lashing straps.3.Remove tool holder.4.Remove emergency wheel.
Prepare wheel change
1.Follow the Safety instructions, refer to
page 283.2.With the wheel chock from the onboard ve‐
hicle tool kit, also secure the vehicle
against rolling away at the front wheel of
the opposite side. For this, place the wheel
chock behind the front wheel diagonally
across.3.Switching off the air suspension, refer to
page 200.4.Loosen the wheel lug bolts a half turn.
Jacking up the vehicle
1.Place the vehicle jack at the jacking point
closest to the wheel such that the vehicle
jack foot is vertically beneath the vehicleSeite 283Replacing componentsMobility283
Online Edition for Part no. 0140 2 964 330 - VI/15
Page 284 of 314

jacking point with the entire surface on the
ground.2.Insert the vehicle jack head in the rectan‐
gular recess of the jacking point for crank‐
ing it up.3.Crank it up until the wheel in question lifts
off of the ground.
Wheel mounting
Mount one emergency wheel only.
1.Unscrew the wheel lug bolts and remove
the wheel.2.Put the new wheel or emergency wheel on
and screw in at least two bolts.
If original BMW light alloy wheels are not
mounted, any accompanying lug bolts also
have to be used.3.Screw in the remaining the lug bolts and
tighten all bolts well in a crosswise pattern.4.Lower the vehicle and remove the vehicle
jack.
After the wheel change
1.Tighten the lug bolts crosswise. The tight‐
ening torque is 101 lb ft/140 Nm.2.Stow the nonworking wheel in the trunk.
The nonworking wheel cannot be stored
under the cargo floor panel because of its
size.3.Check tire inflation pressure at the next op‐
portunity and correct as needed.4.Reinitialize the Flat Tire Monitor.Reset the Tire Pressure Monitor.5.Check to make sure the lug bolts are tight
with a calibrated torque wrench.6.Replace the damaged tires as soon as pos‐
sible.
Driving with emergency wheel
WARNING
The emergency wheel has particular di‐
mensions. When driving with an emergency
wheel, changed driving properties may occur
at higher speeds, e.g. reduced lane stability
when braking, longer braking distance and
changed self-steering properties in the limit
area. There is risk of an accident. Drive moder‐
ately and do not exceed a speed of
50 mph/80 km/h.◀
Vehicle battery Maintenance
The battery is maintenance-free.
The added amount of acid is sufficient for the
service life of the battery.
More information about the battery can be re‐
quested from a dealer’s service center or an‐
other qualified service center or repair shop.
Battery replacement CAUTION
Vehicle batteries that are not compatible
can damage vehicle systems and impair vehi‐
cle functions.There is risk of property damage.
Information on the compatible vehicle batteries
is available at your dealer's service center.◀
After a battery replacement, the manufacturer
of your vehicle recommends that the vehicle
battery be registered on the vehicle by a
dealer’s service center or another qualified
service center or repair shop to ensure that all
comfort features are fully available and that any
Seite 284MobilityReplacing components284
Online Edition for Part no. 0140 2 964 330 - VI/15
Page 307 of 314

Intensity, AUTO pro‐gram 204
Interior equipment 215
Interior lights 133
Interior lights during unlock‐ ing 60
Interior lights with the vehicle locked 61
Interior motion sensor 70
Interior rearview mirror, auto‐ matic dimming feature 86
Internet page 6
Interval display, service re‐ quirements 119
Ionization, see Ambient air package 211
J Jacking points for the vehicle jack 282
Joystick, Steptronic transmis‐ sion 106
Jump-starting 287
K Key/remote control 54
Keyless Go, see Comfort Ac‐ cess 65
Kickdown, Steptronic trans‐ mission 106
Knee airbag 137
L Label on recommended tires 259
Lamp in the exterior mirror, see Active Blind Spot De‐
tection 153
Lamp in the exterior mirror, see crossing traffic warn‐
ing 197
Lamp replacement 282
Lamp replacement, front 282 Lamp replacement, rear 282
Lane departure warning 150
Lane margin, warning 150
Language, on the Control Display 38
Lashing eyes, securing cargo 238
LATCH child restraint sys‐ tem 95
Launch Control 106
Leather, care 292
LEDs, replace light-emitting diodes 282
Light alloy wheels, care 293
Light control 131
Lighting 129
Lights 129
Lights and bulbs 282
Light switch 129
List of all messages 40
Load 238
Loading 237
Lock, door 62
Locking, automatic 68
Locking, settings 67
Locking via door lock 62
Locking with remote con‐ trol 60
Lock, power window 71
Locks, doors, and win‐ dows 96
Low beams 129
Low beams, automatic, see High-beam Assistant 132
Lower back support 77
Luggage rack, see Roof- mounted luggage rack 238
Lumbar support 77
M
Maintenance 279
Maintenance require‐ ments 279
Maintenance, service require‐ ments 119 Maintenance system,
BMW 279
Make-up mirror 217
Malfunction displays, see Check Control 114
Manual air distribution 205
Manual air flow 205
Manual brake, see Parking brake 100
Manual mode, Steptronic transmission 106
Manual operation, door lock 62
Manual operation, exterior mirrors 85
Manual operation, fuel filler flap 250
Marking, run-flat tires 260
Massage seat, front 88
Massage seat, rear 88
Master key, see Remote con‐ trol 54
Maximum cooling 204
Maximum speed, display 120
Maximum speed, winter tires 259
Measurement, units of 39
Medical kit 287
Memory for seat, mirrors, steering wheel 87
Menu in instrument clus‐ ter 121
Menus 22
Menus, operating, iDrive 21
Messages 40
Messages, see Check Con‐ trol 114
Microfilter 206
Minimum tread, tires 258
Mirror 85
Mirror memory 87
Mobile communication devi‐ ces in the vehicle 235
Mobility System 260
Modifications, technical, see Own Safety 7 Seite 307Everything from A to ZReference307
Online Edition for Part no. 0140 2 964 330 - VI/15