2016 BMW 5 SERIES GRAN TURISMO fold seats
[x] Cancel search: fold seatsPage 65 of 263
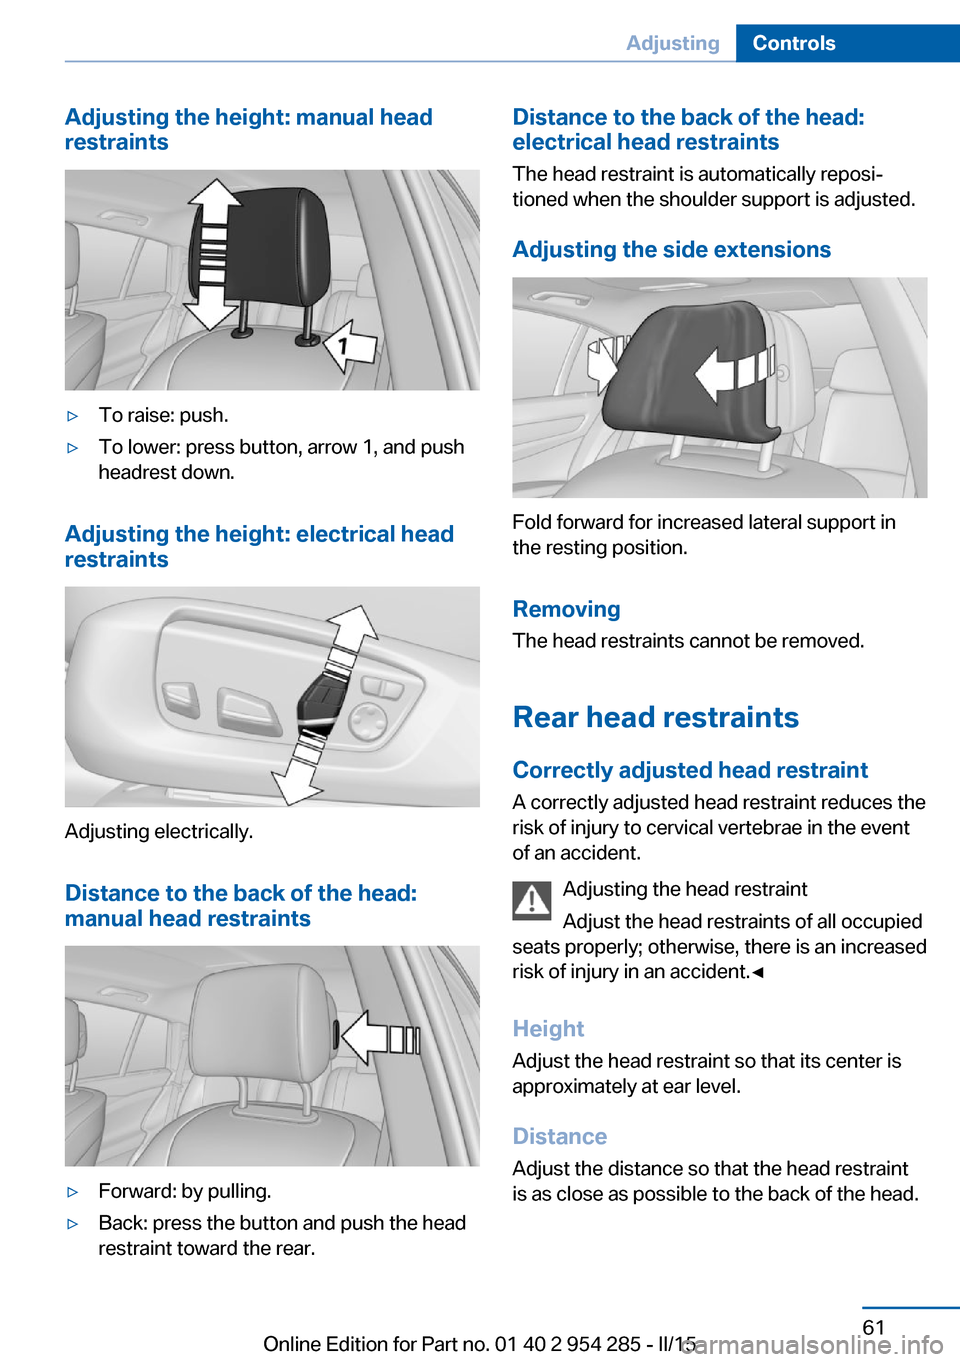
Adjusting the height: manual head
restraints▷To raise: push.▷To lower: press button, arrow 1, and push
headrest down.
Adjusting the height: electrical head
restraints
Adjusting electrically.
Distance to the back of the head:
manual head restraints
▷Forward: by pulling.▷Back: press the button and push the head
restraint toward the rear.Distance to the back of the head:
electrical head restraints
The head restraint is automatically reposi‐
tioned when the shoulder support is adjusted.
Adjusting the side extensions
Fold forward for increased lateral support in
the resting position.
Removing The head restraints cannot be removed.
Rear head restraints
Correctly adjusted head restraint A correctly adjusted head restraint reduces the
risk of injury to cervical vertebrae in the event
of an accident.
Adjusting the head restraint
Adjust the head restraints of all occupied
seats properly; otherwise, there is an increased
risk of injury in an accident.◀
Height
Adjust the head restraint so that its center is
approximately at ear level.
Distance
Adjust the distance so that the head restraint
is as close as possible to the back of the head.
Seite 61AdjustingControls61
Online Edition for Part no. 01 40 2 954 285 - II/15
Page 72 of 263
LATCH child restraint systemLATCH: Lower Anchors and Tether for Chil‐
dren.
Note Follow manufacturer's information for
LATCH child restraint systems
To mount and use the LATCH child restraint
systems, observe the operating and safety in‐
formation from the system manufacturer; oth‐
erwise, the level of protection may be re‐
duced.◀
Mounts for the lower LATCH anchors
The lower anchors may be used to attach the
CRS to the vehicle seat up to a combined child
and CRS weight of 65 lb/30 kg when the child
is restrained by the internal harnesses.
Note Properly engage the lower LATCH an‐
chors
Make sure that the lower LATCH anchors have
properly engaged and that the child restraint
system is resting snugly against the backrest;
otherwise, the degree of protection may be re‐
duced.◀
Position The corresponding symbol shows the
mounts for the lower LATCH anchors.
Seats equipped with lower anchors are
marked with a pair, 2, of LATCH sym‐
bols. It is not recommended to use the
inner lower anchors of standard outer
LATCH positions to fasten a child restraint
system on the middle seat. Use the vehicle
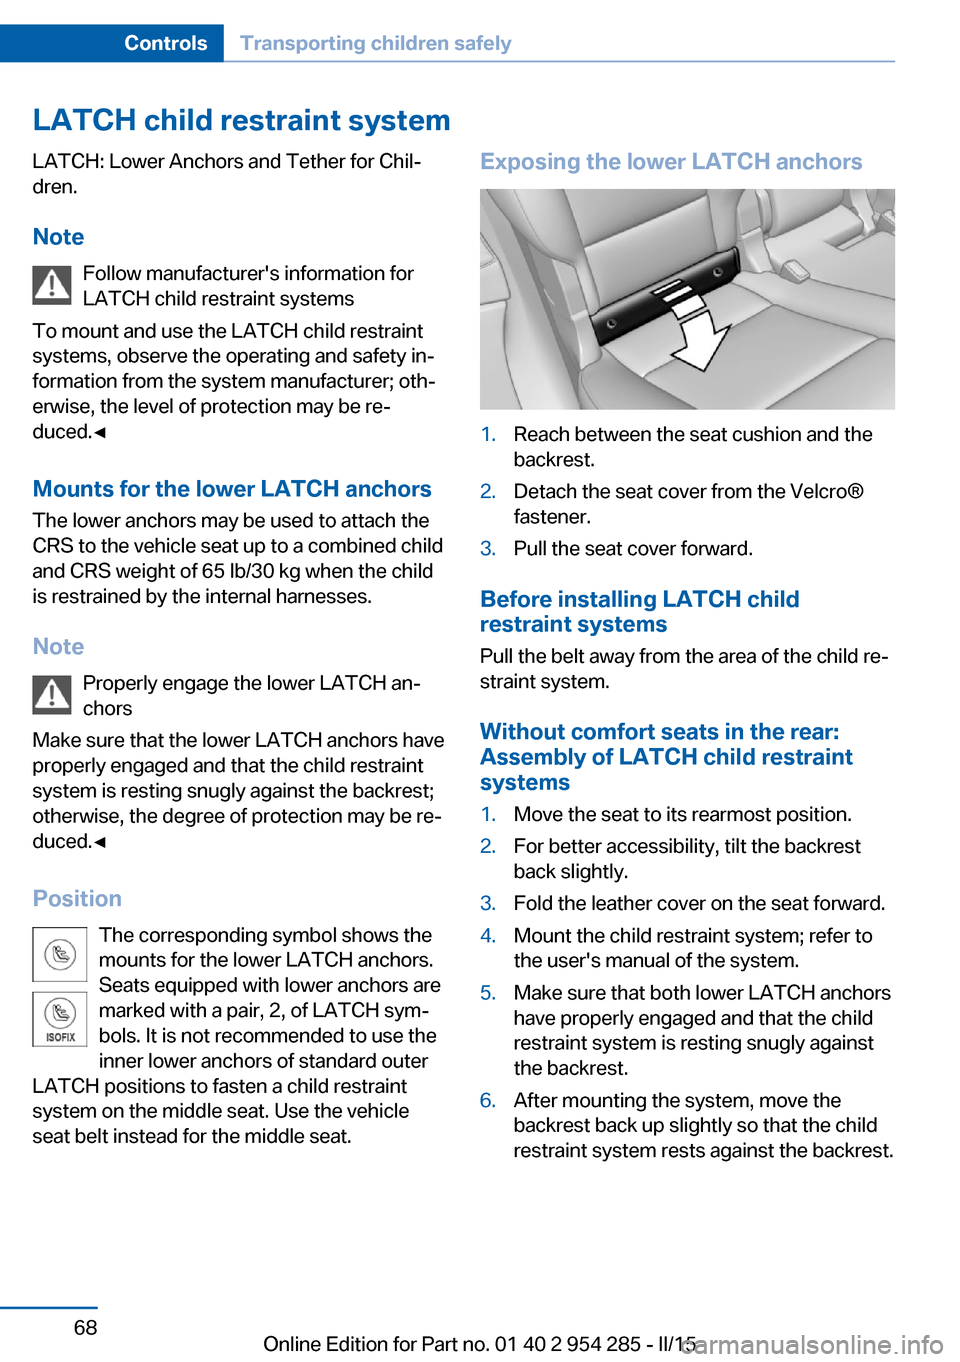
seat belt instead for the middle seat.Exposing the lower LATCH anchors1.Reach between the seat cushion and the
backrest.2.Detach the seat cover from the Velcro®
fastener.3.Pull the seat cover forward.
Before installing LATCH child
restraint systems
Pull the belt away from the area of the child re‐
straint system.
Without comfort seats in the rear:
Assembly of LATCH child restraint
systems
1.Move the seat to its rearmost position.2.For better accessibility, tilt the backrest
back slightly.3.Fold the leather cover on the seat forward.4.Mount the child restraint system; refer to
the user's manual of the system.5.Make sure that both lower LATCH anchors
have properly engaged and that the child
restraint system is resting snugly against
the backrest.6.After mounting the system, move the
backrest back up slightly so that the child
restraint system rests against the backrest.Seite 68ControlsTransporting children safely68
Online Edition for Part no. 01 40 2 954 285 - II/15
Page 182 of 263
Storage compartmentsVehicle features and optionsThis chapter describes all standard, country-
specific and optional features offered with the
series. It also describes features that are not
necessarily available in your car, e. g., due to
the selected options or country versions. This
also applies to safety-related functions and
systems. The respectively applicable country
provisions must be observed when using the
respective features and systems.
Hints No loose objects in the car's interior
Do not stow any objects in the car's inte‐
rior without securing them; otherwise, they
may present a danger to occupants e.g., during
braking and evasive maneuvers.◀
Do not place anti-slip mats on the dash‐
board
Do not place anti-slip mats on the dashboard.
The mat materials could damage the dash‐
board.◀
Storage compartments The following storage compartments are avail‐
able in the vehicle interior:▷Glove compartment on the driver's and
front passenger side, refer to page 178.▷Storage compartment in the center con‐
sole, refer to page 180.▷Storage compartment in the center arm‐
rest, refer to page 179, in the front and
rear.▷Compartments in the doors.▷Pockets on the backrests of the front
seats.▷Net in the front passenger footwell.
Glove compartment
Front passenger side
Note Close the glove compartment again im‐
mediately
Close the glove compartment immediately af‐
ter use while driving; otherwise, injury may oc‐
cur during accidents.◀
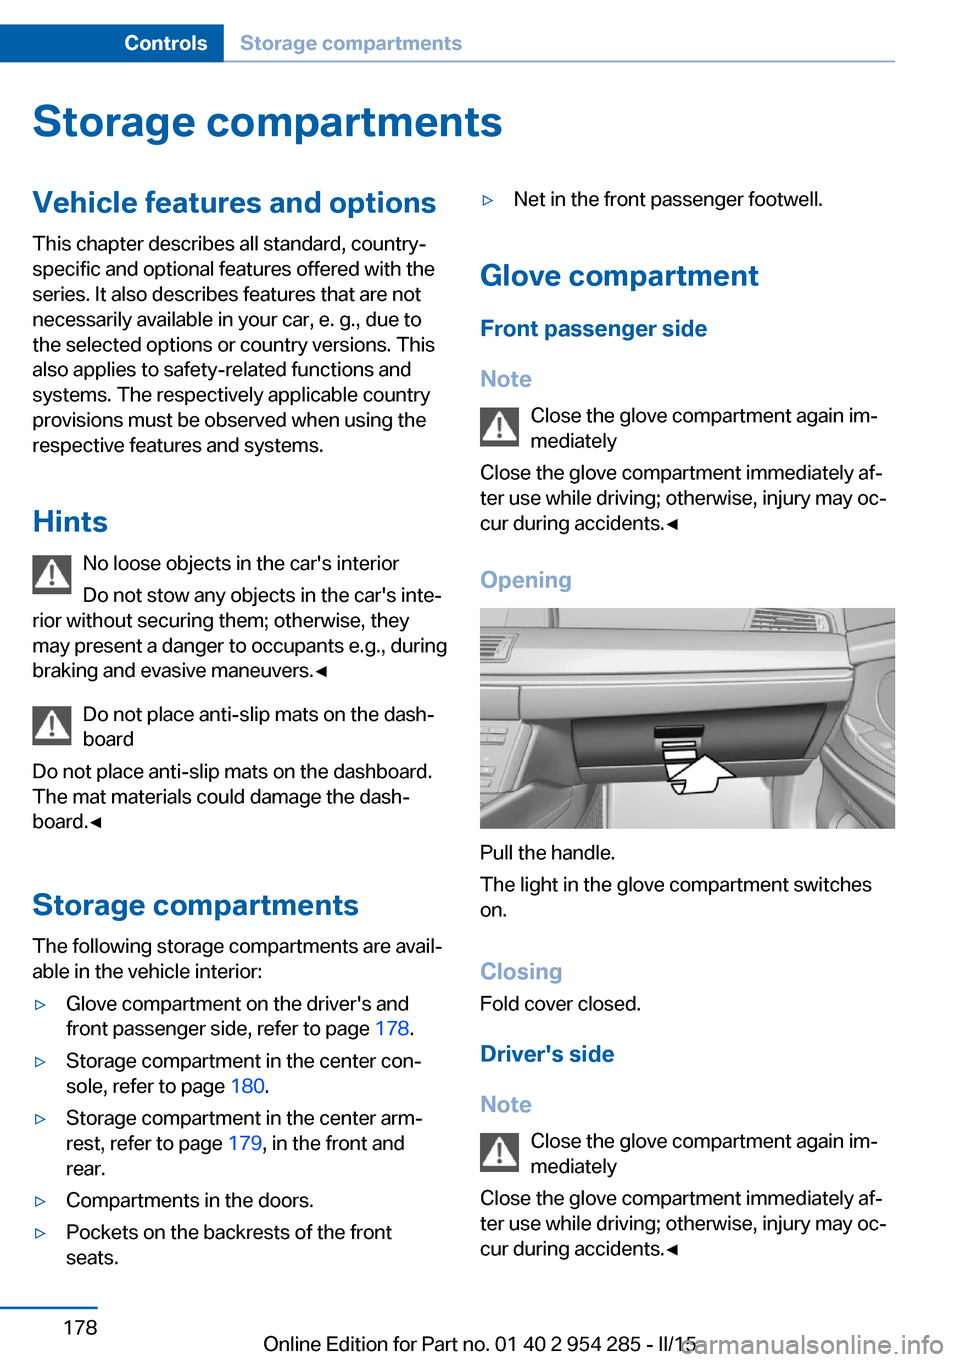
Opening
Pull the handle.
The light in the glove compartment switches
on.
ClosingFold cover closed.
Driver's side
Note Close the glove compartment again im‐
mediately
Close the glove compartment immediately af‐
ter use while driving; otherwise, injury may oc‐
cur during accidents.◀
Seite 178ControlsStorage compartments178
Online Edition for Part no. 01 40 2 954 285 - II/15
Page 183 of 263
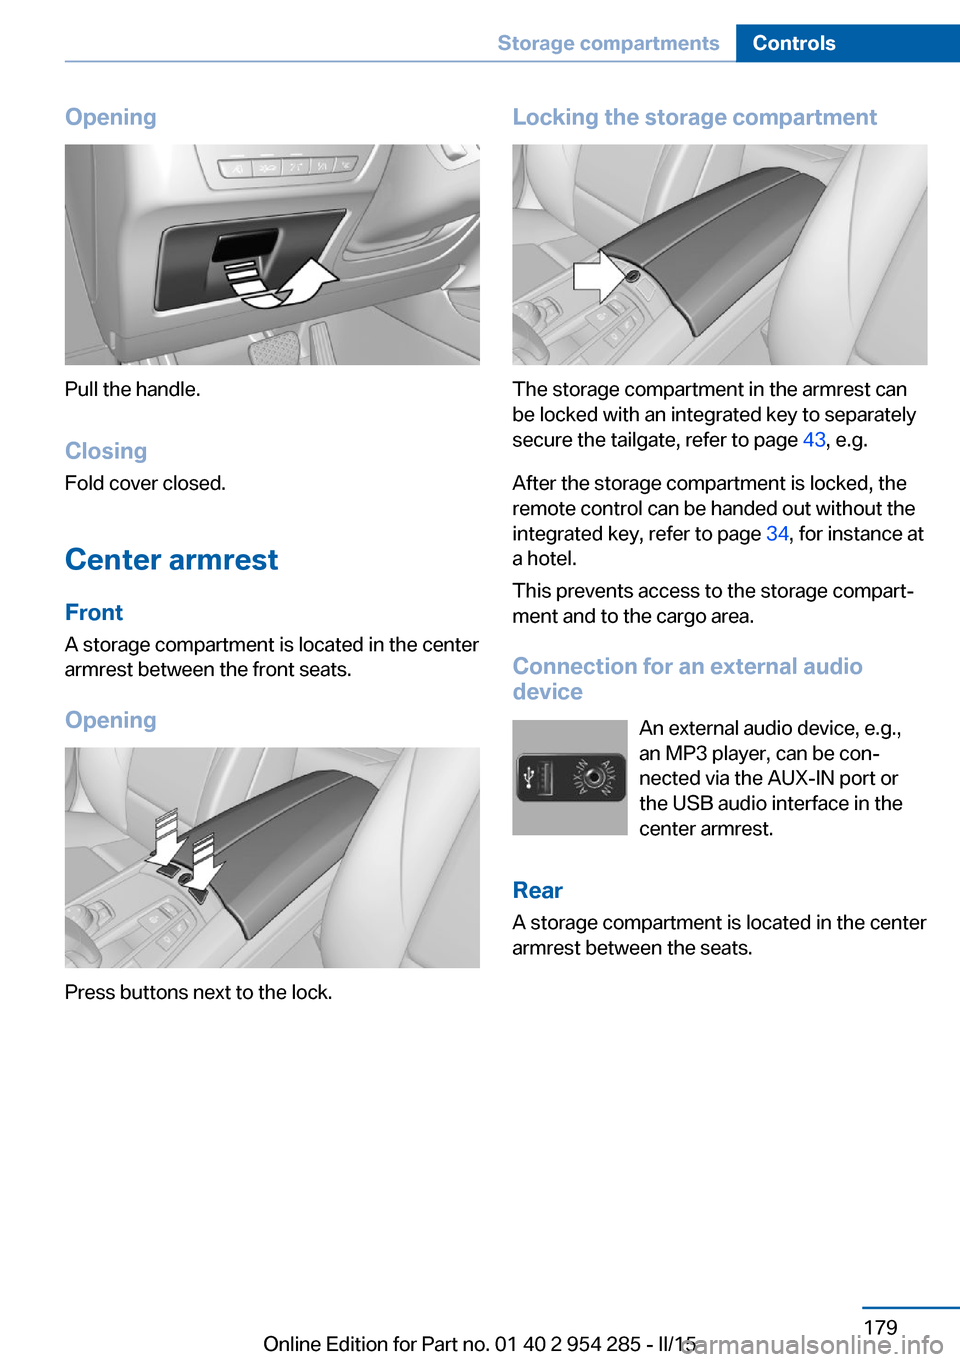
Opening
Pull the handle.ClosingFold cover closed.
Center armrest
Front
A storage compartment is located in the center
armrest between the front seats.
Opening
Press buttons next to the lock.
Locking the storage compartment
The storage compartment in the armrest can
be locked with an integrated key to separately
secure the tailgate, refer to page 43, e.g.
After the storage compartment is locked, the
remote control can be handed out without the
integrated key, refer to page 34, for instance at
a hotel.
This prevents access to the storage compart‐
ment and to the cargo area.
Connection for an external audio
device
An external audio device, e.g.,
an MP3 player, can be con‐
nected via the AUX-IN port or
the USB audio interface in the center armrest.
Rear
A storage compartment is located in the center
armrest between the seats.
Seite 179Storage compartmentsControls179
Online Edition for Part no. 01 40 2 954 285 - II/15
Page 255 of 263
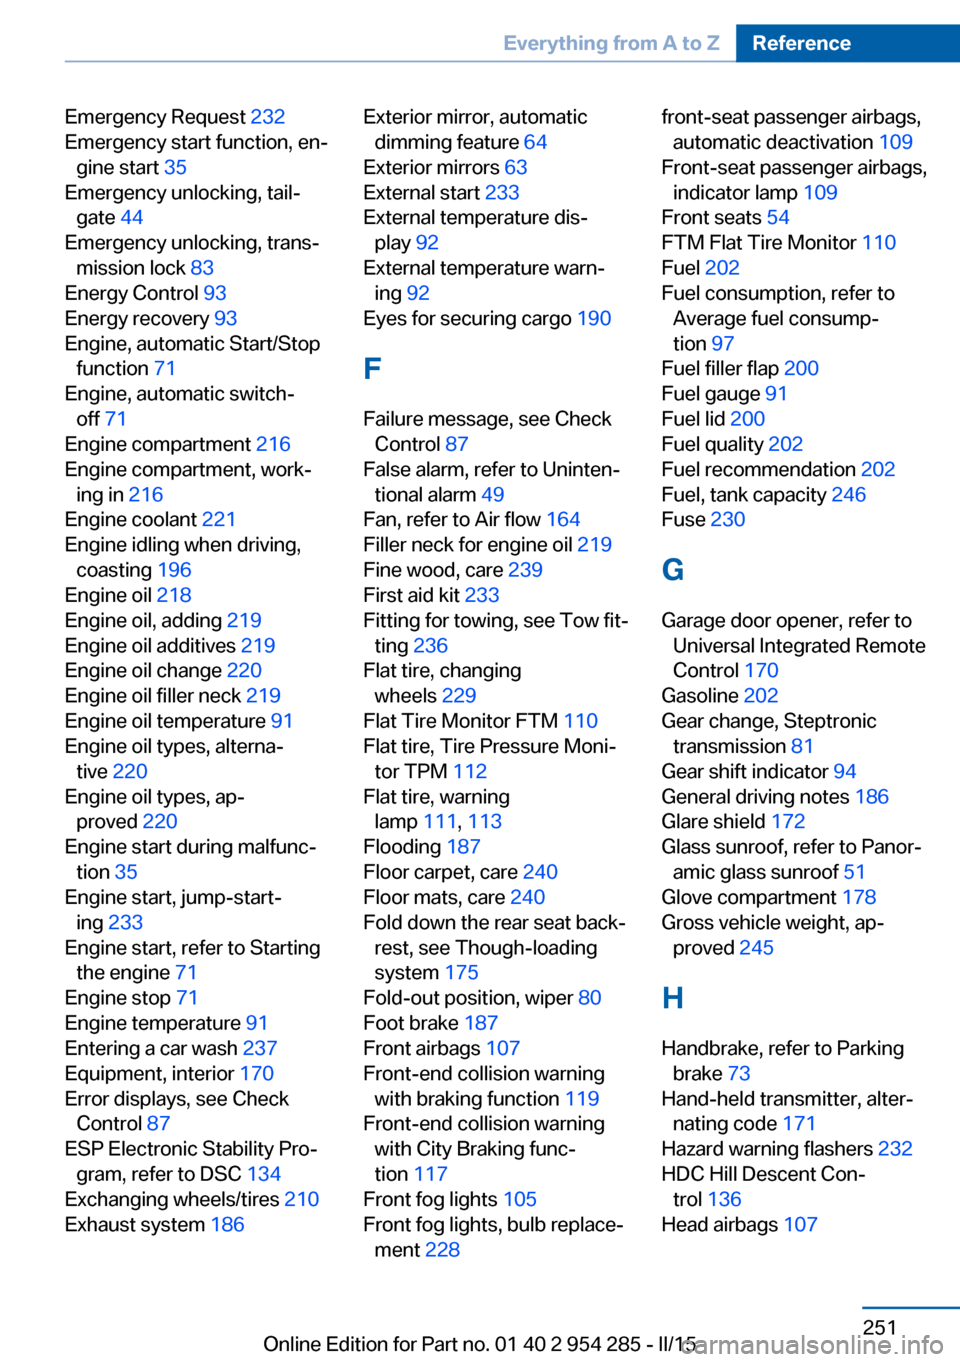
Emergency Request 232
Emergency start function, en‐ gine start 35
Emergency unlocking, tail‐ gate 44
Emergency unlocking, trans‐ mission lock 83
Energy Control 93
Energy recovery 93
Engine, automatic Start/Stop function 71
Engine, automatic switch- off 71
Engine compartment 216
Engine compartment, work‐ ing in 216
Engine coolant 221
Engine idling when driving, coasting 196
Engine oil 218
Engine oil, adding 219
Engine oil additives 219
Engine oil change 220
Engine oil filler neck 219
Engine oil temperature 91
Engine oil types, alterna‐ tive 220
Engine oil types, ap‐ proved 220
Engine start during malfunc‐ tion 35
Engine start, jump-start‐ ing 233
Engine start, refer to Starting the engine 71
Engine stop 71
Engine temperature 91
Entering a car wash 237
Equipment, interior 170
Error displays, see Check Control 87
ESP Electronic Stability Pro‐ gram, refer to DSC 134
Exchanging wheels/tires 210
Exhaust system 186 Exterior mirror, automatic
dimming feature 64
Exterior mirrors 63
External start 233
External temperature dis‐ play 92
External temperature warn‐ ing 92
Eyes for securing cargo 190
F
Failure message, see Check Control 87
False alarm, refer to Uninten‐ tional alarm 49
Fan, refer to Air flow 164
Filler neck for engine oil 219
Fine wood, care 239
First aid kit 233
Fitting for towing, see Tow fit‐ ting 236
Flat tire, changing wheels 229
Flat Tire Monitor FTM 110
Flat tire, Tire Pressure Moni‐ tor TPM 112
Flat tire, warning lamp 111, 113
Flooding 187
Floor carpet, care 240
Floor mats, care 240
Fold down the rear seat back‐ rest, see Though-loading
system 175
Fold-out position, wiper 80
Foot brake 187
Front airbags 107
Front-end collision warning with braking function 119
Front-end collision warning with City Braking func‐
tion 117
Front fog lights 105
Front fog lights, bulb replace‐ ment 228 front-seat passenger airbags,
automatic deactivation 109
Front-seat passenger airbags, indicator lamp 109
Front seats 54
FTM Flat Tire Monitor 110
Fuel 202
Fuel consumption, refer to Average fuel consump‐
tion 97
Fuel filler flap 200
Fuel gauge 91
Fuel lid 200
Fuel quality 202
Fuel recommendation 202
Fuel, tank capacity 246
Fuse 230
G
Garage door opener, refer to Universal Integrated Remote
Control 170
Gasoline 202
Gear change, Steptronic transmission 81
Gear shift indicator 94
General driving notes 186
Glare shield 172
Glass sunroof, refer to Panor‐ amic glass sunroof 51
Glove compartment 178
Gross vehicle weight, ap‐ proved 245
H
Handbrake, refer to Parking brake 73
Hand-held transmitter, alter‐ nating code 171
Hazard warning flashers 232
HDC Hill Descent Con‐ trol 136
Head airbags 107 Seite 251Everything from A to ZReference251
Online Edition for Part no. 01 40 2 954 285 - II/15