2016 Alfa Romeo Giulia fuel
[x] Cancel search: fuelPage 120 of 204

The table below shows the approximate
distances for each area fig. 115:
ZoneDistance from the
rear of the vehicle
Red 0 ÷ 11.8 in (30 cm)
Yellow11.8 in
(30 cm) ÷ 3.3
ft (1 m)
Green 3.3 ft (1 m) or more
IMPORTANT When parking, take the
utmost care over obstacles that may be
above or under the camera range. of the
video cam.
WARNING
115)Parking and other potentially
dangerous manoeuvres are, however,
always the driver’s responsibility. While
carrying out these manoeuvres, always
make sure that no people (especially
children) or animals are in the area
concerned. The camera is an aid for the
driver, but the driver must never allow
his/her attention to lapse during potentially
dangerous manoeuvres, even those
executed at low speeds. Always keep a slow
speed, so as to promptly brake in the case of
obstacles.
IMPORTANT
47)It is vital, for correct operation, that the
camera is always kept clean and free from
any mud, dirt, snow or ice. Be careful not to
scratch or damage the camera while cleaning
it. Avoid using dry, rough or hard cloths. The
camera must be washed using clean water,
with the addition of car shampoo if
necessary. In washing stations which use
steam or high-pressure jets, clean the
camera quickly, keeping the nozzle more
than 10 cm away from the sensors. Also, do
not apply stickers to the camera.
REFUELLING THE VEHICLE
Always stop the engine before refuelling.
PETROL ENGINES
Only use unleaded petrol with a number
of octanes (R.O.N.) not lower than 95
(EN228 specification).
116) 117) 118)
DIESEL ENGINES
Only use Diesel for motor vehicles
(EN590 specification).
REFUELLING PROCEDURE
The fuel flap is unlocked when the central
door locking system is released, while it
is automatically locked when the central
locking system is applied.
Opening the flap
To refuel proceed as follows:
open flap fig. 116, pressing on the
point shown by the arrow;
remove the closing cap;
introduce the dispenser in the filler
and refuel;
118
STARTING AND DRIVING
Page 121 of 204

after refuelling, before removing the
dispenser, wait for at least 10 seconds in
order for the fuel to flow inside the tank;
then remove the dispenser from the
filler, close the plug and then close the
flap.
The label indicates the fuel type
(UNLEADED FUEL=petrol,
DIESEL=diesel fuel), fig. 117.Emergency fuel flap opening
In the event of an emergency the fuel flap
can be opened by operating from inside
the boot.
Proceed as follows:
open the boot and reach the
emergency opening cable placed on the
side of the fuel filler;
pull the cord to unlock the fuel flap,
open the fuel flap by pressing on it
(see the previous instructions).
IMPORTANT If the filler compartment is
washed with a high-pressure jet, keep it
at a distance of at least 10 in (20 cm).
WARNING
116)Do not apply any object/plug to the
end of the filler which is not provided for the
car. The use of non-compliant objects/plugs
could cause a pressure increase inside the
tank, resulting in dangerous situations.
117)Do not bring naked flames or lit
cigarettes near to the fuel filler: fire risk.
Keep your face away from the fuel filler to
prevent breathing in harmful vapours.
118)Do not use a mobile phone near the
refuelling pump: risk of fire.
11607206S0001EM
11707206S0002EM
119
Page 123 of 204

A punctured tyre or a burnt-out bulb?
At times, a problem may interfere with our journey.
The pages on emergencies can help you to deal with critical
situations independently and with calm.
In an emergency we recommend that you call the freephone
number found in the Warranty Booklet.
It is also possible to call the national or international universal
freephone number to search for the nearest Alfa Romeo
Dealership.
IN AN EMERGENCY
HAZARD WARNING LIGHTS.......................122
REPLACING A BULB............................122
REPLACING FUSES . ...........................127
TIRE REPAIR KIT . .............................132
EMERGENCY STARTING.........................134
FUEL CUT-OFF SYSTEM.........................137
BROKEN-DOWN VEHICLE TOWING . . ................138
TOWING THE VEHICLE ..........................138
Page 138 of 204

Cable connection
54)
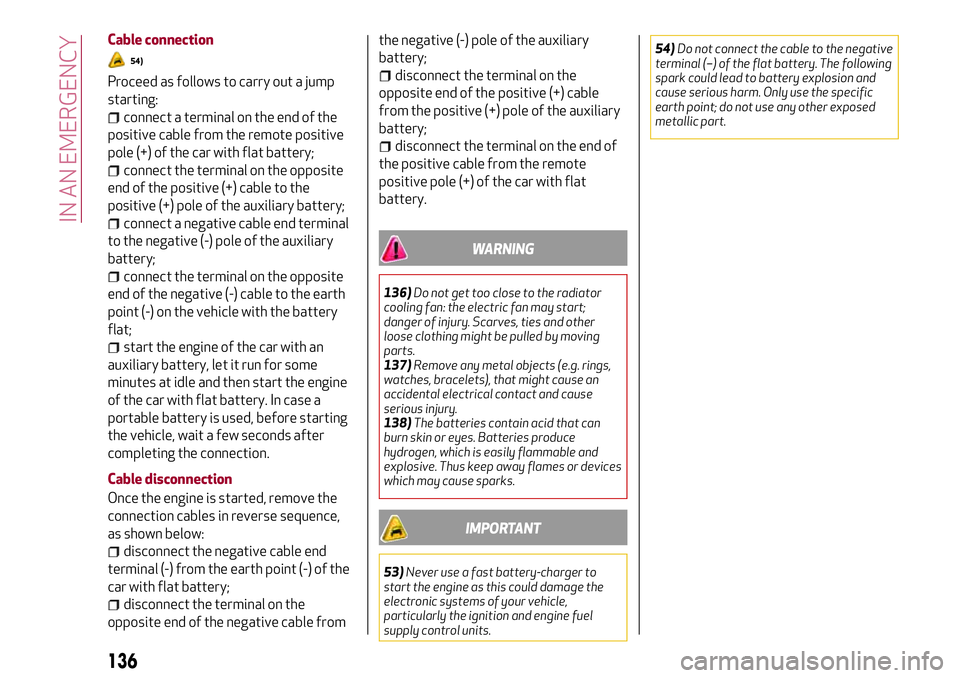
Proceed as follows to carry out a jump
starting:
connect a terminal on the end of the
positive cable from the remote positive
pole (+) of the car with flat battery;
connect the terminal on the opposite
end of the positive (+) cable to the
positive (+) pole of the auxiliary battery;
connect a negative cable end terminal
to the negative (-) pole of the auxiliary
battery;
connect the terminal on the opposite
end of the negative (-) cable to the earth
point (-) on the vehicle with the battery
flat;
start the engine of the car with an
auxiliary battery, let it run for some
minutes at idle and then start the engine
of the car with flat battery. In case a
portable battery is used, before starting
the vehicle, wait a few seconds after
completing the connection.
Cable disconnection
Once the engine is started, remove the
connection cables in reverse sequence,
as shown below:
disconnect the negative cable end
terminal (-) from the earth point (-) of the
car with flat battery;
disconnect the terminal on the
opposite end of the negative cable fromthe negative (-) pole of the auxiliary
battery;
disconnect the terminal on the
opposite end of the positive (+) cable
from the positive (+) pole of the auxiliary
battery;
disconnect the terminal on the end of
the positive cable from the remote
positive pole (+) of the car with flat
battery.
WARNING
136)Do not get too close to the radiator
cooling fan: the electric fan may start;
danger of injury. Scarves, ties and other
loose clothing might be pulled by moving
parts.
137)Remove any metal objects (e.g. rings,
watches, bracelets), that might cause an
accidental electrical contact and cause
serious injury.
138)The batteries contain acid that can
burn skin or eyes. Batteries produce
hydrogen, which is easily flammable and
explosive. Thus keep away flames or devices
which may cause sparks.
IMPORTANT
53)Never use a fast battery-charger to
start the engine as this could damage the
electronic systems of your vehicle,
particularly the ignition and engine fuel
supply control units.54)Do not connect the cable to the negative
terminal (–) of the flat battery. The following
spark could lead to battery explosion and
cause serious harm. Only use the specific
earth point; do not use any other exposed
metallic part.
136
IN AN EMERGENCY
Page 139 of 204

FUEL CUT-OFFSYSTEM
DESCRIPTION
139)
Depending on the type and violence of
the impact, the control unit of the ORC
occupant protection systems determines
whether to activate the airbags and the
front seatbelt pretensioners and whether
to immediately interrupt the current
from the batteries to the supply pumps
and to the devices that operate the
engine. The power from the battery is
interrupted by "skipping" the pyrotechnic
fuse placed on the fuse box next to the
positive pole of the battery.
When the fuse is "skipped", only some
services, necessary for the safety of the
vehicle (eg: door locks, anti-theft device,
etc.), remain powered.
IMPORTANT After the impact, carefully
check the vehicle for fuel leaks, for
instance in the engine compartment,
under the vehicle or near the tank area.
IMPORTANT Contact an Alfa Romeo
Dealership to have the system checked.
WARNING
139)If, after an impact, you smell fuel or
notice leaks from the fuel system, do not
reactivate the system to avoid the risk of
fire.
137
Page 144 of 204

SCHEDULED SERVICING
Correct servicing is crucial for
guaranteeing a long life for the vehicle
under the best conditions.
For this reason, Alfa Romeo has planned
a series of checks and services at fixed
distance intervals and, for
versions/markets, where provided, at
fixed time intervals, as described in the
Scheduled Servicing Plan.
Before each service, it is always
necessary to carefully follow the
instructions in the Scheduled Servicing
Plan (e.g. periodically check level of
fluids, tyre pressure, etc.).
Scheduled Servicing is offered by an Alfa
Romeo Dealership according to a set
time schedule. If, during each operation,
in addition to the ones scheduled, the
need arises for further replacements or
repairs, these may be carried out with the
owner's explicit consent only.
IMPORTANT Scheduled Servicing
Coupons are required by the
Manufacturer. Failure to have them
carried out may invalidate the warranty.
It is advisable to inform the Alfa Romeo
Dealership of any small operating
irregularities without waiting for the next
service.
PERIODIC CHECKS
Every year or every600mi (1,000 km) or
before long trips check and, if necessary,
top up:
engine coolant level;
brake fluid level (if insufficient, see an
Alfa Romeo dealership as soon as
possible);
windscreen washer fluid level;
tyre inflation pressure and condition;
operation of lighting system
(headlights, direction indicators, hazard
warning lights, etc.);
operation of screen washing/wiping
system and positioning/wear of wiper
blades.
Every1,800mi (3,000 km), check and
top up if required: engine oil level.
HEAVY USAGE OF THE CAR
If the vehicle is used under one of the
following conditions:
dusty roads;
short, repeated journeys (less than
4-5 mi (7-8 km)) at sub-zero outside
temperatures;
engine often idling or driving long
distances at low speeds or long periods
of inactivity;
in the event of a long period of
inactivity;
the following checks must be carried outmore often than indicated in the
Scheduled Servicing Plan:
check front and rear disc brake pad
condition and wear;
check cleanliness of bonnet and boot
locks, cleanliness and lubrication of
linkage;
visually inspect conditions of: engine,
gearbox, transmission, pipes and hoses
(exhaust/fuel system/brakes) and rubber
elements (gaiters/sleeves/bushes, etc.);
check battery charge and battery fluid
level (electrolyte);
visually inspect conditions of the
accessory drive belts;
check and, if necessary, change engine
oil and replace oil filter;
check and, if necessary, replace pollen
filter;
check and, if necessary, replace air
cleaner;
check and, if necessary, replace the
Bad Fuel fuel filter (where available).
142
SERVICING AND CARE
Page 145 of 204

SCHEDULED SERVICING PLAN (2.2 JTD diesel engine versions)
The checks listed in the Scheduled Servicing Plan, after reaching 120,000 mi (200,000 km)/10 years, must be cyclically repeated
starting from the first interval, thus following the same intervals as before.
Thousands of miles12 24 36 48 60 72 84 96 108 120
Thousands of kilometres20 40 60 80 100 120 140 160 180 200
Years12345678910
Check battery charge status with the proper instrument●●●●●●●●●●
Check tyre condition/wear and adjust pressure, if necessary.
Check the Tyre Repair Kit recharge condition and expiry date●●●●●●●●●●
Check operation of lighting system (headlights, direction
indicators, hazard warning lights, boot, passenger
compartment, glove compartment, instrument panel warning
lights, etc.)
●●●●●●●●●●
Check and, if necessary, top up fluid levels (1)●●●●●●●●●●
Check exhaust emissions/smokiness●●●●●●●●●●
Use the diagnosis socket to check supply/engine
management systems operation, emissions and, for
versions/markets, where provided, engine oil degradation (2)
●●●●●●●●●●
Visually inspect conditions of: exterior bodywork, underbody
protection, pipes and hoses (exhaust, fuel system, brakes),
rubber elements (gaiters, sleeves, bushes, etc.)
●●●●●
Check position/wear of front windscreen wiper blade●●●●●
(1) Top up using the fluids indicated in the “Fluids and lubricants” paragraph of the “Technical data” chapter and only after checking that the system is
intact.
(2) If the vehicle diagnostics shows the oil to be degraded to less than 20%, replacing the engine oil and filter is advised.
143
Page 146 of 204

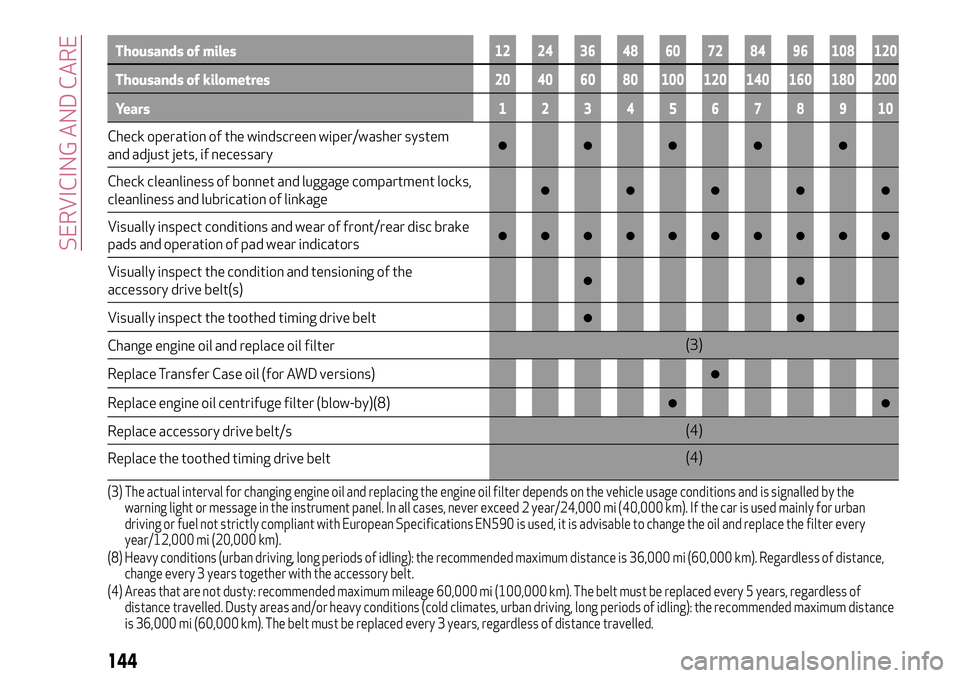
Thousands of miles12 24 36 48 60 72 84 96 108 120
Thousands of kilometres20 40 60 80 100 120 140 160 180 200
Years12345678910
Check operation of the windscreen wiper/washer system
and adjust jets, if necessary●●●●●
Check cleanliness of bonnet and luggage compartment locks,
cleanliness and lubrication of linkage●●●●●
Visually inspect conditions and wear of front/rear disc brake
pads and operation of pad wear indicators●●●●●●●●●●
Visually inspect the condition and tensioning of the
accessory drive belt(s)●●
Visually inspect the toothed timing drive belt●●
Change engine oil and replace oil filter(3)
Replace Transfer Case oil (for AWD versions)
●
Replace engine oil centrifuge filter (blow-by)(8)●●
Replace accessory drive belt/s(4)
Replace the toothed timing drive belt(4)
(3) The actual interval for changing engine oil and replacing the engine oil filter depends on the vehicle usage conditions and is signalled by the
warning light or message in the instrument panel. In all cases, never exceed 2 year/24,000 mi (40,000 km). If the car is used mainly for urban
driving or fuel not strictly compliant with European Specifications EN590 is used, it is advisable to change the oil and replace the filter every
year/12,000 mi (20,000 km).
(8) Heavy conditions (urban driving, long periods of idling): the recommended maximum distance is 36,000 mi (60,000 km). Regardless of distance,
change every 3 years together with the accessory belt.
(4) Areas that are not dusty: recommended maximum mileage 60,000 mi (100,000 km). The belt must be replaced every 5 years, regardless of
distance travelled. Dusty areas and/or heavy conditions (cold climates, urban driving, long periods of idling): the recommended maximum distance
is 36,000 mi (60,000 km). The belt must be replaced every 3 years, regardless of distance travelled.
144
SERVICING AND CARE