Page 44 of 356
GENERAL SPECIFICATIONS
2-1
EAS1SM5053
GENERAL SPECIFICATIONS
Model
Model 1SM5 (USA) (CAN)
1SM6 (EUR)
1SM7 (JPN)
1SM8 (AUS) (NZL) (ZAF)
Dimensions
Overall length 2165 mm (85.2 in) (USA) (CAN) (AUS) (NZL)
(ZAF)
2170 mm (85.4 in) (EUR) (JPN)
Overall width 825 mm (32.5 in)
Overall height 1280 mm (50.4 in) (USA) (CAN) (EUR) (JPN)
1275 mm (50.2 in) (AUS) (NZL) (ZAF)
Seat height 965 mm (38.0 in) (USA) (CAN) (EUR) (JPN)
960 mm (37.8 in) (AUS) (NZL) (ZAF)
Wheelbase 1475 mm (58.1 in)
Ground clearance 325 mm (12.8 in) (USA) (CAN) (AUS) (NZL)
(ZAF)
330 mm (13.0 in) (EUR) (JPN)
Weight
Curb weight 105 kg (231 lb)
Page 46 of 356

ENGINE SPECIFICATIONS
2-3
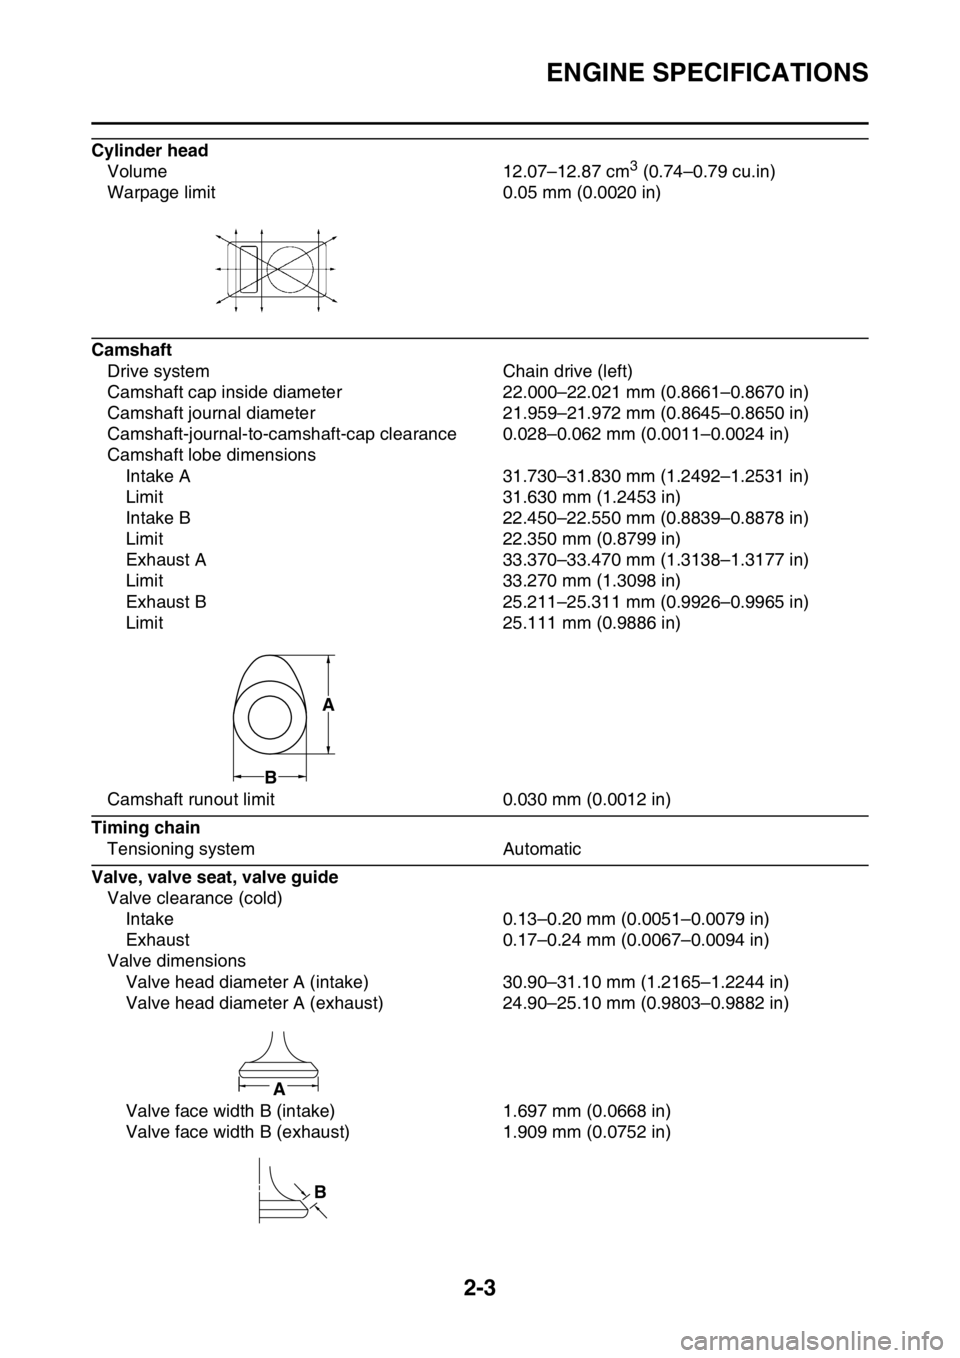
Cylinder head
Volume 12.07–12.87 cm3 (0.74–0.79 cu.in)
Warpage limit 0.05 mm (0.0020 in)
Camshaft
Drive system Chain drive (left)
Camshaft cap inside diameter 22.000–22.021 mm (0.8661–0.8670 in)
Camshaft journal diameter 21.959–21.972 mm (0.8645–0.8650 in)
Camshaft-journal-to-camshaft-cap clearance 0.028–0.062 mm (0.0011–0.0024 in)
Camshaft lobe dimensions
Intake A 31.730–31.830 mm (1.2492–1.2531 in)
Limit 31.630 mm (1.2453 in)
Intake B 22.450–22.550 mm (0.8839–0.8878 in)
Limit 22.350 mm (0.8799 in)
Exhaust A 33.370–33.470 mm (1.3138–1.3177 in)
Limit 33.270 mm (1.3098 in)
Exhaust B 25.211–25.311 mm (0.9926–0.9965 in)
Limit 25.111 mm (0.9886 in)
Camshaft runout limit 0.030 mm (0.0012 in)
Timing chain
Tensioning system Automatic
Valve, valve seat, valve guide
Valve clearance (cold)
Intake 0.13–0.20 mm (0.0051–0.0079 in)
Exhaust 0.17–0.24 mm (0.0067–0.0094 in)
Valve dimensions
Valve head diameter A (intake) 30.90–31.10 mm (1.2165–1.2244 in)
Valve head diameter A (exhaust) 24.90–25.10 mm (0.9803–0.9882 in)
Valve face width B (intake) 1.697 mm (0.0668 in)
Valve face width B (exhaust) 1.909 mm (0.0752 in)
A
B
A
B
Page 48 of 356

ENGINE SPECIFICATIONS
2-5
Spring tilt (intake) 2.5 °/1.6 mm (2.5 °/0.06 in)
Spring tilt (exhaust) 2.5 °/1.5 mm (2.5 °/0.06 in)
Winding direction (intake) Clockwise
Winding direction (exhaust) Clockwise
Cylinder
Bore 77.000–77.010 mm (3.0315–3.0319 in)
Taper limit 0.050 mm (0.0020 in)
Out of round limit 0.050 mm (0.0020 in)
Piston
Piston-to-cylinder clearance 0.030–0.055 mm (0.0012–0.0022 in)
Limit 0.15 mm (0.006 in)
Diameter D 76.955–76.970 mm (3.0297–3.0303 in)
Height H 6.0 mm (0.24 in)
Offset 0.00 mm (0.0000 in)
Piston pin bore inside diameter 16.002–16.013 mm (0.6300–0.6304 in)
Limit 16.043 mm (0.6316 in)
Piston pin outside diameter 15.991–16.000 mm (0.6296–0.6299 in)
Limit 15.971 mm (0.6288 in)
Piston ring
Top ring
Ring type Barrel
Dimensions (B T) 0.90 2.70 mm (0.04 0.11 in)
End gap (installed) 0.15–0.25 mm (0.0059–0.0098 in)
Limit 0.50 mm (0.0197 in)
Ring side clearance 0.030–0.065 mm (0.0012–0.0026 in)
Limit 0.120 mm (0.0047 in)
Oil ring
Dimensions (B T) 1.50 2.25 mm (0.06 0.89 in)
End gap (installed) 0.10–0.35 mm (0.0039–0.0138 in)
H
D
T
B
B
T
Page 158 of 356

HANDLEBAR
4-34
3. Tighten:
• Lower handlebar holder nut4. Install:
• Handlebar grip “1”
▼▼▼▼▼▼▼▼▼▼▼▼▼▼▼▼▼▼▼▼▼▼▼▼▼▼▼▼▼▼▼▼
a. Slightly coat the handlebar left end with a
rubber adhesive.
b. Install the handlebar grip on the handlebar
by pressing the grip from the left side.
c. Wipe off any excess adhesive with a clean
cloth.
EWA13120
WARNING
Securely support the vehicle so that there is
no danger of it falling over.
TIP
Install the handlebar grip to the handlebar so
that the line “a” between the two arrow marks
faces straight upward.
▲▲▲▲▲▲▲▲▲▲▲▲▲▲▲▲▲▲▲▲▲▲▲▲▲▲▲▲▲▲▲▲
5. Install:
• Engine stop switch “1”
• Clutch lever “2”
• Clutch lever holder “3”
•Clamp “4”
TIP
• The engine stop switch, the clutch lever, and
the clutch lever holder should be installed ac-
cording to the dimensions shown.
• Pass the engine stop switch lead through the
middle of the clutch lever holder. Lower handlebar holder nut
40 Nm (4.0 m·kgf, 29 ft·lbf)
3
4
T R..
Engine stop switch screw
0.5 Nm (0.05 m·kgf, 0.36 ft·lbf)
Clutch lever holder bolt
5 Nm (0.5 m·kgf, 3.6 ft·lbf)
T R..
Page 207 of 356

CAMSHAFT
5-14
EAS1SM5210CHECKING THE CAMSHAFT
1. Check:
• Camshaft lobes
Blue discoloration/pitting/scratches Re-
place the camshaft.
2. Measure:
• Camshaft lobe dimensions “A” and “B”
Out of specification Replace the cam-
shaft.3. Measure:
• Camshaft runout
Out of specification Replace.
4. Measure:
• Camshaft-journal-to-camshaft-cap clear-
ance
Out of specification Measure the cam-
shaft journal diameter.
▼▼▼▼▼▼▼▼▼▼▼▼▼▼▼▼▼▼▼▼▼▼▼▼▼▼▼▼▼▼▼▼
a. Install the camshaft into the cylinder head.
b. Position a strip of Plastigauge® “1” onto the
camshaft journal as shown. Camshaft lobe dimensions
Intake A
31.730–31.830 mm (1.2492–
1.2531 in)
Limit
31.630 mm (1.2453 in)
Intake B
22.450–22.550 mm (0.8839–
0.8878 in)
Limit
22.350 mm (0.8799 in)
Exhaust A
33.370–33.470 mm (1.3138–
1.3177 in)
Limit
33.270 mm (1.3098 in)
Exhaust B
25.211–25.311 mm (0.9926–
0.9965 in)
Limit
25.111 mm (0.9886 in)
1
2
3
Camshaft runout limit
0.030 mm (0.0012 in)
Camshaft-journal-to-camshaft-
cap clearance
0.028–0.062 mm (0.0011–0.0024
in)
1