2015 YAMAHA XT1200Z brake light
[x] Cancel search: brake lightPage 86 of 118

PERIODIC MAINTENANCE AND ADJUSTMENT
6-22
6
EAU22283
Brake light switchesThe brake light, which is activated by
the brake pedal and brake lever,
should come on just before braking
takes effect. Since the brake light
switches are components of the cruise
control system, they must be adjusted
by a Yamaha dealer, who has the nec-
essary professional knowledge and ex-
perience.
EAU22393
Checkin g the front an d rear
b rake pa dsThe front and rear brake pads must be
checked for wear at the intervals spec-
ified in the periodic maintenance and
lubrication chart.
EAU36891
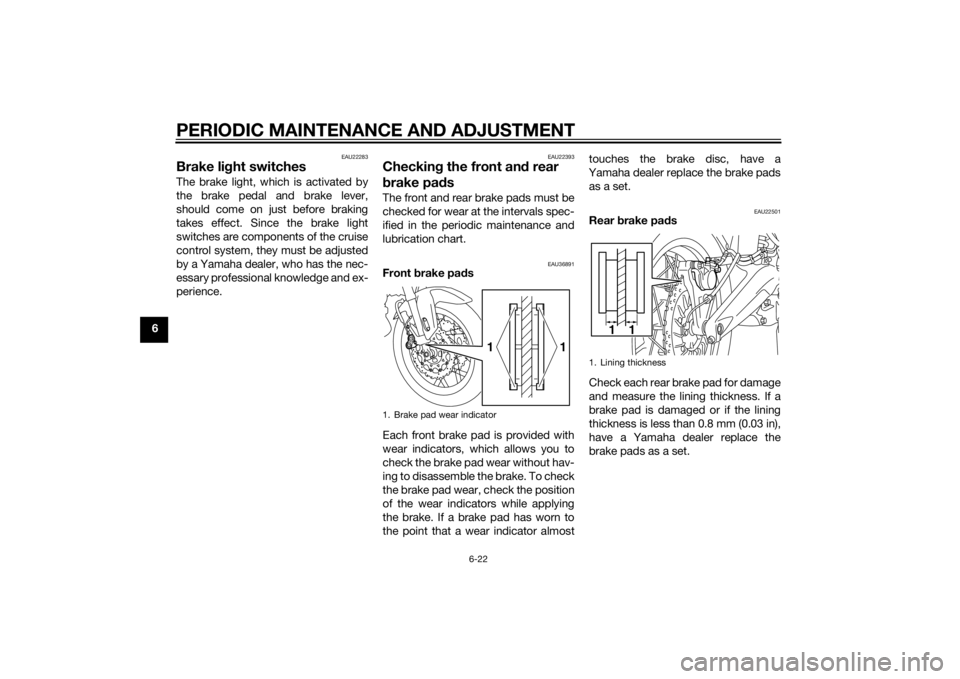
Front brake pa ds
Each front brake pad is provided with
wear indicators, which allows you to
check the brake pad wear without hav-
ing to disassemble the brake. To check
the brake pad wear, check the position
of the wear indicators while applying
the brake. If a brake pad has worn to
the point that a wear indicator almost touches the brake disc, have a
Yamaha dealer replace the brake pads as a set.
EAU22501
Rear brake pad s
Check each rear brake pad for damage
and measure the lining thickness. If a
brake pad is damaged or if the lining
thickness is less than 0.8 mm (0.03 in),
have a Yamaha dealer replace the
brake pads as a set.
1. Brake pad wear indicator
1
1
1. Lining thickness
11
U2BSE1E0.book Page 22 Thursday, July 31, 2014 4:31 PM
Page 94 of 118

PERIODIC MAINTENANCE AND ADJUSTMENT
6-30
6
EAU58961
Replacing the fusesThe fuse boxes and the ABS motor
fuse are located behind cowling A, and
the main fuse, the cruise control fuse
and the brake light fuse are located be-
hind cowling B. (See page 6-8.)
If a fuse is blown, replace it as follows.1. Turn the key to “OFF” and turn off the electrical circuit in question.
2. Remove the blown fuse, and then install a new fuse of the specified
amperage. WARNING! Do not use a fuse of a hi
gher ampera ge
ratin g than recommen ded to
avoi d causin g extensive d am-
a g e to the electrical system an d
possi bly a fire.
[EWA15132]
1. ABS motor fuse
2. ABS motor spare fuse
3. Main fuse
4. Spare fuse
5. Cruise control fuse
6. Brake light fuse
7. Fuse box123
5
4
67
1. Headlight fuse
2. ABS solenoid fuse
3. Electronic throttle valve fuse
4. Fuel injection system fuse
5. Backup fuse (for clock and immobilizer sys-
tem)
6. Radiator fan motor fuse
7. Ignition fuse
8. Signaling system fuse
9. ABS control unit fuse
10.Auxiliary DC jack fuse
11.Parking lighting fuse
12.O/P (option) fuse
13.Spare fuse
13456
2
7
8
9
10
13
11
12
13
U2BSE1E0.book Page 30 Thursday, July 31, 2014 4:31 PM
Page 95 of 118

PERIODIC MAINTENANCE AND ADJUSTMENT
6-31
6
3. Turn the key to “ON” and turn on
the electrical circuit in question to
check if the device operates.
4. If the fuse immediately blows again, have a Yamaha dealer
check the electrical system.
EAU39014
Replacin g a hea dlig ht bul bThis model is equipped with halogen
bulb headlights. If a headlight bulb
burns out, replace it as follows.NOTICE
ECA10651
Take care not to d amage the follow-
in g parts:
Hea dlig ht bul b
Do not touch the glass part of
the hea dlig ht bul b to keep it free
from oil, otherwise the transpar-
ency of the glass, the luminosity
of the bul b, an d the bul b life will
b e a dversely affected . Thor-
ou ghly clean off any dirt an d fin-
g erprints on the head lig ht bul b
usin g a cloth moistene d with al-
cohol or thinner.
Hea dlig ht lens
Do not affix any type of tinted
film or stickers to the hea dlig ht
lens.
Do not use a hea dlig ht bul b of a
watta ge hi gher than specified .
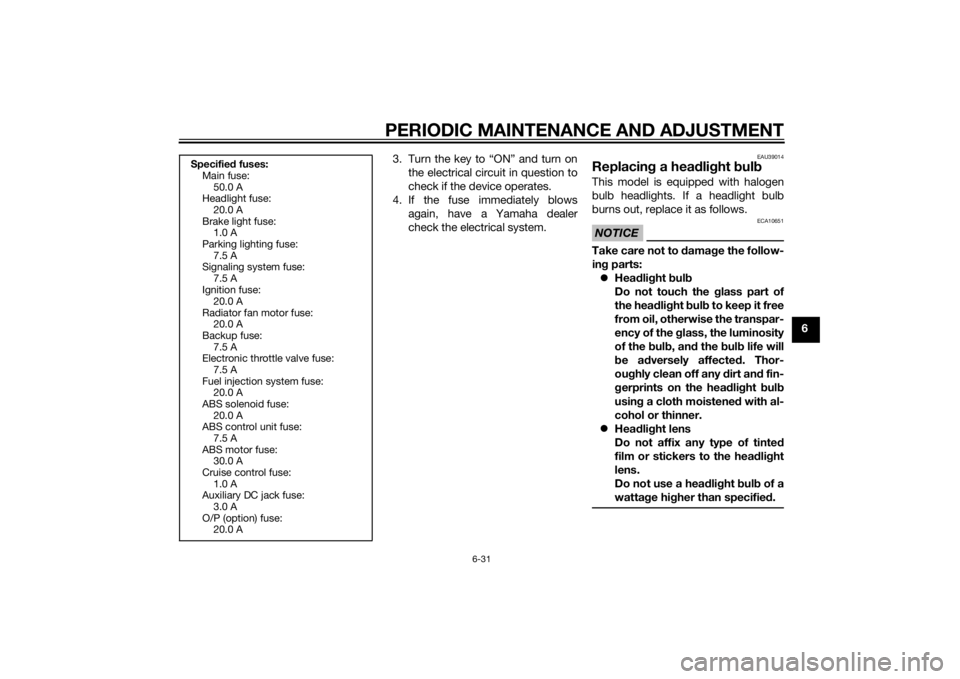
Specified fuses:
Main fuse:
50.0 A
Headlight fuse:
20.0 A
Brake light fuse: 1.0 A
Parking lighting fuse: 7.5 A
Signaling system fuse:
7.5 A
Ignition fuse: 20.0 A
Radiator fan motor fuse: 20.0 A
Backup fuse:
7.5 A
Electronic throttle valve fuse: 7.5 A
Fuel injection system fuse: 20.0 A
ABS solenoid fuse:
20.0 A
ABS control unit fuse: 7.5 A
ABS motor fuse: 30.0 A
Cruise control fuse:
1.0 A
Auxiliary DC jack fuse: 3.0 A
O/P (option) fuse: 20.0 A
U2BSE1E0.book Page 31 Thursday, July 31, 2014 4:31 PM
Page 99 of 118

PERIODIC MAINTENANCE AND ADJUSTMENT
6-35
6
EAU58590
Turn signal li ght an d tail/ brake
lig htThis model is equipped with LED-type
turn signal lights and an LED-type
tail/brake light.
If a turn signal light or the tail/brake
light does not come on, have a
Yamaha dealer check it.
EAU49722
Replacin g a license plate li ght
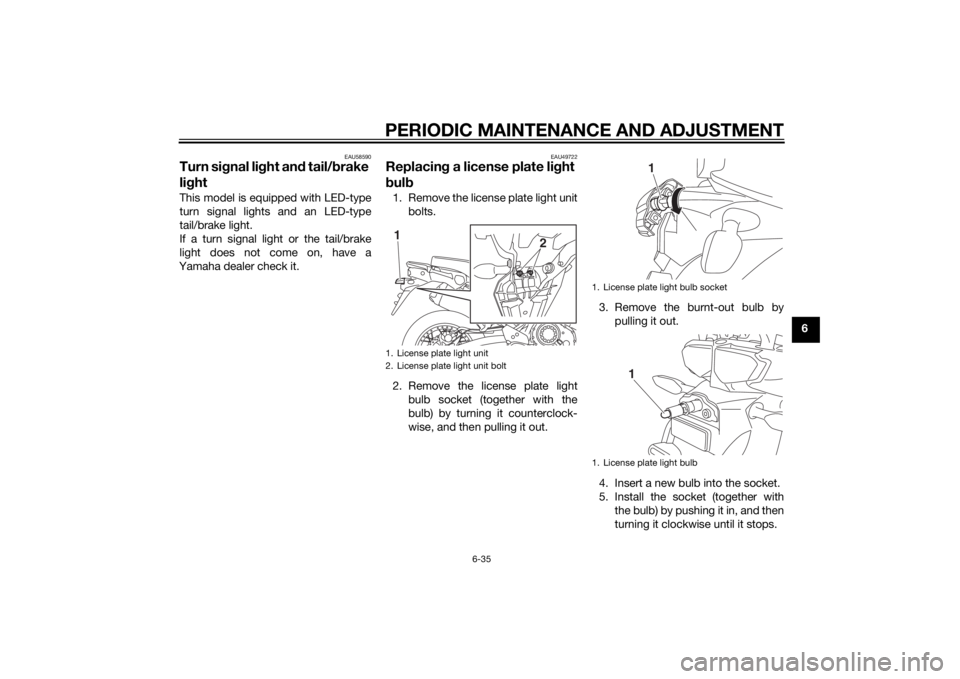
b ul b1. Remove the license plate light unit
bolts.
2. Remove the license plate light bulb socket (together with the
bulb) by turning it counterclock-
wise, and then pulling it out. 3. Remove the burnt-out bulb by
pulling it out.
4. Insert a new bulb into the socket.
5. Install the socket (together with the bulb) by pushing it in, and then
turning it clockwise until it stops.1. License plate light unit
2. License plate light unit bolt
2
1
1. License plate light bulb socket
1. License plate light bulb
1
1
U2BSE1E0.book Page 35 Thursday, July 31, 2014 4:31 PM
Page 106 of 118

MOTORCYCLE CARE AND STORAGE
7-3
7windshield. Before using them, make a
test by polishing an area which does
not affect your visibility.
After cleaning
1. Dry the motorcycle with a chamois or an absorbing cloth.
2. Use a chrome polish to shine chrome, aluminum and stainless-
steel parts, including the exhaust
system. (Even the thermally in-
duced discoloring of stainless-
steel exhaust systems can be re-
moved through polishing.)
3. To prevent corrosion, it is recom- mended to apply a corrosion pro-
tection spray on all metal,
including chrome- and nickel-plat-
ed, surfaces.
4. Use spray oil as a universal clean- er to remove any remaining dirt.
5. Touch up minor paint damage caused by stones, etc.
6. Wax all painted surfaces.
7. Let the motorcycle dry completely before storing or covering it.
WARNING
EWA11132
Contaminants on the brakes or tires
can cause loss of control. Make sure that there is no oil or
wax on the brakes or tires.
If necessary, clean the brake
d iscs an d b rake linin gs with a
re gular brake disc cleaner or
acetone, an d wash the tires with
warm water an d a mil d d eter-
g ent. Before ri din g at hi gher
speed s, test the motorcycle’s
b rakin g performance an d cor-
nerin g b ehavior.NOTICE
ECA10801
Apply spray oil an d wax spar-
in gly an d make sure to wipe off
any excess.
Never apply oil or wax to any
rubber an d plastic parts, but
treat them with a suitab le care
prod uct.
Avoi d usin g a brasive polishin g
compoun ds as they will wear
away the paint.
TIP Consult a Yamaha dealer for ad-
vice on what products to use.
Washing, rainy weather or humid
climates can cause the headlight
lens to fog. Turning the headlight
on for a short period of time will
help remove the moisture from the
lens.
U2BSE1E0.book Page 3 Thursday, July 31, 2014 4:31 PM
Page 111 of 118

SPECIFICATIONS
8-3
8
Electrical system:Ignition system:TCI
Charging system:
AC magnetoBattery:Model:YTZ12S
Voltage, capacity:
12 V, 11.0 AhHea dlig ht:Bulb type:
Halogen bulbBul b volta ge, watta ge × quantity:Headlight:
12 V, 55.0 W × 2
Tail/brake light: LED
Front turn signal light:
LED
Rear turn signal light: LED
Auxiliary light: 12 V, 5.0 W × 2
License plate light:
12 V, 5.0 W × 1
Meter lighting: LED
Neutral indicator light: LED
High beam indicator light:
LED
Oil level warning light: LED Turn signal indicator light:
LED
Engine trouble warning light: LED
ABS warning light:
LED
Cruise control “SET” indicator light: LED
Cruise control “ON” indicator light: LED
Immobilizer system indicator light:
LED
Traction control system indicator/warning
light:
LED
Fuses:Main fuse:50.0 A
Headlight fuse:
20.0 A
Brake light fuse: 1.0 A
Signaling system fuse: 7.5 A
Ignition fuse:
20.0 A
Parking lighting fuse: 7.5 A
Radiator fan motor fuse: 20.0 A
Fuel injection system fuse:
20.0 A
ABS control unit fuse: 7.5 A ABS motor fuse:
30.0 A
ABS solenoid fuse: 20.0 A
Cruise control fuse:
1.0 A
Auxiliary DC jack fuse: 3.0 A
Backup fuse: 7.5 A
Electronic throttle valve fuse:
7.5 A
O/P (option) fuse: 20.0 A
U2BSE1E0.book Page 3 Thursday, July 31, 2014 4:31 PM
Page 114 of 118

10-1
10
INDEXAABS ....................................................... 3-26
ABS warning light ................................... 3-5
Air filter element .................................... 6-17
Auxiliary DC jack ................................... 3-42
Auxiliary light bulb, replacing ................ 6-33BBattery .................................................. 6-28
Brake and clutch fluids, changing ........ 6-24
Brake and clutch levers, checking and lubricating ........................................... 6-25
Brake and shift pedals, checking and
lubricating ........................................... 6-25
Brake fluid level, checking .................... 6-23
Brake lever ............................................ 3-25
Brake lever free play, checking............. 6-21
Brake light switches.............................. 6-22
Brake pedal........................................... 3-26CCare ........................................................ 7-1
Carriers ................................................. 3-39
Catalytic converter ................................ 3-31
Clutch lever ................................. 3-24, 6-21
Coolant ................................................. 6-15
Cowlings, removing and installing .......... 6-8
Cruise control indicator lights ................. 3-4
Cruise control switches ........................ 3-23
Cruise control system ............................. 3-6DDimmer/Pass switch ............................. 3-23
D-mode (drive mode) ............................ 3-22EEngine break-in....................................... 5-4
Engine idling speed, checking .............. 6-17 Engine oil and oil filter
cartridge ........... 6-11
Engine serial number .............................. 9-1
Engine trouble warning light ................... 3-5
FFinal gear oil ......................................... 6-14
Front and rear brake pads, checking ... 6-22
Front fork, adjusting ............................. 3-35
Front fork, checking ............................. 6-27
Fuel ....................................................... 3-30
Fuel consumption, tips for reducing ...... 5-4
Fuel tank breather hose and overflow hose ................................................... 3-31
Fuel tank cap ........................................ 3-29
Fuses, replacing ................................... 6-30HHandlebar switches .............................. 3-22
Hazard switch....................................... 3-23
Headlight bulb, replacing ..................... 6-31
High beam indicator light ....................... 3-4
Horn switch .......................................... 3-23IIdentification numbers ............................ 9-1
Ignition circuit cut-off system ............... 3-40
Immobilizer system ................................ 3-1
Immobilizer system indicator light .......... 3-6
Indicator lights and warning lights ......... 3-4LLicense plate light bulb, replacing........ 6-35
Luggage strap holders ......................... 3-39MMain switch/steering lock....................... 3-2
Maintenance and lubrication, periodic ... 6-4
Maintenance, emission control
system.................................................. 6-3 Matte color, caution ................................7-1
Menu switch..........................................3-23
Model label .............................................9-1
Multi-function meter unit .......................3-10
NNeutral indicator light ..............................3-4OOil level warning light ..............................3-4PParking ....................................................5-5
Part locations ..........................................2-1RRider seat ..............................................3-32
Rider seat height, adjusting ..................3-33SSafety information ...................................1-1
Select switch.........................................3-24
Shifting ....................................................5-2
Shift pedal .............................................3-25
Shock absorber assembly, adjusting ....3-37
Sidestand ..............................................3-40
Sidestand, checking and lubricating.....6-26
Spark plugs, checking ..........................6-10
Specifications .........................................8-1
Start/Engine stop switch .......................3-23
Starting the engine ..................................5-1
Steering, checking ................................6-27
Storage ...................................................7-4
Supporting the motorcycle ...................6-36
Swingarm pivots, lubricating ................6-26TThrottle grip and cable, checking and
lubricating ...........................................6-24
Throttle grip free play, checking ...........6-17
U2BSE1E0.book Page 1 Thursday, July 31, 2014 4:31 PM
Page 115 of 118

INDEX
10-2
10
Tires ...................................................... 6-18
Tool kit .................................................... 6-2
Traction control system ........................ 3-27
Traction control system indicator/warning light.......................... 3-5
Troubleshooting.................................... 6-37
Troubleshooting charts......................... 6-38
Turn signal indicator lights ..................... 3-4
Turn signal light and tail/brake light ..... 6-35
Turn signal switch................................. 3-23VValve clearance .................................... 6-18
Vehicle identification number ................. 9-1WWheel bearings, checking .................... 6-28
Wheels .................................................. 6-20
Windshield ............................................ 3-34
U2BSE1E0.book Page 2 Thursday, July 31, 2014 4:31 PM