Page 462 of 540
4628-2. Steps to take in an emergency
YARIS_F_WE_52G04E
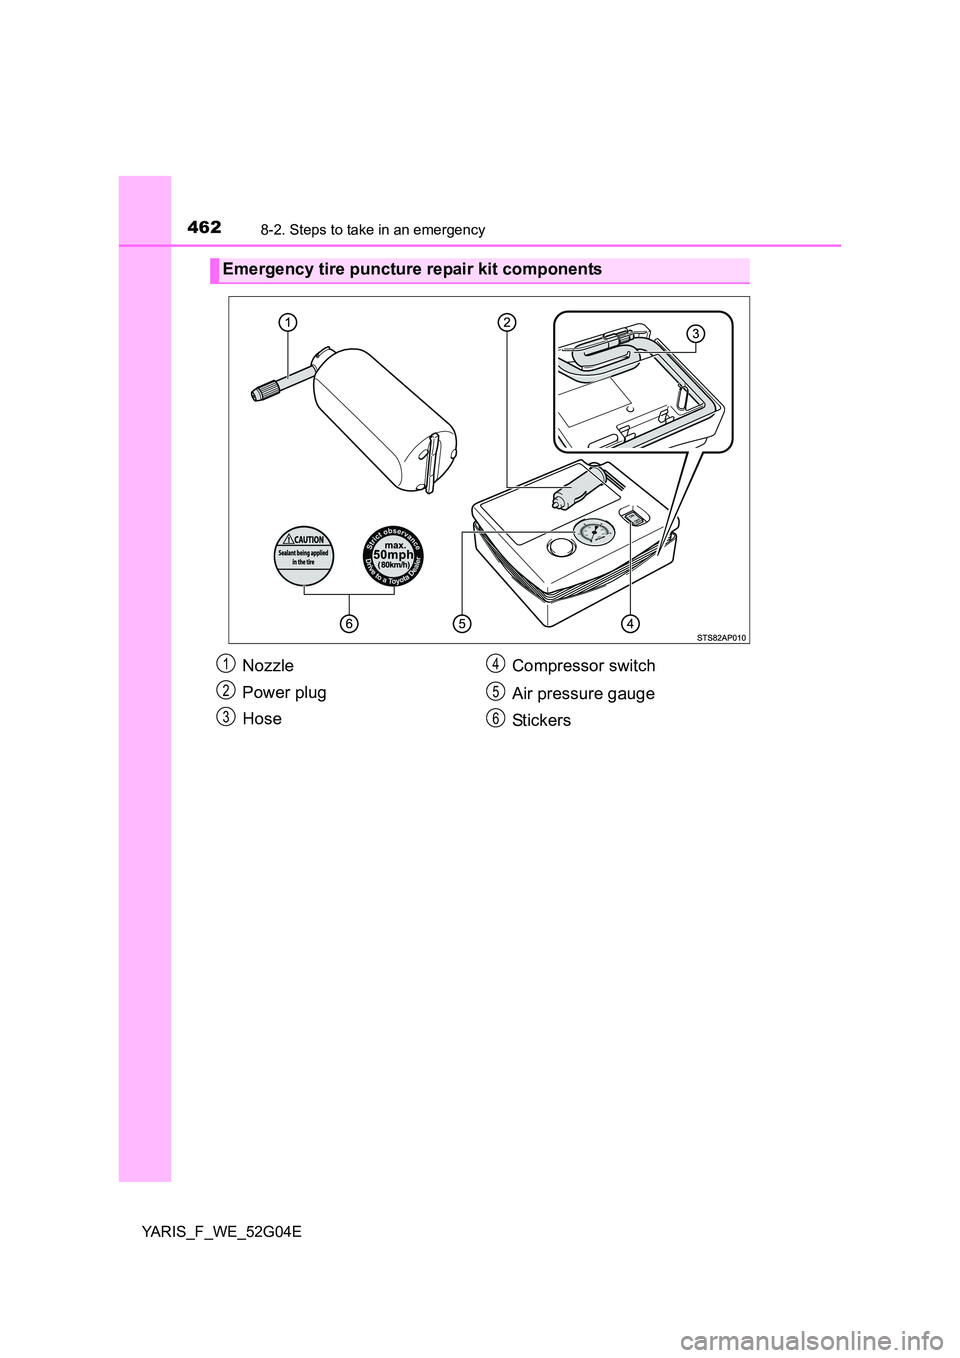
Emergency tire puncture repair kit components
Nozzle
Power plug
Hose
Compressor switch
Air pressure gauge
Stickers
1
2
3
4
5
6
Page 463 of 540
4638-2. Steps to take in an emergency
8
When trouble arises
YARIS_F_WE_52G04E
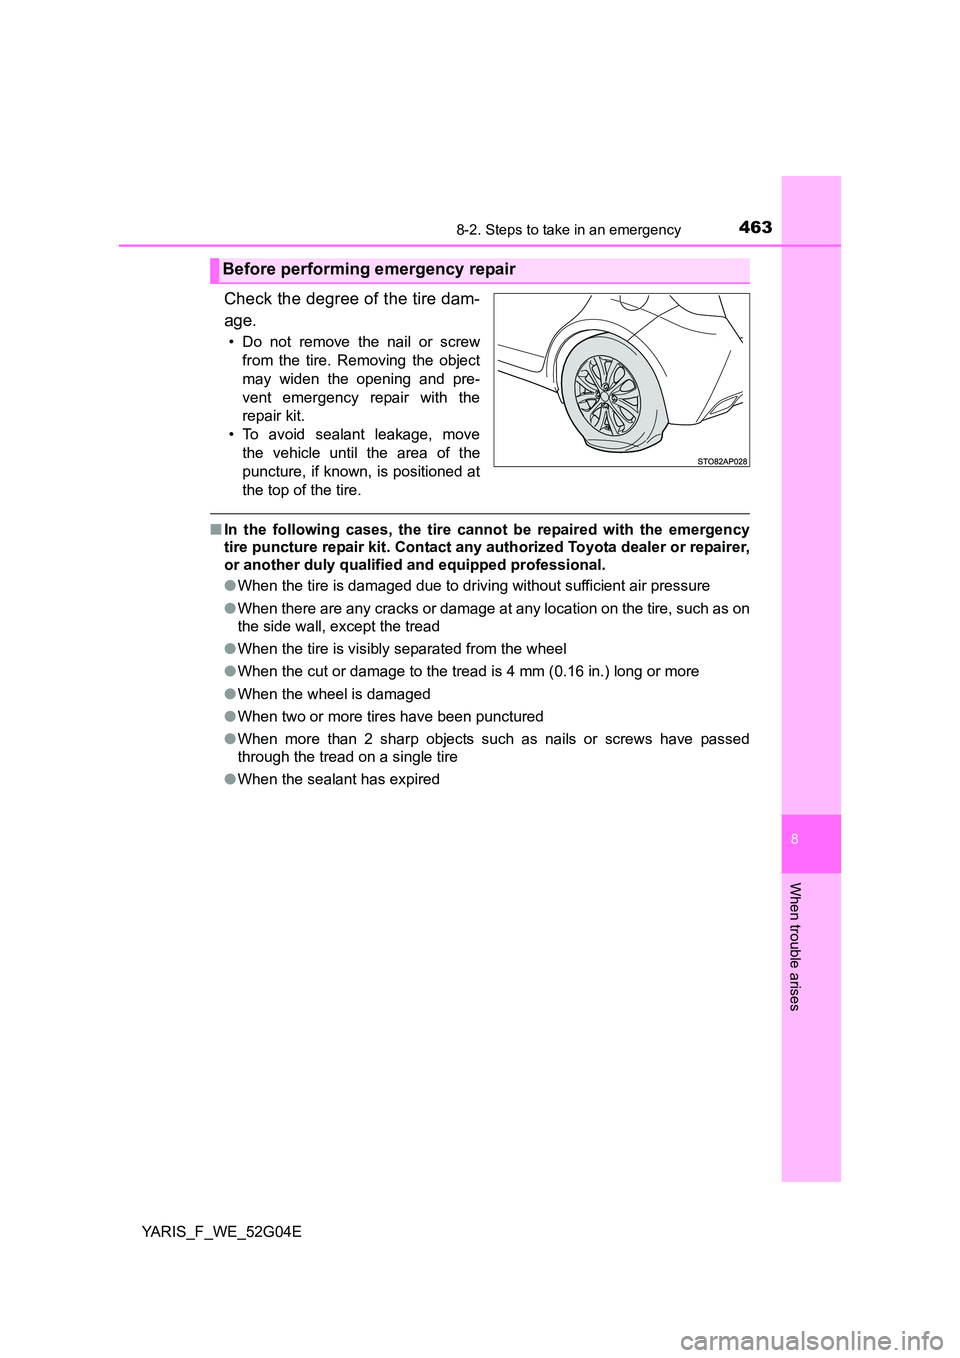
Check the degree of the tire dam-
age.
• Do not remove the nail or screw
from the tire. Removing the object
may widen the opening and pre-
vent emergency repair with the
repair kit.
• To avoid sealant leakage, move
the vehicle until the area of the
puncture, if known, is positioned at
the top of the tire.
■ In the following cases, the tire cannot be repaired with the emergency
tire puncture repair kit. Contact any authorized Toyota dealer or repairer,
or another duly qualified and equipped professional.
● When the tire is damaged due to driving without sufficient air pressure
● When there are any cracks or damage at any location on the tire, such as on
the side wall, except the tread
● When the tire is visibly separated from the wheel
● When the cut or damage to the tread is 4 mm (0.16 in.) long or more
● When the wheel is damaged
● When two or more tires have been punctured
● When more than 2 sharp objects such as nails or screws have passed
through the tread on a single tire
● When the sealant has expired
Before performing emergency repair
Page 467 of 540
4678-2. Steps to take in an emergency
8
When trouble arises
YARIS_F_WE_52G04E
Connect the bottle to the com-
pressor.
Screw the end of the hose clock-
wise as far as possible.
Check the specified tire inflation
pressure.
Tire inflation pressure is specified
on the label in the glove box.
( P. 509)
Start the engine.
To inject the sealant and inflate
the tire, turn the compressor
switch on.
10
11
12
13
Page 468 of 540

4688-2. Steps to take in an emergency
YARIS_F_WE_52G04E
Inflate the tire until the specified
air pressure is reached.
The sealant will be injected
and the pressure will surge
and then gradually decrease.
The air pressure gauge will
display the actual tire infla-
tion pressure about 1 minute
(5 minutes at low tempera-
ture) after the switch is
turned on.
Inflate the tire until the speci-
fied air pressure.
• If the tire inflation pressure is
still lower than the specified
point after inflation for 35 min-
utes with the switch on, the tire
is too damaged to be repaired.
Turn the compressor switch off
and contact any authorized Toy-
ota dealer or repairer, or another
duly qualified and equipped pro-
fessional.
• If the tire inflation pressure exceeds the specified air pressure, let out
some air to adjust the tire inflation pressure. ( P. 470,509)
With the compressor switch off, disconnect the nozzle from the
valve on the tire and then pull out the power plug from the power
outlet socket or cigarette lighter.
Some sealant may leak when the hose is removed.
Install the valve cap onto the valve of the emergency repaired tire.
14
1
2
3
15
16
Page 469 of 540
4698-2. Steps to take in an emergency
8
When trouble arises
YARIS_F_WE_52G04E
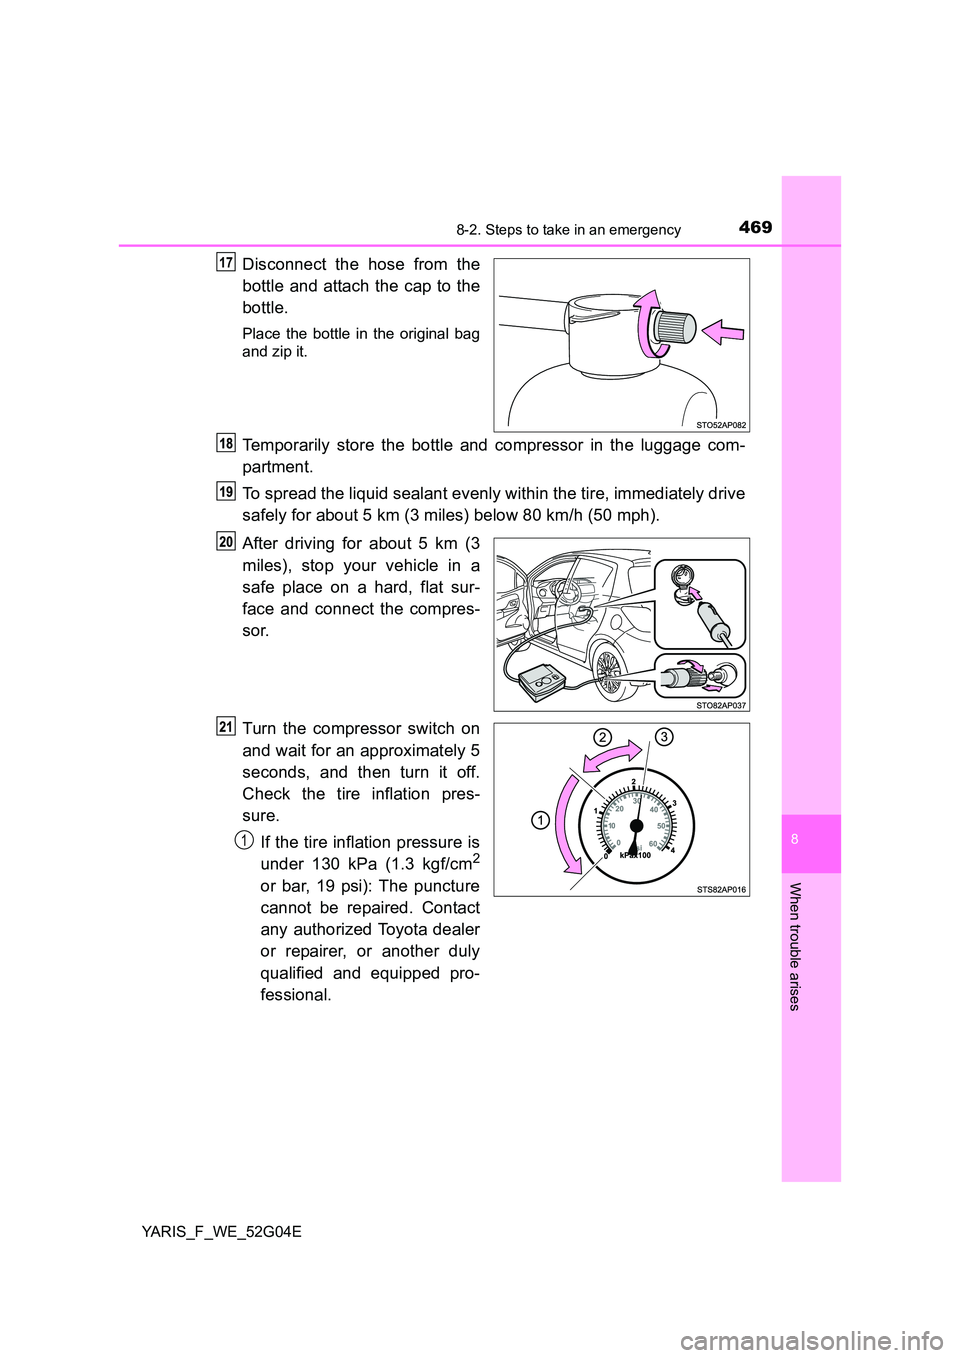
Disconnect the hose from the
bottle and attach the cap to the
bottle.
Place the bottle in the original bag
and zip it.
Temporarily store the bottle and compressor in the luggage com-
partment.
To spread the liquid sealant evenly within the tire, immediately drive
safely for about 5 km (3 miles) below 80 km/h (50 mph).
After driving for about 5 km (3
miles), stop your vehicle in a
safe place on a hard, flat sur-
face and connect the compres-
sor.
Turn the compressor switch on
and wait for an approximately 5
seconds, and then turn it off.
Check the tire inflation pres-
sure.
If the tire inflation pressure is
under 130 kPa (1.3 kgf/cm2
or bar, 19 psi): The puncture
cannot be repaired. Contact
any authorized Toyota dealer
or repairer, or another duly
qualified and equipped pro-
fessional.
17
1
Page 470 of 540
4708-2. Steps to take in an emergency
YARIS_F_WE_52G04E
If the tire inflation pressure is 130 kPa (1.3 kgf/cm2 or bar, 19 psi)
or higher, but less than the specified air pressure: Proceed to .
If the tire inflation pressure is the specified air pressure ( P. 509):
Proceed to .
Turn the compressor switch on to inflate the tire until the specified
air pressure is reached. Drive for about 5 km (3 miles) and then
perform .
Store the compressor in the luggage compartment.
Taking precautions to avoid sudden braking, sudden acceleration
and sharp turns, drive carefully at under 80 km/h (50 mph) to the
nearest authorized Toyota dealer or repairer, or another duly quali-
fied and equipped professional for tire repair or replacement.
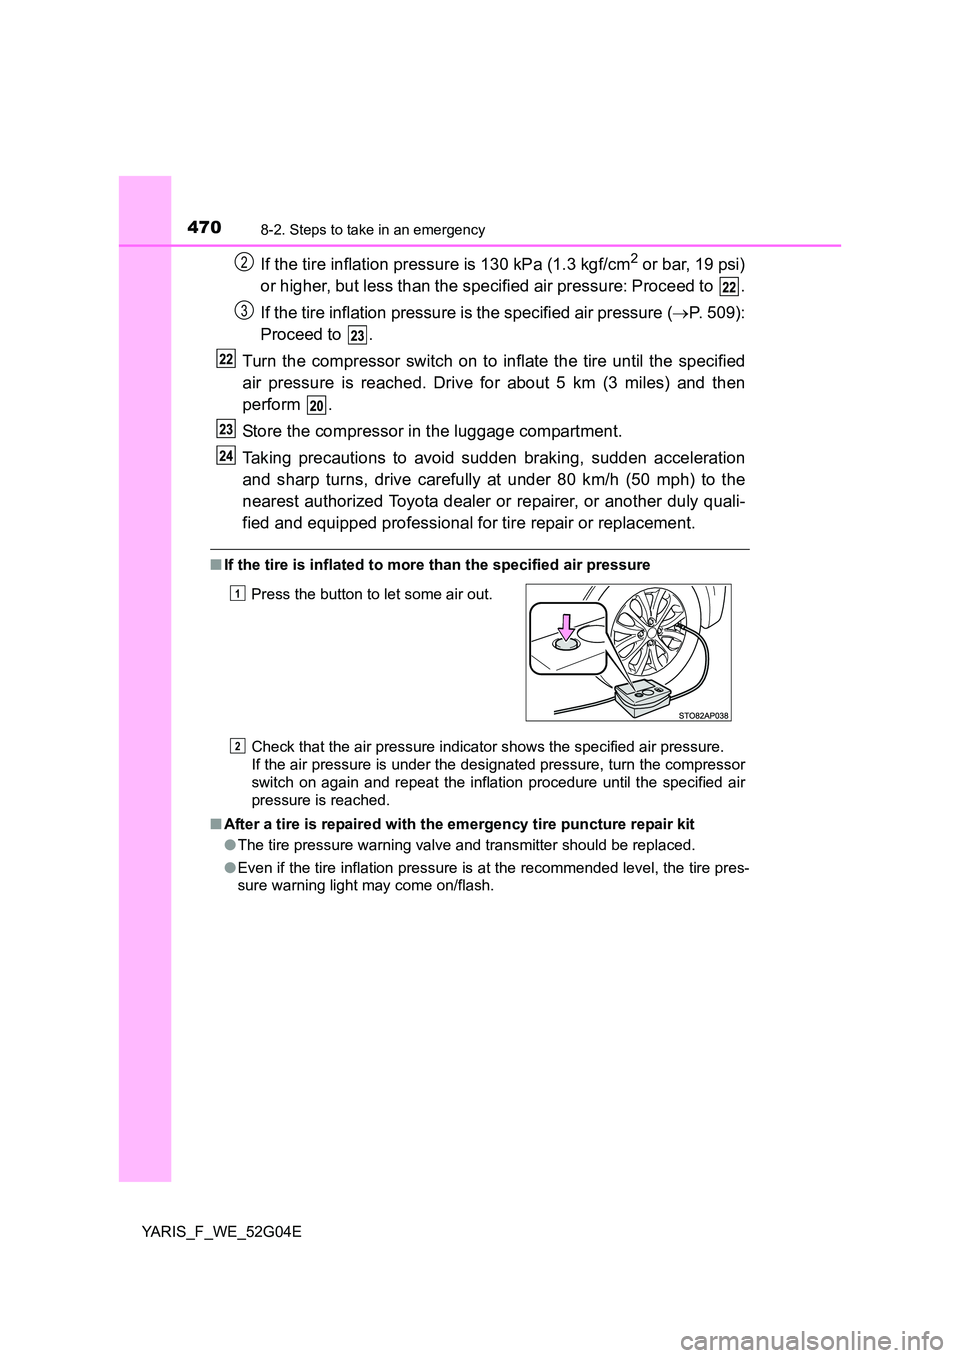
■ If the tire is inflated to more than the specified air pressure
Check that the air pressure indicator shows the specified air pressure.
If the air pressure is under the designated pressure, turn the compressor
switch on again and repeat the inflation procedure until the specified air
pressure is reached.
■ After a tire is repaired with the emergency tire puncture repair kit
● The tire pressure warning valve and transmitter should be replaced.
● Even if the tire inflation pressure is at the recommended level, the tire pres-
sure warning light may come on/flash.
Press the button to let some air out.
2
3
1
2
Page 471 of 540
4718-2. Steps to take in an emergency
8
When trouble arises
YARIS_F_WE_52G04E
■ Note for checking the emergency tire puncture repair kit
Check the sealant expiry date occasionally.
The expiry date is shown on the bottle. Do not use sealant whose expiry date
has already passed. Otherwise, repairs conducted using the emergency tire
puncture repair kit may not be performed properly.
■ Emergency tire puncture repair kit
● The sealant stored in the emergency tire puncture repair kit can be used
only once to temporarily repair a single tire. If the sealant has been used
and needs to be replaced, purchase a new bottle at any authorized Toyota
dealer or repairer, or another duly qualified and equipped professional. The
compressor is reusable.
● The sealant can be used when the outside temperature is from -30°C
(-22°F) to 60°C (140°F).
● The repair kit is exclusively designed for size and type of tires originally
installed on your vehicle. Do not use it for tires that a different size than the
original ones, or for any other purposes.
● The sealant has a limited lifespan. The expiry date is marked on the bottle.
The bottle of sealant should be replaced with a new bottle before the expiry
date. Contact any authorized Toyota dealer or repairer, or another duly qual-
ified and equipped professional for replacement.
● If the sealant gets on your clothes, it may stain.
● If the sealant adheres to a wheel or the surface of the vehicle body, the stain
may not be removable if it is not cleaned at once. Immediately wipe away
the sealant with a wet cloth.
● During operation of the repair kit, a loud operation noise is produced. This
does not indicate a malfunction.
● Do not use to check or to adjust the tire pressure.
Page 473 of 540
4738-2. Steps to take in an emergency
8
When trouble arises
YARIS_F_WE_52G04E
WARNING
●Connect the valve and hose securely with the tire installed on the vehicle.
If the hose is not properly connected to the valve, air leakage may occur
as sealant may be sprayed out.
● If the hose comes off the valve while inflating the tire, there is a risk that
the hose will move abruptly due to air pressure.
● After inflation of the tire has completed, the sealant may splatter when the
hose is disconnected or some air is let out of the tire.
● Follow the operation procedure to repair the tire. If the procedures not fol-
lowed, the sealant may spray out.
● Keep back from the tire while it is being repaired, as there is a chance of it
bursting while the repair operation is being performed. If you notice any
cracks or deformation of the tire, turn off the compressor switch and stop
the repair operation immediately.
● The repair kit may overheat if operated for a long period of time. Do not
operate the repair kit continuously for more than 40 minutes.
● Parts of the repair kit become hot during operation. Be careful when han-
dling the repair kit during and after operation. Do not touch the metal part
around the connecting area between the bottle and compressor. It will be
extremely hot.
● Do not attach the vehicle speed warning sticker to an area other than the
one indicated. If the sticker is attached to an area where an SRS airbag is
located, such as the pad of the steering wheel, it may prevent the SRS air-
bag from operating properly.
■ Driving to spread the liquid sealant evenly
Observe the following precautions to reduce the risk of accidents.
Failing to do so may result in a loss of vehicle control and cause death or
serious injury.
● Drive the vehicle carefully at a low speed. Be especially careful when turn-
ing and cornering.
● If the vehicle does not drive straight or you feel a pull through the steering
wheel, stop the vehicle and check the following.
• Tire condition. The tire may have separated from the wheel.
• Tire inflation pressure. If the tire inflation pressure is 130 kPa (1.3 kgf/cm2
or bar, 19 psi) or less, the tire may be severely damaged.