Page 326 of 664

326
SIENNA_OM_01999-08001_(U)
5-2. Setup
General settings
Press the “SETUP” button.
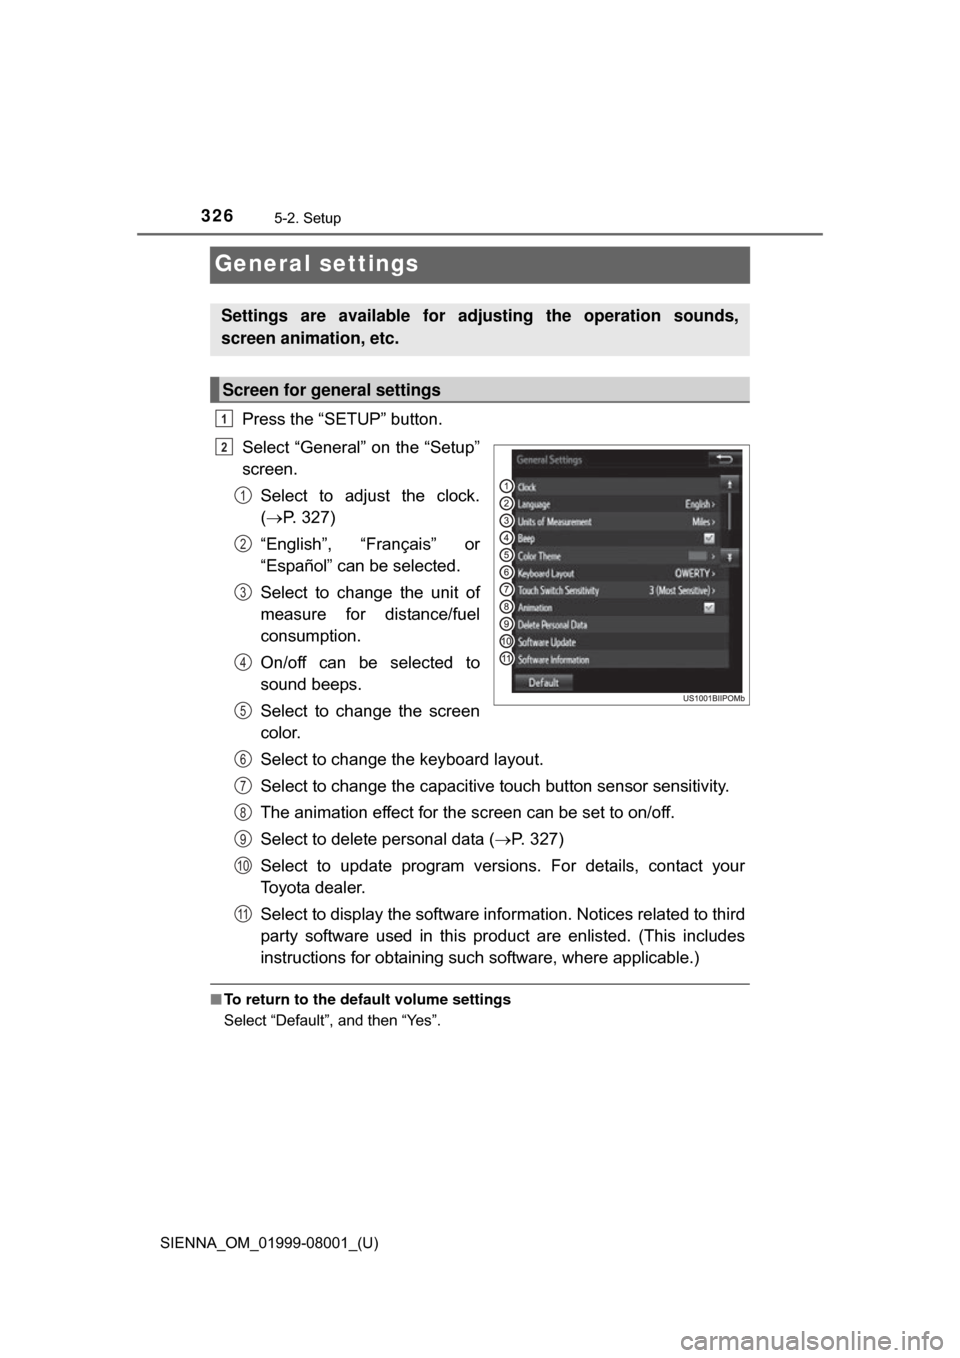
Select “General” on the “Setup”
screen.Select to adjust the clock.
( P. 327)
“English”, “Français” or
“Español” can be selected.
Select to change the unit of
measure for distance/fuel
consumption.
On/off can be selected to
sound beeps.
Select to change the screen
color.
Select to change the keyboard layout.
Select to change the capacitive touch button sensor sensitivity.
The animation effect for the screen can be set to on/off.
Select to delete personal data ( P. 327)
Select to update program versions. For details, contact your
Toyota dealer.
Select to display the software info rmation. Notices related to third
party software used in this pr oduct are enlisted. (This includes
instructions for obtaining such software, where applicable.)
■ To return to the default volume settings
Select “Default”, and then “Yes”.
Settings are available for adjusting the operation sounds,
screen animation, etc.
Screen for general settings
1
2
1
2
3
4
5
6
7
8
9
10
11
Page 327 of 664
SIENNA_OM_01999-08001_(U)
3275-2. Setup
5
Audio system
Display the “General Settings” screen. (P. 326)
Operations up to this point can also be performed by select the clock dis-
play at the top of most screens.
Select the items to be set.
Manual clock setting
Set minutes to 00
The 24-hour time format can
be to on/off.
Select “OK”.
Select “Delete Personal Data” on the “General Settings” screen.
Select “Delete”.
Check carefully beforehand, as data cannot be retrieved once deleted.
A confirmation screen will be displayed. Select “Yes”.
The following personal data will be deleted or changed to its default
settings.
• General settings
• Audio settings
• Phone settings
Clock setting
1
2
1
2
3
Delete personal data
3
1
2
3
Page 403 of 664

403
SIENNA_OM_01999-08001_(U)
6Interior features
6-1. Using the air conditioning system and defogger
Front automatic air conditioning system ........ 404
Rear automatic air conditioning system ........ 413
Heated steering wheel/seat heaters .......... 416
• Heated steering wheel ............................ 417
• Seat heaters ................. 418
6-2. Using the interior lights Interior lights list ................ 419• Personal/interior light
main switch ................... 420
• Personal/interior lights ............................. 420
• Rear ceiling lights ......... 421 6-3. Using the storage features
List of storage features ..... 422• Glove boxes .................. 423
• Console box .................. 424
• Cup holders .................. 426
• Bottle holders ................ 428
• Door pockets................. 429
• Auxiliary boxes.............. 430
Luggage compartment features ........................... 433
6-4. Using the other interior features
Other interior features ....... 435 • Sun visors ..................... 435
• Vanity mirrors................ 435
• Clock ............................. 436
• Conversation mirror ...... 436
• Power outlets ................ 437
• Armrests ....................... 440
• Assist grips ................... 441
• Rear side sunshades .... 442
• Grocery bag hooks ....... 443
Garage door opener.......... 444
Compass ........................... 449
Safety Connect ................. 453
Page 404 of 664
404
SIENNA_OM_01999-08001_(U)
6-1. Using the air conditioning system and defogger
Front automatic air conditioning system
■Adjusting the temperature setting
Turn the “TEMP” dial clockwise to increase the temperature and
counterclockwise to decrease the temperature.
Air outlets and fan speed are automatically adjusted according
to the temperature setting.
Air conditioning controls
Page 407 of 664

SIENNA_OM_01999-08001_(U)
4076-1. Using the air conditioning system and defogger
6
Interior features
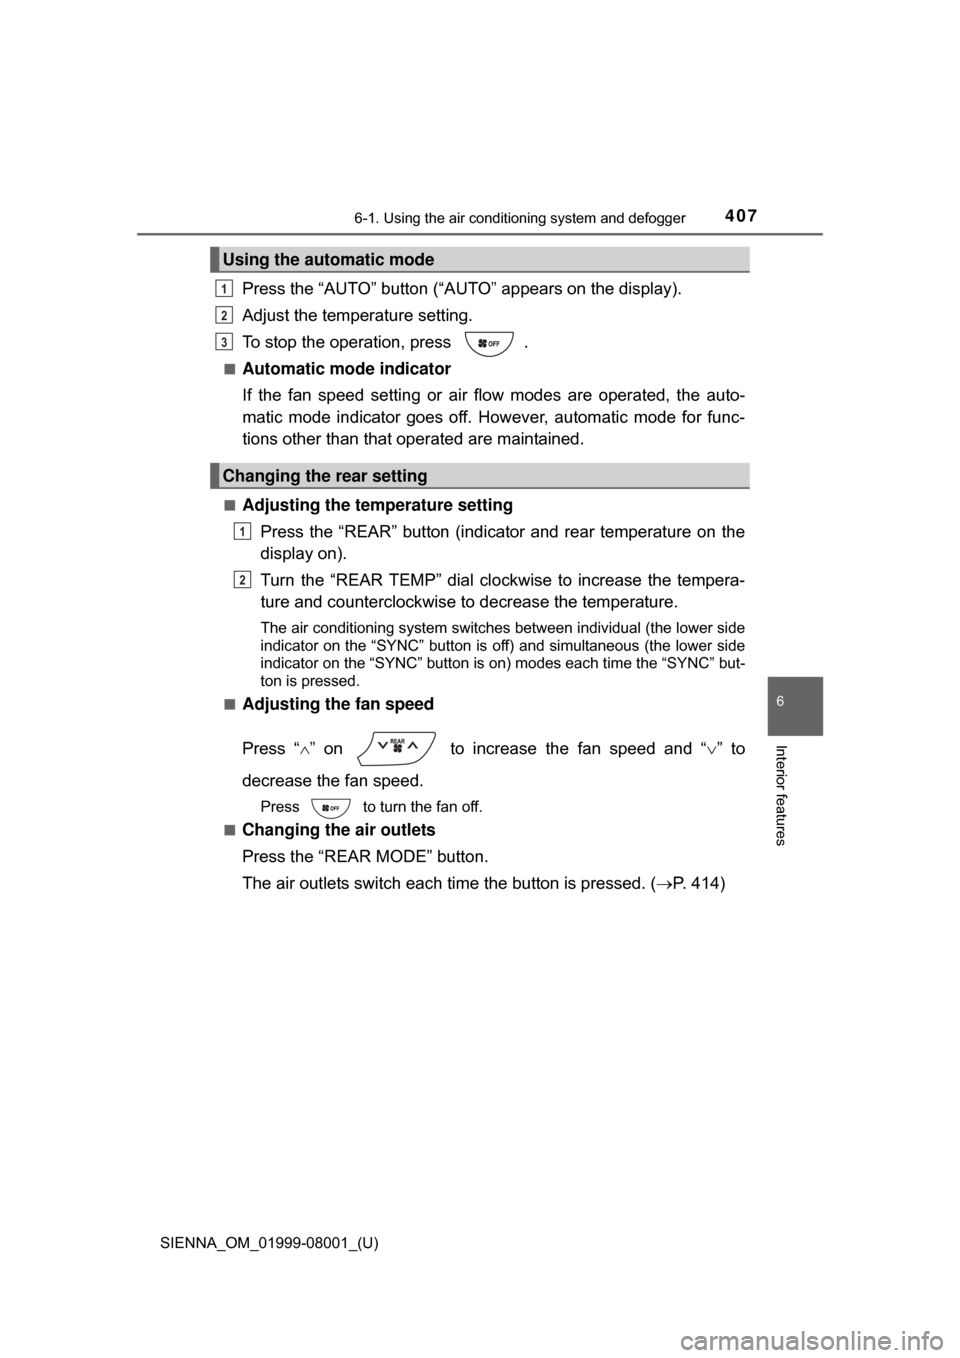
Press the “AUTO” button (“AUTO” appears on the display).
Adjust the temperature setting.
To stop the operation, press .
■Automatic mode indicator
If the fan speed setting or air fl ow modes are operated, the auto-
matic mode indicator goes off. However, automatic mode for func-
tions other than that operated are maintained.
■Adjusting the temperature setting
Press the “REAR” button (indicator and rear temperature on the
display on).
Turn the “REAR TEMP” dial clockwise to increase the tempera-
ture and counterclockwise to decrease the temperature.
The air conditioning system switches between individual (the lower side
indicator on the “SYNC” button is off) and simultaneous (the lower side
indicator on the “SYNC” button is on) modes each time the “SYNC” but-
ton is pressed.
■
Adjusting the fan speed
Press “ ” on to increase the fan speed and “ ” to
decrease the fan speed.
Press to turn the fan off.
■
Changing the air outlets
Press the “REAR MODE” button.
The air outlets switch each time the button is pressed. ( P. 414)
Using the automatic mode
Changing the rear setting
1
2
3
1
2
Page 412 of 664

4126-1. Using the air conditioning system and defogger
SIENNA_OM_01999-08001_(U)
WARNING
■To prevent the windshield from fogging up
● Do not use during cool air operat ion in extremely humid weather.
The difference between the temperature of the outside air and that of the
windshield can cause the outer surface of the windshield to fog up, block-
ing your vision.
■ To prevent burns
● Do not touch the rear view mirror surfaces when the outside rear view mir-
ror defoggers (vehicles with outside rear view mirror defoggers) are on.
● Do not touch the glass at lower part of the windshield or to the side of the
front pillars when the windshield wiper de-icer is on. (vehicles with wind-
shield wiper de-icer)
NOTICE
■To prevent battery discharge
Do not leave the air conditioning system on longer than necessary when the
engine is stopped.
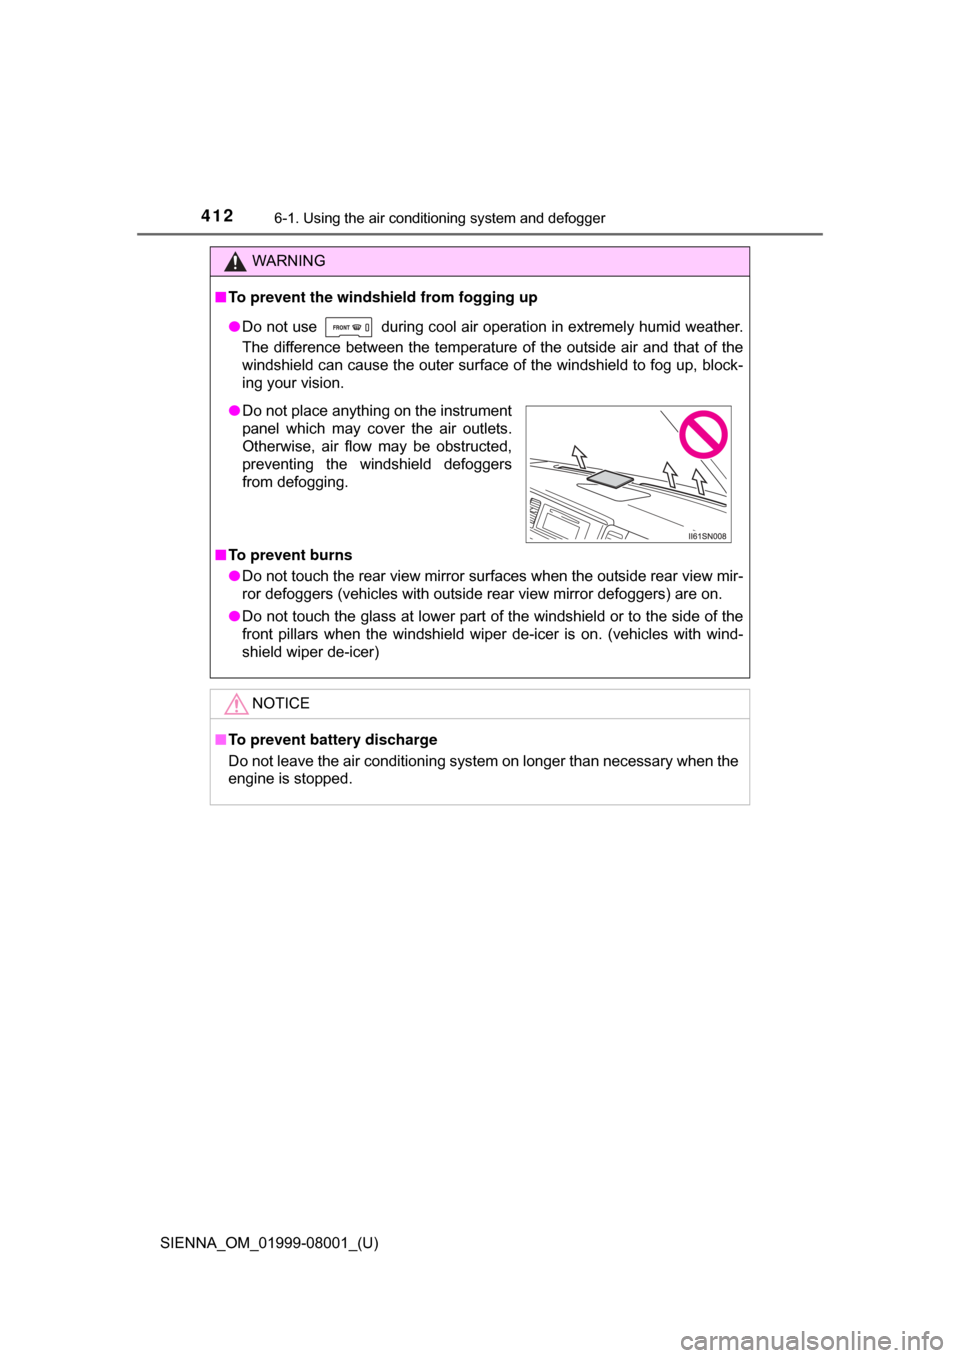
● Do not place anything on the instrument
panel which may cover the air outlets.
Otherwise, air flow may be obstructed,
preventing the windshield defoggers
from defogging.
Page 421 of 664

SIENNA_OM_01999-08001_(U)
4216-2. Using the interior lights
6
Interior features
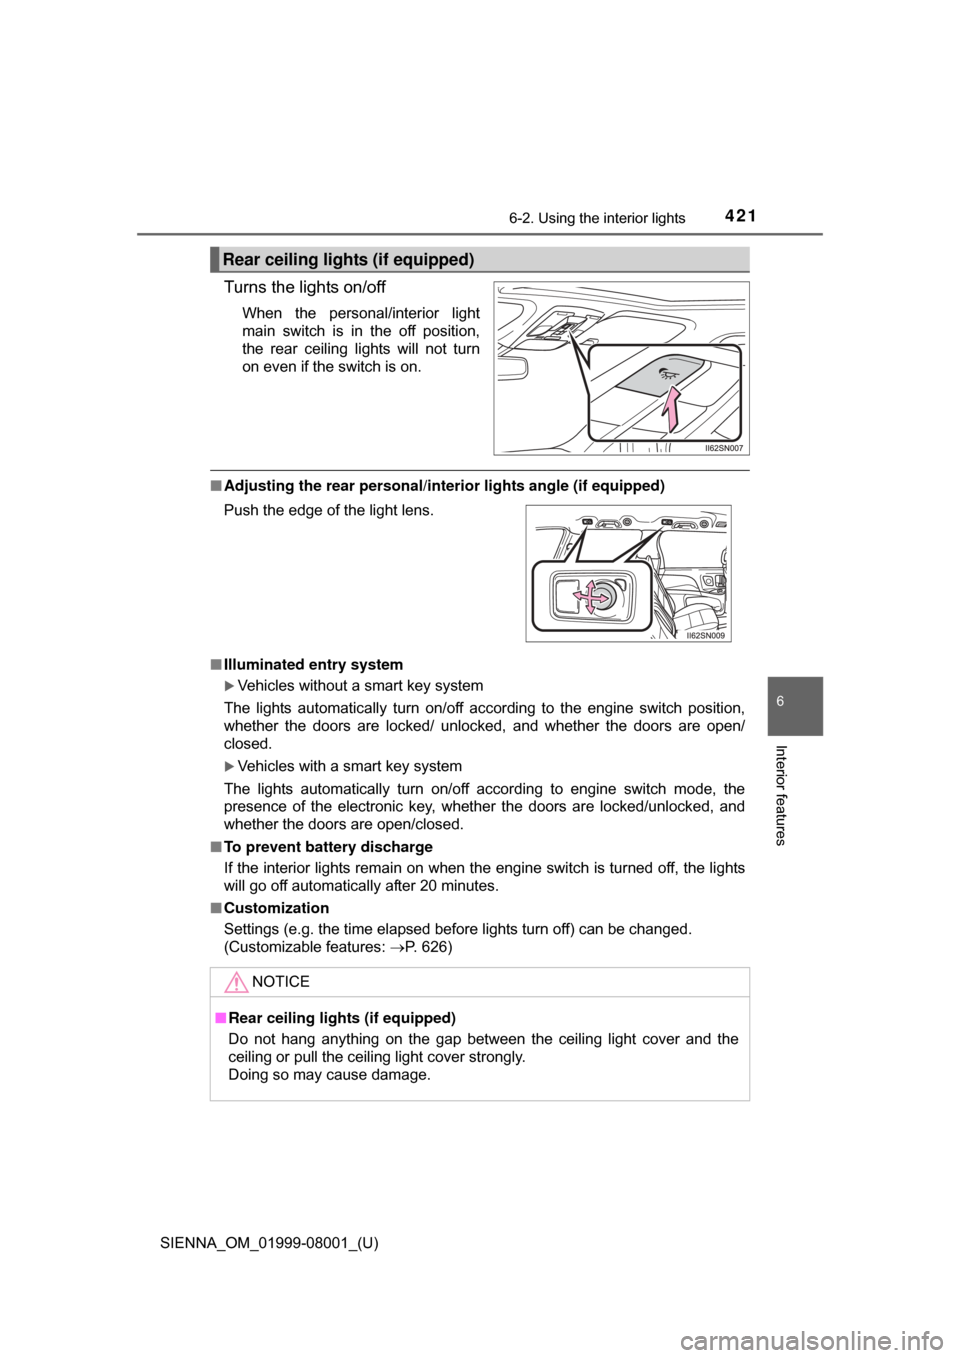
Turns the lights on/off
When the personal/interior light
main switch is in the off position,
the rear ceiling lights will not turn
on even if the switch is on.
■Adjusting the rear personal/interior lights angle (if equipped)
■ Illuminated entry system
Vehicles without a smart key system
The lights automatically turn on/off according to the engine switch position,
whether the doors are locked/ unlocked, and whether the doors are open/
closed.
Vehicles with a smart key system
The lights automatically turn on/off according to engine switch mode, the
presence of the electronic key, whether the doors are locked/unlocked, and
whether the doors are open/closed.
■ To prevent battery discharge
If the interior lights remain on when the engine switch is turned off, the lights
will go off automatically after 20 minutes.
■ Customization
Settings (e.g. the time elapsed before lights turn off) can be changed.
(Customizable features: P. 626)
Rear ceiling lights (if equipped)
Push the edge of the light lens.
NOTICE
■Rear ceiling lights (if equipped)
Do not hang anything on the gap between the ceiling light cover and the
ceiling or pull the ceiling light cover strongly.
Doing so may cause damage.
Page 423 of 664
SIENNA_OM_01999-08001_(U)
4236-3. Using the storage features
6
Interior features
Upper glove box
Push the button.
Open the lid.
Lower glove box
The lower glove box can be opened by pulling the lever and can be
locked and unlocked by using th e master key (vehicles without a
smart key) or the mechanical key (vehicles with a smart key system).
Unlock
Lock
Open
Glove boxes
1
2
1
2
3