Page 451 of 728
451
3-4. Using the hands-free system (for cellular phone)
3
Interior features
LC200_OM_OM60L83U_(U)
Security and system setup
■Security setting items and operation procedure
To enter the menu for each function, follow the steps below.
Press the off-hook switch and select “Setup” using voice
command or .
Select “Security” using voice command or .
Select one of the following items using voice command or
.
● Setting or changing t he PIN (Personal Identification Number)
“Set PIN”
● Locking the phone book
“Phonebook Lock (Phbk Lock)”
● Unlocking the phone book
“Phonebook Unlock (Phbk Unlock)”
STEP1
STEP2
STEP3
Page 456 of 728
456 3-4. Using the hands-free system (for cellular phone)
LC200_OM_OM60L83U_(U)
■Initialization
●The following data in the system can be initialized:
• Phone book
• Outgoing and incoming call history
• Speed dials
• Registered cellular phone data
• Security code
• Registered Bluetooth
® enabled portable player data
• Passkey for the cellular phone
• Passkey for the Bluetooth
® audio players
• Guidance volume
• Receiver volume
• Ring tone volume
● Once the initialization has been completed, the data cannot be restored
to its original state.
■ When the phone book is locked
The following functions cannot be used:
●Dialing by inputting a name
● Speed dialing
● Dialing a number stored in the call history memory
● Using the phone book
Page 497 of 728
497
3-7. Other interior features
3
Interior features
LC200_OM_OM60L83U_(U)
Floor mats
Use only floor mats designed specifically for vehicles of the same
model and model year as your vehicle. Fix them securely in place
onto the carpet.
Insert the retaining hooks
(clips) into the floor mat eye-
lets.
Turn the upper knob of each
retaining hook (clip) to secure
the floor mats in place.
*: Always align the marks.
The shape of the retaining hooks (clip s) may differ from that shown
in the illustration.
STEP1
STEP2
*
Page 498 of 728

498 3-7. Other interior features
LC200_OM_OM60L83U_(U)
CAUTION
Observe the following precautions.
Failure to do so may cause the driver’s floor mat to slip, possibly interfering
with the pedals while driving. An unexpectedly high speed may result or it may
become difficult to stop the vehicle, leading to a serious accident.
■When installing the driver’s floor mat
●Do not use floor mats designed for other models or different model year
vehicles, even if they are Toyota Genuine floor mats.
● Only use floor mats designed for the driver’s seat.
● Always install the floor mat securely using the retaining hooks (clips) pro-
vided.
● Do not use two or more floor mats on top of each other.
● Do not place the floor mat bottom-side up or upside-down.
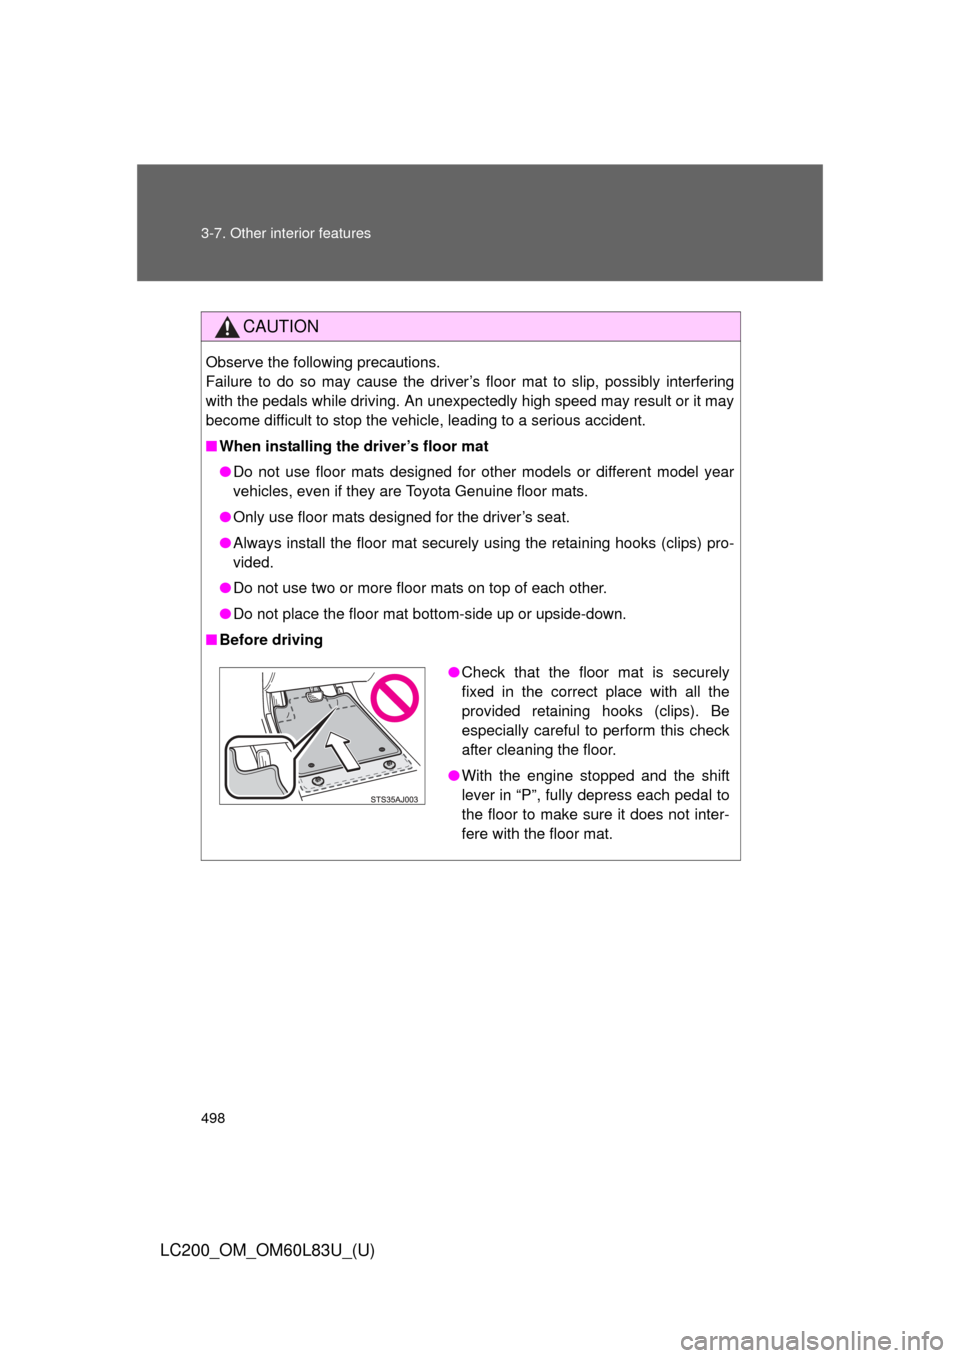
■ Before driving
●Check that the floor mat is securely
fixed in the correct place with all the
provided retaining hooks (clips). Be
especially careful to perform this check
after cleaning the floor.
● With the engine stopped and the shift
lever in “P”, fully depress each pedal to
the floor to make sure it does not inter-
fere with the floor mat.
Page 499 of 728
499
3-7. Other interior features
3
Interior features
LC200_OM_OM60L83U_(U)
Luggage compar tment features
■Cargo hooks
Cargo hooks are provided for
securing loose items.
■ Cargo net hooks
To hang the cargo net, use the
cargo net hooks and rear tie-
down hooks.
The cargo net itself is not
included as an original equip-
ment.
Page 501 of 728
501
3-7. Other interior features
3
Interior features
LC200_OM_OM60L83U_(U)
Garage door opener
The garage door opener (HomeLink Universal Transceiver) is manufac-
tured under license from HomeLink.
Programming HomeLink (for U.S.A. owners)
The HomeLink
compatible transceiver in your vehicle has 3 buttons
which can be programmed to operate 3 different devices. Refer to the
programming method below appropriate for the device.
Buttons
Indicator
The garage door opener can be programmed to operate garage
doors, gates, entry doors, door locks, home lighting systems, secu-
rity systems, and other devices.
Page 505 of 728

505
3-7. Other interior features
3
Interior features
LC200_OM_OM60L83U_(U)
■
Programming an entry gate (f or U.S.A. owners)/Programming
all devices in the Canadian market
Place your transmitter 1 to 3 in. (25 to 75 mm) away from the
surface of the HomeLink
.
Keep the HomeLink indicator light in view while programming.
Press and hold the selected HomeLink button.
Repeatedly press and releas e (cycle) the device’s remote
control button for 2 second s each until is completed.
When the indicator light on the HomeLink
compatible trans-
ceiver starts to flash rapidly, release the buttons.
Test the operation of the HomeLink
by pressing the newly
programmed button. Check to see if the gate/device operates
correctly.
Repeat the steps above to program another device for each of
the remaining HomeLink
buttons.
■ Programming other devices
To program other devices such as home security systems, home
door locks or lighting, contact y our Toyota dealer for assistance.
■ Reprogramming a button
The individual HomeLink
buttons cannot be erased but can be
reprogrammed. To reprogram a button, follow the “Reprogramming
a HomeLink
button” instructions.
STEP1
STEP2
STEP3
STEP4
STEP4
STEP5
STEP6
Page 508 of 728
508
3-7. Other interior features
LC200_OM_OM60L83U_(U)
Safety Connect
: If equipped
Safety Connect is a subscription-based telematics service that uses
Global Positioning System (GPS) data and embedded cellular tech-
nology to provide safety and security features to subscribers. Safety
Connect is supported by Toyota ’s designated response center,
which operates 24 hours per day, 7 days per week.
Safety Connect service is available by subscription on select,
telematics hardware-equipped vehicles.
By using the Safety Connect servi ce, you are agreeing to be bound
by the Telematics Subscription Serv ice Agreement and its Terms and
Conditions, as in effect and amende d from time to time, a current
copy of which is available at Toyota.com. All use of the Safety Con-
nect service is subject to such then-applicable Terms and Condi-
tions.
■ System components
Microphone
LED light indicators
“SOS” button