Page 83 of 356

83
2. RADIO OPERATION
3
AUDIO/VISUAL SYSTEM
No.Function
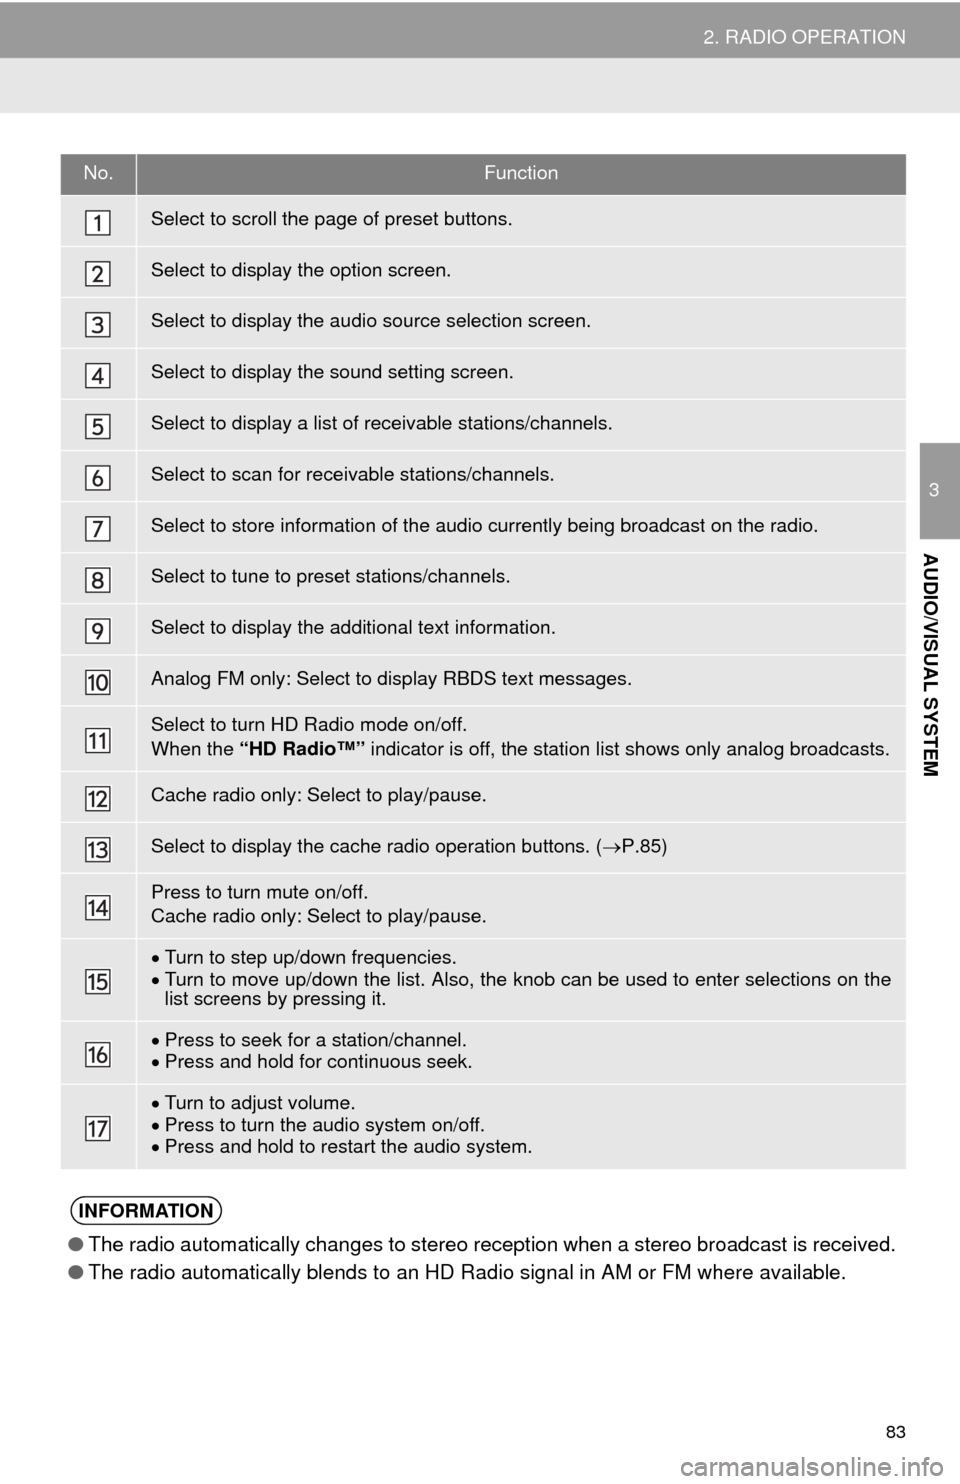
Select to scroll the page of preset buttons.
Select to display the option screen.
Select to display the audio source selection screen.
Select to display the sound setting screen.
Select to display a list of receivable stations/channels.
Select to scan for receivable stations/channels.
Select to store information of the audio currently being broadcast on the radio.
Select to tune to preset stations/channels.
Select to display the additional text information.
Analog FM only: Select to display RBDS text messages.
Select to turn HD Radio mode on/off.
When the “HD Radio™” indicator is off, the station list shows only analog broadcasts.
Cache radio only: Select to play/pause.
Select to display the cache radio operation buttons. ( P.85)
Press to turn mute on/off.
Cache radio only: Select to play/pause.
Turn to step up/down frequencies.
Turn to move up/down the list. Also, the knob can be used to enter selections on the
list screens by pressing it.
Press to seek for a station/channel.
Press and hold for continuous seek.
Turn to adjust volume.
Press to turn the audio system on/off.
Press and hold to restart the audio system.
INFORMATION
● The radio automatically changes to stereo reception when a stereo broadcast is received.
● The radio automatically blends to an HD Radio signal in AM or FM where available.
Page 84 of 356
84
2. RADIO OPERATION
1Tune in the desired station.
2Select “(add new)” .
To change the preset station to a different
one, select and hold the preset station.
3Select “Yes” on the confirmation
screen.
4Select “OK” after setting the new pre-
set station.
1Select “Station List” .
2FM radio only: Select the desired pro-
gram genre.
3Select the desired station and select
“OK”.
PRESETTING A STATION
Radio mode has a mix preset function,
which can store up to 36 stations (6
stations per page x 6 pages) from any
of the AM, FM or SAT bands.
INFORMATION
●The number of preset radio stations dis-
played on the screen can be changed.
( P.122)
SELECTING A STATION
FROM THE LIST
A station list can be displayed.
Page 92 of 356

92
2. RADIO OPERATION
No.Function
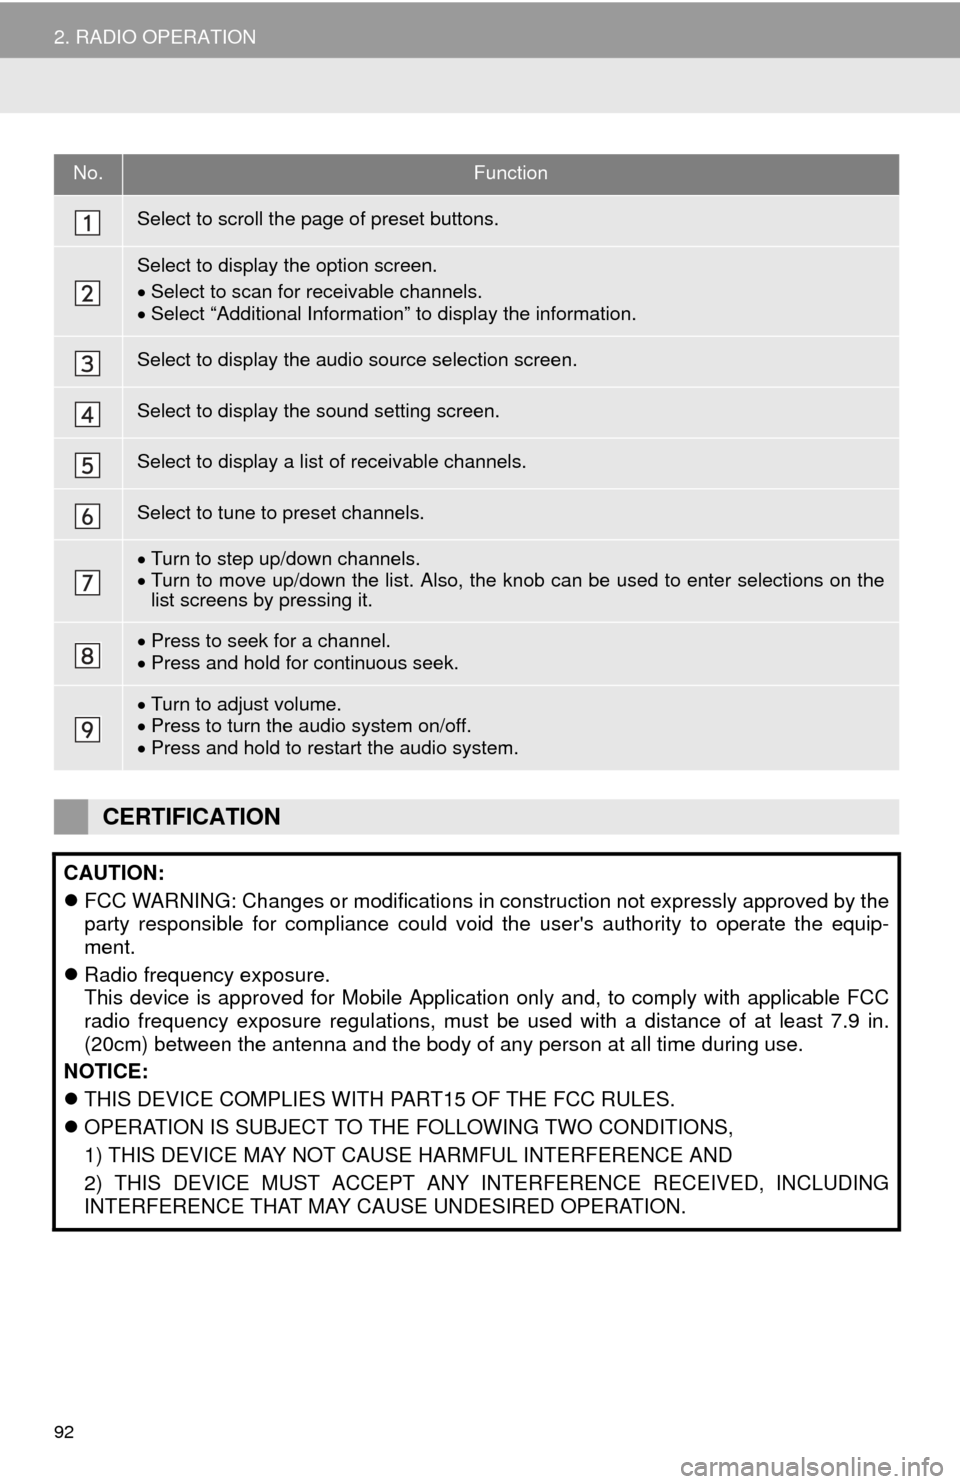
Select to scroll the page of preset buttons.
Select to display the option screen.
Select to scan for receivable channels.
Select “Additional Information” to display the information.
Select to display the audio source selection screen.
Select to display the sound setting screen.
Select to display a list of receivable channels.
Select to tune to preset channels.
Turn to step up/down channels.
Turn to move up/down the list. Also, the knob can be used to enter selections on the
list screens by pressing it.
Press to seek for a channel.
Press and hold for continuous seek.
Turn to adjust volume.
Press to turn the audio system on/off.
Press and hold to restart the audio system.
CERTIFICATION
CAUTION:
FCC WARNING: Changes or modifications in construction not expressly approved by the
party responsible for compliance could void the user's authority to operate the equip-
ment.
Radio frequency exposure.
This device is approved for Mobile Application only and, to comply with applicable FCC
radio frequency exposure regulations, must be used with a distance of at least 7.9 in.
(20cm) between the antenna and the body of any person at all time during use.
NOTICE:
THIS DEVICE COMPLIES WITH PART15 OF THE FCC RULES.
OPERATION IS SUBJECT TO THE FOLLOWING TWO CONDITIONS,
1) THIS DEVICE MAY NOT CAUSE HARMFUL INTERFERENCE AND
2) THIS DEVICE MUST ACCEPT ANY INTERFERENCE RECEIVED, INCLUDING
INTERFERENCE THAT MAY CAUSE UNDESIRED OPERATION.
Page 122 of 356
122
5. SETUP
1Display the “Audio Settings” screen.
(P.121)
2Select “Number of Radio Presets” .
3Select the button with the desired num-
ber to be displayed.
1Display the “Audio Settings” screen.
(P.121)
2Select “iPod Video Sound Input”
(“iPod Sound Input”) .
3Select a screen button for the desired
setting.
1Display the “Audio Settings” screen.
(P.121)
2Select “Video Input Mode” .
3Select a screen button for the desired
setting.
No.FunctionPage
Select to change the num-
ber of preset radio sta-
tions/channels displayed
on the screen.
122
Select to set the iPod au-
dio signal input settings.122
Select to set the video sig-
nal format settings.122
Select to set cover art set-
tings on/off.
Select to set automatic
sound levelizer.77
*1Select to create a feeling
of presence.77
*2Select to enable cache ra-
dio.
Select to reset all setup
items.
*
1: If equipped
*2: With navigation function
SETTING THE NUMBER OF
RADIO PRESETS
iPod SETTINGS
EXTERNAL VIDEO SETTINGS
Page 147 of 356
147
7. REAR SEAT ENTERTAINMENT SYSTEM OPERATION
3
AUDIO/VISUAL SYSTEM
DVD video
AVCHD
BDAV
No.Function
Turning off the option screen
Displaying the third page
Displaying the second page
Displaying the top menu screen
Displaying the pop-up menu
Displaying the menu screen
Rewind
Stop
Play/pause
Fast-forward
Displaying the initial setup screen
Displaying the top page
Searching for a title
Searching for a chapter
Page 152 of 356

152
7. REAR SEAT ENTERTAINMENT SYSTEM OPERATION
1Select “Setup” .
2Select the settings to be changed. Af-
ter the settings are changed, select
“OK”.
■CHANGING THE INITIAL AUDIO
LANGUAGE
1Select “Audio Language” .
2Select the desired language.
If you cannot find the desired language,
select “Other” and input the desired lan-
guage code. ( P.157)
■CHANGING THE INITIAL SUBTITLE
LANGUAGE
1Select “Subtitle Language” .
2Select the desired language.
If you cannot find the desired language,
select “Other” and input the desired lan-
guage code. ( P.157)
INITITAL SETUP
The initial setting can be changed.
No.Function
Changing the initial audio language
Changing the initial subtitle lan-
guage
Changing the initial language of the
disc menu
Setting the angle mark
Setting the DVD parental lock
Goes to next page
Restores default settings
BD history data such as bookmarks
and resume point can be deleted.
Setting the BD parental lock
Setting a quick playback
Setting the BD parental lock
Returns to previous page
No.Function
Page 163 of 356
163
7. REAR SEAT ENTERTAINMENT SYSTEM OPERATION
3
AUDIO/VISUAL SYSTEM
4. PLAYING AN SD CARD*
This system can play still pictures and
AVCHD video that are stored in an SD
card. It does not support music play-
back.
Press the “SD” button if an SD card
has already been inserted in the SD
card slot.
REMOTE CONTROLLER
No.Function
Selecting a control icon
Inputting the selected control icon
Volume up/down
Fast-forward/rewind
Play/pause
Stop
*: If equipped
Displaying the option screen
Selecting a chapter
Turning on the SD card mode
MAIN MENU
No.FunctionPage
Playing still pictures164
Playing AVCHD video165
Formatting the SD card166
Deleting the BD history
data166
No.Function
Page 164 of 356

164
7. REAR SEAT ENTERTAINMENT SYSTEM OPERATION
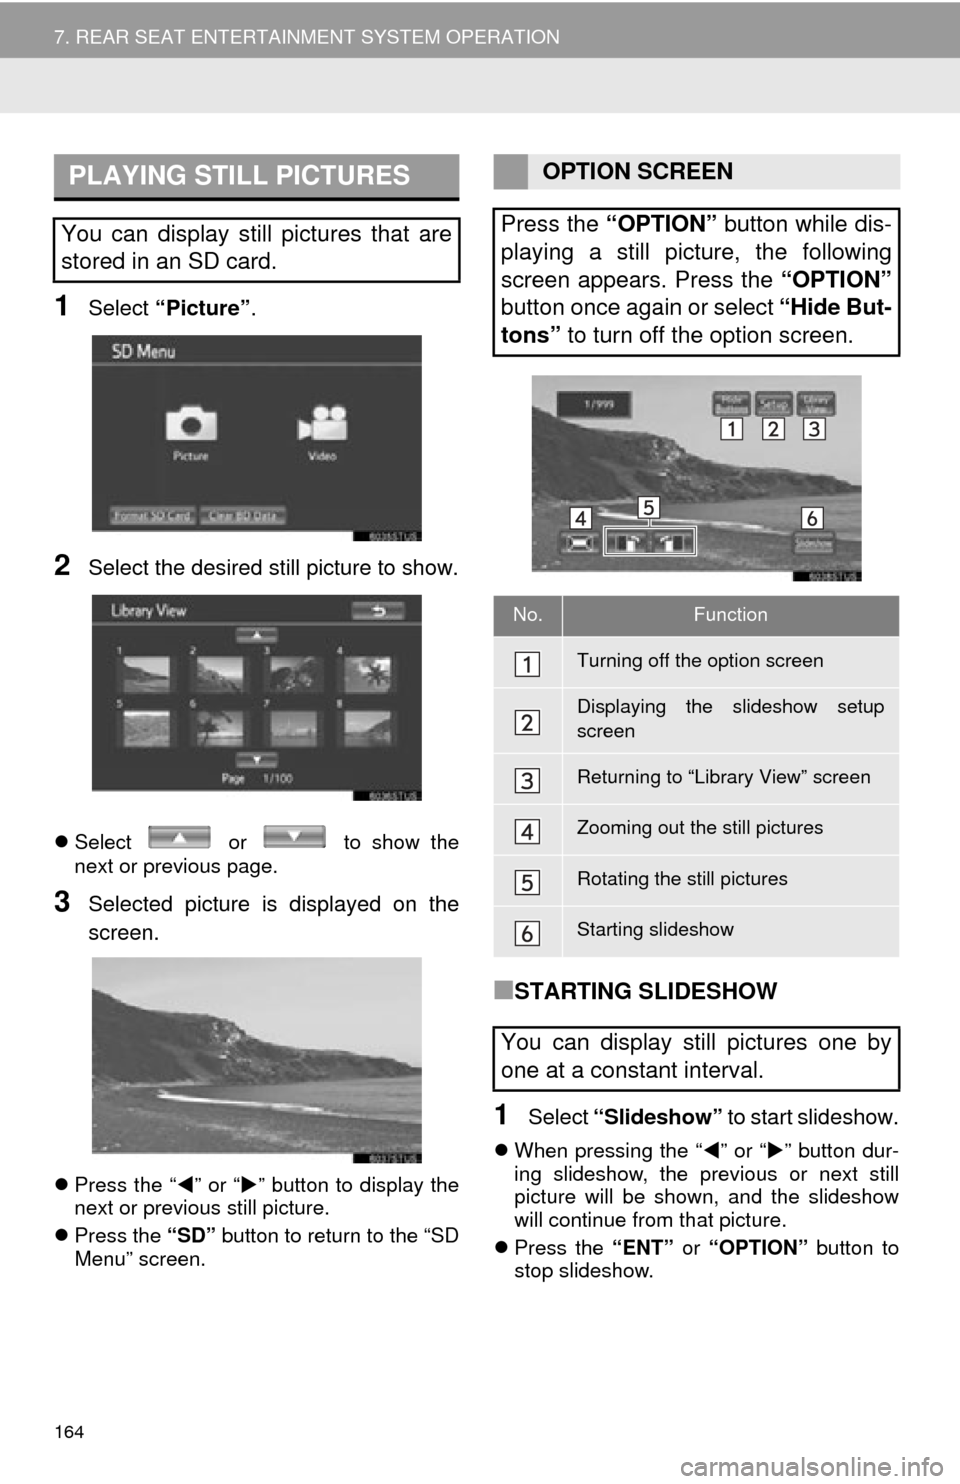
1Select “Picture” .
2Select the desired still picture to show.
Select or to show the
next or previous page.
3Selected picture is displayed on the
screen.
Press the “ ” or “ ” button to display the
next or previous still picture.
Press the “SD” button to return to the “SD
Menu” screen.
■STARTING SLIDESHOW
1Select “Slideshow” to start slideshow.
When pressing the “ ” or “” button dur-
ing slideshow, the previous or next still
picture will be shown, and the slideshow
will continue from that picture.
Press the “ENT” or “OPTION” button to
stop slideshow.
PLAYING STILL PICTURES
You can display still pictures that are
stored in an SD card.
OPTION SCREEN
Press the “OPTION” button while dis-
playing a still picture, the following
screen appears. Press the “OPTION”
button once again or select “Hide But-
tons” to turn off the option screen.
No.Function
Turning off the option screen
Displaying the slideshow setup
screen
Returning to “Library View” screen
Zooming out the still pictures
Rotating the still pictures
Starting slideshow
You can display still pictures one by
one at a constant interval.