Page 333 of 440
3337-3. Do-it-yourself maintenance
7
Maintenance and care
AYGO_EE_OM99J92E
■Front turn signal lights
Turn the bulb base counter-
clockwise.
Remove the light bulb.
When installing, reverse the steps listed.
■Front fog lights (if equipped)
To allow enough working
space, turn the steering
wheel to the opposite side of
the bulb to be replaced.
Turn the steering wheel to the
left when replacing the right side
light bulb, and turn the steering
wheel to the right when replac-
ing the left side light bulb.
Remove the 2 screws.
1
2
3
1
2
Page 334 of 440
3347-3. Do-it-yourself maintenance
AYGO_EE_OM99J92E
Remove the fender liner clip
and open the fender liner.
Unplug the connector while
pressing the lock release.
Turn the bulb base counter-
clockwise.
Set the new light bulb.
Align the 3 tabs on the light bulb
with the mounting, and insert.
Turn it clockwise to set.
3
4
5
6
Page 335 of 440
3357-3. Do-it-yourself maintenance
7
Maintenance and care
AYGO_EE_OM99J92E
Set the connector.
After installing the connector,
shake the bulb base gently to
check that it is not loose, turn
the fog lights on once and visu-
ally confirm that no light is leak-
ing through the mounting.
Reinstall the fender liner and
install the clip.
Insert the clip and turn to lock.
Reinstall the 2 screws.
7
8
9
Page 336 of 440
3367-3. Do-it-yourself maintenance
AYGO_EE_OM99J92E
■Stop/tail lights, back-up light, rear fog light and rear turn signal
lights
Open the back door and
remove the 2 screws, and
remove the lamp assembly
by pulling it directly backward
from the rear of the vehicle.
Turn the bulb base counter-
clockwise.
Stop/tail light
Back-up light or rear fog
light
Rear turn signal light
Remove the light bulb.
Stop/tail light
Back-up light or rear fog
light
Rear turn signal light
When installing the light bulb, install by conducting and
with the directions reversed.
Install the lamp assembly
and then install the 2 screws.
Align the guide ( ) and pins
( ) on the lamp assembly with
the mounting when installing it.
1
2
1
2
3
3
1
2
3
432
5
1
2
Page 337 of 440
3377-3. Do-it-yourself maintenance
7
Maintenance and care
AYGO_EE_OM99J92E
■License plate lights
Disengage the claws and
remove the license plate
lights.
To prevent damage, cover the
tip of the flathead screwdriver
with rag.
Turn the bulb base counter-
clockwise.
Remove the light bulb.
Set the new light bulb and
turn the bulb base clockwise.
1
2
3
4
Page 338 of 440
3387-3. Do-it-yourself maintenance
AYGO_EE_OM99J92E
Reinstall the license plate
lights as shown in the illustra-
tion.
Align the notches and claws on
the license plate lights with the
mounting when installing.
■High mounted stoplight
Push the upper springs using
the flathead screwdriver and
remove the high mounted
stoplight assembly.
To prevent damage, cover the
tip of the flathead screwdriver
with rag.
Remove the bulb base.
5
Spring
Springs
1
2
Page 339 of 440

3397-3. Do-it-yourself maintenance
7
Maintenance and care
AYGO_EE_OM99J92E
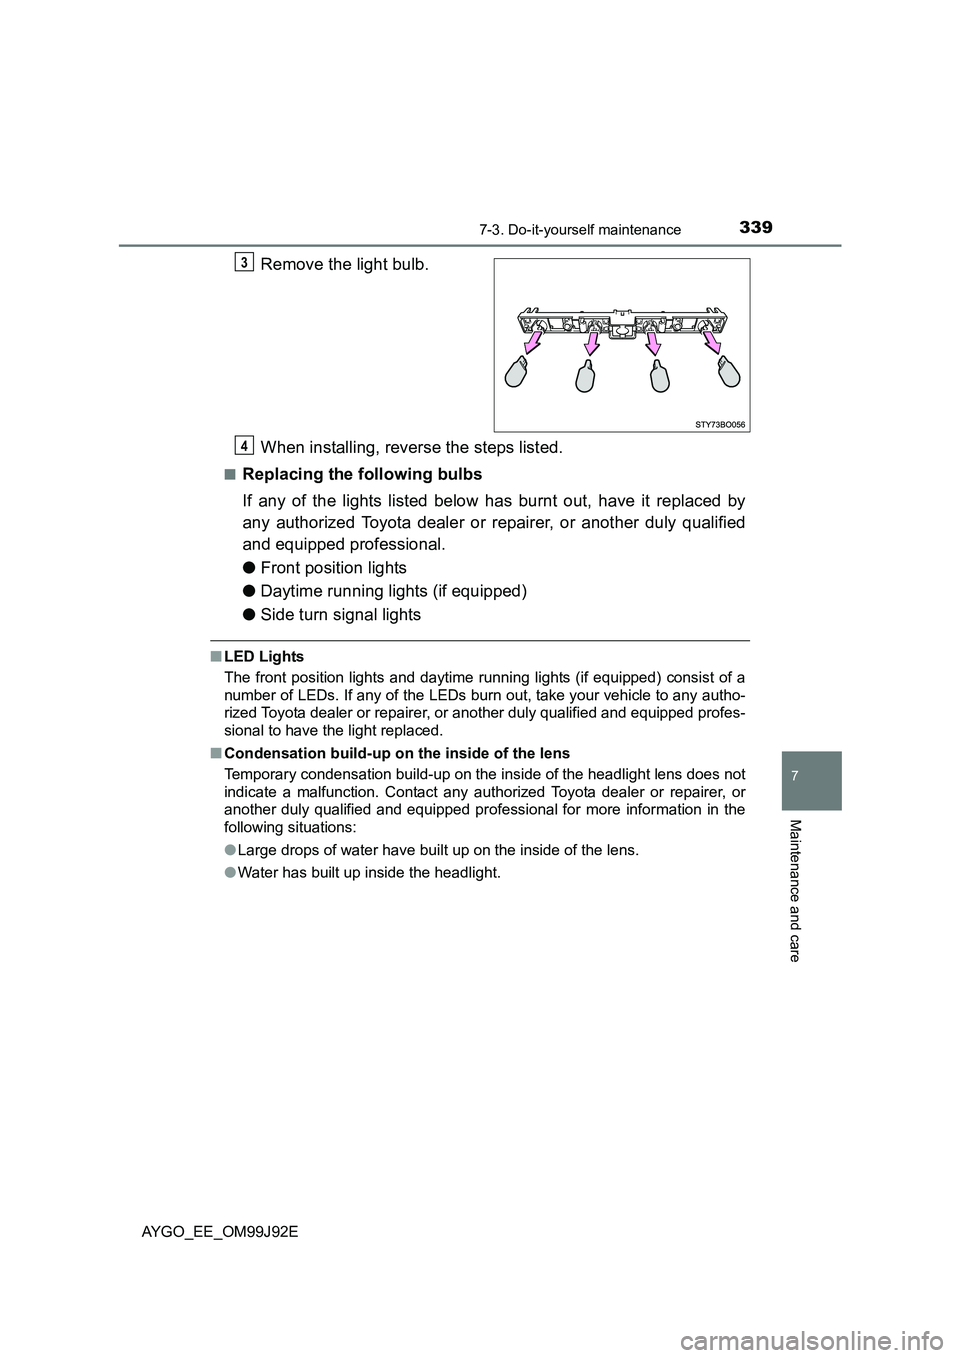
Remove the light bulb.
When installing, reverse the steps listed.
■Replacing the following bulbs
If any of the lights listed below has burnt out, have it replaced by
any authorized Toyota dealer or repairer, or another duly qualified
and equipped professional.
● Front position lights
● Daytime running lights (if equipped)
● Side turn signal lights
■LED Lights
The front position lights and daytime running lights (if equipped) consist of a
number of LEDs. If any of the LEDs burn out, take your vehicle to any autho-
rized Toyota dealer or repairer, or another duly qualified and equipped profes-
sional to have the light replaced.
■ Condensation build-up on the inside of the lens
Temporary condensation build-up on the inside of the headlight lens does not
indicate a malfunction. Contact any authorized Toyota dealer or repairer, or
another duly qualified and equipped professional for more information in the
following situations:
● Large drops of water have built up on the inside of the lens.
● Water has built up inside the headlight.
3
4
Page 340 of 440
3407-3. Do-it-yourself maintenance
AYGO_EE_OM99J92E
WARNING
■ Replacing light bulbs
● Turn off the lights. Do not attempt to replace the bulb immediately after
turning off the lights.
The bulbs become very hot and may cause burns.
● Do not touch the glass portion of the light bulb with bare hands. When it is
unavoidable to hold the glass portion, use and hold with a clean dry cloth
to avoid getting moisture and oils on the bulb.
Also, if the bulb is scratched or dropped, it may blow out or crack.
● Fully install light bulbs and any parts used to secure them. Failure to do so
may result in heat damage, fire, or water entering the headlight unit. This
may damage the headlights or cause condensation to build up on the lens.
■ To prevent damage or fire
● Make sure bulbs are fully seated and locked.
● Check the wattage of the bulb before installing to prevent heat damage.