2015 SKODA SUPERB warning
[x] Cancel search: warningPage 7 of 100

Notes
Structure of these Operating Instructions
The Operating Instructions are hierarchically divided into the following areas.
■ Main chapters (e.g. Introductory information) - the title of the main chapter is
always shown on the lower right side of the page ■ Chapter (e.g. Equipment overview)
■ Introduction to the topic - Module Overview within the chapter intro-
ductory information about the chapter content, if necessary, valid for the
entire chapter notes
■ Module (for example, Switching the unit on/off)
Text notesNoteMeaning“Press”Short press of the button for under 1 s“Hold”Long press of the button for 2 - 5 s
Text Symbols
SymbolMeaningReference to the introductory module of a chapter with im-
portant information and safety warningsContinuation of the module on the next page®Registered Trademark™→Marker to the next operation stepThe text symbol used for the right control dialWARNINGTexts with this symbol draw attention to threats of a serious accident, in-
jury or loss of life .
CAUTION
Texts with this symbol draw attention to the risk of vehicle damage or possible
inoperability of some systems.
Note
Texts with this symbol contain additional information.Information search
When searching for information in the Operating Instructions, we recommend
using the Index at the end of the manual.4Notes
Page 9 of 100
Introductory information
Important notes
Introduction
This chapter contains information on the following subjects:
Information on use, updating and compatibility
6
Component protection
6WARNING■ Concentrate fully at all times on your driving! As the driver you are fully
responsible for the operation of your vehicle.■
Only use the device in such a way that you are in full control of your vehi-
cle in every traffic situation – there is the risk of accidents!
■
Adjust the volume to ensure that acoustic signals from outside the vehi-
cle, e.g. sirens from emerging vehicles instructing you to give way to, such
as the police, ambulance and fire brigade, can be heard at all times.
■
High volumes can cause hearing damage!
CAUTION
In some countries, some unit features can no longer be selected when the ve-
hicle is running faster than a certain speed. This is not a malfunction, but com-
plies with the national legal regulations.
Information on use, updating and compatibility
Read and observe
and on page 6 first.
Refer to the ŠKODAInternet pages http://infotainment.skoda-auto.com for in-
formation on the compatibility of external devices as well as software updates
and navigation data.
Component protection
Read and observe
and on page 6 first.
Some electronic control units are equipped with protection components, which
serve as protective mechanisms, for example, in cases of theft of the ECUs.
For activated component theft protection the following message appears in
the screen Component theft protection: infotainment system availability cur-
rently limited. Please switch on the ignition.
If the component protection does not activate by switching on the ignition,
please contact a ŠKODA specialist garage.
Equipment overview
Introduction
This chapter contains information on the following subjects:
Description of the device
7
External module
7
Touch screen
7
Turn device on/off
7
Unit menus
8
Adjusting the volume
8
This chapter covers the device, the switching on and off and volume control of
the device.
6Introductory information
Page 11 of 100

Automatic Power On of the device
If the device was not turned off with the control switch before the ignition
was turned off, it will automatically switch on after the ignition is switched on.
Automatic Power Off of the device
If the vehicle key is pulled out of the ignition lock while the unit is switched on,
the device will switch off automatically.
If the vehicle is fitted with the starter button, the device will switch off auto-
matically after the engine is switched off and the door is opened.
With the ignition off, the device will automatically turn off after about 30 mi-
nutes.
The device turns off automatically under certain circumstances. The device in-
forms you for a few seconds by means of a text message on the device screen.
› Warning: 12 V battery low. Please start the engine or switch off the info-
tainment system. - The vehicle battery is low, start the engine or turn the
unit off.
› 12 V battery almost empty. The infotainment system will be switched off.
-
The vehicle battery is discharged, the device switches itself off.
› Operating temperature not maintained. The infotainment system will be
switched off. - The device temperature is too low or too high, the device
switches itself off.
Unit menus
Fig. 3
Unit menus
Call up the main menu
›
Press the key and the display shows the device menu
» Fig. 3.
Overview of the function keys
Menu Radio » page 17
Menu Media » page 22
Menu Images » page 30
Settings Sound » page 14
Device Settings Setup » page 14
Vehicle system settings Vehicle » page 80
Navigation menu » page 60
Menu Telephone » page 37
Menu TV tuner » page 34
Display of TMC traffic reports Road » page 76
Menu SmartLink » page 53
When connecting a supported mobile device, the actual connection is
shown instead of a symbol
›
-
Android Auto » page 54
›
-
Apple CarPlay » page 56
›
-
MirrorLink™ » page 57
Adjusting the volume
Every change in volume is displayed on the screen.
Increase volume
›
Turn the control to the right.
Decrease volume
›
Turn the control to the left.
Muting
›
Adjust the volume by turning the control to the left to 0.
The following symbol appears in the display when the sound is muted .
If at the time of muting a sound is made in the menu Media, then the playback
is interrupted (pause) 1)
.
CAUTION
If the volume is too high sound resonance can occur in the vehicle which can
lead to damaged speakers.1)
Does not apply to AUX.
8Introductory information
Page 14 of 100

›Telephone
› NavigationWARNINGDo not use the function of the telephone voice control in an emergency.
Your voice commands may not be recognized in such situations. The tele-
phone connection may not be established or the connection may take too
much time to complete. The emergency number should be dialled manually!
CAUTION
The messages are generated by the device. The flawless clarity (e.g. road or
city name) cannot always be guaranteed.
Function requirements
Read and observe
and on page 11 first.
Function requirements for voice control The unit is switched on.
No telephone call is in progress.
The parking aid is not active.
Requirements for optimum voice command recognition
› The voice commands are only then to be spoken when the symbol is dis-
played in the device screen or in the display of the combined instrument
.
› Speak with a normal tone of voice without intonation and excessive pauses.
› Avoid bad pronunciation.
› Close the doors, windows and sliding roof, in order to avoid disturbing envi-
ronmental influences on the function of the voice commands.
› You are recommended to speak louder at higher speeds, so that the sound of
your voice is not drowned out by the increased ambient noise.
› During voice control, limit additional noise in the vehicle, e.g. passengers
talking at the same time.
CAUTION
■ For some languages, there is no voice control available. This device indicates
this fact through a text message that is displayed after setting the device lan-
guage screen .
Note
During voice control, no navigation announcements and traffic announce-
ments are played.Switching on/off
Read and observe
and on page 11 first.
Switching on voice control
Voice control can be switched on in one of the following ways.
›
Press the key on the device.
or
›
Release the symbol key
on the multifunction steering wheel.
Activation of voice control is indicated by an acoustic signal and the device
screen will display a collection of basic voice commands for the current menu.
Switching off voice control
Voice control can be switched off in one of the following ways.
›
Hold the button on the device or press twice.
›
Release the symbol key
on the multifunction steering wheel or press
twice.
›
Issue the voice command End voice control.
The voice control switches off when certain device buttons (e.g.
, etc.)
are operated.
Guidance and help for voice control
Read and observe
and on page 11 first.
The unit will play a tutorial for voice mode, which makes using the familiar
voice control operate the appliance you, or help with the information which
voice commands are expected for the currently selected menu.
Instructions for voice control
When you give the voice command Start tutorial, the unit plays one of the sev-
en parts of the voice control tutorial. After saying the command again the next
part is played , etc.
Individual parts of the introduction can be called up separately by saying the
voice command Introduction part ... and the number 1 through 7.
Help for voice control
When you give the voice command Help, the unit displays voice commands for
the current selected menu. In some cases, after pronouncing Help again, the
next part of the help is shown.
11Device operation and settings
Page 24 of 100
■Auto-save station logos - Automatic storage of the station logos
■ DAB traffic announcements - Switch on/off DAB traffic announcements
■ Other DAB announcements - Switch on/off other announcements (e.g.,
warnings, regional weather, sports reports, financial news)
■ DAB - DAB station tracking - Switch on/off automatic DAB station tracking
on another frequency or in other station groups
■ Automatic DAB - FM switching - Switch on/off auto-switching from DAB to
the FM broadcasting range if the DAB signal is lost
■ L-Band - Enable / disable the availability of L-band
DAB station tracking
When a DAB transmitter is a part of several broadcast stations and if the cur-
rent station group is not available on any other frequency, then when the sig-
nal is poor, the same station will be searched in another channel group.
Automatic change from DAB to FM
With bad DAB reception the device tries to find an FM transmitter.
The station name is followed by ( ) while the station is being received on the
FM band. The ( ) marker disappears when the relevant DAB station can be re-
ceived again.
If a DAB station is also not available in the FM band due to poor reception, the
device will be switched to mute.
L-band
For the DAB radio reception in different countries, different broadcasting rang-
es are used. In some countries the DAB radio reception is only possible in the
so called L-band.
If no L-band DAB radio reception is possible in the country then we recom-
mend turning off the L-band. The channel scan is therefore faster.21Radio
Page 28 of 100
WARNING■Never place audio sources close to the airbags. They could be thrown into
the passenger compartment when the airbags are deployed, injuring the
occupants.■
Never place audio sources on the dash panel, in your hand or on your
knees. They could be thrown into the passenger compartment during sud-
den driving manoeuvres, thereby injuring the occupants.
■
Always route the connection cable of the audio source such that is does
not restrict you when driving.
CAUTION
Do not store any important data on the connected sources. ŠKODA assumes
no responsibility for lost or damaged files or connected audio sources.
Jukebox
Fig. 13
Importing files into the Jukebox / Jukebox database
Read and observe
and on page 25 first.
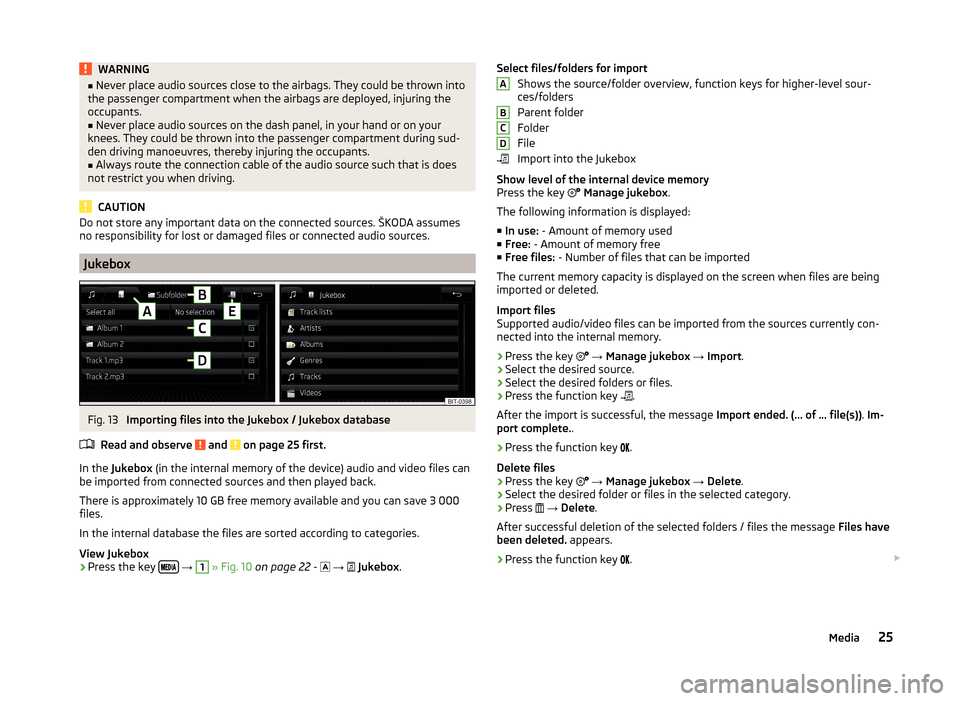
In the Jukebox (in the internal memory of the device) audio and video files can
be imported from connected sources and then played back.
There is approximately 10 GB free memory available and you can save 3 000
files.
In the internal database the files are sorted according to categories.
View Jukebox
›
Press the key
→
1
» Fig. 10 on page 22 -
→
Jukebox .
Select files/folders for import
Shows the source/folder overview, function keys for higher-level sour-
ces/folders
Parent folder
Folder
File
Import into the Jukebox
Show level of the internal device memory
Press the key
Manage jukebox .
The following information is displayed:
■ In use: - Amount of memory used
■ Free: - Amount of memory free
■ Free files: - Number of files that can be imported
The current memory capacity is displayed on the screen when files are being imported or deleted.
Import files
Supported audio/video files can be imported from the sources currently con-
nected into the internal memory.
› Press the key
→ Manage jukebox → Import .
› Select the desired source.
› Select the desired folders or files.
› Press the function key
.
After the import is successful, the message Import ended. (… of … file(s)). Im-
port complete. .
› Press the function key
.
Delete files
› Press the key
→ Manage jukebox → Delete .
› Select the desired folder or files in the selected category.
› Press
→ Delete .
After successful deletion of the selected folders / files the message Files have
been deleted. appears.
› Press the function key
. ABCD25Media
Page 29 of 100
Note■It is not possible to copy the contents of copyright protected CDs or DVDs to
the Jukebox.■
Files that have already been copied are recognized and cannot be copied
again (shown in grey).
■
It is not possible to copy files while simultaneously playing back audio or vid-
eo files in the CD/DVD drive.
CD / DVD
Fig. 14
CD/DVD case
Read and observe
and on page 25 first.
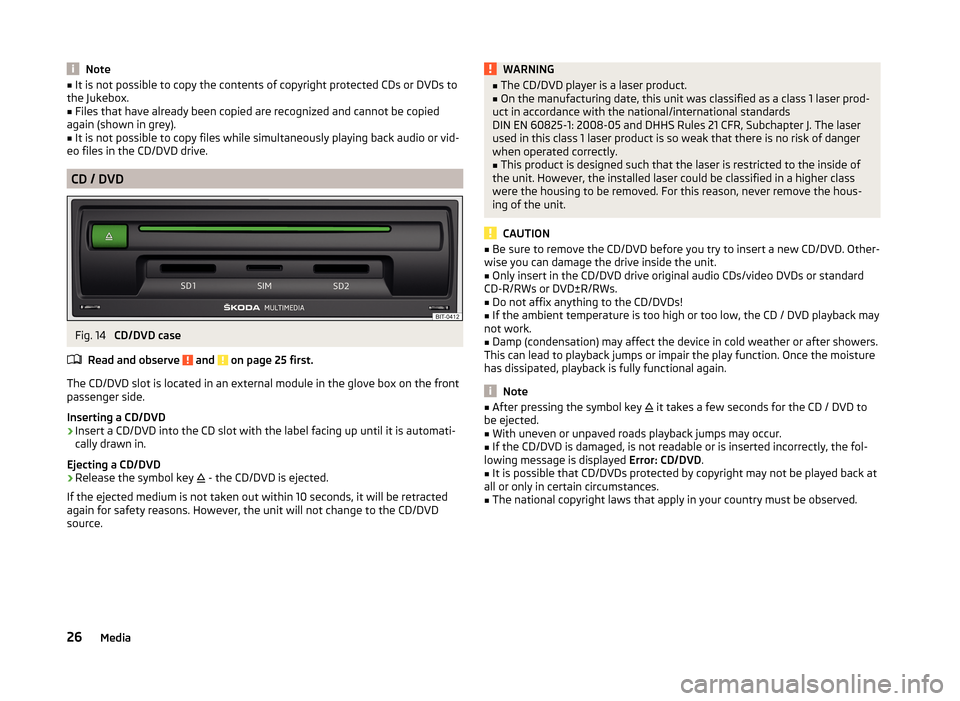
The CD/DVD slot is located in an external module in the glove box on the front
passenger side.
Inserting a CD/DVD
›
Insert a CD/DVD into the CD slot with the label facing up until it is automati-
cally drawn in.
Ejecting a CD/DVD
›
Release the symbol key
- the CD/DVD is ejected.
If the ejected medium is not taken out within 10 seconds, it will be retracted
again for safety reasons. However, the unit will not change to the CD/DVD
source.
WARNING■ The CD/DVD player is a laser product.■On the manufacturing date, this unit was classified as a class 1 laser prod-
uct in accordance with the national/international standards
DIN EN 60825-1: 2008-05 and DHHS Rules 21 CFR, Subchapter J. The laser
used in this class 1 laser product is so weak that there is no risk of danger
when operated correctly.■
This product is designed such that the laser is restricted to the inside of
the unit. However, the installed laser could be classified in a higher class
were the housing to be removed. For this reason, never remove the hous-
ing of the unit.
CAUTION
■ Be sure to remove the CD/DVD before you try to insert a new CD/DVD. Other-
wise you can damage the drive inside the unit.■
Only insert in the CD/DVD drive original audio CDs/video DVDs or standard
CD-R/RWs or DVD±R/RWs.
■
Do not affix anything to the CD/DVDs!
■
If the ambient temperature is too high or too low, the CD / DVD playback may
not work.
■
Damp (condensation) may affect the device in cold weather or after showers.
This can lead to playback jumps or impair the play function. Once the moisture
has dissipated, playback is fully functional again.
Note
■ After pressing the symbol key it takes a few seconds for the CD / DVD to
be ejected.■
With uneven or unpaved roads playback jumps may occur.
■
If the CD/DVD is damaged, is not readable or is inserted incorrectly, the fol-
lowing message is displayed Error: CD/DVD.
■
It is possible that CD/DVDs protected by copyright may not be played back at
all or only in certain circumstances.
■
The national copyright laws that apply in your country must be observed.
26Media
Page 31 of 100
Bluetooth®
player
Read and observe
and on page 25 first.
The unit allows audio files of a connected Bluetooth ®
player to play using the
A2DP and AVRCP audio profile.
Connect the Bluetooth ®
player
›
Connect the player to the device - follow the same instructions as for pairing
the device with a telephone » page 41.
›
Select the audio source
BT audio » page 22 , Select audio source and then
the desired player.
Separate the Bluetooth ®
player
›
Terminate the connection in the list of paired devices » page 43.
Automatic playback stop and disconnection
If an Apple device is connected as a Bluetooth ®
player and is it connected to
the USB input (for example, for the purpose of charging the connected device),
then playback via Bluetooth ®
stops and playback is then only possible via USB.
If the audio source is switched from Bluetooth ®
Players to USB, then there is
an automatic interruption of the Bluetooth ®
connection. The following warning
message appears in the screen Bluetooth audio (A2DP) … Connection cancel-
led.
If the Bluetooth ®
player audio source is connected to the AUX input, then the
audio output is switched from the AUX input of the connected device. For fur-
ther playback the audio source is to be switched to AUX.
Note
If a device is connected to the device using Apple CarPlay, then a connection
using Bluetooth ®
is possible.
WLAN
Read and observe
and on page 25 first.
The device allows you to play audio files connected from a WLAN device to the
device.
Play over WLAN
›
Connect the player to the device's WLAN » page 51, WLAN Hotspot - Con-
nection to the external device with the device WLAN .
›Start the UPnP application in the connected device or connect a device that
allows you to set up a DLNA server.›
Select the audio source
WLAN » page 22 , Select audio source .
AUX - input
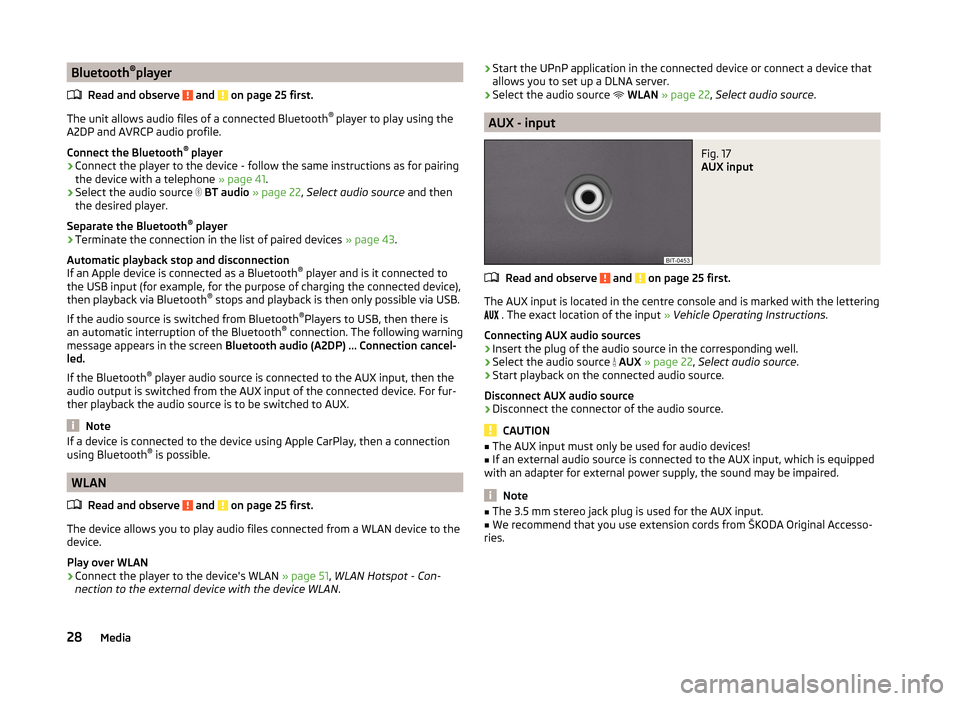
Fig. 17
AUX input
Read and observe and on page 25 first.
The AUX input is located in the centre console and is marked with the lettering
. The exact location of the input
» Vehicle Operating Instructions .
Connecting AUX audio sources
›
Insert the plug of the audio source in the corresponding well.
›
Select the audio source
AUX » page 22 , Select audio source .
›
Start playback on the connected audio source.
Disconnect AUX audio source
›
Disconnect the connector of the audio source.
CAUTION
■ The AUX input must only be used for audio devices!■If an external audio source is connected to the AUX input, which is equipped
with an adapter for external power supply, the sound may be impaired.
Note
■ The 3.5 mm stereo jack plug is used for the AUX input.■We recommend that you use extension cords from ŠKODA Original Accesso-
ries.28Media