Page 29 of 100

Note■It is not possible to copy the contents of copyright protected CDs or DVDs to
the Jukebox.■
Files that have already been copied are recognized and cannot be copied
again (shown in grey).
■
It is not possible to copy files while simultaneously playing back audio or vid-
eo files in the CD/DVD drive.
CD / DVD
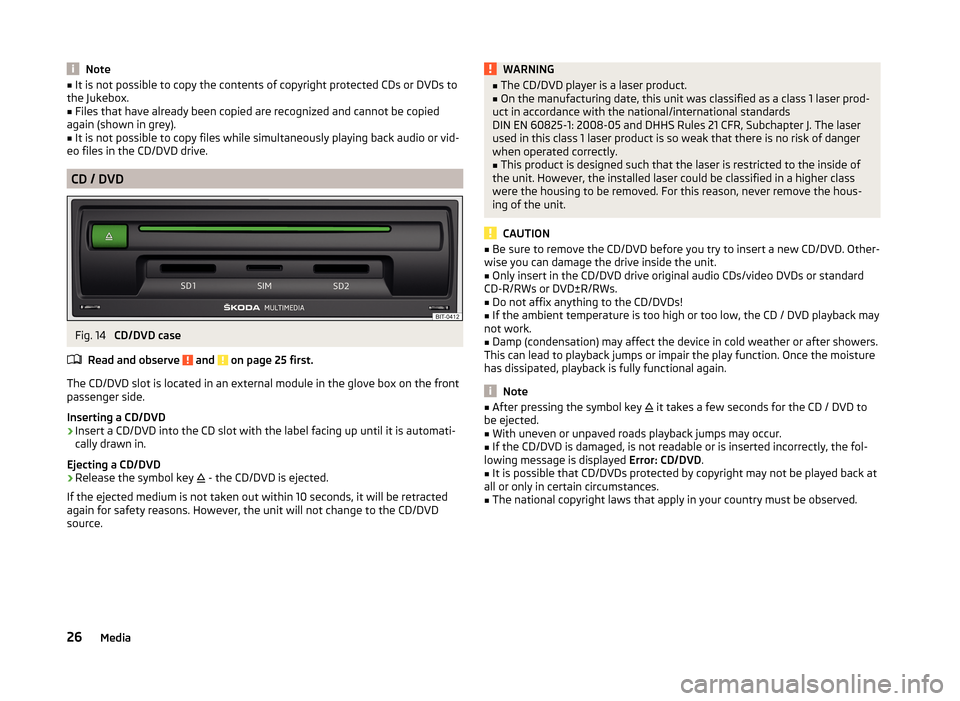
Fig. 14
CD/DVD case
Read and observe
and on page 25 first.
The CD/DVD slot is located in an external module in the glove box on the front
passenger side.
Inserting a CD/DVD
›
Insert a CD/DVD into the CD slot with the label facing up until it is automati-
cally drawn in.
Ejecting a CD/DVD
›
Release the symbol key
- the CD/DVD is ejected.
If the ejected medium is not taken out within 10 seconds, it will be retracted
again for safety reasons. However, the unit will not change to the CD/DVD
source.
WARNING■ The CD/DVD player is a laser product.■On the manufacturing date, this unit was classified as a class 1 laser prod-
uct in accordance with the national/international standards
DIN EN 60825-1: 2008-05 and DHHS Rules 21 CFR, Subchapter J. The laser
used in this class 1 laser product is so weak that there is no risk of danger
when operated correctly.■
This product is designed such that the laser is restricted to the inside of
the unit. However, the installed laser could be classified in a higher class
were the housing to be removed. For this reason, never remove the hous-
ing of the unit.
CAUTION
■ Be sure to remove the CD/DVD before you try to insert a new CD/DVD. Other-
wise you can damage the drive inside the unit.■
Only insert in the CD/DVD drive original audio CDs/video DVDs or standard
CD-R/RWs or DVD±R/RWs.
■
Do not affix anything to the CD/DVDs!
■
If the ambient temperature is too high or too low, the CD / DVD playback may
not work.
■
Damp (condensation) may affect the device in cold weather or after showers.
This can lead to playback jumps or impair the play function. Once the moisture
has dissipated, playback is fully functional again.
Note
■ After pressing the symbol key it takes a few seconds for the CD / DVD to
be ejected.■
With uneven or unpaved roads playback jumps may occur.
■
If the CD/DVD is damaged, is not readable or is inserted incorrectly, the fol-
lowing message is displayed Error: CD/DVD.
■
It is possible that CD/DVDs protected by copyright may not be played back at
all or only in certain circumstances.
■
The national copyright laws that apply in your country must be observed.
26Media
Page 30 of 100

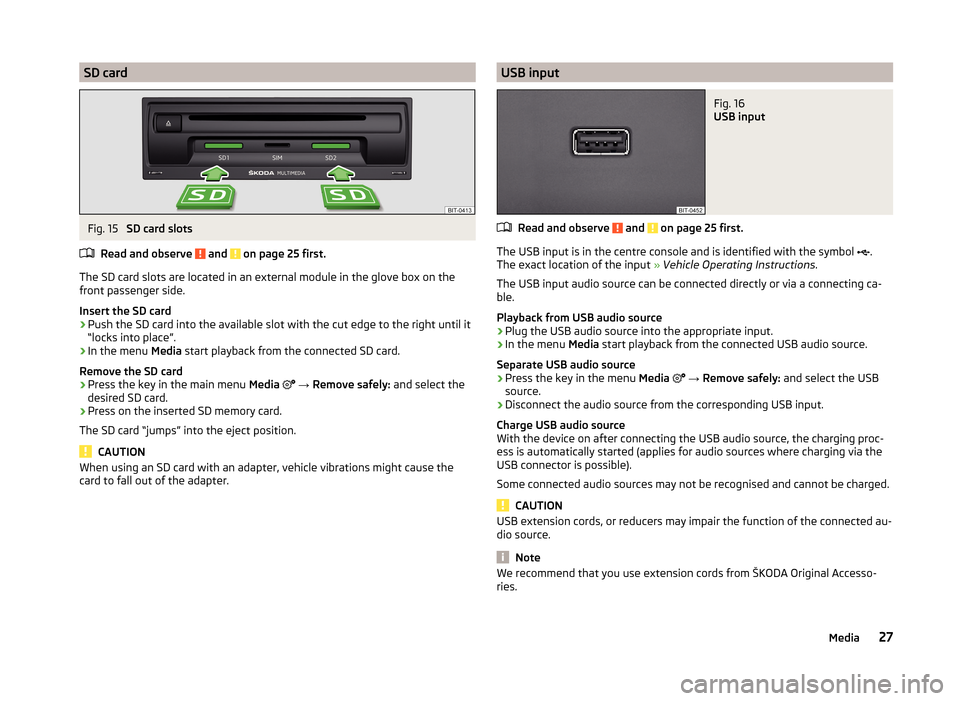
SD cardFig. 15
SD card slots
Read and observe
and on page 25 first.
The SD card slots are located in an external module in the glove box on the
front passenger side.
Insert the SD card
›
Push the SD card into the available slot with the cut edge to the right until it
“locks into place”.
›
In the menu Media start playback from the connected SD card.
Remove the SD card
›
Press the key in the main menu Media
→ Remove safely: and select the
desired SD card.
›
Press on the inserted SD memory card.
The SD card “jumps” into the eject position.
CAUTION
When using an SD card with an adapter, vehicle vibrations might cause the
card to fall out of the adapter.USB inputFig. 16
USB input
Read and observe and on page 25 first.
The USB input is in the centre console and is identified with the symbol .
The exact location of the input » Vehicle Operating Instructions .
The USB input audio source can be connected directly or via a connecting ca-
ble.
Playback from USB audio source
›
Plug the USB audio source into the appropriate input.
›
In the menu Media start playback from the connected USB audio source.
Separate USB audio source
›
Press the key in the menu Media
→ Remove safely: and select the USB
source.
›
Disconnect the audio source from the corresponding USB input.
Charge USB audio source
With the device on after connecting the USB audio source, the charging proc-
ess is automatically started (applies for audio sources where charging via the
USB connector is possible).
Some connected audio sources may not be recognised and cannot be charged.
CAUTION
USB extension cords, or reducers may impair the function of the connected au-
dio source.
Note
We recommend that you use extension cords from ŠKODA Original Accesso-
ries.27Media
Page 47 of 100

- Delete all device
- Delete the desired device
› Confirm the deletion by pressing the function key
Delete.
Note
The Bluetooth ®
audio profile can be turned off/on by pressing the button →
→ Bluetooth → Bluetooth audio (A2DP/AVRCP) .
Connection using the SIM card in the external module
Introduction
This chapter contains information on the following subjects:
Slot in SIM card and establish connection
44
Remove SIM card
45
The device allows the use of a connection in the external module of the device
by means of the inserted SIM card.
The SIM card can be used for data and telephone services.
The services are available (with the ignition on when the ignition is switched off or if a telephone call is made).
The SIM card slot is located in an external module in the glove box on the front
passenger side.
A SIM card size mini (standard size 25x15 mm) is to be used.
CAUTION
■
When inserting an improperly sized SIM card, there is a risk of damaging the
device.■
Avoid using a an adapter for the SIM card as the SIM card may fall out while
driving due to vehicle vibrations. There is a risk of damage to the external
module.
Delete allSlot in SIM card and establish connectionFig. 27
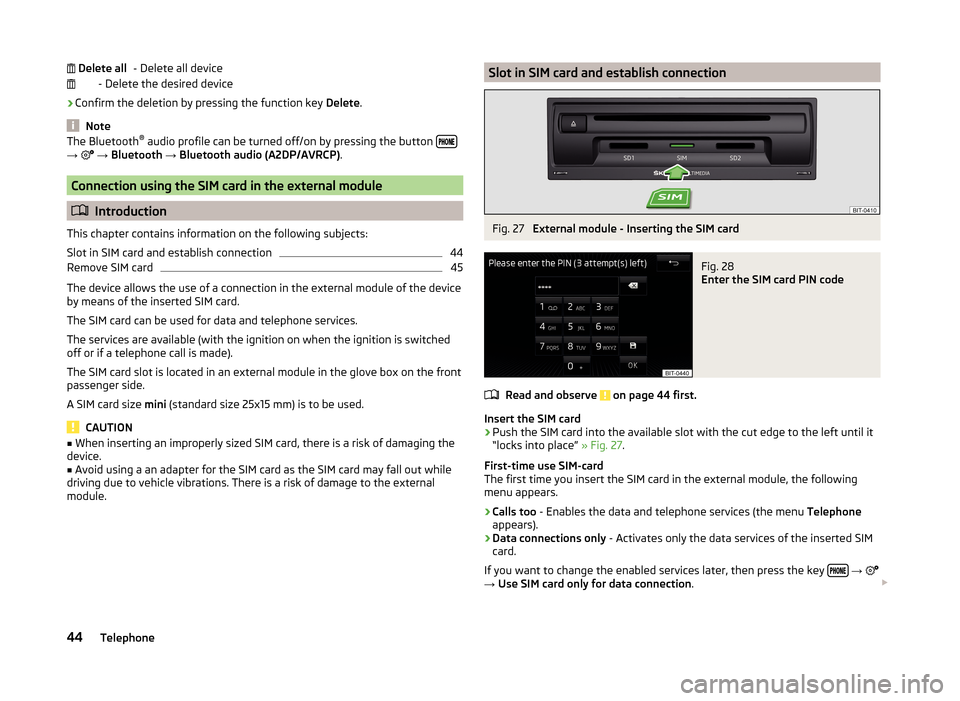
External module - Inserting the SIM card
Fig. 28
Enter the SIM card PIN code
Read and observe on page 44 first.
Insert the SIM card
›
Push the SIM card into the available slot with the cut edge to the left until it
“locks into place” » Fig. 27.
First-time use SIM-card
The first time you insert the SIM card in the external module, the following
menu appears.
›
Calls too - Enables the data and telephone services (the menu Telephone
appears).
›
Data connections only - Activates only the data services of the inserted SIM
card.
If you want to change the enabled services later, then press the key
→
→ Use SIM card only for data connection .
44Telephone