2015 SKODA SUPERB phone
[x] Cancel search: phonePage 54 of 100
WLAN connectivity and data connection
WLAN
Introduction
This chapter contains information on the following subjects:
WLAN Hotspot - Connection to the external device with the device WLAN
51
WLAN Client - Connect the device to an external device with WLAN
51
WLAN client - manual settings
52
The requirement for the WLAN function is the ignition is switched on.
After switching on the ignition, the last-used WLAN connection appears.
WLAN can be used to connect to the Internet or as a source for playing audio
files in the menu Media.
The device allows you to set up the WLAN hotspot on which up to 8 external
devices can be connected, or to connect to an external device via WLAN client.
WLAN hotspot and WLAN client are two independent connections, these can
be turned on simultaneously.
If the external module has a SIM card with activated data services or if there is
a connection with the telephone via the rSAP profile then it is not possible to
connect the device to the external device using WLAN.
WLAN Hotspot - Connection to the external device with the device
WLAN
WLAN hotspot switch on/off
›
Press the key
→
→ WLAN → Mobile hotspot → Mobile hotspot .
Connection set-up
›
Set WLAN hotspot in the device » page 16, WLAN Settings .
›
Enable the WLAN in the external device and search for any available WLAN.
›
Select the WLAN hotspot of the device (WLAN name of the device - SSID
» page 16 , WLAN Settings ).
›
Enter the type of security and the access password (if required).
WLAN Client - Connect the device to an external device with
WLANFig. 36
List of available WLAN networks
WLAN client switch on/off
›
Press the key
→
→ WLAN → WLAN → WLAN .
View of available WLAN networks
› Press the key
→
→ WLAN → WLAN 1)
.
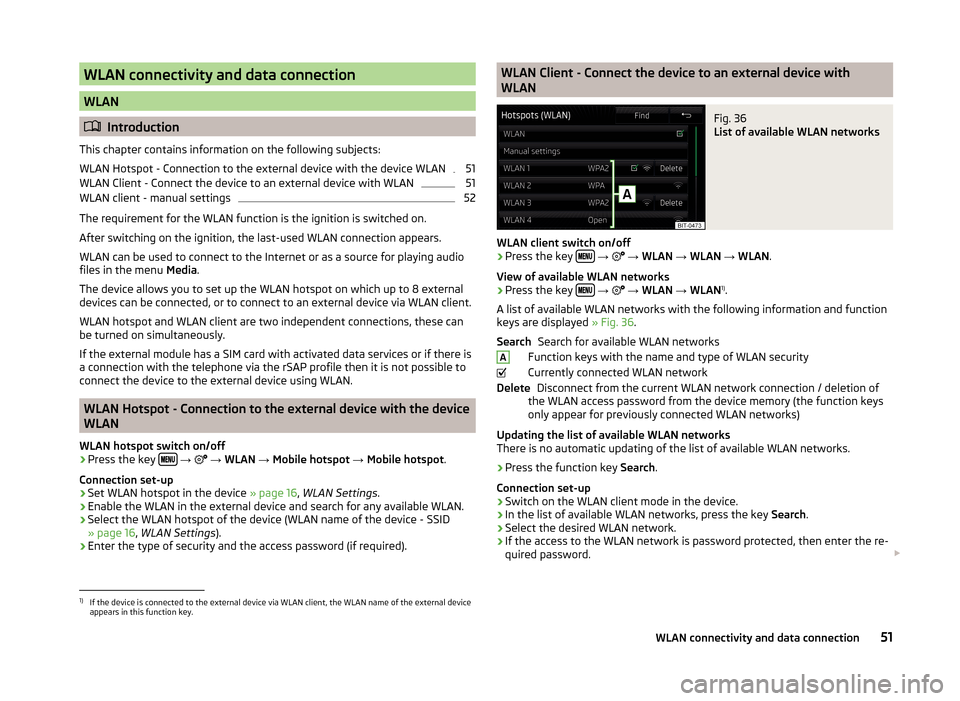
A list of available WLAN networks with the following information and function
keys are displayed » Fig. 36.
Search for available WLAN networks
Function keys with the name and type of WLAN security
Currently connected WLAN network Disconnect from the current WLAN network connection / deletion of
the WLAN access password from the device memory (the function keys
only appear for previously connected WLAN networks)
Updating the list of available WLAN networks
There is no automatic updating of the list of available WLAN networks.
› Press the function key
Search.
Connection set-up › Switch on the WLAN client mode in the device.
› In the list of available WLAN networks, press the key
Search.
› Select the desired WLAN network.
› If the access to the WLAN network is password protected, then enter the re-
quired password.
SearchADelete1)
If the device is connected to the external device via WLAN client, the WLAN name of the external device
appears in this function key.
51WLAN connectivity and data connection
Page 55 of 100
If the device is connected to the external device via WLAN client the following
will appear in the function key
→ → WLAN → WLAN the WLAN name
of the external device.
Security type
In the list of available WLAN networks the security type appears in the func-
tion key with the name of the WLAN security type A
» Fig. 36 .
■ WPA2 - WPA2 security
■ WPA - WPA security
■ Open - Without security (without WLAN access password)
Disconnection
› Switch off the WLAN client mode in the device.
or
› Press the key
→
→ WLAN → WLAN → Delete .
WLAN client - manual settings
Manual settings / connections are then to be used when the desired WLAN
network is not in the list of available WLAN networks (e.g. the desired WLAN
network is not broadcasting a name).
›
Press the key
→
→ WLAN → WLAN → Manual settings .
›
Enter and select the following menu items.
■ Network name - Enter the WLAN name
■ Network key - Enter password for the WLAN connection
■ Security level: - Setting of the WLAN connection security
■ WPA2 - WPA2 security
■ WPA - WPA security
■ No security level - Without protection (without WLAN access password)
› Press the function key
Connect.
Data connection
Introduction
This chapter contains information on the following subjects:
Connection options for the data connection
52
Settings
52Connection options for the data connection
Using the data connection, the device can be connected to the Internet.
The data connection can be established in one of the following ways.
Data connection using rSAP›
Connect the device via Bluetooth ®
profile rSAP to a telephone with activated
data services.
Data connection using the SIM card in the external module
›
Insert a SIM card with activated data services in the external module and es-
tablish the data connection » page 44.
Data connection via WLAN
›
Connect the device to an external device with activated data services over
the WLAN client mode » page 51.
Settings
›
Press the key
→
→ Network .
■ Network settings - Setting of the data connection according to the associ-
ated telephone service provider (APN settings)
■ Access point name: ... - Setting of the access point name
■ User name: … - Setting of user name
■ Password: ... - Password setting
■ Authentication - Setting for the type of verification
■ Normal - Without verification
■ Safe - Verification required
■ Delete connection - Delete the data connection
■ Reset access point (APN) - Delete the settings of the data connection pa-
rameters
■ Store - Saving the settings
■ Network provider: ... - Select the data connection provider (the menu item is
visible when only the data connection of the inserted SIM card is active)
■ Data roaming - Enable / disable the use of data roaming connection
■ Current connection details - Display of information on data downloaded (by
pressing the function key Reset the data information is deleted)
■ Restore factory settings - Restoring the data connection settings
■ Data connection: - Settings relating to turning on/off the data connection
■ Off - Turning the data connection off
■ Ask - Switch on the data connection after confirming the request
■ On - Switch on the data connection
52WLAN connectivity and data connection
Page 56 of 100
SmartLink
Introductory information
Introduction
This chapter contains information on the following subjects:
Main menu
53
List of connected devices
54
Settings
54
The SmartLink function offers the possibility to display and operate certified
applications of a connected device (such as a telephone) in the device screen.
Depending on the connected device some applications can be started using
the voice activation, via the device screen, using the operating elements on
the device or using the buttons on the multi-function steering wheel.
The voice control of the connected device can be activated by pressing and
holding the button
or by pressing and holding the symbol key
on the
multifunction steering wheel.
For reasons of safety, the operation of some applications while driving is limi-
ted or not possible.
Using the applications in the connected device it is possible to use the naviga-
tion, to make a call, to listed to music or similar things.
The SmartLinkFunction supports the following connection types.
› Android Auto ™
› Apple CarPlay
› MirrorLink ™
The device allows only one active connection.
CAUTION■ ŠKODA is not responsible for damage to the unit or to the vehicle by the use
of faulty or incorrectly programmed applications in the connected device.■
Due to the low charging current from the USB input, intensive use of the
SmartLink function can lead to the discharge of the battery of the connected
device.
■
To establish the connection, it is necessary that the date and time values in
the device are set correctly. If the setting of the date and time values are
based on the GPS signal, then a connection may not be possible with bad sig-
nal reception. If there is sufficient signal reception, the synchronization of the
device with the GPS signal may take up to ten minutes.
Note
■ We recommend that you use extension cords from ŠKODA Original Accesso-
ries.■
The device saves the last 10 connected devices.
■
With some connected devices, it is necessary that the connected device is
“unlocked” over the entire duration of the connection for trouble-free func-
tioning of the SmartLink function.
Main menu
Fig. 37
Main menu: no connection / example of an active connection
Read and observe
on page 53 first.
›
Press the key
→
.
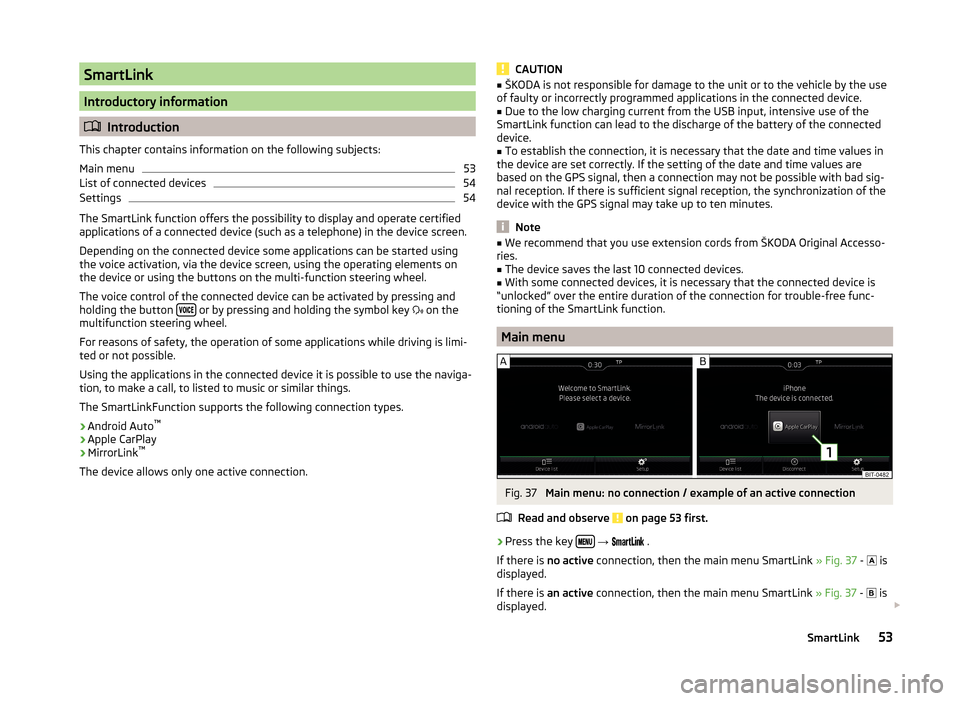
If there is no active connection, then the main menu SmartLink » Fig. 37 -
is
displayed.
If there is an active connection, then the main menu SmartLink » Fig. 37 -
is
displayed.
53SmartLink
Page 58 of 100
Some applications require that the data connection in the connected device is
turned on.
By establishing the Android Auto ™
connection all existing Bluetooth ®
connec-
tions are terminated to the device and a Bluetooth ®
connection using the
Android Auto ™
is established to the device.
A device connected using Android Auto ™
cannot be used as an audio source in
the menu Media.
If route guidance is active at this moment in the device, then this is terminated
by starting the route guidance in the Android Auto ™
application. This is also
true reciprocally.
A list of devices and applications that the Android Auto ™
connection supports
can be found on the Google website.
Main menu
Fig. 39
Android Auto™: Main menu
Connection set-up
The device saves the last 10 connected devices.
›
Connect the device to the USB input » Vehicle operating instructions .
In the main menu the Android Auto ™
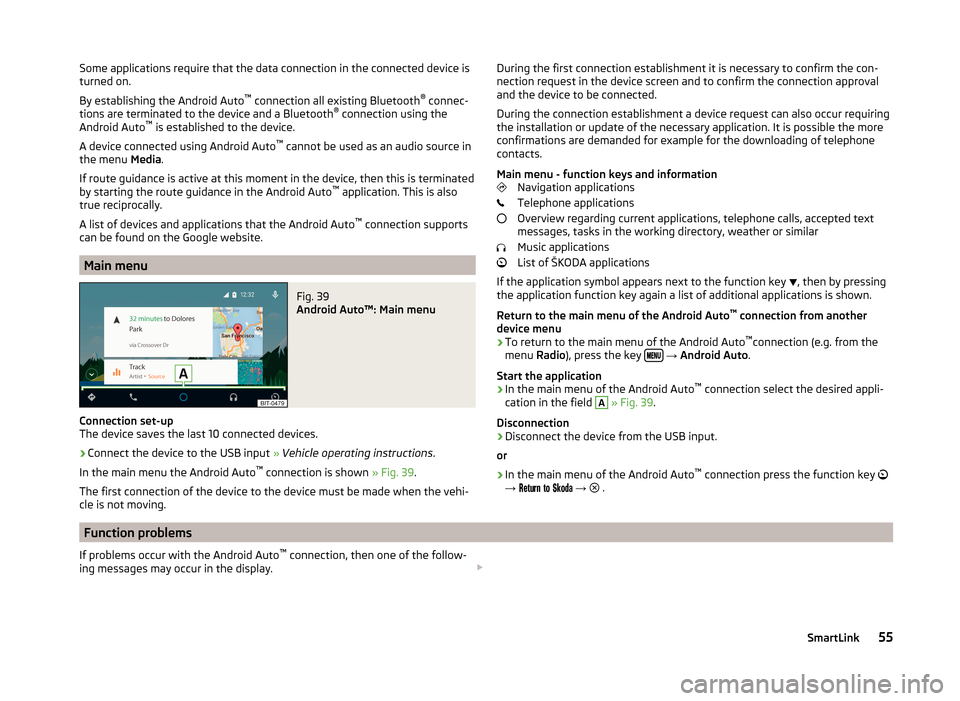
connection is shown » Fig. 39.
The first connection of the device to the device must be made when the vehi- cle is not moving.
During the first connection establishment it is necessary to confirm the con-
nection request in the device screen and to confirm the connection approval
and the device to be connected.
During the connection establishment a device request can also occur requiring
the installation or update of the necessary application. It is possible the more
confirmations are demanded for example for the downloading of telephone
contacts.
Main menu - function keys and information Navigation applications
Telephone applications
Overview regarding current applications, telephone calls, accepted text
messages, tasks in the working directory, weather or similar
Music applications
List of ŠKODA applications
If the application symbol appears next to the function key , then by pressing
the application function key again a list of additional applications is shown.
Return to the main menu of the Android Auto ™
connection from another
device menu
› To return to the main menu of the Android Auto ™
connection (e.g. from the
menu Radio), press the key
→ Android Auto .
Start the application › In the main menu of the Android Auto ™
connection select the desired appli-
cation in the field
A
» Fig. 39 .
Disconnection
› Disconnect the device from the USB input.
or
› In the main menu of the Android Auto ™
connection press the function key
→
→
.
Function problems
If problems occur with the Android Auto ™
connection, then one of the follow-
ing messages may occur in the display. 55SmartLink
Page 59 of 100
MessageMeaning… Unable to connect to mobile device. … is already connected via Android Au-
to.The device allows only one active connection.Check the setting on the mobile device and the connection.Stop the vehicle, “unlock” the display of the connected device and follow the
instructions displayed on the connected device.Apple CarPlay
Introduction
This chapter contains information on the following subjects:
Home menu
56
Function problems
57
The Apple CarPlay connection can be set up under the following conditions. The ignition is switched on.
The unit is switched on.
The device to be connected is switched on.
The data connection is turned on in the device to be connected.
The Siri voice control is switched on in the device to be connected.
By establishing an Apple CarPlay connection all existing Bluetooth ®
connec-
tions to the device are terminated and a connection using Apple CarPlay to the
connected device is established. During the Apple CarPlay connection the use
of the menu Telephone is not possible.
A device connected with Apple CarPlay cannot be used as an audio source in
the menu Media.
If at this moment the route guidance is active by means of the menu Naviga-
tion , then the guidance by the device is terminated by the start of the route
guidance in the Apple CarPlay application. This is also true reciprocally.
A list of devices, supported regions and applications that the Apple CarPlay
connection supports, can be obtained from the Apple website.
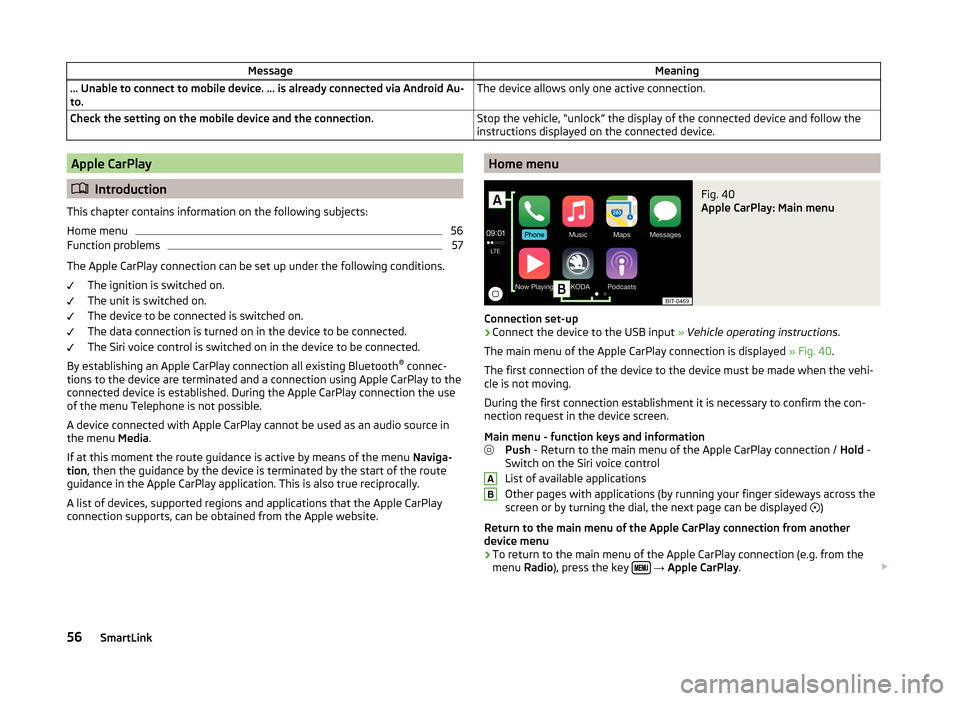
Home menuFig. 40
Apple CarPlay: Main menu
Connection set-up
›
Connect the device to the USB input » Vehicle operating instructions .
The main menu of the Apple CarPlay connection is displayed » Fig. 40.
The first connection of the device to the device must be made when the vehi-
cle is not moving.
During the first connection establishment it is necessary to confirm the con-
nection request in the device screen.
Main menu - function keys and information Push - Return to the main menu of the Apple CarPlay connection / Hold -
Switch on the Siri voice control
List of available applications
Other pages with applications (by running your finger sideways across the
screen or by turning the dial, the next page can be displayed )
Return to the main menu of the Apple CarPlay connection from another device menu
› To return to the main menu of the Apple CarPlay connection (e.g. from the
menu Radio), press the key
→ Apple CarPlay .
AB56SmartLink
Page 60 of 100
Start the application› In the main menu of the Apple CarPlay connection select the desired applica-
tion in the field A
» Fig. 40 .
Disconnection
› Disconnect the device from the USB input.
or
› In the main menu of the Apple CarPlay connection press the function key
→
.
Function problems
If problems occur with the Apple CarPlay connection, then one of the following
messages may occur in the display.MessageMeaning… Unable to connect to mobile device. … is already connected via Apple Car-
Play.The device allows only one active connection.SmartLink: ... has been disconnected.Check the connection to the USB input.Unable to connect. … is not supported by the mobile device.The connection type is not supported by the connected device.Please note that this UBS port may not support Apple CarPlay. Use a different
USB port and try again.The Apple CarPlay connection is not supported by the USB input. Connect the
external device to a different USB port.MirrorLink ™
Introduction
This chapter contains information on the following subjects:
Home menu
57
Operation
58
Function problems
59
The MirrorLink ™
connection can be set up under the following conditions.
The ignition is switched on.
The unit is switched on.
The device to be connected is switched on.
Some applications require that the data connection in the connected device is turned on.
If you want to use the device menu Telephone, then before establishing the
MirrorLink ™
connection with the device then connect the device first via Blue-
tooth ®
.
A device connected using MirrorLink ™
cannot be used as an audio source in the
menu Media.
If route guidance is active at this moment in the device, then this is not termi-
nated by starting the route guidance in the MirrorLink ™
application.
The list of available applications and devices, which support the MirrorLink ™
function, can be seed in the ŠKODA Internet pages www.infotainment.skoda-
auto.com.
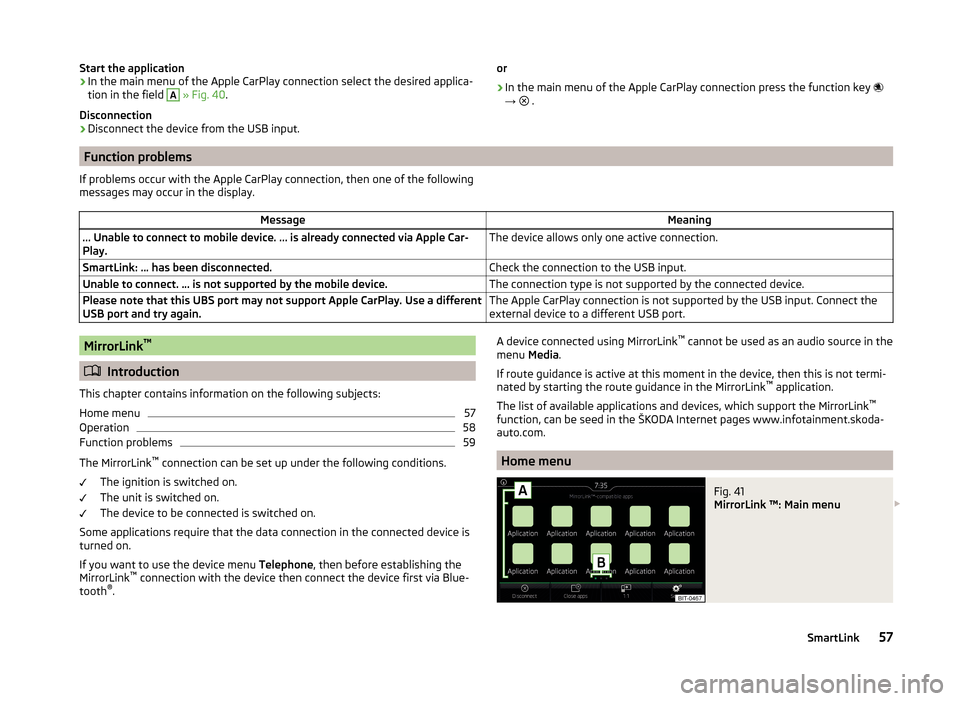
Home menu
Fig. 41
MirrorLink ™: Main menu
57SmartLink
Page 66 of 100

›Enter destination.›Press the function key
Start→ Stopover .
In the displayed menu of a new tour the order of the stopovers can be
changed by pressing the function key
and moving the stopover to a differ-
ent position.›
Press the function key Calculate.
A route is created by inserting the destination in the route. For more informa-
tion on the tour » page 73.
Note
Up to 20 destinations can be included in a tour.
My Destinations
Introduction
This chapter contains information on the following subjects:
List of registered destinations
63
Home address
63
Current vehicle position Store(flagged destination)
64
This chapter discusses the entry options and selecting the destinations stored
in the device memory.
List of registered destinations
Fig. 48
List of stored destinations
Display list of stored destinations
› Press in the
Navigation menu the function key
→ Destinations .
The last selected list of registered destinations are displayed.
The following functions can be performed from the displayed list. - Destination search by name (with more than 5 entries)
- Management of the stored destination
Display category of the stored destinations
› Press in the
Navigation menu the function key
→ Destinations →
.
The following menu is displayed with the categories of stored destinations
» Fig. 48 .
Last destinations to which the guidance was carried out (automatically
saved, max. 50)
Destination memory (manually saved):
›
Flagged destination (current vehicle position is saved)
›
Stored destination (stored in the destination details / imported in
vCard format)
›
Favourite (stored in the destination details)
Favourites (max. 50 entries). The favourite position is displayed in the map
by the symbol .
Telephone contacts of the connected telephone or the SIM card with the
address. If the address is in an unsupported format, then a menu for edit-
ing is displayed.
Route guidance to the stored destination
› Select the desired destination in the list of stored destinations.
› Press the function key
Start.
If the menu setting for the alternative routes is turned on, the guidance for
this route type (economic / fast / short) must be selected before starting.
If the destination entry occurs during route guidance, the destination change
must be confirmed by pressing the function key Start in addition to confirming
in the following menu that appears.
Home address
Define home address
When your home address is not entered, then proceed as follows.
›
Press in the Navigation menu the function key
→ Home address .
›
Defining the home address using the current vehicle position or by entering
the address.
Search63Navigation
Page 73 of 100

Destination managementFig. 54
Destination details
Read and observe on page 69 first.
After you enter a new destination or after pressing the function key in the
list of registered destinations a menu for the destination and route manage-
ment appears » Fig. 54.
Area with function keys
Detailed destination information
Destination position in the map
Magnification of the window with destination information
Reduction of the window with destination information
Function keys in range
A
› Start
- Depending on the setting of the start of the route calculation or route
type selection
› Finish
- Stop the route guidance
› Route options
- Display a menu for setting the route options
› Store
- Store the destination in the destination memory
› Edit
- Edit the address of the destination entered through the map point
› Dial number
- Start a telephone conversation with the contact number of the
POI
Store destination
› Press the function key
Store.
› Name destination and confirm store.
Edit destination
By pressing the function key Edit the following menu is displayed for the desti-
nation processing.
ABC› Delete
- Delete the destination
› Store as
- Edit the name and then store the destination
› Favourite
- Add or remove the destinations as favourites
Route calculation
Fig. 55
Alternative routes
Read and observe on page 69 first.
Route calculation is done on the basis of the set route options. These route
options can be set » page 78, Route options .
Alternative routes
With selection of alternative routes turned on, the following menu is displayed
after the route calculation » Fig. 55.
Calculate the most economical route with shortest travelling time and
distance travelled – the route is highlighted green
Calculate the fastest route to the destination, even if a detour is neces-
sary - the route is highlighted in red
Calculate the shortest route to the destination, even if a longer travel-
ling time is required - the route is highlighted in orange
In the Alternative Routes function keys, information about the route length
and the estimated travel time are displayed.
With the icons, the following icons can be displayed for alternative routes. Use of a toll motorway
Use of a train / ferry
Using a toll tunnel
Use of a toll road
Using a vignette duty highway
ABC70Navigation