2015 SKODA SUPERB version
[x] Cancel search: versionPage 6 of 100

Important information about this manual
This Owner's Manual is valid for the different versions of the Infotainment Co-
lumbus (hereinafter referred to only as device). The device may differ depend-
ing on the vehicle model, in which it is installed in both its appearance and in
the arrangement of the controls.
This Owner's Manual describes all possible device functions without identify-
ing them as special equipment, model variants or market-dependent equip-
ment. Consequently, the device on this vehicle does not need to contain all of
the functions described in this Owner's Manual.
For example, if the vehicle is not factory equipped with the CANTON sound
system, the menu points CANTON Optimisation, CANTON Surround and CAN-
TON Equaliser are not shown.
The availability of some features described in this manual depends on the
type of external devices (for example, telephone, music player, etc.).
Information on the compatibility of external devices can be found on ŠKODAIn- ternet pages http://infotainment.skoda-auto.com .
The Images in these Operating Instructions are for illustrative purposes only.
The illustrations can differ in minor details from your vehicle; they are only in-
tended to provide general information.
ŠKODA AUTO a.s. pursues a policy of ongoing product and model development
with all vehicles. Changes in terms of supply scope are possible at any time
with regard to design, equipment and technology. The information listed in
these Operating Instructions corresponds to the information available at the
time of going to press.
It is therefore not possible for legal claims to be made based on the technical
data, illustrations and information contained in these Operating Instructions.
Declaration of conformity
ŠKODA AUTO a.s. hereby declares that the ŠKODA Infotainment systems meet
the basic requirements and additional provisions of Directive 1999/5/EC with
reference to radio equipment and telecommunications devices.
Applies to Nigeria: ŠKODA AUTO a.s. hereby declares that the “connection and
the use of this communication device is granted by the Nigerian Communica-
tions Commission.”3Important information about this manual
Page 19 of 100

■Voice control session end tone - Switch on/off the audible signal when voice
control ends
■ Input tone in voice dialogue - Switch on/off the audible signal for the voice
input
Safe removal of the data source
›
Press the key
→
→ Remove safely: Press and select the data source
to be removed.
Restore factory settings
›
Press the key
→
→ Factory settings .
In this menu, some or all settings can be restored.
Bluetooth ®
settings
›
Press the key
→
→ Bluetooth .
■ Bluetooth - Switch on/off Bluetooth ®
function
■ Visibility: - Switch on/off the visibility of the Bluetooth ®
device for other de-
vices
■ Name: - Change the device name
■ Paired devices - Display the list of coupled Bluetooth ®
Devices
■ Find devices - Searches for available devices
■ Bluetooth audio (A2DP/AVRCP) - Turn on/off the ability to connect an audio
device (e.g. MP3 player, tablet etc...)
WLAN Settings
›
Press the key
→
→ WLAN → Mobile hotspot .
The transfer all the settings is made only after pressing the function key
Store .
■ Mobile hotspot - WLAN hotspot switch on/off (if an external device is con-
nected to the device via a WLAN hotspot, then the symbol will appear in the
function key with the associated number of connected external devices)
■ Security level: - Setting the connection security with the WLAN hotspot
■ WPA2 - WPA2 security
■ WPA - WPA security
■ No security level - Without security (without access password for WLAN
hotspot)
■ Network key - Enter the access code to the WLAN hotspot
■ SSID: ... - Name of the WLAN hotspot device
■ Do not send network name (SSID) - WLAN hotspot security switch on/off
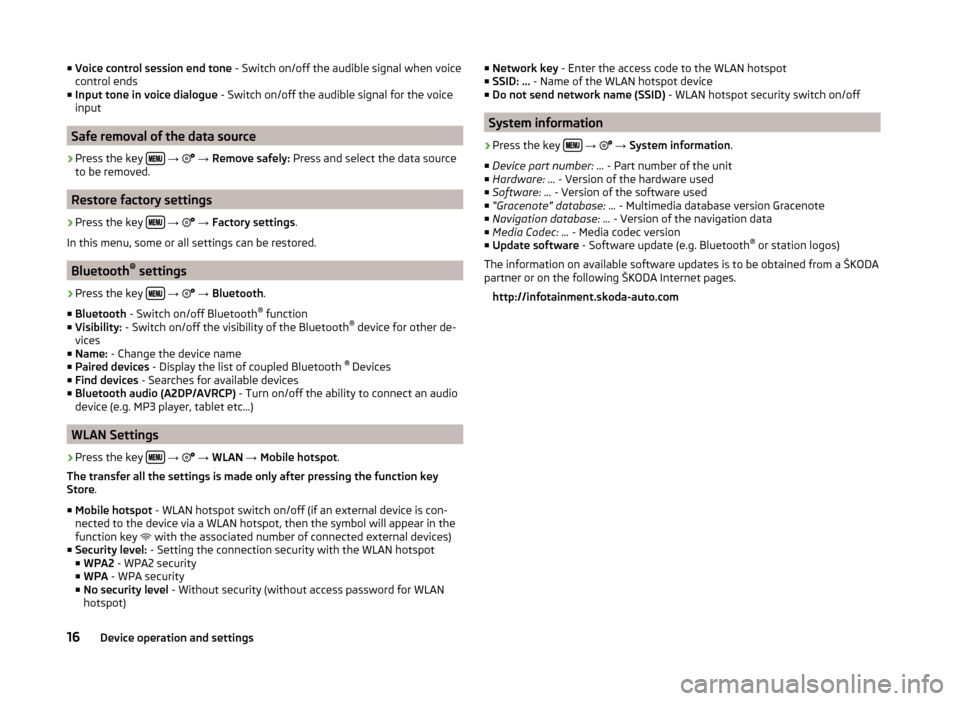
System information
›
Press the key
→
→ System information .
■ Device part number: ... - Part number of the unit
■ Hardware: ... - Version of the hardware used
■ Software: ... - Version of the software used
■ “Gracenote” database: ... - Multimedia database version Gracenote
■ Navigation database: ... - Version of the navigation data
■ Media Codec: ... - Media codec version
■ Update software - Software update (e.g. Bluetooth ®
or station logos)
The information on available software updates is to be obtained from a ŠKODA
partner or on the following ŠKODA Internet pages.
http://infotainment.skoda-auto.com
16Device operation and settings
Page 23 of 100

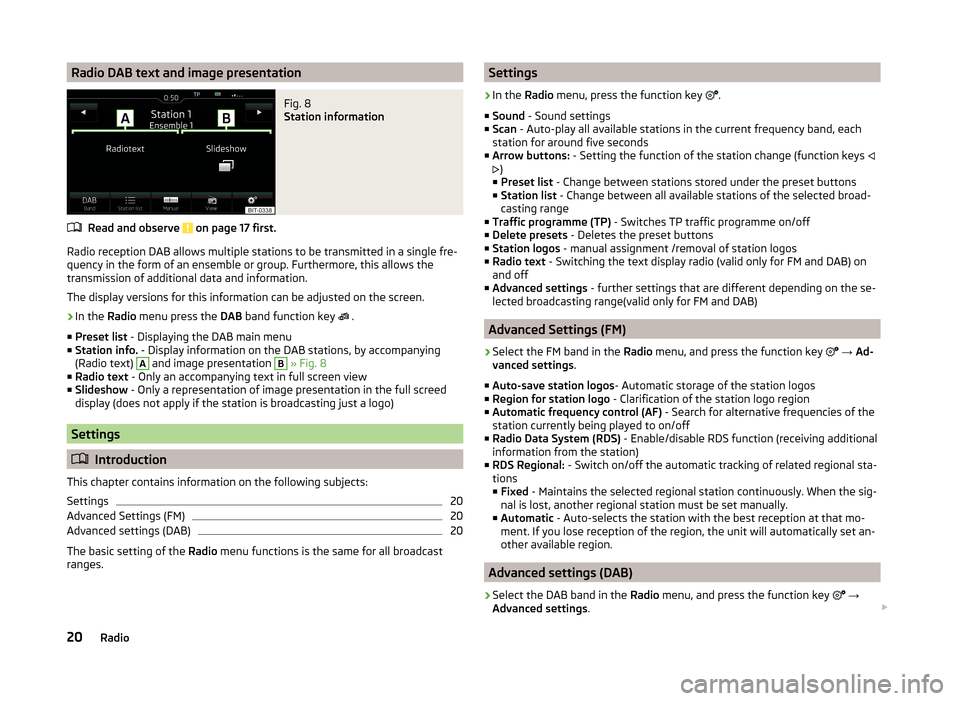
Radio DAB text and image presentationFig. 8
Station information
Read and observe on page 17 first.
Radio reception DAB allows multiple stations to be transmitted in a single fre-
quency in the form of an ensemble or group. Furthermore, this allows the
transmission of additional data and information.
The display versions for this information can be adjusted on the screen.
›
In the Radio menu press the DAB band function key
.
■ Preset list - Displaying the DAB main menu
■ Station info. - Display information on the DAB stations, by accompanying
(Radio text)
A
and image presentation
B
» Fig. 8
■ Radio text - Only an accompanying text in full screen view
■ Slideshow - Only a representation of image presentation in the full screed
display (does not apply if the station is broadcasting just a logo)
Settings
Introduction
This chapter contains information on the following subjects:
Settings
20
Advanced Settings (FM)
20
Advanced settings (DAB)
20
The basic setting of the Radio menu functions is the same for all broadcast
ranges.
Settings›
In the Radio menu, press the function key
.
■ Sound - Sound settings
■ Scan - Auto-play all available stations in the current frequency band, each
station for around five seconds
■ Arrow buttons: - Setting the function of the station change (function keys
)
■ Preset list - Change between stations stored under the preset buttons
■ Station list - Change between all available stations of the selected broad-
casting range
■ Traffic programme (TP) - Switches TP traffic programme on/off
■ Delete presets - Deletes the preset buttons
■ Station logos - manual assignment /removal of station logos
■ Radio text - Switching the text display radio (valid only for FM and DAB) on
and off
■ Advanced settings - further settings that are different depending on the se-
lected broadcasting range(valid only for FM and DAB)
Advanced Settings (FM)
›
Select the FM band in the Radio menu, and press the function key
→ Ad-
vanced settings .
■ Auto-save station logos - Automatic storage of the station logos
■ Region for station logo - Clarification of the station logo region
■ Automatic frequency control (AF) - Search for alternative frequencies of the
station currently being played to on/off
■ Radio Data System (RDS) - Enable/disable RDS function (receiving additional
information from the station)
■ RDS Regional: - Switch on/off the automatic tracking of related regional sta-
tions
■ Fixed - Maintains the selected regional station continuously. When the sig-
nal is lost, another regional station must be set manually.
■ Automatic - Auto-selects the station with the best reception at that mo-
ment. If you lose reception of the region, the unit will automatically set an-
other available region.
Advanced settings (DAB)
›
Select the DAB band in the Radio menu, and press the function key
→
Advanced settings .
20Radio
Page 45 of 100

›Press the function key
Replace.
› Confirm the coupling.
The connection with the two telephones will be terminated and the rSAP pro-
file paired telephone connects to the device as a main telephone.
Connected SIM card in an external module, no telephone
connected
Fig. 25
Display list of blocked coupled
devices
If a SIM card is located in the external module with activated telephone serv-
ices, then proceed as follows.
›
Press the key
→
A
» Fig. 25 → Find telephone .
A search for available Bluetooth ®
devices takes place.
›
Select the desired select telephone.
›
Confirm the coupling.
After pairing confirmation the telephone connects to the device.
Connected SIM card in an external module, a telephone - coupling
If a SIM card is located in the external module with activated telephone serv-
ices, then proceed as follows.
›
Press the key
→
A
» Fig. 25 on page 42 → Find telephone .
A search for available Bluetooth ®
devices takes place.
›
Select the desired select telephone.
The following menu appears in the screen.
■ Cancel - Cancel the coupling
■ Replace - Replacement of the connected telephone
› Confirm the coupling.
After pairing confirmation the telephone connects to the device.
Pairing from the telephone
When pairing from the telephone, follow the instructions in the telephone
owner's manual.
›
Search available Bluetooth ®
devices in your telephone.
›
Select the Bluetooth ®
device unit.
The device is displayed in the telephone to be connected to as SKODA BT .....
... is replaced with the last four symbols of the vehicle identification number
(VIN) of your vehicle.
›
Confirm the pairing request.
›
Confirm the pairing » page 42, Pairing confirmation .
After pairing confirmation the telephone is connected to the device as follows. No telephone connected - The telephone connects as main telephone .
One or two connected phones - The phone is paired and connected only as an
audio player (with free audio profile).
SIM card inserted, no telephone connected - The phone is paired and connec-
ted only as an audio player (with free audio profile).
SIM card is inserted, telephone connected - The phone is only coupled.
Note
You can change the name of the Bluetooth ®
device » page 16 .
Pairing confirmation
Depending on the type of telephone, the pairing confirmation takes place in
one of the following ways.
Confirmation of the pairing from the device
Version 1
› Confirm the 6-digit PIN code displayed on the device screen and the tele-
phone display within 30 seconds on both the device and the telephone.
42Telephone
Page 46 of 100

Version 2
› Confirm the pairing request in the telephone.
› Enter the 4 digit or the 16 digit (rSAP) PIN code shown on the unit display in-
to the telephone within 30 seconds 1)
.
Confirmation of the pairing from the telephone
Version 1
› Confirm the pairing request on the device.
› Confirm the 6-digit PIN code displayed on the device screen and the tele-
phone display within 30 seconds on both the device and the telephone.
Version 2
› Enter the 4 - 16 digit PIN code into the telephone.
› Confirm the pairing request on the device.
› Enter the same PIN code into the device that is in the telephone and con-
firm 1 )
.
Version 3
› Confirm the pairing request on the device.
› The device generates a 4 - 16 digit PIN code.
› Enter into the telephone the PIN generated by the device and confirm 1 )
.
Administering coupled devices
Fig. 26
List of paired devices / Bluetooth ® profiles
Display list of blocked coupled devices
›
Press in the menu Telephone the function key
→ Bluetooth → Paired de-
vices .
In the list displayed the following symbol of the Bluetooth ®
profile » Fig. 26 -
may appear with some devices.SymbolIcon col- ourOperation
grey
A device that supports the connection via the hands-
free profile (HFP).A device that supports the connection on the remote
transmission of the SIM data (rSAP).
green
A device that is connected via the handsfree profile
(HFP).A device that is connected to the remote transmis-
sion of the SIM data (rSAP).
greyA device that supports the connection via the audio
profile.whiteA device that is connected via the audio profile.
greyA device that only supports the downloading of con-
tacts and text messages (the icon only appears if the
SIM-card in the external module is plugged in)blueA device that only connects the downloading of con-
tacts and text messages (the icon only appears if the
SIM-card in the external module is plugged in)
Connection set-up
› Select the device you want from the list of paired devices.
› Select the desired profile from the list of available Bluetooth ®
profiles
» Fig. 26 -
.
The subsequent connection is affected by whether another device is connec-
ted or not connected by means of the desired profile.
Disconnection
› Select the device you want from the list of paired devices.
› Select the desired profile from the list of available Bluetooth ®
profiles
» Fig. 26 -
.
› Press the function key
Disconnect.
Delete the coupled device
› Select the device you want from the list of paired devices.
1)
Entering and confirmation of the PIN code is not possible while driving.
43Telephone
Page 62 of 100

Function problemsIf problems occur with the MirrorLink™
connection, then one of the following
messages may occur in the display.MessageMeaning…: MirrorLink™ connection not available.Check the connection to the USB input.Error: MirrorLink™Error: transferDisconnect the device and reconnect to the USB input.MirrorLink™ Audio is not available.A problem with the playback of audio files. Disconnect the device and recon-
nect.MirrorLink™ availability on this mobile device is restricted.The MirrorLink ™
version of the connected device is supported by the device on-
ly when the vehicle is not moving.Connection failed. MirrorLink™ is not supported by this mobile device.The connected device is not supported.The mobile device is locked. Please unlock the mobile device in order to use
MirrorLink™“Unlock” the connected device.The app is unavailable while the vehicle is in motion.
The application is only available when the vehicle is stationary.
The app is unavailable while the vehicle is in motion. The app is not certified
or the certification restricts use while the vehicle is in motion.App is not compatible.The application is not certified.The app is unavailable while the vehicle is in motion. The app is not available
in this country.In the country of operation, the application is available only when the vehicle is
at a standstill.Unable to start app or app not working.A problem with the start of the application. Disconnect the device and recon-
nect to the USB input.No compatible apps found on this mobile device. This device may not support
MirrorLink™.There is no certified MirrorLink ™
application available in the device.59SmartLink
Page 63 of 100

Navigation
Navigation description
Introduction
This chapter contains information on the following subjects:
GPS satellite signal
60
Navigation data
60
Main menu
60
Pop-up windows
61
GPS satellite signal
The unit uses the GPS (Global Positioning System) satellite signal for route
guidance.
Outside the range of the GPS satellite signal (e.g. in dense vegetation, in tun-
nels, parking garages, etc.), the unit navigates only with restrictions using
some on-vehicle sensors (such as speed sensor or steering angle sensor).
The unit offers the possibility to show in the split screen display the following
Position » Fig. 44 on page 61 information about the current geographical po-
sition of the vehicle and the satellite signal.
Geographical longitude
Geographical latitude
Elevation
Number of received/available satellites
To view the information on the longitude and latitude of the current vehicle
position display requires the reception of GPS signals from at least three satel-
lites.
To view the elevation information of the current vehicle position display re-
quires the reception of GPS signals from at least five satellites.
Navigation data
Navigation data source
The navigation data is stored in the internal memory.
Finding out the version of the navigation data › Press in the
Navigation menu the function key
→ Version information .
Update navigation data
We recommend that you update the navigation data on a regular basis (e.g.
Due to newly developed roads and changed traffic signs etc.).
For information on how to update the navigation data ask a ŠKODA partner or
go to the following ŠKODA website.
http://infotainment.skoda-auto.com
Main menu
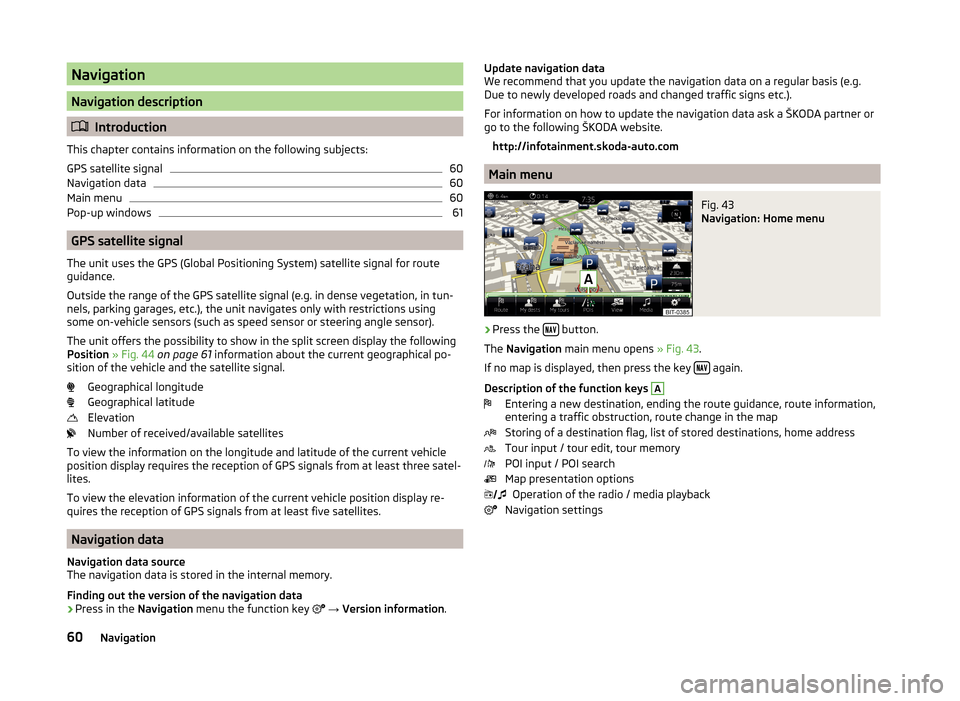
Fig. 43
Navigation: Home menu
›
Press the button.
The Navigation main menu opens » Fig. 43.
If no map is displayed, then press the key
again.
Description of the function keys
A
Entering a new destination, ending the route guidance, route information,
entering a traffic obstruction, route change in the map
Storing of a destination flag, list of stored destinations, home address
Tour input / tour edit, tour memory
POI input / POI search
Map presentation options Operation of the radio / media playback
Navigation settings
60Navigation
Page 69 of 100

http://infotainment.skoda-auto.com
Custom destination in vCard-format
In the device memory, a custom destination can be imported in the vCard for-
mat (*.vcf) from an SD card or a USB source.
Import
›
Insert the SD card into the device or connect a USB source with the file of
custom destination.
›
Press in the Navigation menu the function key
→ Import destinations .
›
Select the source and confirm the import.
Route guidance
›
Press in the Navigation menu the function key
→ Destinations →
→
.
›
Press the function key of the vCard to start the route guidance.
›
Press the function key
Start.
If the menu setting for the alternative routes is turned on, the guidance for
this route type (economic / fast / short) must be selected before starting.
If the destination entry occurs during route guidance, the destination change
must be confirmed by pressing the function key Start in addition to confirming
in the following menu that appears.
Delete
›
Press in the Navigation menu the function key
→ Destinations →
→
.
›
Press the function key
in the line with the name of your stored custom des-
tination.
›
In the destination details, press the function key Edit → Delete .
›
Confirm the deletion.
Custom POI category
In the device memory, custom POI categories that have been created using the
ŠKODA application “MyDestination” can be imported from the SD card.
Import
›
Insert the SD card with the POI categories into the device.
›
Press in the Navigation menu the function key
→ Version information →
Update .
›
Select the SD card as the source and confirm the import.
If there is already the same POI category name in the device, then it will be
overwritten during import.
Custom POI categories can be displayed on the map.›
Press in the Navigation menu the function key
→ Map → Select catego-
ries for POIs → My points of interest (Personal POI) .
Route guidance to a destination of another category
›
Press in the Navigation menu the function key
→ Other POIs .
›
Press the function key
A
» Fig. 50 on page 65 .
›
Select the search area.
›
Press the function key
B
» Fig. 50 on page 65 → My Points of Interest (Per-
sonal POI) .
›
Select the desired category of own destinations.
›
Press the function key Start.
If the menu setting for the alternative routes is turned on, the guidance for
this route type (economic / fast / short) must be selected before starting.
If the destination entry occurs during route guidance, the destination change
must be confirmed by pressing the function key Start in addition to confirming
in the following menu that appears.
Delete
›
Press in the Navigation menu the function key
→ Manage memory → De-
lete my POIs → Delete .
Map
Introduction
This chapter contains information on the following subjects:
Map description
67
Options for map display
67
Options for map display in the split screen
67
POI on the map
68
Road sign
68
Map Orientation
68
Map scale
68
Map alignment
6966Navigation