2015 SKODA RAPID SPACEBACK navigation system
[x] Cancel search: navigation systemPage 6 of 208
Board literature
You always find these Owner´s Manualand the Service Plan in the on-board
literature for your vehicle.
Depending on the equipment, the on-board literature can also contain The ra-
dio instruction manual or Manual of the navigation system and in some coun-
tries also the brochure On the road.
Owner´s Manual
These Owner´s Manual apply to all body variants of the vehicle and all related
model versions as well as all equipment levels .
This owner's manual describes all possible equipment variants without identi-
fying them as special equipment, model variants or market-dependent equip-
ment. Consequently, this vehicle does not contain all of the equipment com-
ponents described in this Owner's Manual.
The level of equipment in your vehicle refers to your purchase contract for the
vehicle. For questions regarding the scope of equipment, please contact a
ŠKODA Partner, if required.
The Pictures in this manual are for illustrative purposes only. The illustrations
can differ in minor details from your vehicle; they are only intended to provide
general information.
ŠKODA AUTO a.s. pursues a policy of constant product and model develop-
ment. Changes in terms of supply scope are possible at any time with regard to
design, equipment and technology. The information listed in this operating
manual corresponds to the information available at the time of going to press.
Therefore legal claims cannot be made based on the technical data, illustra-
tions and information contained in this Owner's Manual.
We recommend that the web pages that are referred to in this Owner's Man-
ual are displayed using the classic view. If the web pages are displayed using
the mobile view, they may not contain all necessary information.
Service schedule
The service plan includes the documentation of the vehicle handover informa-
tion with regard to warranty and service events.
Infotainment Owner's Manual
The Infotainment Owner's Manual contains a description of the Infotainment
operating controls, as well as, possibly, some functions and vehicle systems.On The Move Brochure
The On The Move brochure contains the importer's customer service number
and the service number in the individual countries as well as the emergency
numbers.
Online user manualsFig. 1
This QR code opens a web page with a model overview of the ŠKODA brand.
The page can also be accessed by entering the following address in the web
browser.
http://www.skoda-auto.com/en/mini-apps/owners-manuals/
▶ Select the desired model - a menu with the user manuals is displayed.
▶ Select the construction period as well as the language.
▶ Select the desired manual - it can be displayed either online or in pdf format.
4Board literature
Page 44 of 208
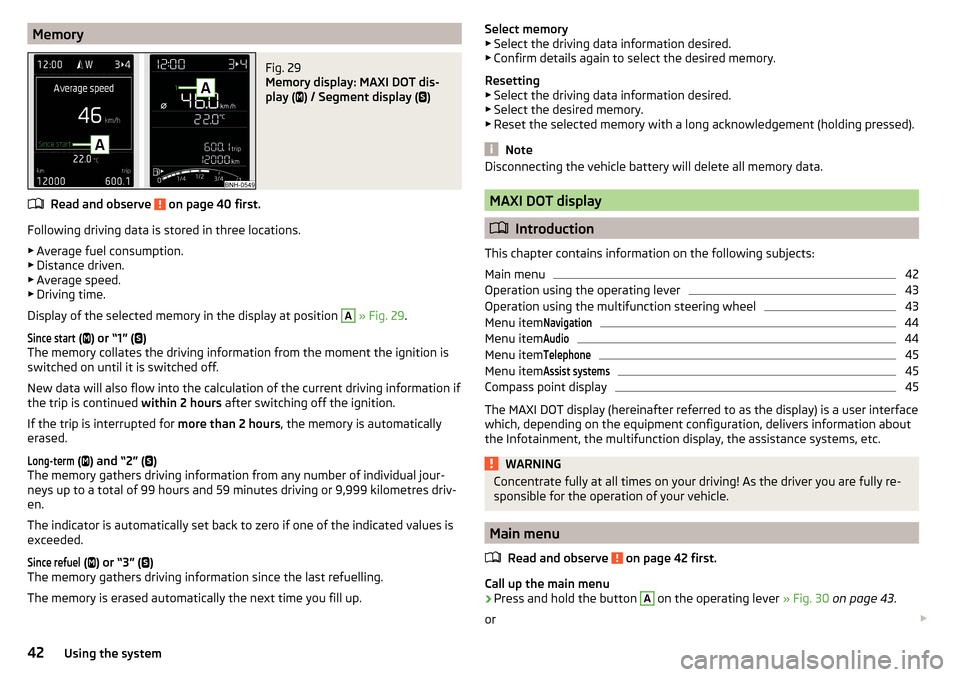
MemoryFig. 29
Memory display: MAXI DOT dis-
play (
) / Segment display (
)
Read and observe on page 40 first.
Following driving data is stored in three locations.
▶ Average fuel consumption.
▶ Distance driven.
▶ Average speed.
▶ Driving time.
Display of the selected memory in the display at position
A
» Fig. 29 .
Since start
(
) or “1” (
)
The memory collates the driving information from the moment the ignition is
switched on until it is switched off.
New data will also flow into the calculation of the current driving information if
the trip is continued within 2 hours after switching off the ignition.
If the trip is interrupted for more than 2 hours, the memory is automatically
erased.
Long-term
( ) and “2” (
)
The memory gathers driving information from any number of individual jour-
neys up to a total of 99 hours and 59 minutes driving or 9,999 kilometres driv-
en.
The indicator is automatically set back to zero if one of the indicated values is
exceeded.
Since refuel
( ) or “3” (
)
The memory gathers driving information since the last refuelling.
The memory is erased automatically the next time you fill up.
Select memory
▶ Select the driving data information desired.
▶ Confirm details again to select the desired memory.
Resetting ▶ Select the driving data information desired.
▶ Select the desired memory.
▶ Reset the selected memory with a long acknowledgement (holding pressed).
Note
Disconnecting the vehicle battery will delete all memory data.
MAXI DOT display
Introduction
This chapter contains information on the following subjects:
Main menu
42
Operation using the operating lever
43
Operation using the multifunction steering wheel
43
Menu item
Navigation44
Menu item
Audio44
Menu item
Telephone45
Menu item
Assist systems45
Compass point display
45
The MAXI DOT display (hereinafter referred to as the display) is a user interface
which, depending on the equipment configuration, delivers information about
the Infotainment, the multifunction display, the assistance systems, etc.
WARNINGConcentrate fully at all times on your driving! As the driver you are fully re-
sponsible for the operation of your vehicle.
Main menu
Read and observe
on page 42 first.
Call up the main menu
›
Press and hold the button
A
on the operating lever » Fig. 30 on page 43 .
or
42Using the system
Page 45 of 208
›Press and hold the dial G on the multifunction steering wheel
» Fig. 31 on
page 43 .
Main menu items (depending on vehicle equipment) ■Driving data
» page 40
■
Assist systems
» page 45
■
Navigation
» page 44
■
Audio
» page 44
■
Telephone
» page 45 ;
■
Vehicle
» page 39 , Auto-check control
The menus can be opened using the buttons on the control lever » Fig. 30 on
page 43 or on the multi-function steering wheel » Fig. 31 on page 43 .
Note
■
If warning messages are displayed, these messages must first be confirmed
to access the main menu.■
The travel mode can be set in the Infotainment » Owner´s Manual Infotain-
ment , chapter Vehicle settings (SET-UP button) .
■
For vehicles without Infotainment, the display language can only be adjusted
by a specialist garage.
Operation using the operating lever
Fig. 30
Buttons: on the operating lever
Read and observe on page 42 first.
Description of the operation by means of the buttons on the operating lever
ButtonActionOperationABriefly press at the top or downSwitch between menu items / menusPress and hold at the top or downDisplay main menuButtonActionOperationBPress brieflyConfirm menu item / menu
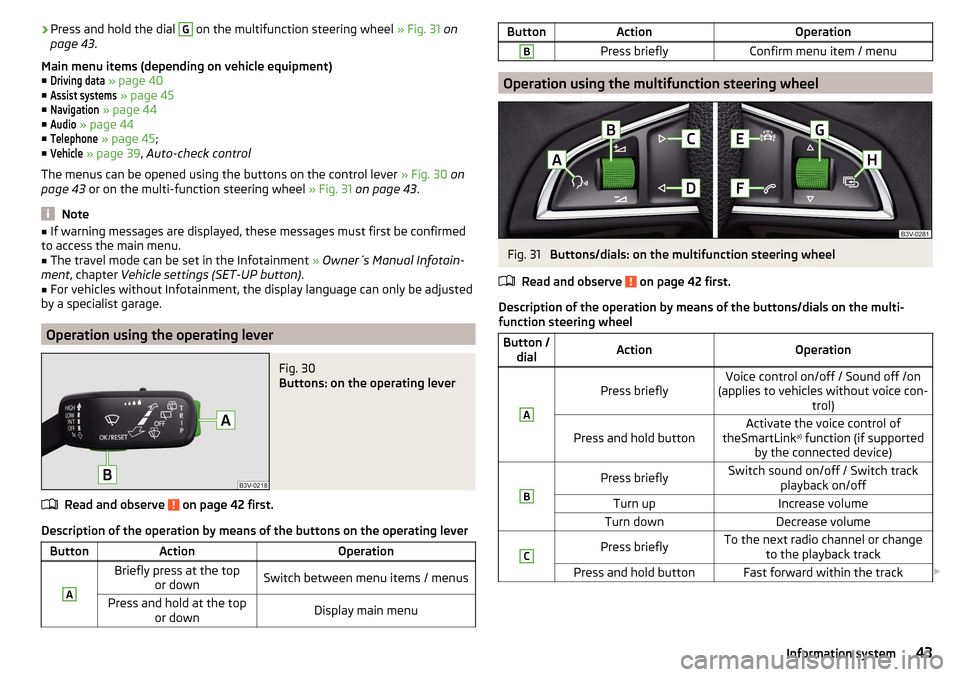
Operation using the multifunction steering wheel
Fig. 31
Buttons/dials: on the multifunction steering wheel
Read and observe
on page 42 first.
Description of the operation by means of the buttons/dials on the multi-
function steering wheel
Button / dialActionOperationA
Press brieflyVoice control on/off / Sound off /on
(applies to vehicles without voice con- trol)Press and hold buttonActivate the voice control of
theSmartLink a)
function (if supported
by the connected device)BPress brieflySwitch sound on/off / Switch track playback on/offTurn upIncrease volumeTurn downDecrease volumeCPress brieflyTo the next radio channel or changeto the playback trackPress and hold buttonFast forward within the track 43Information system
Page 46 of 208
Button /dialActionOperationDPress brieflyto the previous radio channel orchange to the playback track b)Press and hold buttonFast reverse within the trackEPress brieflySelect menu item Assist systems
» page 45
F
Press brieflyTake the call / end the call / Menu Tel-ephone
display / display call list / call
the selected contactPress and hold buttonReject call / Redial last callG
Press brieflyConfirm menu item / menu / Repeat
the last navigation announcement or clarify / interrupt traffic report
Turn up
Previous menu item / track b)
/ Show
available list (e.g. list of available
channels, list of the last destinations, call list)Turn downNext menu item / track / View availa-
ble list (e.g. List of available channels, list the last destinations, call list)HPress brieflyReturn to a previous level in the menuPress and hold buttonDisplay main menua)
» Infotainment Owner's Manual
b)
Valid for pressing within about 4 s from the beginning of the given track. Pressing after about 4 seconds
from the beginning of the track, starts the playback from the beginning of the track.
Note
Depending on equipment not all functions may be available. The system can
indicate this fact by a text message in the display of the instrument cluster or
in the Infotainment display.
Menu item
Navigation
Read and observe on page 42 first.
Select menu item
Navigation›
Select and confirm
Navigation
in the main menu.
Route guidance takes place
Graphical driving recommendations and other route and destination informa-
tion are displayed after selection.
No route guidance is carried out
A compass/vehicle symbol is shown to display the current vehicle position in relation to the compass after selection.
Then turn dial G
» Fig. 31 on page 43 on the multifunction steering wheel to
display the
Last destinations
menu.
The menu shows the
Home address
menu item and a list of recent destinations.
When you select one of the menu items, the destination name and the follow-
ing items are displayed.
■
OK
- Start navigation
■
Cancel
- Return to the Navigation menu – the compass/vehicle symbol will be
displayed
If the home address is not defined when the menu item
Home address
is selec-
ted, the following message appears:
Please enter the home address on the infotain-ment system.
Menu item
Audio
Read and observe on page 42 first.
Select menu item
Audio›
Select and confirm
Audio
in the main menu.
The following information can be displayed in the display.
■ Radio
■ Currently played station (name/frequency):
■ The selected frequency range (e.g. FM) optionally with the number of the
station button (e.g. FM3), if the station is stored in the memory list
■ List of available station (if more than 5 stations can be received);
■ TP traffic announcements.
■ Media
■ Name of the track being played, if necessary, further information regarding
title (e.g. artist, album name), if this information is stored as a so called ID3
tag on the audio source.
44Using the system
Page 47 of 208
Menu itemTelephone
Read and observe on page 42 first.
Select menu item
Telephone›
Select and confirm
Telephone
in the main menu.
›
Turn dial
G
» Fig. 31 on page 43 .
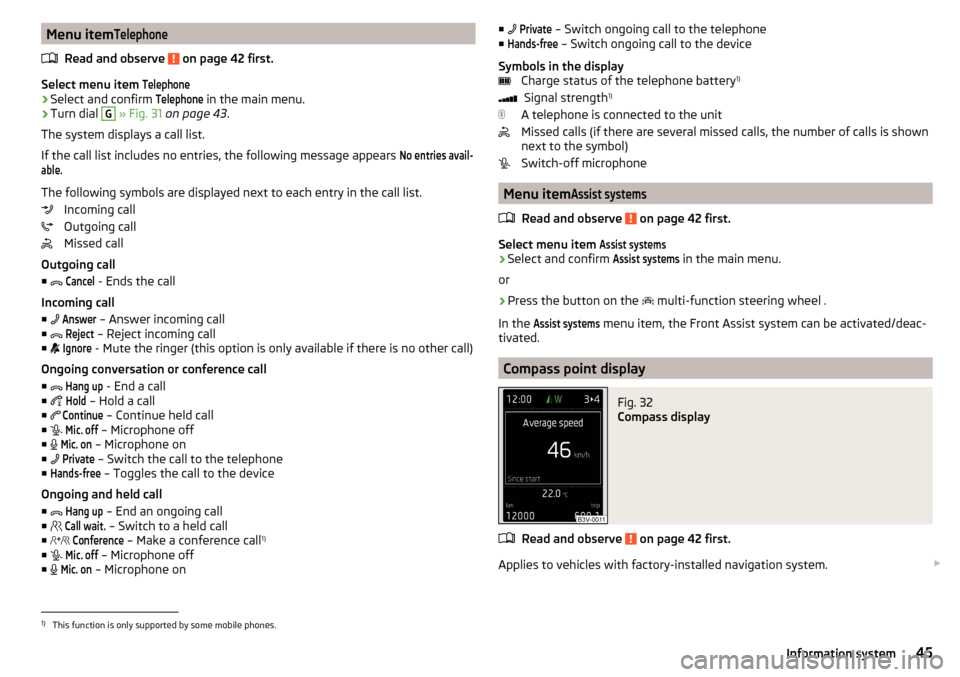
The system displays a call list.
If the call list includes no entries, the following message appears
No entries avail-able.
The following symbols are displayed next to each entry in the call list. Incoming call
Outgoing call
Missed call
Outgoing call
■
Cancel
- Ends the call
Incoming call
■
Answer
– Answer incoming call
■
Reject
– Reject incoming call
■
Ignore
- Mute the ringer (this option is only available if there is no other call)
Ongoing conversation or conference call
■
Hang up
- End a call
■
Hold
– Hold a call
■
Continue
– Continue held call
■
Mic. off
– Microphone off
■
Mic. on
– Microphone on
■
Private
– Switch the call to the telephone
■
Hands-free
– Toggles the call to the device
Ongoing and held call ■
Hang up
– End an ongoing call
■
Call wait.
– Switch to a held call
■
Conference
– Make a conference call 1)
■
Mic. off
– Microphone off
■
Mic. on
– Microphone on
■
Private – Switch ongoing call to the telephone
■Hands-free
– Switch ongoing call to the device
Symbols in the display Charge status of the telephone battery 1)
Signal strength 1)
A telephone is connected to the unit
Missed calls (if there are several missed calls, the number of calls is shown
next to the symbol)
Switch-off microphone
Menu item
Assist systems
Read and observe on page 42 first.
Select menu item
Assist systems›
Select and confirm
Assist systems
in the main menu.
or
›
Press the button on the multi-function steering wheel .
In the
Assist systems
menu item, the Front Assist system can be activated/deac-
tivated.
Compass point display
Fig. 32
Compass display
Read and observe on page 42 first.
Applies to vehicles with factory-installed navigation system.
1)
This function is only supported by some mobile phones.
45Information system
Page 69 of 208

WARNINGAutomatic wiping during rain is only a support. The driver is not released
from the responsibility to set the function of the windscreen wipers man-
ually depending on the visibility conditions.
Headlight cleaning system
Read and observe
and on page 66 first.
To clean the headlights, the headlamp is also sprayed after every ten squirts.The headlight washer system works under the following conditions. The ignition is switched on.
The low beam is switched on.
The outside temperature is about -11° C to +36° C.
To ensure the correct functioning of the system, even in winter, this needs to
be regularly cleared of snow and ice, e.g. free with a de-icing spray.
CAUTION
Never remove the nozzles from the headlight cleaning system by hand – risk of
damage!
Rear mirror
Introduction
This chapter contains information on the following subjects:
Interior mirror dimming
67
Exterior mirror
68WARNING■ Convex (curved outward) or aspheric exterior mirrors increase the field of
vision. They do, however, make objects appear smaller in the mirror. These
mirrors are therefore only of limited use for estimating distances to the fol-
lowing vehicles.■
Whenever possible use the interior mirror for estimating the distances to
the following vehicles.
Interior mirror dimmingFig. 57
Interior mirror: manual dimming/auto-darkening
Read and observe
on page 67 first.
Mirrors with manual dimming » Fig. 57 -
Basic position of the mirror
Mirror blackout
Mirror with automatic dimming
After starting the engine, the mirror darkens » Fig. 57 -
automatically.
The mirror dimming is controlled by the light incident on the sensors on the
front and back of the mirror.
When the interior lights are switched on or the reverse gear is engaged, the
mirror always moves back into the basic position (not dimmed).
Do not attach external devices (e.g. navigation systems) on to the windscreen
or in the vicinity of the interior mirror »
.
WARNING■
The illuminated display of an external navigation device can lead to op-
erational faults to the automatic dimming interior mirror – risk of accident.■
Automatic mirror dimming operates only properly if the light striking the
sensors is not affected by other objects.
1267Lights and visibility
Page 177 of 208

CAUTION■“Never repair” fuses, and do not replace them with fuses of a higher amper-
age – risk of fire! This may also cause damage at other points in the electrical
system.■
If a newly inserted fuse blows again after a short time, have the electrical
system checked as quickly as possible by a specialist garage.
■
A blown fuse is recognisable by the molten metal strip. Replace the faulty
fuse with a new one of the same amperage.
Note
■
We recommend always carrying replacement fuses in the vehicle. A box of
replacement fuses and bulbs can be purchased from ŠKODA Genuine Accesso-
ries.■
There can be several power-consuming devices for one fuse.
■
Multiple fuses may exist for a single power-consuming device.
Fuses in the dash panel
Fig. 183
Remove the fuse box cover.
Read and observe and on page 174 first.
The fuses are located on the bottom of the dash panel behind a cover.
Replacing fuses
›
Grip the fuse box cover at point
A
and take-out in the direction of arrow
» Fig. 183 .
›
Remove the plastic clip from the holder in the fuse box cover.
›
Place the clip on the respective fuse and pull this fuse out.
›
Insert a new fuse.
›
Replace the bracket at the original position.
›
Insert the top edge of the cover into the dash panel first.
Carefully push the cover in.
Assignment of the fuses in the dash panelFig. 184
Schematic representation of the fuse box for vehicles with left-
hand steering/right-hand steering
Read and observe
and on page 174 first.
No.Power consumer1Left light2Central locking system3Relay for ignition4Right light5Power windows - driver6Central control unit - interior lights7Horn8Towing hitch - left light
9
Operating lever beneath the steering wheel, engine control unit (on-
ly without KESSY), automatic gearbox (only without KESSY), selector
lever of the automatic transmission (only without KESSY), ESC (only
without KESSY), towing equipment (only without KESSY), power
steering (only without KESSY)10Power windows - rear left11Headlight cleaning system12Radio, navigation display13Taxi preparation14Operating lever under the steering wheel, light switch, ignition key
removal lock (automatic gearbox), headlight flasher, SmartGate, rain
sensor 175Fuses and light bulbs
Page 197 of 208
Luggage compartment81
Cover84
Fastening elements82
Fixing nets83
floor covering on both sides86
Lighting81
unlock manually172
Unlock the boot lid172
Variable loading floor86
Luggage compartment cover84
Luggage compartment lid55
Luggage Storage Storage net bag
85
M
Main beam
60
Warning light36
Maintenance see vehicle care
135
Manual air conditioning Air distribution control
93
Controls91
Manual gear changing see Gear changing
103
MAXI DOT See MAXI DOT display
42
MAXI DOT display42
Main menu42
Menu item assist systems45
Menu item Audio44
Menu item navigation44
Menu item telephone45
Operation43
Maximum permissible weights
183
Maximum speed188
MCB111
MDI80
Mechanical window lifter open and close
56
Mechanical window lifters56
Media see Infotainment
4
Mirror Exterior mirror
68
Interior mirror67
Make-up65
Modifications130
Modifications and technical alterations Airbags
132
Service131
Spoiler132
Multi-function display operation
40
Multi collision brake (MCB)111
Multifunction display Functions
40
Information40
Memory42
Multifunction pocket83
Multifunction steering wheel Operation
43
Multimedia AUX
80
USB80
Multimedia holder77
N
N1
86
Nameplate183
Navigation see Infotainment
4
Nets83
Notes for driving with tyre repaired167
Notes on using wheels154
O
Oil See Engine oil
147
Warning messages37
Oil pressure Warning messages
37
On-board computer see multifunction display
40
Operating weight184
Operation in winter Diesel fuel
142
Vehicle battery152
Original accessories131
Overview Engine compartment
145
Indicator lights31
P
Parking
103
Parking assistance112
Parking aid Automatic system activation when moving for-ward
114
Function112
Parking assistance112
Activation / deactivation113
Display in the Infotainment display113
Parking light59
Park Pilot112
Park the vehicle see Parking
103
Passive safety Before setting off
8
Driving safety8
Passive Safety8
Pedals103
Footmats103
Petrol see fuel
141
195Index