2015 SKODA OCTAVIA brake
[x] Cancel search: brakePage 34 of 268

Some warning lights can be accompanied by acoustic signals and messages in
the display of the instrument cluster.
After switching on the ignition, some warning lights light up briefly as a func-
tion test.
If the tested systems are OK, the corresponding warning lights go out a few
seconds after switching on the ignition or after starting the engine.
Warning lights in the display
Depending on the importance the warning light
(danger) or
(warning) illu-
minate along with some of the warning lights in the list with the warning
lights.
Depending on vehicle equipment, some warning lights may be displayed in col-
our on the display. For example, the coolant warning light may be displayed as
follows.
▶ - Segment display/monochromatic (“black and white”) MAXI DOT display
▶ - Coloured MAXI DOT displayWARNING■
Ignoring illuminated warning lights and related messages or instructions
in the display of the instrument cluster may lead to serious personal injury
or damage to the vehicle.■
If you have to stop for technical reasons, then park the vehicle at a safe
distance from the traffic, switch off the engine and activate the hazard
warning light system » page 73. Place the warning triangle at the prescri-
bed distance.
■
The engine compartment of your car is a hazardous area. The following
warning instructions must be followed at all times when working in the en-
gine compartment » page 194, Engine compartment .
Handbrake
Read and observe
on page 32 first.
illuminates – the hand brake is applied.
An acoustic signal will sound if you drive the vehicle above 5 km/h while the
handbrake is still on.
Release the handbrake!RELEASE HANDBRAKE Brake system
Read and observe
on page 32 first.
illuminates – the brake fluid level in the braking system is too low.
Brake fluid: owner's manual!BRAKE FLUID PLEASE CHECK›
Stop the vehicle, switch off the engine, and check the level of the brake fluid
» page 200 .
WARNING■
If warning light illuminates simultaneously with warning light
» page 34 , Anti-lock braking system (ABS) , do not continue your
journey! Seek help from a specialist garage.■
A fault to the ABS system or the braking system can increase the vehi-
cle's braking distance – risk of accident!
Seat belt warning light
Read and observe
on page 32 first.
illuminates - the driver or front passenger has not fastened their seat belt.
At a speed of more than approximately 30 km/h the warning light flashes
and an audible warning sounds at a time.
If the seat belt is not fastened by the driver or front passenger during the next
approx. 2 seconds, the warning signal is deactivated and the warning light
lights up permanently.
Adaptive Cruise Control (ACC)
Read and observe
on page 32 first.
illuminates - the ACC delay is not sufficient.
Apply the brake!›
Apply the brake.
For more information about the ACC system » page 150.
32Using the system
Page 36 of 268

NoteOn vehicles without the ESC system, the warning light does not illuminate
upon deactivation of the TCS system, but a message is only displayed on the
display of the instrument cluster.
Stability Control (ESC)
Read and observe
on page 32 first.
flashes - the ESC is now being activated.
ESC fault
Illumi-
nates
Error: stabilization control (ESC)ESC ERROR
Seek help from a specialist garage.
If the warning light comes on after starting the engine, the ESC system may
be switched off for technical reasons. ▶ Switch the ignition off and on again.
If the indicator light does not illuminate after you switch the engine back
on, the ESC is fully functional again.
Disconnecting the vehicle battery
If the vehicle's battery has been disconnected and reconnected, the indicator
light comes on after switching on the ignition.
The warning light should go out after driving a short distance.
If, after a short drive, the indicator light does not go out, there is a system er-
ror.
Seek help from a specialist garage.
For more information about the ESC system » page 136.
Anti-lock braking system (ABS)
Read and observe
on page 32 first.
illuminates – there is an ABS fault.
Error: ABSABS ERROR
The vehicle will only be braked by the normal brake system without the ABS.
Seek help from a specialist garage.WARNING■
If warning light illuminates simultaneously with warning light
» page 32 , Brake system , do not continue your journey! Seek help
from a specialist garage.■
A fault to the ABS system or the braking system can increase the vehi-
cle's braking distance – risk of accident!
Rear fog light
Read and observe
on page 32 first.
illuminates – the rear fog light is switched on.
Exhaust inspection system
Read and observe
on page 32 first.
illuminates – there is a fault in the emission control system. The system
makes possible operation emergency mode - there may be a noticeable reduc-
tion in engine performance.
Seek help from a specialist garage.
Glow plug system (diesel engine)
Read and observe
on page 32 first.
flashes – there is a fault in the engine management system. The system
makes possible operation emergency mode - there may be a noticeable reduc-
tion in engine performance.
There is a fault in the glow plug system if the warning light does not come
on or illuminates continuously.
Seek help from a specialist garage.
34Using the system
Page 38 of 268

Other incidents
The illumination of the warning light can have the following reasons.
▶ The vehicle is loaded on one side. Distribute loads as evenly as possible.
▶ The wheels of one axle are loaded more heavily (e.g. when towing a trailer or
when driving uphill or downhill).
▶ Snow chains are mounted.
▶ A wheel has been changed.
CAUTION
Under certain circumstances (e.g. sporty style of driving, wintry or unpaved
roads) the warning light in the instrument cluster can be delayed or does
not light up at all.
Brake linings
Read and observe
on page 32 first.
illuminates - the brake pads are worn.
Check brake pad!BRAKE PADS PLEASE CHECK
Seek help from a specialist garage.
Fuel reserve
Read and observe
on page 32 first.
illuminates – the fuel level in the fuel tank is at the reserve level (approxi-
mately 6 litres).
Please refuel. Range: ...
kmPLEASE REFUEL RANGE …
km
An audible signal sounds as a warning.
Note
The text in the display goes out after refuelling and driving a short distance.
Lane following system (Lane Assist)
Read and observe
on page 32 first.
The warning lights
indicates the state of the Lane Assist system.
More information about the Lane Assist System » page 160.
Turn signal system
Read and observe
on page 32 first.
flashes – the left turn signal is turned on.
flashes – the right turn signal is turned on.
If there is a fault in the turn signal system, the warning light flashes at twice
its normal rate. This does not apply when towing a trailer.
Switching off the hazard warning light system is switched on will cause all of
the turn signal lights as well as both warning lights to flash.
Trailer turn signal lights
Read and observe
on page 32 first.
flashes – the trailer lights are switched on.
If a trailer is hitched and the warning light is not flashing, one of the trailer
turn signal lights has failed.
An example message in the display of the instrument cluster
Trailer: check left turn signal!TRAILER TURN SIG_ CHECK LEFT
Check the trailer bulbs.
Fog lights
Read and observe
on page 32 first.
illuminates – the fog lights are switched on.
Cruise control system
Read and observe
on page 32 first.
illuminates - the vehicle speed is limited by the speed regulator system
and/or the automatic distance control.
36Using the system
Page 39 of 268

Brake pedal (automatic transmission)Read and observe
on page 32 first.
illuminates – apply the brake.
Natural gas operation
Read and observe
on page 32 first.
illuminates - the vehicle is running on natural gas.
Main beam
Read and observe
on page 32 first.
illuminates – the main beam or the headlight flasher is switched on.
Automatic transmission
Read and observe
on page 32 first.
Gearbox overheated
The warning light is only shown in the MAXI DOTdisplay.
Illumi-
nates
Gearbox overheated. Stop! Log book!STOP VEHICLE GEARBOX OVERHEAT Illumi-
nates
Gearbox overheated.GEARBOX OVERHEATED
▶
do not continue to drive! Stop the vehicle and turn off the engine.
You can continue your journey as soon as the warning light disappears.
If the warning light does not go out, do not continue driving. Seek help from a specialist garage.
Transmission problem
The warning light is only shown in the MAXI DOTdisplay.
Illumi-
nates
Gearbox faulty. Workshop!GEARBOX FAULTY WORKSHOP Illumi-
nates
Error: gearbox. Reverse gear not available.GEARBOX ERROR REV_ GEAR NOT AVAIL Illumi-
nates
Error: gearboxGEARBOX ERROR
Seek help from a specialist garage.
Rear seat belt warning light
Read and observe
on page 32 first.
illuminates – a rear seat belt is not fastened.
illuminates – a rear seat belt is fastened.
When the seat belt is fastened/unfastened, the particular light lights up briefly
and indicates the current belt status!
Generator
Read and observe
on page 32 first.
illuminates – the battery is not being charged whilst the engine is running.
Seek help from a specialist garage.
CAUTION
If in addition to the light the light lights up while driving, stop driving -
risk of engine damage! Switch off the engine and seek assistance from a spe-
cialist garage.
Coolant
Read and observe
on page 32 first.
Coolant level too low
Illumi-
nates
Check coolant! Log book!ENGINE COOLANT PLEASE CHECK
▶ Stop the vehicle, switch off the engine, and check the coolant level
» page 199 , Checking the coolant level .
37Instruments and warning lights
Page 42 of 268
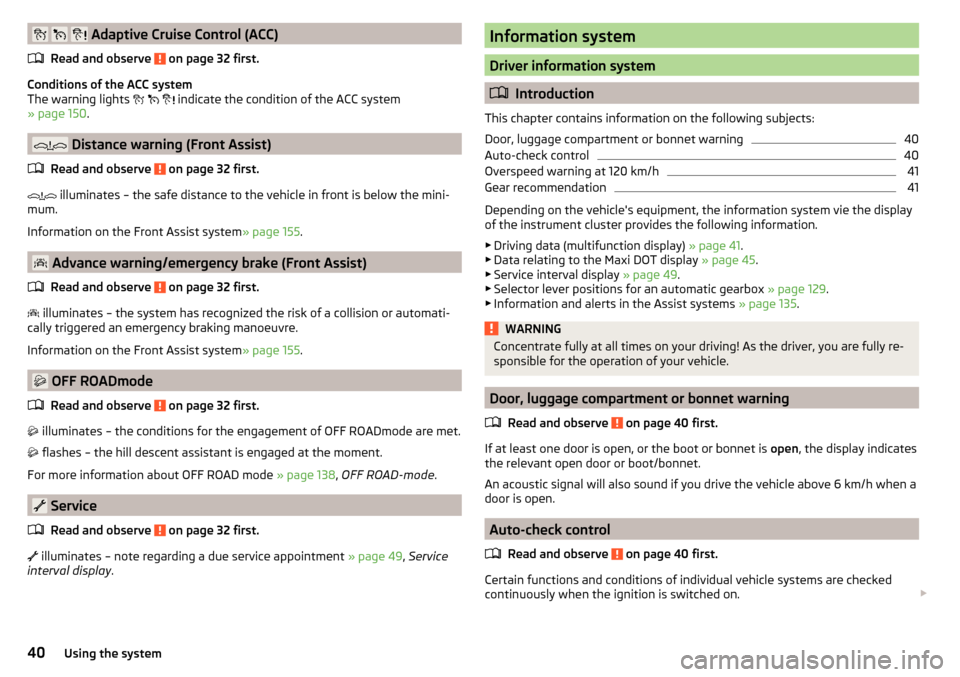
Adaptive Cruise Control (ACC)
Read and observe
on page 32 first.
Conditions of the ACC system
The warning lights
indicate the condition of the ACC system
» page 150 .
Distance warning (Front Assist)
Read and observe
on page 32 first.
illuminates – the safe distance to the vehicle in front is below the mini-
mum.
Information on the Front Assist system » page 155.
Advance warning/emergency brake (Front Assist)
Read and observe
on page 32 first.
illuminates – the system has recognized the risk of a collision or automati-
cally triggered an emergency braking manoeuvre.
Information on the Front Assist system » page 155.
OFF ROADmode
Read and observe
on page 32 first.
illuminates – the conditions for the engagement of OFF ROADmode are met.
flashes – the hill descent assistant is engaged at the moment.
For more information about OFF ROAD mode » page 138, OFF ROAD-mode .
Service
Read and observe
on page 32 first.
illuminates – note regarding a due service appointment
» page 49, Service
interval display .
Information system
Driver information system
Introduction
This chapter contains information on the following subjects:
Door, luggage compartment or bonnet warning
40
Auto-check control
40
Overspeed warning at 120 km/h
41
Gear recommendation
41
Depending on the vehicle's equipment, the information system vie the display
of the instrument cluster provides the following information.
▶ Driving data (multifunction display) » page 41.
▶ Data relating to the Maxi DOT display » page 45.
▶ Service interval display » page 49.
▶ Selector lever positions for an automatic gearbox » page 129.
▶ Information and alerts in the Assist systems » page 135.
WARNINGConcentrate fully at all times on your driving! As the driver, you are fully re-
sponsible for the operation of your vehicle.
Door, luggage compartment or bonnet warning
Read and observe
on page 40 first.
If at least one door is open, or the boot or bonnet is open, the display indicates
the relevant open door or boot/bonnet.
An acoustic signal will also sound if you drive the vehicle above 6 km/h when a
door is open.
Auto-check control
Read and observe
on page 40 first.
Certain functions and conditions of individual vehicle systems are checked
continuously when the ignition is switched on.
40Using the system
Page 88 of 268

WARNINGIf you have a subdued pain and/or temperature sensitivity, e.g. through
medication, paralysis or because of chronic illness (e.g. diabetes), we rec-
ommend not to use the seat heating. There may be difficult to heal burns. If
the seat heating is used, we recommend to make regular breaks in your
journey when driving long distances, so that the body can recuperate from
the stress of the journey. Please consult your doctor, who can evaluate
your specific condition.
CAUTION
The following instructions must be observed to avoid damage to the seats.■Do not kneel on the seats or otherwise apply concentrated pressure to them.■
Do not turn on any of the seat heaters if seats are not occupied.
■
Do not switch on the relevant seat heating if the seats have objects attached
to or placed on them, for example a child seat, a bag, etc.
■
When there are additional protective covers or protective covers mounted on
each of the seats, do not turn the seat heating on.
Note
If the on-board voltage decreases, the seat heating switches off automatically
» page 204 , Automatic load deactivation .
Front armrest setting
Fig. 78
Adjust armrest
The armrest is adjustable for height and length.
Lifting
›
Lift the armrest in the direction of arrow
A
into one of the six locking posi-
tions » Fig. 78 .
Folding down
›
Lift the armrest in the direction of arrow
A
until it stops » Fig. 78.
›Fold down the rear armrest.
Move›
Move the cover into the desired position in the direction of the arrow
B
» Fig. 78 .
Note
Push the armrest cover all the way back to the stop before applying the hand-
brake.
Rear armrest setting
Fig. 79
Fold down armrest
The armrest can be folded down to increase comfort.
Lowering / raising
›
Pull on the loop
A
» Fig. 79 and fold down the armrest forward in the direc-
tion of the arrow.
Raising takes place in reverse order.
Folding front passenger seat
Fig. 80
Folding the front passenger seat
forward
The front passenger seat can be folded forward into a horizontal position.
86Using the system
Page 91 of 268

WARNINGThe through-loading channel is only intended for transporting skis that are
placed in a properly secured, through-loading bag.Transporting and practical equipment
Useful equipment
Introduction
This chapter contains information on the following subjects:
Car park ticket holder
90
Storage compartment on the driver's side
90
stowage compartments in the doors
90
Storage compartment in the front centre console
91
Cup holders
91
Cigarette lighter
92
Ashtray
92
12-Volt power outlet
93
Waste container
93
Multimedia holder
94
Storage compartment under the front arm rest
95
Glasses compartment
95
Storage compartment on the front passenger side
95
Clothes hook
96
Storage pockets on the backs of the front seats
96
Storage compartment in the rear centre console
97
230-volt socket
97
Removable through-loading bag
98
AUX and USB inputs
99WARNING■ Do not place anything on the dash panel. These objects might slide or fall
down when driving (when accelerating, cornering or with an incorrect driv-
ing action) and may distract you from concentrating on the traffic – there is
the risk of an accident.■
When driving, ensure that no objects from the centre console or from oth-
er storage compartments can get into the driver's footwell. You would not
be able to brake, operate the clutch pedal or accelerate - danger of causing
an accident!
89Transporting and practical equipment
Page 94 of 268

Placement of the cup holders » Fig. 89
In the front centre console
In the rear armrestWARNING■ Do not use any cups or beakers which are made of brittle material (e.g.
glass, porcelain). This could lead to injuries in the event of an accident.■
Never put hot cups in the cup holder. If the vehicle moves, they may spill –
risk of scalding!
■
No objects should be placed in the holders that might endanger the vehi-
cle's occupants if the vehicle brakes suddenly or the vehicle is in collision.
CAUTION
Do not leave open beverage containers in the cup holder during the journey.
There is a risk of spilling e.g. when braking which may cause damage to the
electrical components or seat upholstery.
Cigarette lighter
Fig. 90
Cigarette lighter
Read and observe on page 89 first.
Use
›
Press the igniter in as far as the stop » Fig. 90.
›
Wait until the igniter pops out.
›
Remove the glowing igniter and use immediately.
›
Place the cigarette lighter back into the socket.
ABWARNING■
The cigarette lighter also works if the ignition is switched off. When leav-
ing the vehicle, never leave persons who are not completely independent,
such as children, unattended in the vehicle. These could operate the lighter
and get burned, start a fire or damage the interior.■
Take care when using the cigarette lighter! Improper usage can case
burns.
Note
The cigarette lighter socket can also be used as a 12 volt socket.
Ashtray
Fig. 91
Remove front ashtray / open rear ashtray / remove rear ashtray
insert
Read and observe
on page 89 first.
The ashtray can be used for discarding ash, cigarettes, cigars and the like » .
Removing/inserting the front ash tray
›
When removing, do not hold the ashtray on the cover.
›
Pull out the ashtray in the direction of the arrow » Fig. 91 -
.
Insertion takes place in reverse order.
Removing/inserting the rear ashtray insert
›
Pull the upper part of the well and open the ashtray in the direction of arrow
1
» Fig. 91 -
.
›
Grasp the insert in the area marked with the arrows and remove it in the di-
rection of arrow
2
» Fig. 91 -
.
92Using the system