2015 Seat Altea XL wheel
[x] Cancel search: wheelPage 154 of 236
Advice
Caring for rubber seals will also prevent pre-
mature ageing and leaks. The doors will be
easier to open. If rubber seals are well looked
after, they will not freeze so quickly in winter.
Door lock cylinder The door lock cylinders can freeze up in win-
ter.
To de-ice the lock cylinders you should only
use spray with lubricating and anti-corrosive
properties.
Cleaning chrome parts 1. Clean chrome parts with a damp cloth.
2. Polish chrome parts with a soft, dry cloth.
If this does not provide satisfying results, use
a specialist
chrome cleaning product.
Chrome cleaning products will remove stains
from the surface. CAUTION
To prevent scratching chrome surfaces:
● Never use an abrasive cleaning product on
chrome.
● Do not clean or polish chrome parts in a
sandy or dusty environment. Steel wheel rims
–
Clean steel wheel rims regularly using a
separate sponge.
Use an industrial cleaner to remove brake
dust. Any damage to the paint on steel wheel
rims should be repaired before starting to
rust. WARNING
● Never wash tyres with a cylindrical jet. Even
at large spraying distances and short clean-
ing times, damage can occur to the tyres.
This may cause an accident.
● Water, ice and salt on the brake system can
reduce braking effectiveness. Risk of acci-
dent. Directly after washing, avoid sudden
and sharp braking. “Dry” the brakes by brak-
ing several times ››› page 123. Alloy wheel rims
Every two weeks
– Wash salt and brake dust from alloy
wheels.
– Use an acid free detergent to clean the
wheel rims.
Every 3 months
– Apply a hard wax compound to the wheels. Alloy wheels require regular attention to pre-
serve their appearance. If road salt and brake
dust are not often removed, the aluminium
finish will be impaired.
Always use an acid-free detergent for alloy
wheel rims.
Car polish or other abrasive agents should
not be used for maintaining the rims. If the
protective coating is damaged, e.g. by flying
stones, the damaged area should be re-
paired immediately.
WARNING
● Never wash tyres with a cylindrical jet. Even
at large spraying distances and short clean-
ing times, damage can occur to the tyres.
This may cause an accident.
● Water, ice and salt on the brake system can
reduce braking effectiveness. Risk of acci-
dent. Directly after washing, avoid sudden
and sharp braking. “Dry” the brakes by brak-
ing several times ››› page 123. Underbody protection
The vehicle underbody is coated to protect it
from chemical and mechanical damage.
The protective coating can be damaged when
driving. We recommend that you check the
protective coating under the body and on the
152
Page 155 of 236
Care and maintenance
running gear, and retouch it if necessary,
before and after the winter season.
We recommend that you go to your Technical
Service to carry out repair work and addition-
al anti-corrosion work. WARNING
Do not apply underseal or anti-corrosion
coatings to the exhaust pipes, catalytic con-
verter or the heat shields on the exhaust sys-
tem. The heat of the exhaust system or the
engine could cause them to ignite. Risk of
fire. Cleaning the engine compartment
Take special care when cleaning the engine
compartment.
Anti-corrosion treatment
The engine compartment and the surface of
the power unit are given anti-corrosion treat-
ment at the factory.
Good corrosion protection is particularly im-
portant in winter when the vehicle is fre-
quently driven on salted roads. To prevent
the salt corroding the vehicle, the entire en-
gine compartment should be thoroughly
cleaned before and after winter.
Technical Services
have the proper products
for cleaning and preservation as well as the necessary workshop equipment. For this rea-
son, we recommend having this work per-
formed by them.
The anti-corrosion protection is usually re-
moved if the engine compartment is cleaned
with grease removing solutions, or if you
have the engine cleaned. On commissioning
this work, ensure that all surfaces, seams,
joints and components in the engine com-
partment are given anti-corrosion treatment.
WARNING
● When working in the engine compartment,
always observe the safety warnings
››› page 163.
● Bef
ore opening the bonnet, switch the en-
gine off, apply the handbrake firmly and al-
ways remove the key from the ignition.
● Allow the engine to cool before you clean
the engine compartment.
● Do not clean, for example, the vehicle un-
derbody, wheel arches or wheel trims without
protecting your hands and arms. You may cut
yourself on sharp-edged metal parts. Failure
to comply could result in injury.
● Moisture, ice and salt on the brake system
may affect braking effectiveness. Risk of acci-
dent. Directly after washing, avoid sudden
and sharp braking.
● Never touch the radiator fan. It is tempera-
ture-controlled and could start automatically,
even when the key is removed from the igni-
tion! For the sake of the environment
Fuel, grease and oil deposits can be removed
when the engine is washed. The polluted wa-
ter must be cleaned in an oil separator. For
this reason, engine washing should be car-
ried out only by a specialised workshop or a
petrol station. Caring for the vehicle interior
Introduction The dye used in many modern garments, for
example dark jeans, is not always sufficiently
colour-fast. Seat upholstery (material and
leather), especially when light-coloured, may
visibly discolour if the dye comes out of
clothing (even when used correctly). This is
not an upholstery defect but indicates that
the dye in the item of clothing is not suffi-
ciently colour-fast.
The longer stains or dirt remain on the vehi-
cle surfaces, especially the fabrics covering
the padded upholstery, the more difficult it
becomes to clean and maintain them. If
stains and dirt are left for a long time, it may
be that they are impossible to remove.
WARNING
Car-care products may be toxic and hazard-
ous. Using unsuitable car-care products or, » 153
Technical specifications
Advice
Operation
Safety
Page 160 of 236
Advice
Checking and refilling levels
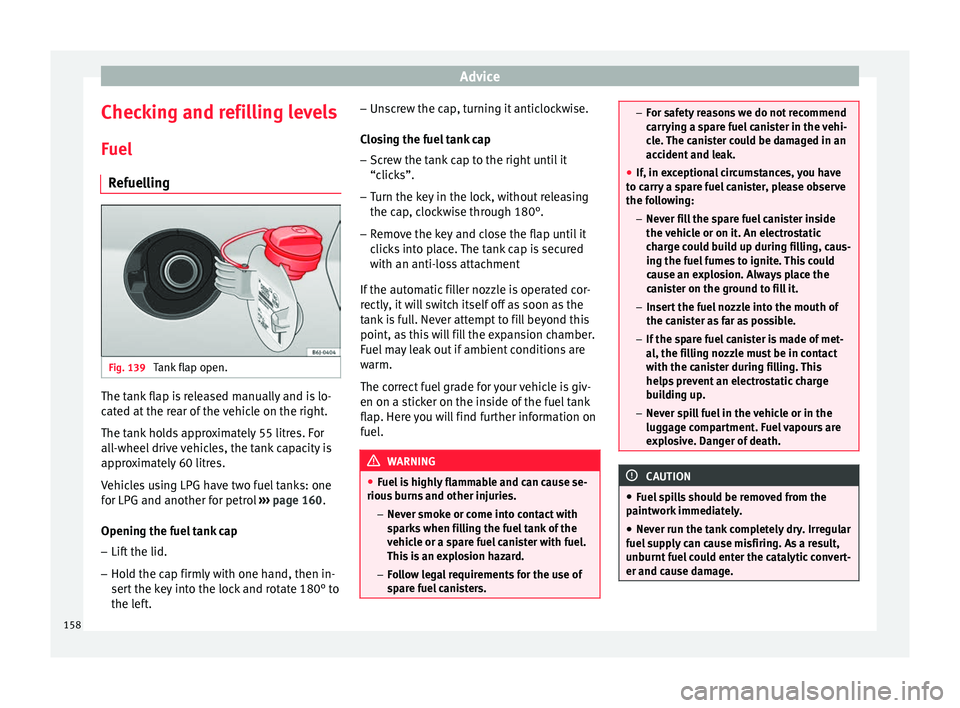
Fuel Refuelling Fig. 139
Tank flap open. The tank flap is released manually and is lo-
cated at the rear of the vehicle on the right.
The tank holds approximately 55 litres. For
all-wheel drive vehicles, the tank capacity is
approximately 60 litres.
Vehicles using LPG have two fuel tanks: one
for LPG and another for petrol
››› page 160.
Opening the fuel tank cap
– Lift the lid.
– Hold the cap firmly with one hand, then in-
sert the key into the lock and rotate 180° to
the left. –
Unscrew the cap, turning it anticlockwise.
Closing the fuel tank cap
– Screw the tank cap to the right until it
“clicks”.
– Turn the key in the lock, without releasing
the cap, clockwise through 180°.
– Remove the key and close the flap until it
clicks into place. The tank cap is secured
with an anti-loss attachment
If the automatic filler nozzle is operated cor-
rectly, it will switch itself off as soon as the
tank is full. Never attempt to fill beyond this
point, as this will fill the expansion chamber.
Fuel may leak out if ambient conditions are
warm.
The correct fuel grade for your vehicle is giv-
en on a sticker on the inside of the fuel tank
flap. Here you will find further information on
fuel. WARNING
● Fuel is highly flammable and can cause se-
rious burns and other injuries.
–Never smoke or come into contact with
sparks when filling the fuel tank of the
vehicle or a spare fuel canister with fuel.
This is an explosion hazard.
– Follow legal requirements for the use of
spare fuel canisters. –
For safety reasons we do not recommend
carrying a spare fuel canister in the vehi-
cle. The canister could be damaged in an
accident and leak.
● If, in exceptional circumstances, you have
to carry a spare fuel canister, please observe
the following:
–Never fill the spare fuel canister inside
the vehicle or on it. An electrostatic
charge could build up during filling, caus-
ing the fuel fumes to ignite. This could
cause an explosion. Always place the
canister on the ground to fill it.
– Insert the fuel nozzle into the mouth of
the canister as far as possible.
– If the spare fuel canister is made of met-
al, the filling nozzle must be in contact
with the canister during filling. This
helps prevent an electrostatic charge
building up.
– Never spill fuel in the vehicle or in the
luggage compartment. Fuel vapours are
explosive. Danger of death. CAUTION
● Fuel spills should be removed from the
paintwork immediately.
● Never run the tank completely dry. Irregular
fuel supply can cause misfiring. As a result,
unburnt fuel could enter the catalytic convert-
er and cause damage. 158
Page 163 of 236
Checking and refilling levels
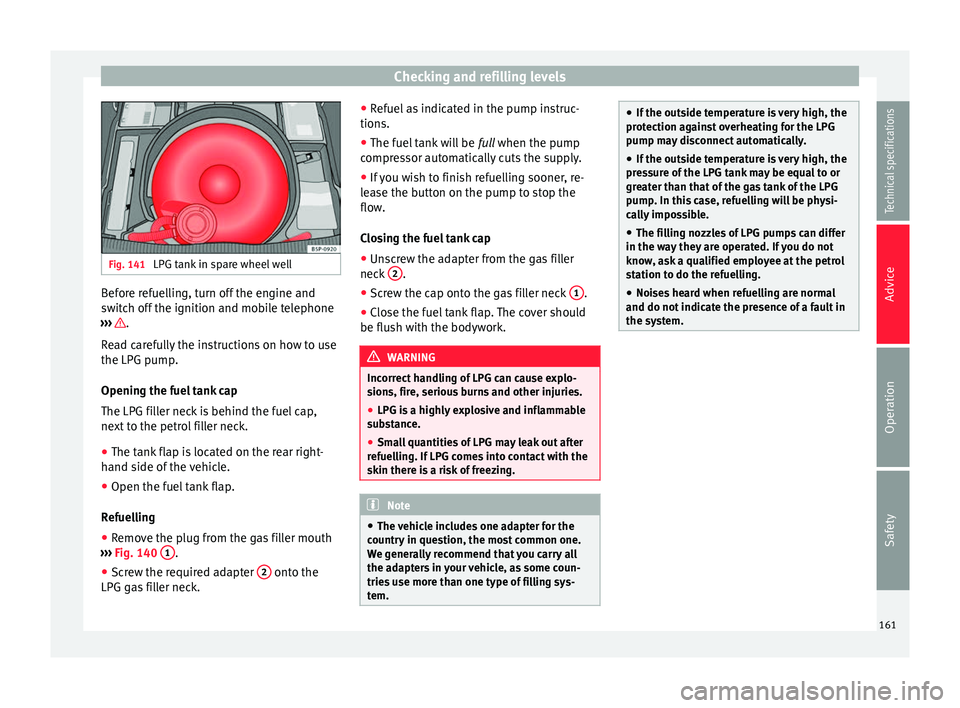
Fig. 141
LPG tank in spare wheel well Before refuelling, turn off the engine and
switch off the ignition and mobile telephone
››› .
Read carefully the instructions on how to use
the LPG pump.
Opening the fuel tank cap
The LPG filler neck is behind the fuel cap,
next to the petrol filler neck.
● The tank flap is located on the rear right-
hand side of the vehicle.
● Open the fuel tank flap.
Refuelling
● Remove the plug from the gas filler mouth
››› Fig. 140 1 .
● Screw the required adapter 2 onto the
LPG gas filler neck. ●
Refuel as indicated in the pump instruc-
tions.
● The fuel tank will be full when the pump
c ompr
essor automatically cuts the supply.
● If you wish to finish refuelling sooner, re-
lease the button on the pump to stop the
flow.
Closing the fuel tank cap
● Unscrew the adapter from the gas filler
neck 2 .
● Screw the cap onto the gas filler neck 1 .
● Close the fuel tank flap. The cover should
be flush with the bodywork. WARNING
Incorrect handling of LPG can cause explo-
sions, fire, serious burns and other injuries.
● LPG is a highly explosive and inflammable
substance.
● Small quantities of LPG may leak out after
refuelling. If LPG comes into contact with the
skin there is a risk of freezing. Note
● The vehicle includes one adapter for the
country in question, the most common one.
We generally recommend that you carry all
the adapters in your vehicle, as some coun-
tries use more than one type of filling sys-
tem. ●
If the outside temperature is very high, the
protection against overheating for the LPG
pump may disconnect automatically.
● If the outside temperature is very high, the
pressure of the LPG tank may be equal to or
greater than that of the gas tank of the LPG
pump. In this case, refuelling will be physi-
cally impossible.
● The filling nozzles of LPG pumps can differ
in the way they are operated. If you do not
know, ask a qualified employee at the petrol
station to do the refuelling.
● Noises heard when refuelling are normal
and do not indicate the presence of a fault in
the system. 161
Technical specifications
Advice
Operation
Safety
Page 177 of 236

Wheels
Wheels
Wheels and tyres General notes Avoiding damage
– If you have to drive over a kerb or similar
obstacle, drive very slowly and at a right
angle.
– Keep grease, oil and fuel off the tyres.
– Inspect the tyres regularly for damage
(cuts, cracks or blisters, etc.). Remove any
foreign objects embedded in the treads.
Storing tyres
– When you remove the tyres, mark them in
order to maintain the same direction of ro-
tation when they are installed again.
– When removed, the wheels and/or tyres
should be stored in a cool, dry and prefera-
bly dark location.
– Store tyres in a vertical position if they are
not fitted on wheel rims.
New tyres
New tyres must be run in ›››
page 130.
The tread depth of new tyres may vary, ac-
cording to the type and make of tyre and the
tread pattern. Concealed damage
Damage to tyres and rims is often not readily
visible. If you notice unusual vibrations or the
vehicle pulling to one side, this may indicate
that one of the tyres is damaged. They
should be checked immediately by a Techni-
cal Service.
Tyres with directional tread pattern
An arrow on the tyre sidewall indicates the di-
rection of rotation on tyres with directional
tread. Always observe the direction of rota-
tion indicated when fitting the wheel. This
guarantees optimum grip and helps to avoid
aquaplaning, excessive noise and wear.
WARNING
● New tyres do not have maximum grip dur-
ing the first 500 km (300 miles). Drive partic-
ularly carefully to avoid possible accidents.
● Never drive with damaged tyres. This may
cause an accident.
● If you notice unusual vibrations or if the ve-
hicle pulls to one side when driving, stop the
vehicle immediately and check the tyres for
damage. Checking tyre pressure
The correct tyre pressure can be seen on the
sticker on the inside of the fuel tank flap.1. Read the required tyre inflation pressure
from the sticker. The values refer to Sum-
mer tyres. For winter tyres, you must add
0.2 bar (2.9 psi / 20 kPa) to the values
given for summer tyres.
2. The tyre pressures should only be checked when the tyres are cold. The slightly raised
pressures of warm tyres must not be re-
duced.
3. Adjust the tyre pressure to the load you are carrying.
Tyre pressure
The correct tyre pressure is especially impor-
tant at high speeds. The pressure should
therefore be checked at least once a month
and before starting a journey.
The sticker with the tyre pressure values can
be found on the inside of the fuel tank flap.
The tyre pressure values given are for cold
tyres. Do not reduce the slightly raised pres-
sures of warm tyres ››› .
WARNING
● Check the tyre pressure at least once per
month. Checking the tyre pressure is very im-
portant. If the tyre pressure is too high or too
low, there is an increased danger of accidents
- particularly at high speeds.
● A tyre can easily burst if the pressure is too
low, causing an accident! » 175Technical specifications
Advice
Operation
Safety
Page 178 of 236

Advice
●
At continuously high speeds, a tyre with in-
sufficient pressure flexes more. In this way it
becomes too hot, and this can cause tread
separation and tyre blow-out. Always observe
the recommended tyre pressures.
● If the tyre pressure is too low or too high,
the tyres will wear prematurely and the vehi-
cle will not handle well. Risk of accident! For the sake of the environment
Under-inflated tyres will increase fuel con-
sumption. Tyre pressure monitoring
The tyre pressure monitoring system con-
stantly checks the pressure of the tyres.
The system uses the speed sensors of the
ABS wheels. It operates by analysing the
speed and frequency spectrum of each
wheel.
For optimum performance, use genuine SEAT
tyres. In addition, check and adjust tyre pres-
sures regularly.
Whenever the tyre pressure is are changed or
one or more tyres are changed, the system
should be reset by pressing the SET button
on the centre console.
The system warns the driver in the event of a
loss of pressure by means of symbols and messages in the instrument panel display.
The system operates via the ESC
››› page 134.
Note that tyre pressure also depends on tyre
temperature. Said pressure increases around
0.1 bar (2.9 psi/10 kPa) for each +10 °C
(+50 °F) in tyre temperature increase. The tyre
heats up while the vehicle is being driven
and the tyre pressure will rise accordingly.
Therefore, you should only adjust the tyre
pressure when they are cold (i.e. approxi-
mately at ambient temperature).
To ensure that the tyre pressure monitoring
system works reliably, you should check and,
if necessary, adjust the tyre pressures at reg-
ular intervals and store the correct pressures
(reference values) in the system.
A tyre pressure information label is attached
to the inside of the fuel tank flap. WARNING
● Never adjust tyre pressure when the tyres
are hot. This may damage or even burst the
tyres. Risk of accident!
● An insufficiently inflated tyre flexes a lot
more at high speeds and causes significant
heating of the tyre. Under these conditions,
the tyre bead may be released or the tyre may
burst. Risk of accident! For the sake of the environment
Under-inflated tyres lead to increased fuel
consumption and tyre wear. Significant tyre pressure loss
The tyre symbol
is displayed and indicates
th at
the tyre pressure of at least one tyre is
insufficient.
– Stop the vehicle.
– Switch the ignition off.
– Check the tyre(s).
– Change the wheel if necessary.
176
Page 179 of 236

Wheels
Tyre useful life Fig. 152
Tyre tread wear indicators. Fig. 153
Diagram for changing wheels The useful life of tyres is dependent on tyre
pressure, driving style and fitting.
Wear indicators
The original tyres on your vehicle have
1.6 mm high “tread wear indicators”
››› Fig. 152 , running across the tread. De- pendin
g on the m ake, there will be 6 to 8 of
them evenly spaced around the tyre. Mark-
ings on the tyre sidewall (for instance the let-
ters “TWI” or other symbols) indicate the po-
sitions of the tread wear indicators. The mini-
mum tread depth required by law is 1.6 mm
(measured in the tread grooves next to the
tread wear indicators). Worn tyres must be re-
placed. Different figures may apply in export
countries ››› .
Tyre pressure
Incorrect tyre pressure causes premature
wear and could cause tyre blow-out. For this
reason, the tyre pressure should be checked
at least once per month ››› page 175.
Driving style
Fast cornering, heavy acceleration and hard
braking all increase tyre wear.
Changing wheels around
If the front tyres are worn considerably more
than the rear ones it is advisable to change
them around as shown ››› Fig. 153 . The use-
f u
l life of all the tyres will then be about the
same time.
Wheel balance
The wheels on new vehicles are balanced.
However, various factors encountered in nor-
mal driving can cause them to become unbal-
anced, which results in steering vibration. Unbalanced wheels should be rebalanced, as
they otherwise cause excessive wear on
steering, suspension and tyres. A wheel must
also be rebalanced when a new tyre is fitted.
Incorrect wheel alignment
Incorrect wheel alignment causes excessive
tyre wear, impairing the safety of the vehicle.
If tyres show excessive wear, you should
have the wheel alignment checked by a Tech-
nical Service.
WARNING
There is a serious danger of accidents if a tyre
bursts during driving!
● The tyres must be replaced at the latest
when the tread wear indicators are worn
››› page 177. Failure to follow this instruction
could result in an accident. Worn tyres do not
grip well at high speeds on wet roads. There
is also a greater risk of “aquaplaning”.
● At continuously high speeds, a tyre with in-
sufficient pressure flexes more. This causes it
to overheat. This can cause tread separation
and tyre blow-out. Risk of accident. Always
observe the recommended tyre pressures.
● If tyres show excessive wear, you should
have the running gear checked by a Technical
Service.
● Keep chemicals such as oil, fuel and brake
fluid away from tyres.
● Damaged wheels and tyres must be re-
placed immediately! » 177
Technical specifications
Advice
Operation
Safety
Page 180 of 236
Advice
For the sake of the environment
Under-inflated tyres will increase fuel con-
sumption. Run-flat tyres
Run-flat tyres allow you to continue driving
even with a punctured tyre, in the majority of
cases.
In vehicles that are factory-fitted with run-flat
tyres
1)
the loss of tyre pressure is indicated
on the instrument panel.
Driving with run-flat tyres (emergency
running)
– Leave the ESC/ASR on (Electronic Stability
Control), or switch it on ›››
page 137.
– Continue driving carefully and slowly
(80 km/h [50 mph] maximum).
– Avoid sudden manoeuvres and sharp turns.
– Avoid driving over obstacles (e.g. kerbs) or
potholes.
– Pay attention if the ESC/ASR activates of-
ten, if smoke comes from the tyres or there
is a smell of rubber, the vehicle vibrates or
there are clattering noises. If any of these
occur, stop the vehicle. The run-flat tyres have a tag on the side of
the tyre, with the description: “DSST”, “Eufo-
nia”, “RFT”, “ROF”, “RSC”, “SSR” or “ZP”.
The sides of this type of tyre are reinforced.
When the tyres lose air they are supported on
the sides (emergency driving).
The loss of pressure in the tyre is shown on
the instrument panel. You can then drive a
maximum of 80 km (50 miles) and if the cir-
cumstances are favourable (e.g. low load),
even more.
The damaged tyre should be changed as
soon as possible. The rim should be checked
in a specialised workshop to detect possible
damage and replace it if necessary. We rec-
ommend you contact your technical service.
If more than one tyre is being used under
emergency conditions, this reduces the dis-
tance that can be travelled.
Starting driving in emergency conditions
When loss in tyre pressure is displayed on
the instrument panel, this means that at least
one tyre is being driven in emergency condi-
tions
››› .
End of emergency operation
Do not drive on if:
● smoke is coming from one of the tyres, ●
there is a smell of rubber,
● the vehicle vibrates,
● there is a rattling noise.
When is it no longer possible to continue
driving even using run-flat tyres?
● If one of the tyres has been severely dam-
aged in an accident, etc. If a tyre has been
badly damaged there is a risk that parts of
the tread can be thrown off and cause dam-
age to the fuel lines, brake pipes or fuel filler.
● It is also advisable to stop driving if severe
vibrations occur, or if the wheel starts over-
heating and gives off smoke. WARNING
When driving in emergency conditions, the
driving quality of the vehicle is considerably
impaired.
● The maximum permitted speed of 80 km/h
(50 mph) is subject to road and weather con-
ditions. Please observe related legal require-
ments.
● Avoid sharp turns and rapid manoeuvres,
and brake earlier than usual.
● Avoid driving over obstacles (e.g. kerbs) or
potholes.
● If one or more tyres are being driven in
emergency conditions, the driving quality of 1)
Depending upon version and country.
178