Page 69 of 292

1.63
CHILD SEATS: attachment by seat belt (13/14)
X = Seat not suitable for fitting child seats of this type.
U = Seat which allows a child seat with “Universal” approval to be ins\
talled using a seat belt; check that it can be fitted.
(2) A carrycot can be installed across the vehicle and will take up at least \
two seats. Position the child with his or her feet nea rest
the door.
(3) Move the front seat as far forward as possible to install a rear-facing \
child seat, then move back the seat in front as far as it will
go, although without allowing it to come into contact with the child sea\
t.
(4) Forward-facing child seat; position the seatback of the child seat in co\
ntact with the seatback of the vehicle seat. In all sit ua-
tions, remove the rear headrest of the seat on which the child seat is p\
ositioned. This must be done before fitting the child s eat
(please refer to the section entitled “Rear headrests” in Section\
3). Do not push the seat in front of the child more than half way
back on its runners and do not recline the seatback more than 25°.
Page 70 of 292
1.64
RISK OF DEATH OR
SERIOUS INJURY: before
fitting a rear-facing child
seat on the front passen-
ger seat, check that the air bag has
been deactivated (refer to the infor-
mation on “Deactivating the front
passenger air bag” in Section 1).
³Check the status of the air bag
before fitting a child seat or al-
lowing a passenger to use the seat.
Child seat attached using the belt
¬Seat which allows a seat with
“Universal” approval to be
fitted using a seat belt;
²Seat not suitable for fitting
child seats.
Using a child safety system
which is not approved for
this vehicle will not correctly
protect the baby or child.
They risk serious or even fatal injury.
CHILD SEATS: attachment by seat belt (14/14)
9-seater combi/bus
Page 83 of 292

1.77
CHILD SAFETY: deactivating/activating the front passenger air bag (1/3)
Deactivating the front
passenger airbags
(on equipped vehicles)
You must deactivate the devices in ad-
dition to the front passenger seat belt
before fitting a child seat in the front
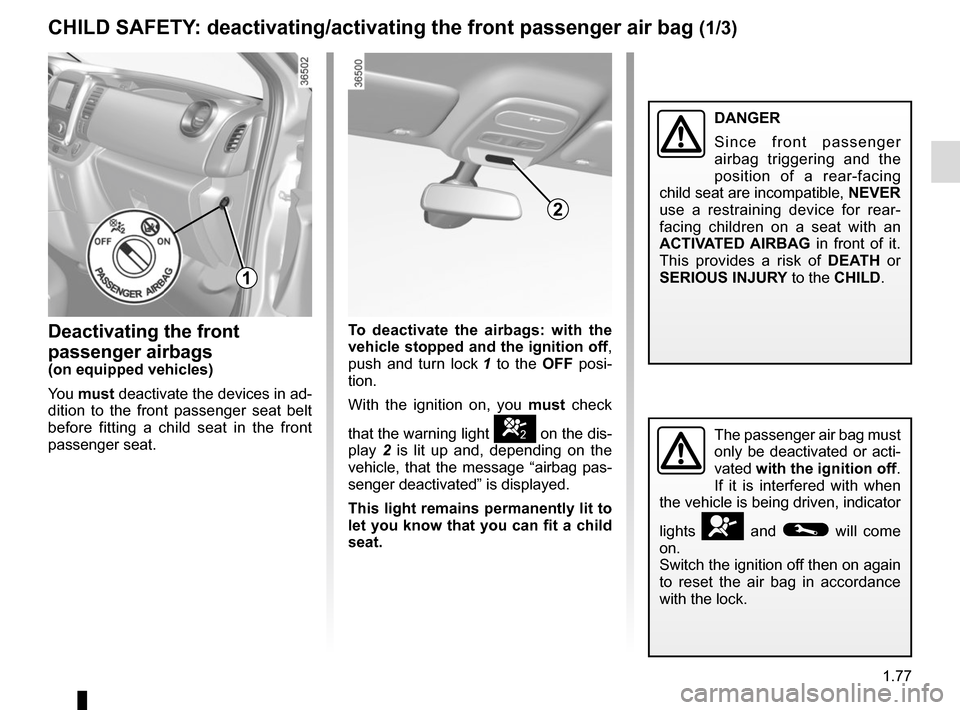
passenger seat. To deactivate the
airbags: with the
vehicle stopped and the ignition off ,
push and turn lock 1 to the OFF posi-
tion.
With the ignition on, you must check
that the warning light
] on the dis-
play 2 is lit up and, depending on the
vehicle, that the message “airbag pas-
senger deactivated” is displayed.
This light remains permanently lit to
let you know that you can fit a child
seat.
2
The passenger air bag must
only be deactivated or acti-
vated with the ignition off.
If it is interfered with when
the vehicle is being driven, indicator
lights
å and © will come
on.
Switch the ignition off then on again
to reset the air bag in accordance
with the lock.
DANGER
Since front passenger
airbag triggering and the
position of a rear-facing
child seat are incompatible, NEVER
use a restraining device for rear-
facing children on a seat with an
ACTIVATED AIRBAG in front of it.
This provides a risk of DEATH or
SERIOUS INJURY to the CHILD.
1
Page 85 of 292

1.79
CHILD SAFETY: deactivating/activating the front passenger air bag (3/3)
Activating the front
passenger air bags
You should reactivate the airbags as
soon as you remove the child seat from
the front passenger seat to ensure the
protection of the front passenger in the
event of an impact.
The passenger airbag must
only be deactivated or acti-
vated when the vehicle is
stationary.
If it is interfered with when the ve-
hicle is being driven, indicator lights
å and © will come on.
Switch the ignition off then on again
to reset the airbag in accordance
with the lock position.
2
Operating faults
It is forbidden to fit a rear-facing child
seat to the front passenger seat if the
airbags activation/deactivation system
is faulty.
Allowing any other passenger to sit in
that seat is not recommended.
Contact your approved dealer as soon
as possible.
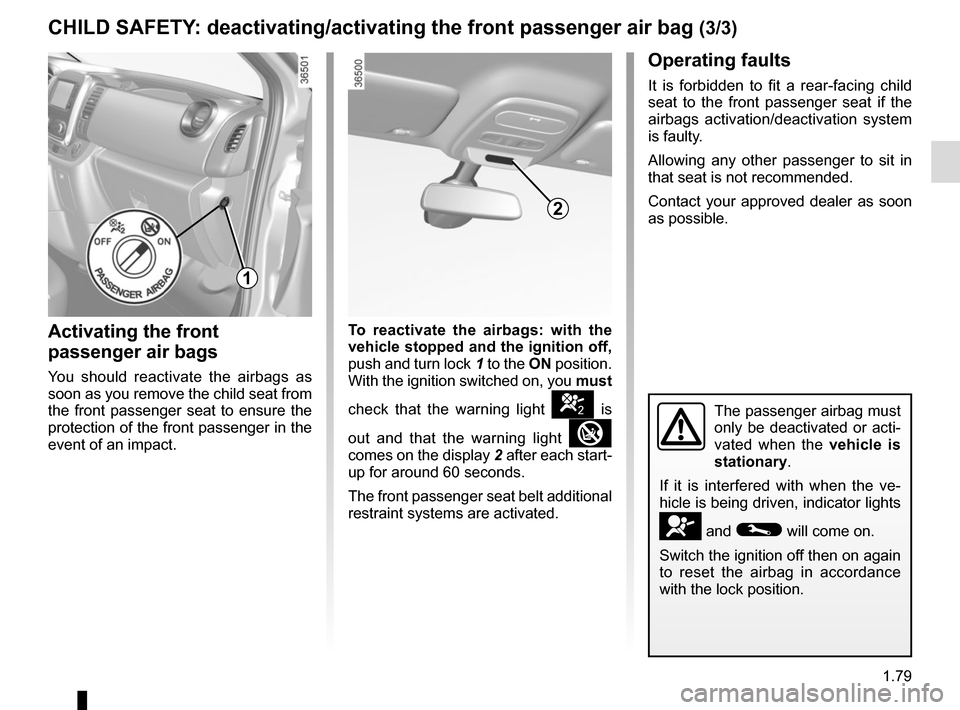
To reactivate the airbags: with the
vehicle stopped and the ignition off,
push and turn lock 1 to the ON position.
With the ignition switched on, you must
check that the warning light
] is
out and that the warning light
�
comes on the display 2 after each start-
up for around 60 seconds.
The front passenger seat belt additional
restraint systems are activated.
1
Page 93 of 292

1.87
WARNING LIGHTS (4/4)
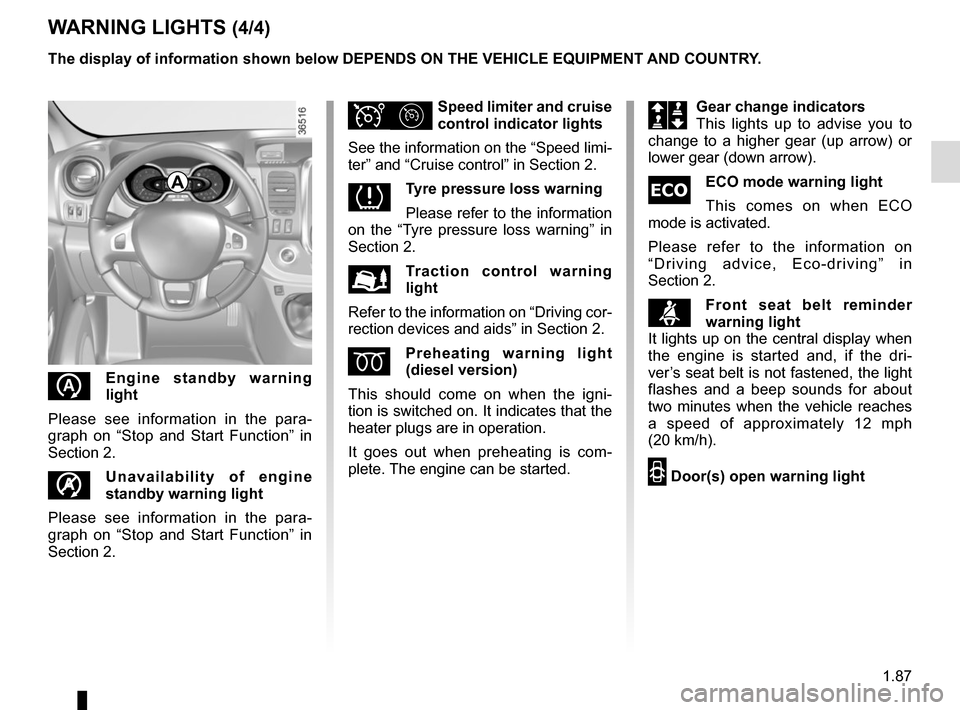
ΦSpeed limiter and cruise
control indicator lights
See the information on the “Speed limi-
ter” and “Cruise control” in Section 2.
�Tyre pressure loss warning
Please refer to the information
on the “Tyre pressure loss warning” in
Section 2.
�Traction control warning
light
Refer to the information on “Driving cor-
rection devices and aids” in Section 2.
ÉPreheating warning light
(diesel version)
This should come on when the igni-
tion is switched on. It indicates that the
heater plugs are in operation.
It goes out when preheating is com-
plete. The engine can be started.
A
The display of information shown below DEPENDS ON THE VEHICLE EQUIPMENT \
AND COUNTRY.
Š‰Gear change indicators
This lights up to advise you to
change to a higher gear (up arrow) or
lower gear (down arrow).
�ECO mode warning light
This comes on when ECO
mode is activated.
Please refer to the information on
“Driving advice, Eco-driving” in
Section 2.
ßFront seat belt reminder
warning light
It lights up on the central display when
the engine is started and, if the dri-
ver’s seat belt is not fastened, the light
flashes and a beep sounds for about
two minutes when the vehicle reaches
a speed of approximately 12 mph
(20 km/h).
2 Door(s) open warning light
\bEngine standby warning
light
Please see information in the para-
graph on “Stop and Start Function” in
Section 2.
Unavailability of engine
standby warning light
Please see information in the para-
graph on “Stop and Start Function” in
Section 2.
Page 103 of 292

1.97
TRIP COMPUTER AND WARNING SYSTEM: operating fault messages
These appear with the © warning light and mean that you should drive very carefully to an author\
ised dealer as
soon as possible. If you fail to follow this recommendation, you risk da\
maging your vehicle.
They disappear when the display selection key is pressed or after severa\
l seconds and are stored in the computer log. The
© warning light stays on. Examples of operating fault messages are given \
in the following pages.
Examples of messages Interpreting the display selected
« CLEAN DIESEL FILTER » Indicates the presence of water in the diesel filter; contact an approve\
d Dealer
as soon as possible.
« CHECK VEHICLE » Indicates a fault in one of the pedal sensors, battery management system\
or oil
level sensor.
« CHECK AIRBAG » Indicates a fault in the restraint system in addition to the seat belts.\
In the event
of an accident, it is possible that they may not be triggered.
« Check antipollution system » – Indicates a fault in the vehicle’s emission control system.
– Indicates a fault in the emissions reduction system when it is accompani\
ed
by the
� warning light. Refer to the information on «Additive tank» in
Section 1.
Page 132 of 292

2.8
STOP AND START function (2/3)
Special cases
– For vehicles using a RENAULT card, while the system is operating and
the engine is stopped (traffic jam,
traffic lights, etc.), if the driver gets
out of their seat or unfastens their
seatbelt and opens the driver’s door,
the ignition will be switched off. To
restart and reactivate the Stop and
Start system, press the start button
(please see “Starting and stopping
the engine”).
– In the event of the engine stalling, if the system is operational, press
down the clutch pedal as far as it will
go to restart.
Conditions preventing the
standby of the engine
Depending on the vehicle, certain
conditions prevent the system from
using the engine standby function, in-
cluding when:
– reverse gear is engaged;
– the bonnet is not locked;
– for vehicles using a RENAULT card, the driver’s side door is not closed;
– for vehicles using a RENAULT card, the driver’s seat belt is not buckled;
– the outdoor temperature is too low or too high (less than around 0 °C or
higher than around 30 °C);
– the battery is not sufficiently char- ged;
– the difference between the vehicle interior temperature and the automa-
tic climate control instruction is too
high; – the “Clear View” function is activated
(please see the information on “Air
conditioning” in Section 3);
– the engine coolant temperature is too low;
– automatic particle filter cleaning is underway;
or
– ...
Warning light
� is displayed on the
instrument panel. This notifies you that
engine standby is not available.
To fill up with fuel, the engine must
be stopped (and not on standby):
stop the engine (please refer to the
information on “Starting and stop-
ping the engine” in Section 2).
Page 193 of 292
3.31
REAR BENCH SEATS: functions (1/4)
Depending on the vehicle, there may
be two rear bench seats: bench seat 2
(2nd row of seats) and bench seat 1
(3rd row of seats).Bench seat 2
Insert the buckles 3 into the housings 4
before moving the seatback(s).
To assist with access to the last row
(bench seat 1 ), move control 5 down-
wards (movement A) to tilt the bench
seat back 2.
Remember to lock the seat belt in place
once more when a passenger is oc-
cupying the seat.
Ensure that the bench seats
are locked in place correctly
when refitting them.
Check that the side seat
belts are locked in their unit cor-
rectly.
2
1
4
5
A
For safety reasons, carry
out any adjustments when
the vehicle is not being
driven.
3