2015 RENAULT ESPACE sound
[x] Cancel search: soundPage 11 of 316

1.5
RENAULT “HANDS-FREE” CARD: usage (2/4)
“Hands-free” locking using the
sensor 3
If you wish to lock your vehicle while the
card is within range, make sure that the
doors and boot are closed and place
your finger over the sensor 3 on the
driver’s door handle. The vehicle will
lock.
Note: The sensor cannot be used to
lock the vehicle unless the RENAULT
card is within the access zone 1.
Special features of the locking
system
Having locked the vehicle by pressing
the sensor 3, there is a delay of approx-
imately 3 seconds before it can be un-
locked again. During these 3 seconds,
the door handles can be tried to make
sure that the vehicle is locked properly.
If a door is open or not properly closed:
– when locking using the sensor 3,
the vehicle will lock/unlock in quick
succession, but the hazard warning
lights will not flash;
– the vehicle will not lock as you move away.
3
Remote “Hands-free” locking
With the RENAULT card on you, and
doors and boot closed, move away
from the vehicle: it will lock automati-
cally as soon as you leave the access
zone.
Note: The distance at which the vehicle
locks depends on the surroundings.
To indicate that the doors have been
locked, the hazard warning lights
flash once and then light up for ap-
proximately four seconds, and a beep
sounds in confirmation.
4
“Hands-free” unlocking
With the RENAULT card in zone 1 ,
place your hand on a door handle 2: the
vehicle will unlock.
The hazard warning lights flash once
to indicate that the doors have been un-
locked.
Pressing button 4 unlocks the whole
vehicle, including the boot, or, for ve-
hicles equipped with an automatic tail-
gate, opens the boot completely.
2
Page 17 of 316

1.11
OPENING AND CLOSING THE DOORS (1/3)
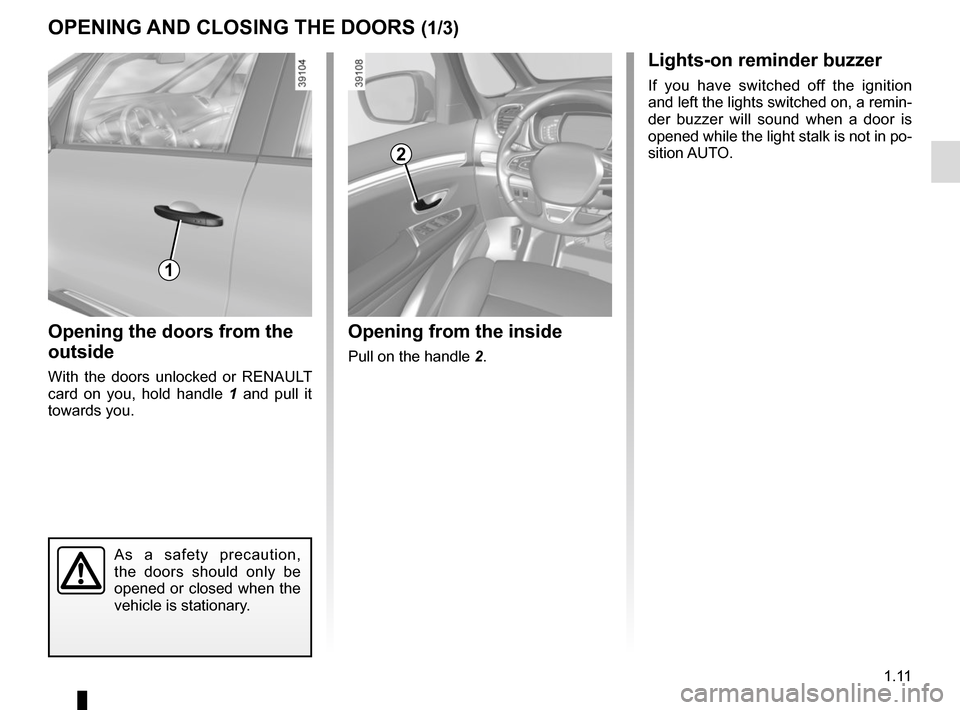
Opening the doors from the
outside
With the doors unlocked or RENAULT
card on you, hold handle 1 and pull it
towards you.
Opening from the inside
Pull on the handle 2.
2
As a safety precaution,
the doors should only be
opened or closed when the
vehicle is stationary.
1
Lights-on reminder buzzer
If you have switched off the ignition
and left the lights switched on, a remin-
der buzzer will sound when a door is
opened while the light stalk is not in po-
sition AUTO.
Page 18 of 316

1.12
OPENING AND CLOSING THE DOORS (2/3)
4
Door/tailgate open buzzer
At a standstill, warning light 3 lights
up on the instrument panel alongside
warning light 4, indicating the opening
element(s) (door, boot) open or incor-
rectly closed. Once the vehicle reaches a speed of
approximately 12 mph (20 km/h), a war-
ning light indicates if the door(s) or lug-
gage compartment are open or impro-
perly closed, along with the message
«Boot open» or «Door open» and a
beep will sound for around 40 seconds
or until the door/luggage compartment
is closed.
3
Page 19 of 316

1.13
OPENING AND CLOSING THE DOORS (3/3)
Child safety
Press switch 5 to allow or prevent ope-ning of the rear doors and rear electric
windows from inside the vehicle.
The indicator light in the switch lights up
to confirm that the locks have been ac-
tivated.
Note: If there is a system fault, the mes-
sage “Check child safety device” is dis-
played on the instrument panel: please
contact an authorised dealer.
Safety of rear occupants
The driver can enable op-
eration of the rear doors
and, depending on the ve-
hicle, the electric windows by press-
ing switch 4 on the side with the il-
lustration.
Depending on the vehicle, in the
event of a fault:
– a beep sounds;
– a message is displayed on the instrument panel;
– the integrated indicator does not light up.
If the battery has been discon-
nected, press switch 4 on the side
with the symbol to lock the rear
doors.
Driver’s responsibility
when parking or stopping
the vehicle
Never leave an animal,
child or adult who is not self-suffi-
cient alone on your vehicle, even for
a short time.
They may pose a risk to themselves
or to others by starting the engine,
activating equipment such as the
electric windows or locking the
doors.
Also, in hot and/or sunny weather,
please remember that the tempera-
ture inside the passenger compart-
ment increases very quickly.
RISK OF DEATH OR SERIOUS
INJURY.
5
As a safety precaution,
the doors should only be
opened or closed when the
vehicle is stationary.
Page 20 of 316

1.14
AUTOMATIC LOCKING WHEN DRIVING
Operating principleAfter the vehicle is started, the system
automatically locks the doors when you
are driving at approximately 6 mph
(10 km/h) and over.
The door can be unlocked:
– by pressing central door unlocking
switch 2.
– at a standstill, by opening a front
door from inside the vehicle.
Note: if a door is opened or closed, it
will automatically lock again when the
vehicle reaches a speed of 6 mph
(10 km/h).
Activating/deactivating the
function
To switch it on: with the vehicle at a
standstill and the engine running, press
switch 2 until a beep sounds.
To deactivate: with the vehicle at a
standstill and the engine running, press
switch 2 until two beeps sound.
You can also deactivate/activate the
function from the menu on the multi-
function screen 1 (refer to the informa-
tion on the “Vehicle settings customisa-
tion menu” section 1, “Auto door locking
while driving” function).
Operating faults
If you experience an operating fault (no
automatic locking, the indicator light in-
corporated in switch 2 does not light up
when trying to lock the doors and boot,
etc.), make sure that locking has not
been deactivated by mistake and check
that the doors and boot are properly
closed. If they are correctly locked and
the fault is still present, contact an au-
thorised dealer.
2
Driver’s responsibility
If you decide to keep the
doors locked when you are
driving, remember that it
may be more difficult for those as-
sisting you to gain access to the
passenger compartment in the
event of an emergency.
1
Page 21 of 316

1.15
If fitted on the vehicle, the tailgate locks
and unlocks at the same time as the
doors.
There are four modes to manoeuvre
the tailgate:
– using the RENAULT card remote control;
– using the controls on the tailgate;
– using the dashboard control;
– using the hands-free function.
AUTOMATIC TAILGATE (1/5)
Conditions of use
– Immobilise the vehicle.
– If there is any ice or snow prevent-ing the tailgate from opening, this ice
or snow must be removed to free the
tailgate.
– In the event that the battery is dis- charged or if it is changed, the tail-
gate should be closed (manually
if necessary) to restart the tailgate
motor.
Ensure that nobody is close
to the moving parts when
opening/closing the tail-
gate.
Risk of injury.
Opening/Closing
Activating the automatic tailgate open-
ing or closing using the dashboard
control or using the card, three beeps
sound just before the tailgate begins to
move.
When opening or closing the tail-
gate, ensure that nothing interferes
with the manoeuvre.
To avoid damaging the tailgate
system, do not manually force the
tailgate to open or close while it is
moving.
Page 24 of 316

1.18
AUTOMATIC TAILGATE (4/5)
Stopping the tailgate
manoeuvre
The automatic tailgate manoeuvre can
be stopped at any time by a short press
on one of the controls.
If the tailgate is stationary in the inter-
mediate position, your next press will
move the tailgate in the opposite direc-
tion to when you stopped it.
Manual mode
After stopping the tailgate, you can per-
form the manoeuvre manually if you
wish.
You can switch to automatic movement
at any time by pressing one of the con-
trols.
Automatic reversal of the
tailgate manoeuvre
If the tailgate encounters an obstacle
(presence of an object or a person)
during its manoeuvre, it will stop and
reverse its direction by a few degrees
in order to release the obstacle.
Press the tailgate opening/closing con-
trol to reperform the tailgate movement
in the same direction as before encoun-
tering the obstacle.
The automatic reverse
function is a system aid and
should under no circum-
stances be taken to replace
the driver’s care or responsibility
whilst closing the tailgate.
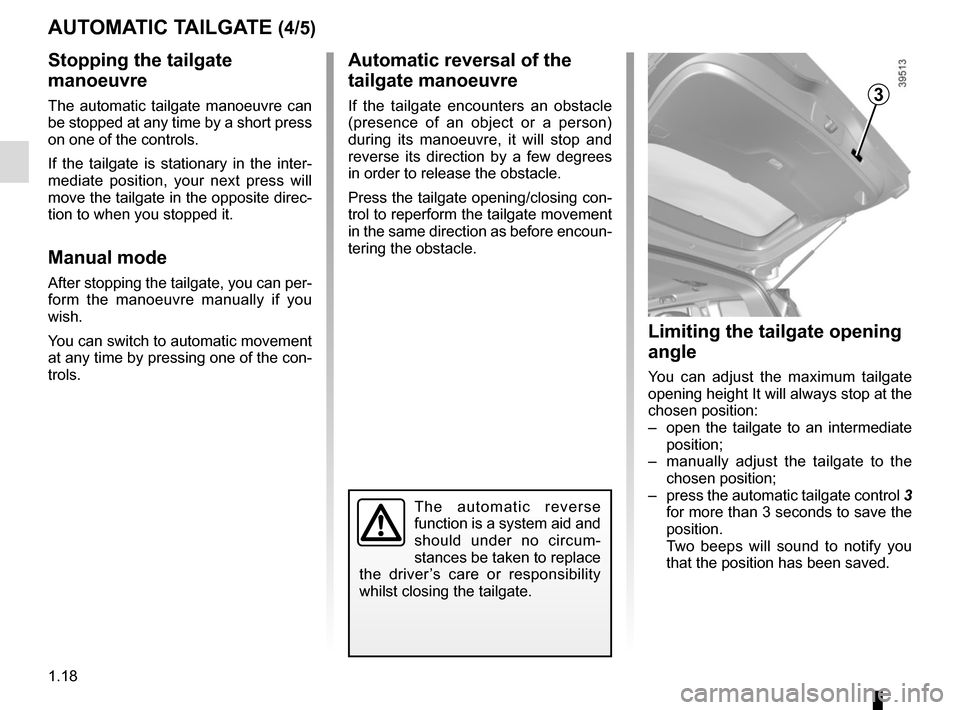
Limiting the tailgate opening
angle
You can adjust the maximum tailgate
opening height It will always stop at the
chosen position:
– open the tailgate to an intermediate position;
– manually adjust the tailgate to the chosen position;
– press the automatic tailgate control 3
for more than 3 seconds to save the
position.
Two beeps will sound to notify you
that the position has been saved.
3
Page 35 of 316

1.29
SEAT BELTS (2/3)
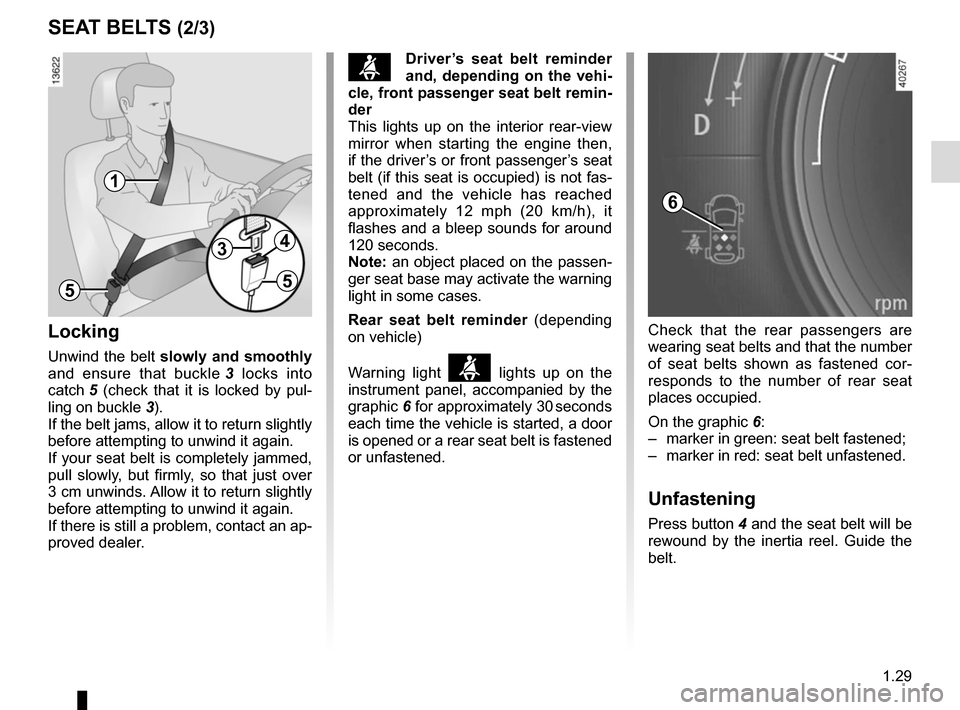
Locking
Unwind the belt slowly and smoothly
and ensure that buckle 3 locks into
catch 5 (check that it is locked by pul-
ling on buckle 3).
If the belt jams, allow it to return slightly
before attempting to unwind it again.
If your seat belt is completely jammed,
pull slowly, but firmly, so that just over
3 cm unwinds. Allow it to return slightly
before attempting to unwind it again.
If there is still a problem, contact an ap-
proved dealer.
ßDriver’s seat belt reminder
and, depending on the vehi-
cle, front passenger seat belt remin-
der
This lights up on the interior rear-view
mirror when starting the engine then,
if the driver’s or front passenger’s seat
belt (if this seat is occupied) is not fas-
tened and the vehicle has reached
approximately 12 mph (20 km/h), it
flashes and a bleep sounds for around
120 seconds.
Note: an object placed on the passen-
ger seat base may activate the warning
light in some cases.
Rear seat belt reminder (depending
on vehicle)
Warning light
ß lights up on the
instrument panel, accompanied by the
graphic 6 for approximately 30 seconds
each time the vehicle is started, a door
is opened or a rear seat belt is fastened
or unfastened.
1
34
55
Check that the rear passengers are
wearing seat belts and that the number
of seat belts shown as fastened cor-
responds to the number of rear seat
places occupied.
On the graphic 6:
– marker in green: seat belt fastened;
– marker in red: seat belt unfastened.
Unfastening
Press button 4 and the seat belt will be
rewound by the inertia reel. Guide the
belt.
6