Page 172 of 389
170
4008_en_Chap06_securite_ed01-2014
Child lock
Mechanical system to prevent opening of the rear doors using their interior controls.the control is located on the edge of each rear door.
Child lock on
F Move the control A towards position 1 .
Child lock off
F Move the control A towards position 2 .
Safety
Page 179 of 389
177
4008_en_Chap07_info-pratiques_ed01-2014
Removing a wheel
Parking the vehicle
Immobilise the vehicle where it does not
block traffic: if possible, park the vehicle
on level, stable and non-slippery
ground.
Apply the parking brake, switch off the
ignition and engage first gear to lock
the wheels.
If necessary, place a chock under the
wheel diagonally opposite the wheel to
be changed.
Never go underneath a vehicle raised
using a jack; use a stand.
List of operations
F If your vehicle is equipped with security wheel bolts (equipment available as an
accessory) fit the security socket 5 on the
wheelbrace 1 to slacken the security bolt.
F
S
lacken the other bolts using the
wheelbrace 1 o n l y.
7
Practical information
Page 190 of 389
188
4008_en_Chap07_info-pratiques_ed01-2014
Changing a fuse
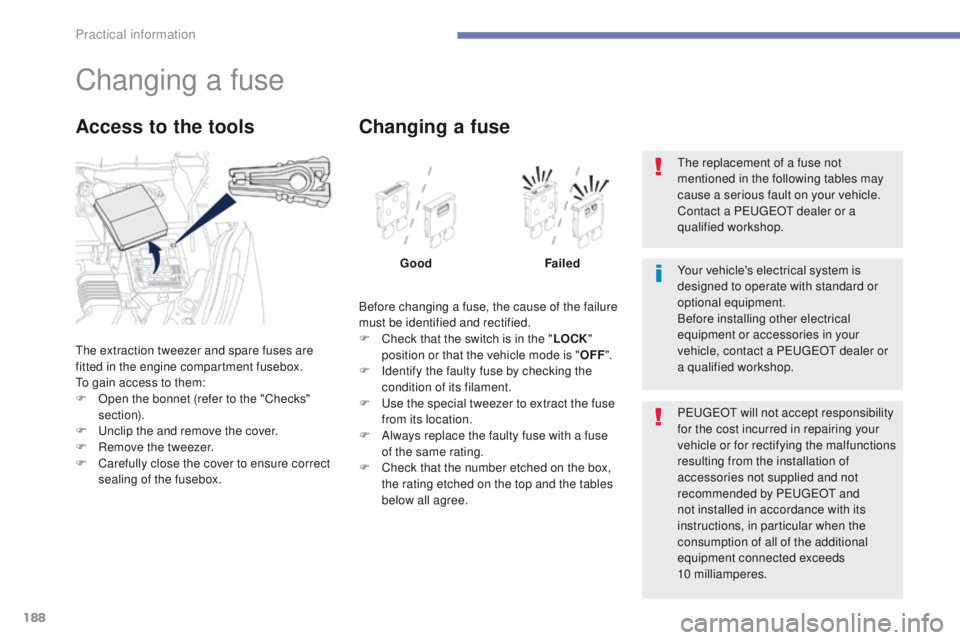
the extraction tweezer and spare fuses are
fitted in the engine compartment fusebox.
to g
ain access to them:
F
O
pen the bonnet (refer to the "Checks"
section).
F
u
n
clip the and remove the cover.
F
R
emove the tweezer.
F
C
arefully close the cover to ensure correct
sealing of the fusebox.
Access to the tools
Before changing a fuse, the cause of the failure
must be identified and rectified.
F
C
heck that the switch is in the " LOCK"
position or that the vehicle mode is " OFF".
F
I
dentify the faulty fuse by checking the
condition of its filament.
F
u
s
e the special tweezer to extract the fuse
from its location.
F
A
lways replace the faulty fuse with a fuse
of the same rating.
F
C
heck that the number etched on the box,
the rating etched on the top and the tables
below all agree.
Changing a fuse
Good Failed
P
e
uge
Ot
will not accept responsibility
for the cost incurred in repairing your
vehicle or for rectifying the malfunctions
resulting from the installation of
accessories not supplied and not
recommended by P
e
uge
Ot
and
not installed in accordance with its
instructions, in particular when the
consumption of all of the additional
equipment connected exceeds
10 milliamperes. Your vehicle's electrical system is
designed to operate with standard or
optional equipment.
Before installing other electrical
equipment or accessories in your
vehicle, contact a P
e
uge
Ot
dealer or
a qualified workshop.
th
e replacement of a fuse not
mentioned in the following tables may
cause a serious fault on your vehicle.
Contact a P
e
uge
Ot
dealer or a
qualified workshop.
Practical information
Page 191 of 389
189
4008_en_Chap07_info-pratiques_ed01-2014
Dashboard fuses
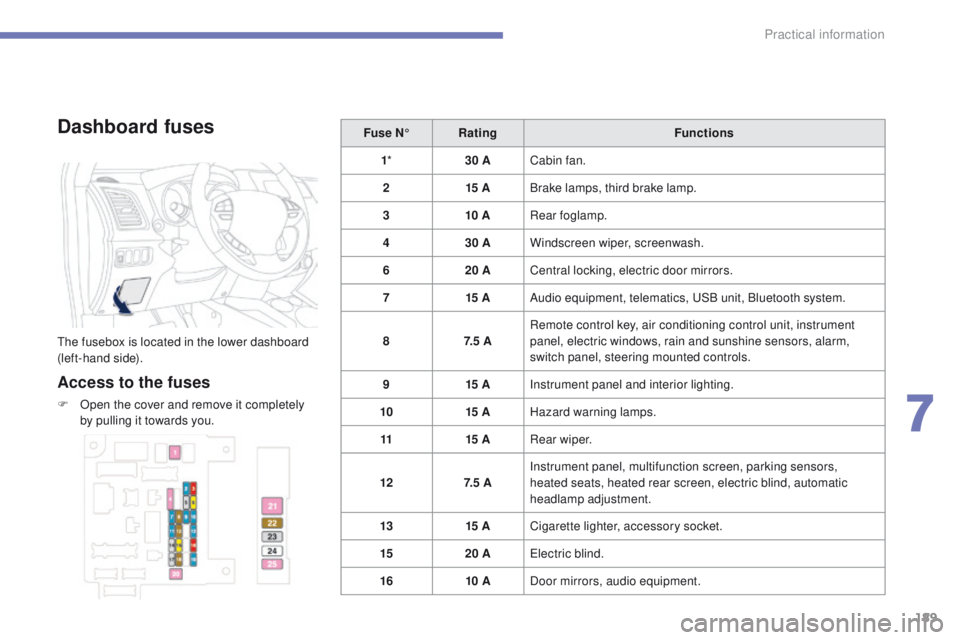
the fusebox is located in the lower dashboard
(left-hand side).
Access to the fuses
F Open the cover and remove it completely by pulling it towards you. Fuse N°
Rating Functions
1 * 30 ACabin fan.
2 15 ABrake lamps, third brake lamp.
3 10 ARear foglamp.
4 30 AWindscreen wiper, screenwash.
6 20 ACentral locking, electric door mirrors.
7 15 AAudio equipment, telematics, u
S
B unit, Bluetooth system.
8 7. 5 ARemote control key, air conditioning control unit, instrument
panel, electric windows, rain and sunshine sensors, alarm,
switch panel, steering mounted controls.
9 15 AInstrument panel and interior lighting.
10 15 AHazard warning lamps.
11 15 ARear wiper.
12 7. 5 AInstrument panel, multifunction screen, parking sensors,
heated seats, heated rear screen, electric blind, automatic
headlamp adjustment.
13 15 ACigarette lighter, accessory socket.
15 20 A
ele
ctric blind.
16 10 ADoor mirrors, audio equipment.
7
Practical information
Page 200 of 389
198
4008_en_Chap07_info-pratiques_ed01-2014
Recovering the vehicle
Recovery of your
vehicle
2 wheel drive (2WD) versions: towing
with the wheels on the ground
F Put the gear lever into neutral (position N for the CVt gearbox).
F
u
n
lock the steering by by turning the
ignition switch to the " ON" position (or
to " ON " mode for vehicle fitted with the
"Keyless
e
n
try and Starting" system).
F
R
elease the parking brake.
F
S
witch on the hazard warning lamps on
both vehicles.
F
M
ove off gently and travel slowly for a short
distance only.
General recommendations
Observe the legislation in force in your
c o unt r y.
en
sure that the weight of the towing
vehicle is higher than that of the towed
vehicle.
th
e driver must remain at the wheel of
the towed vehicle and must have a valid
driving licence.
When towing a vehicle with all four
wheels on the ground, always use an
approved towing bar; rope and straps
are prohibited.
When towing a vehicle with the engine
off, there is no longer any power
assistance for braking or steering.
In the following cases, you must always
call on a professional recovery service:
-
v
ehicle broken down on a motor way
or fast road,
-
4 w
heel drive vehicle,
-
w
hen it is not possible to put the
gearbox into neutral, unlock the
steering, or release the parking
brake,
-
t
owing with only two wheels on the
ground,
-
w
here there is no approved towing
bar available...
to
wing with the wheels on the ground
is only possible on 2 wheel drive (2WD)
versions.
F
F
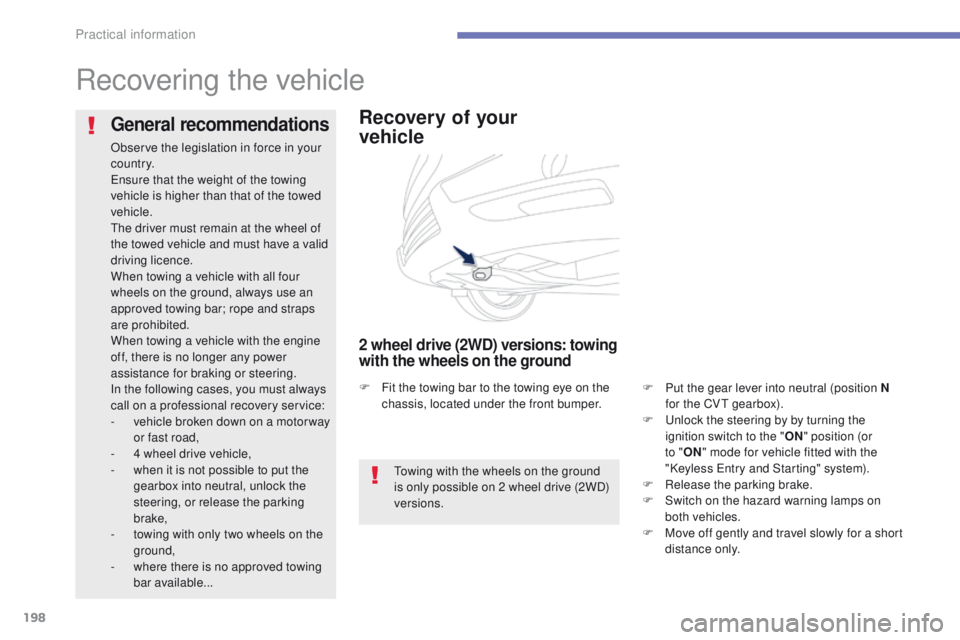
it the towing bar to the towing eye on the
chassis, located under the front bumper.
Practical information
Page 244 of 389
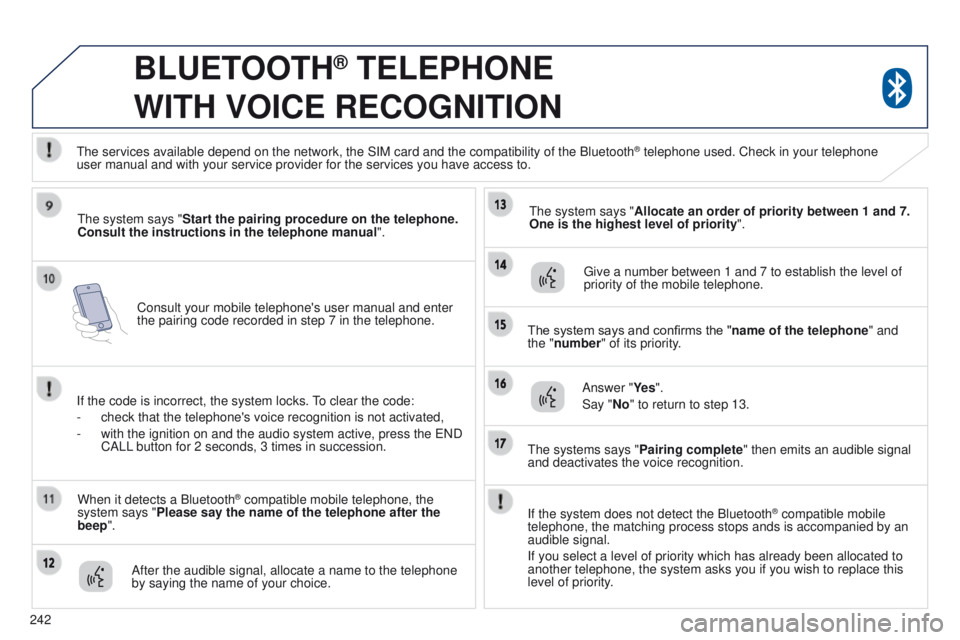
242Consult your mobile telephone's user manual and enter
the pairing code recorded in step 7 in the telephone.
BLUETOOTH® TELEPHONE
WITH
VOICE
RECOGNITION
the system says "Start the pairing procedure on the telephone.
Consult the instructions in the telephone manual ".
If the code is incorrect, the system locks.
to clear the code:
-
check that the telephone's voice recognition is not activated,
-
with the ignition on and the audio system active, press the
e ND
CALL button for 2 seconds, 3 times in succession.
When it detects a Bluetooth
® compatible mobile telephone, the
system says "Please say the name of the telephone after the
beep".
After the audible signal, allocate a name to the telephone
by saying the name of your choice.
t
he system says "Allocate an order of priority between 1 and 7.
One is the highest level of priority ".
g
ive a number between 1 and 7 to establish the level of
priority of the mobile telephone.
The system says and confirms the "name of the telephone " and
the "number" of its priority.
Answer "Ye s ".
Say "No" to return to step 13.
t
he systems says "Pairing complete" then emits an audible signal
and deactivates the voice recognition.
t
he services available depend on the network, the SIM card and the compat\
ibility of the Bluetooth
® telephone used. Check in your telephone
user
manual and with your service provider for the services you have access t\
o.
If the system does not detect the Bluetooth
® compatible mobile
telephone, the matching process stops ands is accompanied by an
audible signal.
If you select a level of priority which has already been allocated to
another telephone, the system asks you if you wish to replace this
level of priority.
Page 267 of 389
04
265
4008_en_Chap10b_Mitsu6_ed01-2014
NAVIGATION - GUIDANCE
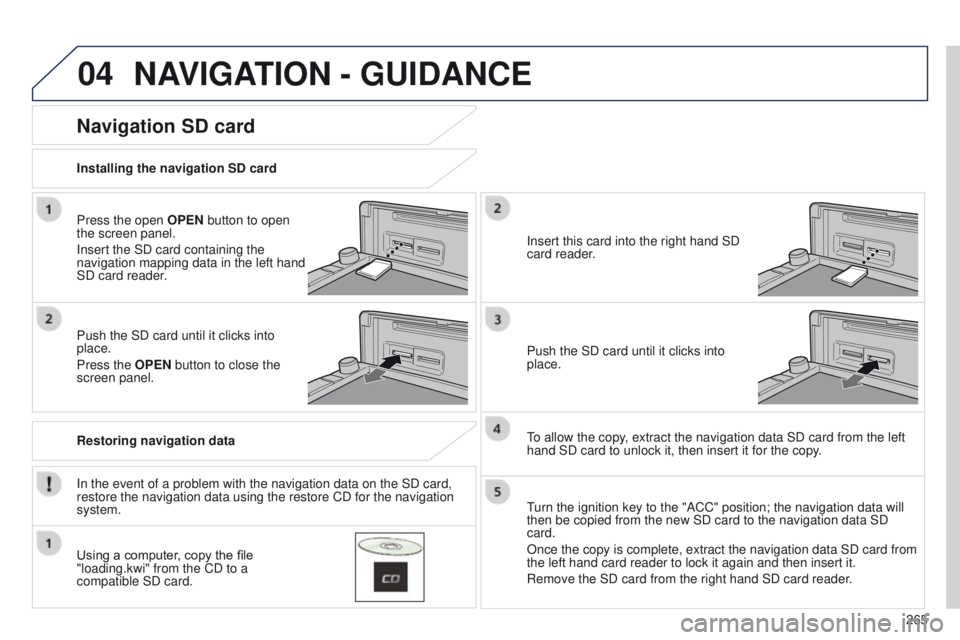
Press the open OPEN button to open
the screen panel.
Insert the SD card containing the
navigation mapping data in the left hand
SD card reader.
Push the SD card until it clicks into
place.
Press the OPEN button to close the
screen panel.
In the event of a problem with the navigation data on the SD card,
restore the navigation data using the restore CD for the navigation
system. Installing the navigation SD card
Restoring navigation data
Navigation SD card
Using a computer, copy the file
"loading.kwi" from the CD to a
compatible SD card.Insert this card into the right hand SD
card reader.
Push the SD card until it clicks into
place.
to allow the copy
, extract the navigation data SD card from the left
hand SD card to unlock it, then insert it for the copy.
turn the ignition key to the "ACC" position; the navigation data will
then be copied from the new SD card to the navigation data SD
card.
Once the copy is complete, extract the navigation data SD card from
the left hand card reader to lock it again and then insert it.
Remove the SD card from the right hand SD card reader
.
Page 280 of 389
05
278
4008_en_Chap10b_Mitsu6_ed01-2014
Using the USB port
With the vehicle stationary, ignition
switch in the LOCK position, connect
a suitable cable to the portable player.t
he
u
SB port is used to connect a
portable device (MP3 player, Apple®
player, ...). The files are sent from the
player to your audio system and heard
through the vehicle's speakers.
t
hen connect the cable to the
vehicle's
u SB port.
Models supported:
-
iPod
® 5th generation (video).
-
iPod classic® (2009).
-
iPod nano® 6th generation.
-
iPod nano® 3rd generation (video).
-
iPod touch® 4th generation.
-
iPhone 4S®.
-
u
SB memory sticks formatted FA
t
32 (File Allocation
table)
only
.
File formats: MP3, WMA, AAC, WAV.
-
Maximum number of levels (including root): 8.
-
Number of folders: 100.
-
Number of files: 255.
to disconnect the cable, the ignition switch must be in the LOCK
position.
take care not to trap the cable when closing the armrest.
MUSIC