2015 Peugeot 308 ECU
[x] Cancel search: ECUPage 87 of 416
85
308_en_Chap03_confort_ed01-2015
Rear seats (hatchback)
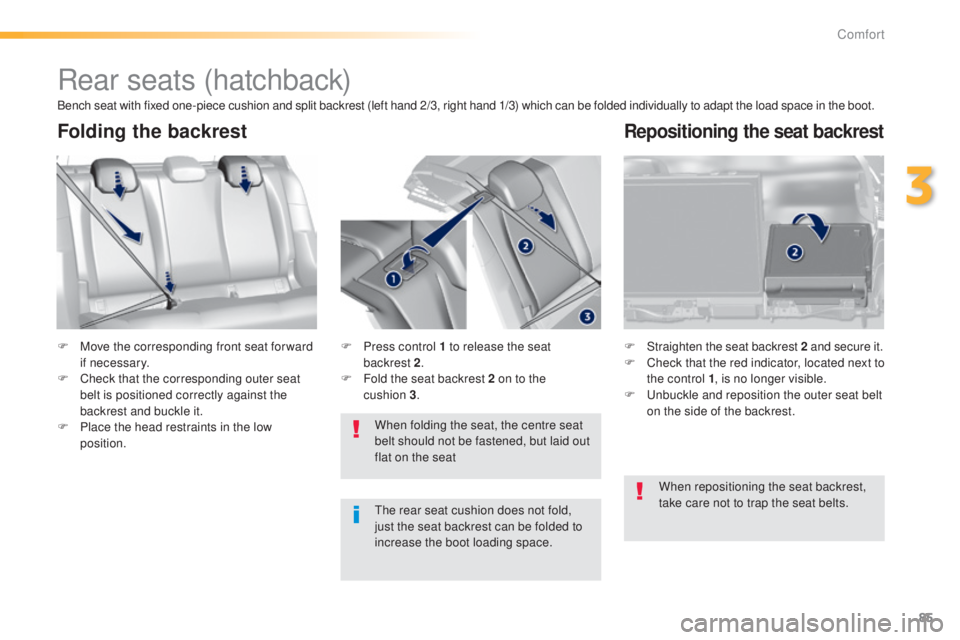
F Move the corresponding front seat for ward if necessary.
F
C
heck that the corresponding outer seat
belt is positioned correctly against the
backrest and buckle it.
F
P
lace the head restraints in the low
position. F
S traighten the seat backrest 2
and secure it.
F C heck that the red indicator, located next to
the control 1 , is no longer visible.
F
u
n
buckle and reposition the outer seat belt
on the side of the backrest.
When folding the seat, the centre seat
belt should not be fastened, but laid out
flat on the seat
F
P ress control 1 to release the seat
backrest 2.
F
F
old the seat backrest 2 on to the
cushion
3.
Folding the backrestRepositioning the seat backrest
Bench seat with fixed one-piece cushion and split backrest (left hand 2/3, right hand 1/3) which can be folded individually to adapt the load space in the boot.
th
e rear seat cushion does not fold,
just the seat backrest can be folded to
increase the boot loading space. When repositioning the seat backrest,
take care not to trap the seat belts.
3
Comfort
Page 89 of 416
87
308_en_Chap03_confort_ed01-2015
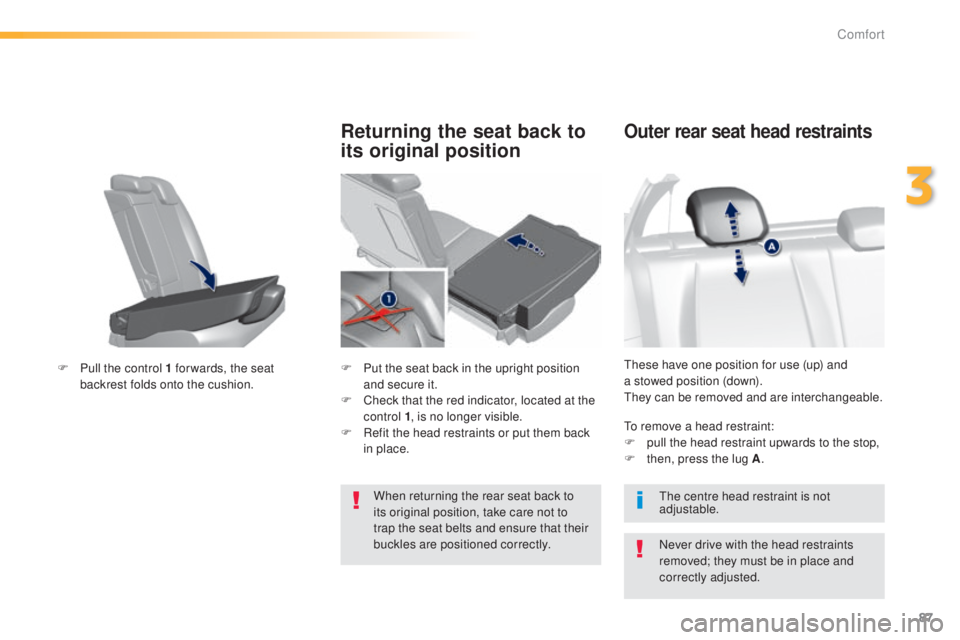
these have one position for use (up) and
a stowed position (down).
th
ey can be removed and are interchangeable.
Outer rear seat head restraints
Never drive with the head restraints
removed; they must be in place and
correctly adjusted.
to r
emove a head restraint:
F
p
ull the head restraint upwards to the stop,
F
t
hen, press the lug A
.
th
e centre head restraint is not
adjustable.
F
P
ull the control 1 for wards, the seat
backrest folds onto the cushion.
Returning the seat back to
its original position
F Put the seat back in the upright position and secure it.
F
C
heck that the red indicator, located at the
control 1 , is no longer visible.
F
R
efit the head restraints or put them back
in place.
When returning the rear seat back to
its original position, take care not to
trap the seat belts and ensure that their
buckles are positioned correctly.
3
Comfort
Page 91 of 416
89
308_en_Chap03_confort_ed01-2015
MatsRemovable carpet protection.
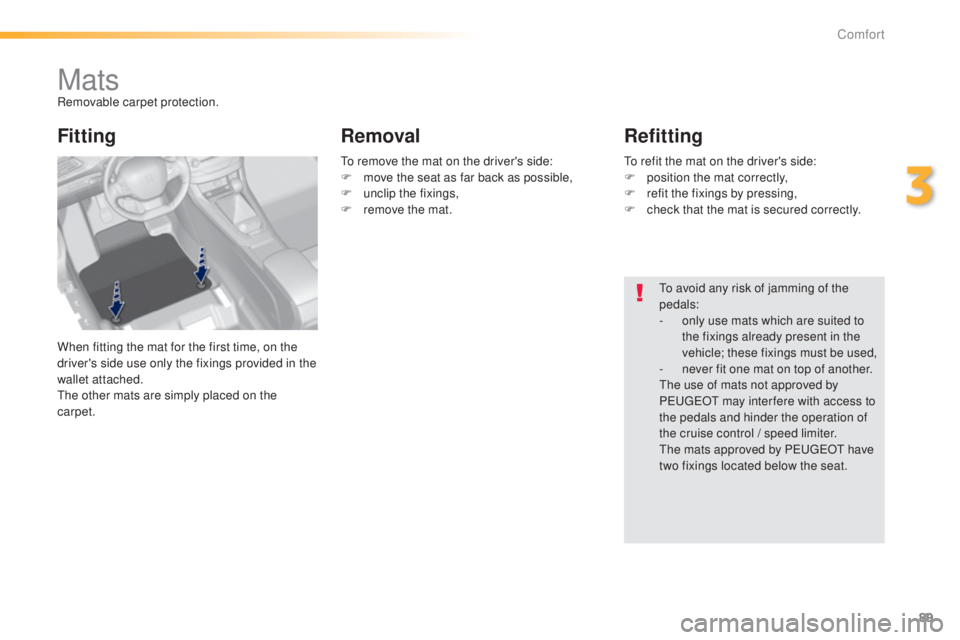
When fitting the mat for the first time, on the
driver's side use only the fixings provided in the
wallet attached.
th
e other mats are simply placed on the
carpet.
Fitting RemovalRefitting
to avoid any risk of jamming of the
pedals:
-
o
nly use mats which are suited to
the fixings already present in the
vehicle; these fixings must be used,
-
n
ever fit one mat on top of another.
th
e use of mats not approved by
P
e
uge
Ot
may inter fere with access to
the pedals and hinder the operation of
the cruise control / speed limiter.
th
e mats approved by P
e
uge
Ot
have
two fixings located below the seat.
to r
emove the mat on the driver's side:
F
m
ove the seat as far back as possible,
F
un
clip the fixings,
F
r
emove the mat.
to r
efit the mat on the driver's side:
F
p
osition the mat correctly,
F
r
efit the fixings by pressing,
F
c
heck that the mat is secured correctly.
3
Comfort
Page 99 of 416
97
308_en_Chap03_confort_ed01-2015
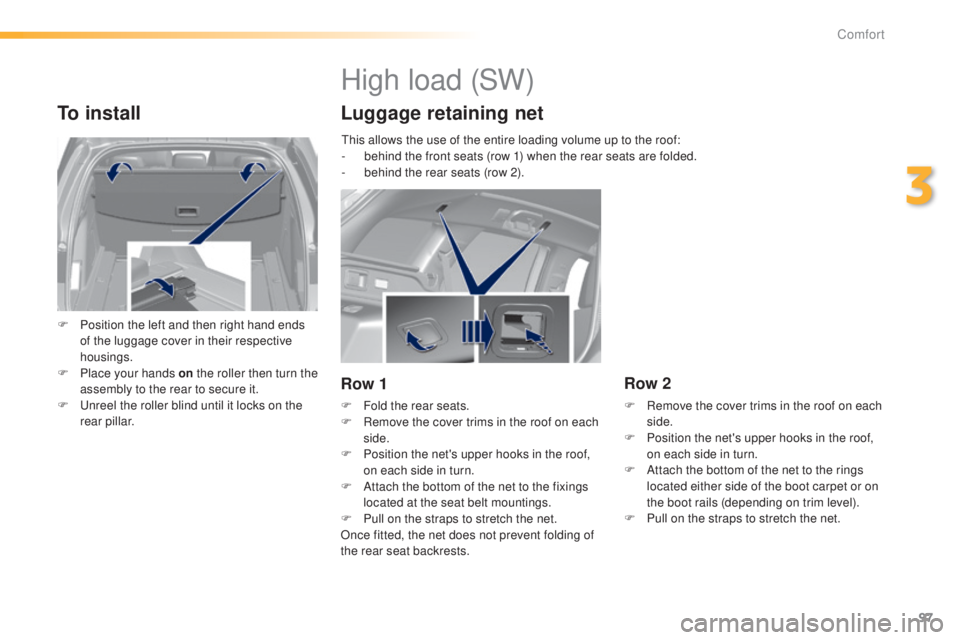
To install
F Position the left and then right hand ends of the luggage cover in their respective
housings.
F
P
lace your hands on the roller then turn the
assembly to the rear to secure it.
F
u
n
reel the roller blind until it locks on the
rear pillar.
High load (SW)
Luggage retaining net
Row 1
F Fold the rear seats.
F R emove the cover trims in the roof on each
side.
F
P
osition the net's upper hooks in the roof,
on each side in turn.
F
A
ttach the bottom of the net to the fixings
located at the seat belt mountings.
F
P
ull on the straps to stretch the net.
Once fitted, the net does not prevent folding of
the rear seat backrests.
Row 2
F Remove the cover trims in the roof on each side.
F
P
osition the net's upper hooks in the roof,
on each side in turn.
F
A
ttach the bottom of the net to the rings
located either side of the boot carpet or on
the boot rails (depending on trim level).
F
P
ull on the straps to stretch the net.
th
is allows the use of the entire loading volume up to the roof:
-
b
ehind the front seats (row 1) when the rear seats are folded.
-
b
ehind the rear seats (row 2).
3
Comfort
Page 129 of 416
127
308_en_Chap04_conduite_ed01-2015
SituationsConsequences
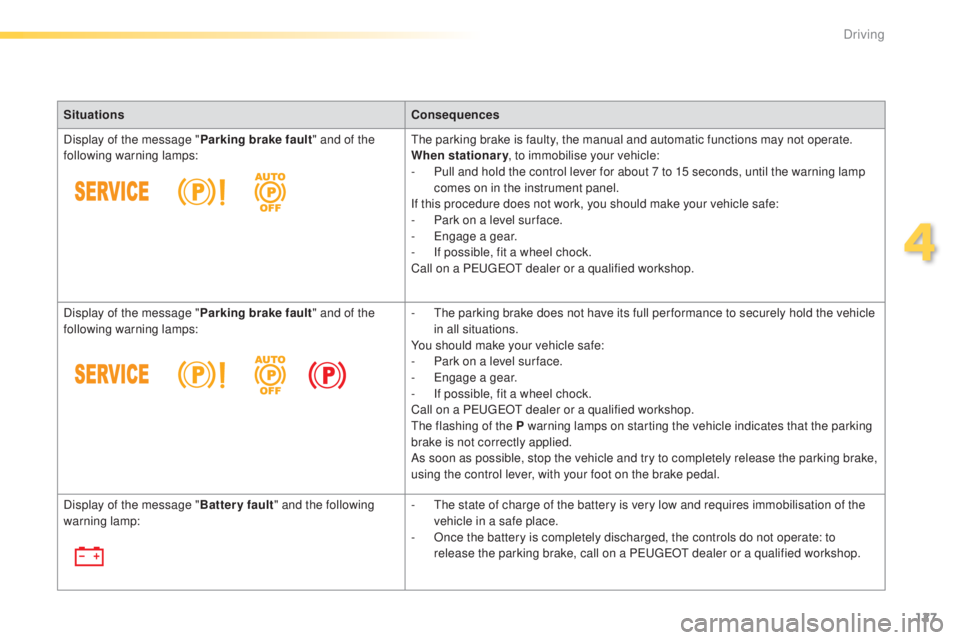
Display of the message " Parking brake fault" and of the
following warning lamps:
th
e parking brake is faulty, the manual and automatic functions may not operate.
When stationary , to immobilise your vehicle:
-
P
ull and hold the control lever for about 7 to 15 seconds, until the warning lamp
comes on in the instrument panel.
If this procedure does not work, you should make your vehicle safe:
-
P
ark on a level sur face.
-
e
n
gage a gear.
-
I
f possible, fit a wheel chock.
Call on a P
e
uge
Ot
dealer or a qualified workshop.
Display of the message " Parking brake fault" and of the
following warning lamps: -
t
h
e parking brake does not have its full per formance to securely hold the vehicle
in all situations.
You should make your vehicle safe:
-
P
ark on a level sur face.
-
e
n
gage a gear.
-
I
f possible, fit a wheel chock.
Call on a P
e
uge
Ot
dealer or a qualified workshop.
th
e flashing of the P warning lamps on starting the vehicle indicates that the parking
brake is not correctly applied.
As soon as possible, stop the vehicle and try to completely release the parking brake,
using the control lever, with your foot on the brake pedal.
Display of the message " Battery fault" and the following
warning lamp: -
t
h
e state of charge of the battery is very low and requires immobilisation of the
vehicle in a safe place.
-
O
nce the battery is completely discharged, the controls do not operate: to
release the parking brake, call on a P
e
uge
Ot
dealer or a qualified workshop.
4
Driving
Page 144 of 416
142
308_en_Chap04_conduite_ed01-2015
On sharp acceleration, as when
descending a steep hill, the speed
limiter will not be able to prevent
the vehicle from exceeding the
programmed speed.
the
limiter is temporarily deactivated
and the displayed programmed speed
flashes.
An audible signal accompanies the
flashing of the programmed speed
when exceeding the speed is not due to
an action by the driver.
th
e use of mats not approved by
P
e
uge
Ot
may inter fere with the
operation of the speed limiter.
to a
void any risk of jamming of the
pedals:
-
e
nsure that the mat is secured
c o r r e c t l y,
-
d
o not fit one mat on top of another.
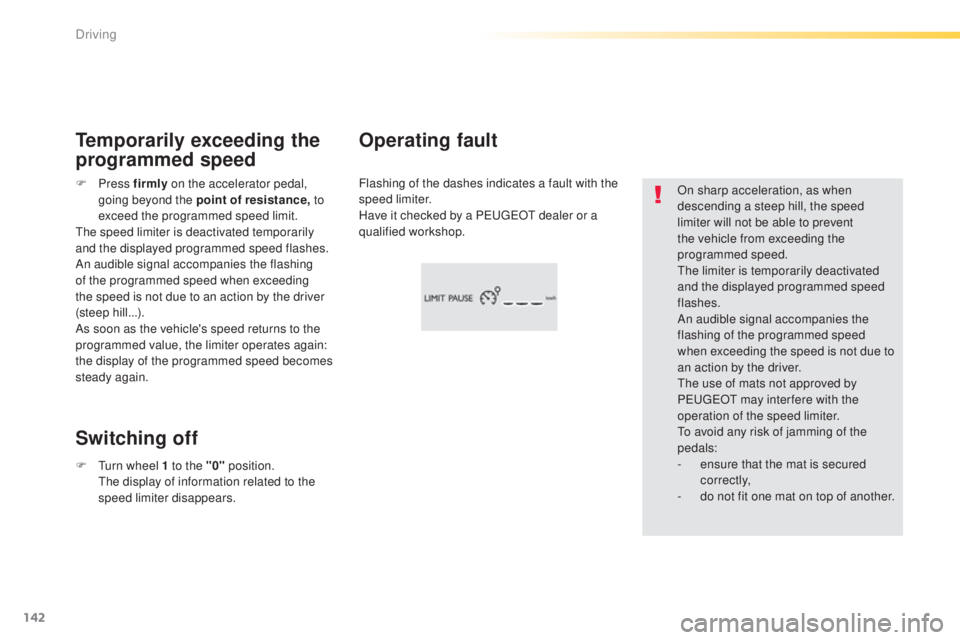
Flashing of the dashes indicates a fault with the
speed limiter.
Have it checked by a P
e
uge
Ot
dealer or a
qualified workshop.
Operating fault
Temporarily exceeding the
programmed speed
Switching off
F Press f irmly on the accelerator pedal,
going beyond the point of resistance, to
exceed the programmed speed limit.
th
e speed limiter is deactivated temporarily
and the displayed programmed speed flashes.
An audible signal accompanies the flashing
of the programmed speed when exceeding
the speed is not due to an action by the driver
(steep hill...).
As soon as the vehicle's speed returns to the
programmed value, the limiter operates again:
the display of the programmed speed becomes
steady again.
F
t
u
rn wheel 1 to the "0" position.
t
h
e display of information related to the
speed limiter disappears.
Driving
Page 147 of 416

145
308_en_Chap04_conduite_ed01-2015
Flashing of the dashes indicates a fault with the
cruise control.
Have it checked by a P
e
uge
Ot
dealer or a
qualified workshop.
Operating fault
Exceeding the programmed
speed
Switching off
When the cruise control is switched on,
be careful if you maintain the pressure
on one of the programmed speed
changing buttons: this may result in a
very rapid change in the speed of your
vehicle.
Do not use the cruise control on
slippery roads or in heavy traffic.
On a steep descent, the cruise control
will not be able to prevent the vehicle
from exceeding the programmed speed.
On steep climbs or when towing, the
programmed speed may not be reached
or maintained.
th
e use of mats not approved by
P
e
uge
Ot
may inter fere with the
operation of the cruise control.
to a
void any risk of jamming of the
pedals:
-
e
nsure that the mat is secured
c o r r e c t l y,
-
n
ever fit one mat on top of another.
If the programmed speed is exceeded, the
displayed speed flashes.
Once the vehicle returns to the programmed
speed, the display becomes steady again.
F
t
u
rn wheel 1 to the "0" position.
t
h
e display of information related to the
cruise control disappears.
4
Driving
Page 155 of 416
153
308_en_Chap04_conduite_ed01-2015
In the event of a fault with the active cruise
control, you are alerted by an audible signal
and display of the message message "Driving
aid functions fault".
Have the system checked by a P
e
uge
Ot
dealer or a qualified workshop. When the cruise control is working, take
care if making a maintained press on
one of the cruise control programmed
speed modification buttons: this can
lead to a very quick change in the
speed of your vehicle.
Do not use the active cruise control on
slippery sur faces or in heavy traffic.
When descending a steep hill, the
cruise control may not be able to
prevent the vehicle from exceeding the
programmed speed.
When ascending a steep hill or when
towing, it might not be possible to attain
or maintain the programmed speed.
Operating fault
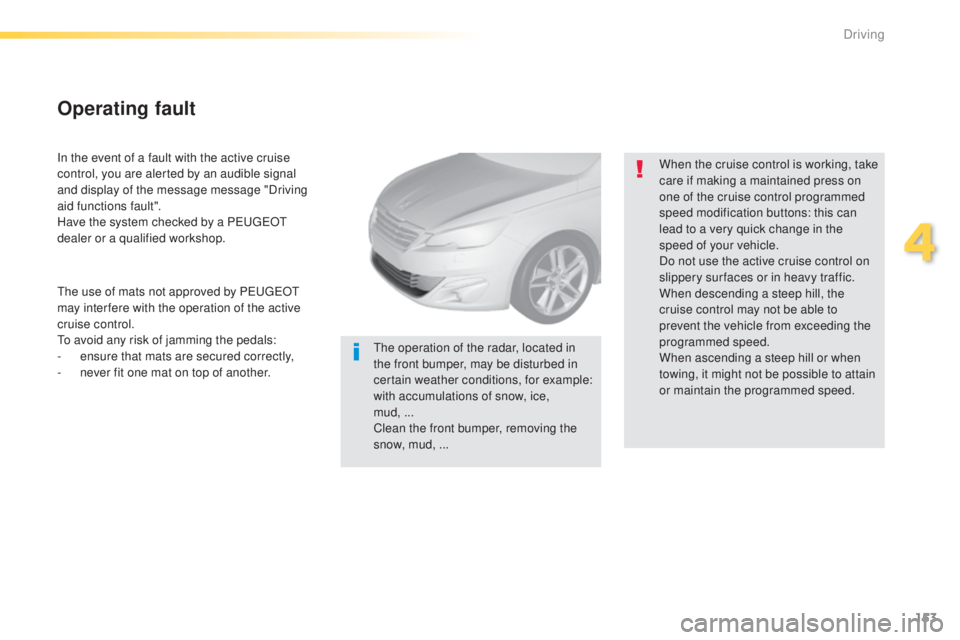
the operation of the radar, located in
the front bumper, may be disturbed in
certain weather conditions, for example:
with accumulations of snow, ice,
mud,
...
Clean the front bumper, removing the
snow, mud, ...
th
e use of mats not approved by P
e
uge
Ot
may inter fere with the operation of the active
cruise control.to a
void any risk of jamming the pedals:
-
e
nsure that mats are secured correctly,
-
n
ever fit one mat on top of another.
4
Driving