Page 244 of 416
242
308_en_Chap07_info-pratiques_ed01-2015
Snow chains
In wintry conditions, snow chains improve traction as well as the behaviour of the vehicle
when braking.
th
e snow chains must be fitted only
to the front wheels.
t
h
ey must never
be fitted to "space-saver" type spare
wheels.
ta
ke account of the legislation in force
in your country on the use of snow
chains and the maximum running speed
authorised. Avoid driving with snow chains on roads
that have been cleared of snow, to
avoid damaging your vehicle's tyres and
the road sur face. If your vehicle is fitted
with alloy wheels, check that no part of
the chain or its fixings is in contact with
the wheel rim.
us
e only the chains designed to be fitted to the
type of wheel fitted to your vehicle:
You can also use non-slip tyre covers.
For more information on snow chains, contact a
P
e
uge
Ot
dealer or a qualified workshop.
Advice on installation
F If you have to fit the chains during a journey, stop the vehicle on a flat sur face
on the side of the road.
F
A
pply the parking brake and position any
wheel chocks to prevent movement of
your
vehicle.
F
F
it the chains following the instructions
provided by the manufacturer.
F
M
ove off gently and drive for a few
moments, without exceeding 30 mph
(50
km/h).
F
S
top your vehicle and check that the snow
chains are correctly tightened.
Original
tyre size
ty
pe of chain.
195/65 R15 9 mm links
205/55 R16
2 2 5 /4 5 R17
225/40 R18 K-Summit K23
It is strongly recommended that before
you leave, you practise fitting the snow
chains on a level and dry sur face.
Practical information
Page 268 of 416
266
308_en_Chap07_info-pratiques_ed01-2015
General recommendations
Observe the legislation in force in your country.ensure that the weight of the towing vehicle is higher than that of the towed vehicle.
th
e driver must remain at the wheel of the towed vehicle and must have a valid driving licence.
When towing a vehicle with all four wheels on the ground, always use an approved towing
arm; rope and straps are prohibited.
th
e towing vehicle must move off gently.
When towing a vehicle with the engine off, there is no longer any power assistance for
braking or steering.
In the following cases, you must always call on a professional recovery service:
-
v
ehicle broken down on a motor way or fast road,
-
f
our-wheel drive vehicle,
-
w
hen it is not possible to put the gearbox into neutral, unlock the steering, or release
the parking brake,
-
t
owing with only two wheels on the ground,
-
w
here there is no approved towing arm available...
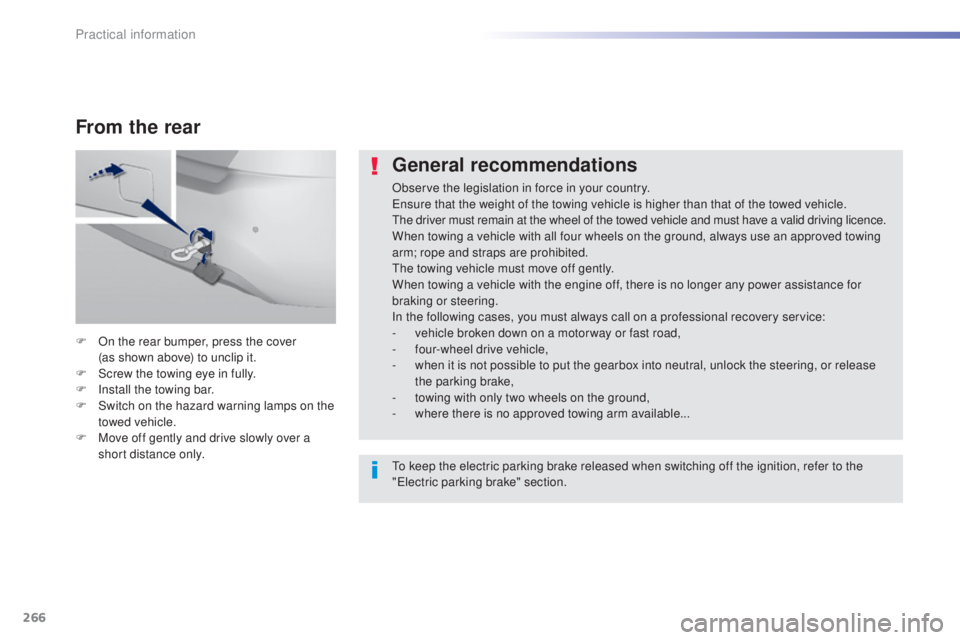
F
O
n the rear bumper, press the cover
(as shown above) to unclip it.
F
S
crew the towing eye in fully.
F
I
nstall the towing bar.
F
S
witch on the hazard warning lamps on the
towed vehicle.
F
M
ove off gently and drive slowly over a
short distance only.
From the rear
to keep the electric parking brake released when switching off the ignition, refer to the
"el ectric parking brake" section.
Practical information
Page 274 of 416

272
308_en_Chap07_info-pratiques_ed01-2015
Accessories
A wide range of accessories and genuine parts is available from the PeugeOt dealer network.th
ese accessories and parts are all suitable for your vehicle and benefit from Pe ugeOt' s recommendation and warranty.
"Comfort"
Door deflectors, side blinds and rear blind,
cigarette lighter, boot dividers, coat hanger
fixed to head restraint, front centre armrest,
under shelf storage, front and rear parking
sensors, styling mudflaps, window film, boot
management system, ...
"Transport solutions"
Boot liners, roof bars, bicycle carrier on roof
bars, ski carrier, roof box, towbar harness, ...
to
w bar, which mst be fitted by P
e
uge
Ot
dealer or a qualified workshop.
"Styling"
alloy wheels from 15 inch to 18 inch, finishers
for wheels, door sills, gear lever knobs, ...
"Ligne S": 16 and 17 inch alloy wheels, body
kit, stickers, interior and exterior mirror shells,
gear lever knob, door sills, mats*, …
*
t
o a
void any risk of jamming of the pedals:
-
e
nsure that the mat is positioned and
secured correctly,
-
n
ever fit one mat on top of another.
"Security and safety"
Anti-theft alarm, window engraving, wheel
security bolts, child seats and booster
cushions, breathalyzer, first aid kit, warning
triangle, high visibility jacket, stolen vehicle
tracking system, temporary puncture repair kit,
snow chains, non-slip covers, front foglamps
kit, dog guard, ...
"Protection"
Mats*, seat covers compatible with lateral
airbags, mud flaps, side protection rubbing
strips, bumper protection rubbing strips,
bumper protectors, boot sill finishers, boot
mat,
...
Conversion kits
You can obtain an "en terprise" kit to convert a
trade vehicle to a private car and vice-versa.
Practical information
Page 287 of 416
285
308_en_Chap08_verifications_ed01-2015
Recommendations on storage
Never store bottles of AdBlue® in your
vehicle.
AdBlue
® freezes at about -11°C and
deteriorates above 25°C. It is recommended
that bottles be stored in a cool area and
protected from direct sunlight.
und
er these conditions, the additive can be
kept for at least a year.
If the additive has frozen, can be used once it
has completely thawed out.
Procedure
Before topping-up, ensure that the vehicle is
parked on a flat and level sur face.
In wintry conditions, ensure that the
temperature of the vehicle is above -11°C.
Otherwise, by freezing, the AdBlue
® cannot
be poured into its tank. Park your vehicle in a
warmer area for a few hours to allow the top-up
to be carried out.
F
S
witch off the ignition and remove the
key, or if your vehicle has one, press
the S
tA
R
t/
S
tO
P button to switch off
the
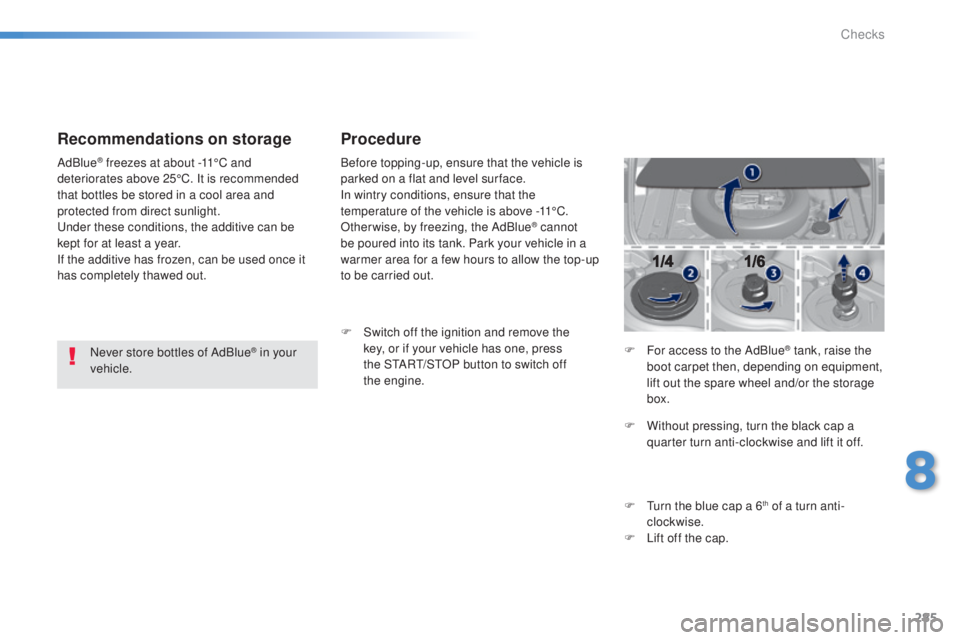
engine. F
F
or access to the AdBlue
® tank, raise the
boot carpet then, depending on equipment,
lift out the spare wheel and/or the storage
box.
F
W
ithout pressing, turn the black cap a
quarter turn anti-clockwise and lift it off.
F
t
u
rn the blue cap a 6
th of a turn anti-
clockwise.
F
L
ift off the cap.
8
Checks
Page 288 of 416
286
308_en_Chap08_verifications_ed01-2015
Never dispose of AdBlue® additive
bottles in the household waste. Place
them in a special container provided
this purpose or take them to your dealer.
Important
: if your vehicle's
AdBlue
® tank is completely empty -
w
hich is confirmed by the alert
messages and the impossibility of
starting the engine, you must add at
least 3.8 litres (so two 1.89 litre bottles). F
A
fter emptying the bottle, wipe away any
spillage around the tank filler using a damp
cloth.
If any additive is split or splashed, wash
immediately with cold water or wipe with
a damp cloth.
If the additive has crystallised, clean it
off using a sponge and hot water.
F
R
efit the blue cap to the tank and turn it a
6
th of a turn clockwise, to its stop.
F
R
efit the black cap and turn it a quarter of
a turn clockwise without pressing.
e
n
sure
that the indicator on the cap lines up with
the indicator on the support.
F
D
epending on equipment, return the spare
wheel and/or the storage box to the bottom
of the boot.
F
R
efit the boot carpet and close the tailgate. Important: when topping
-up after
running out of additive , signalled
by the message "
to
p up emissions
additive: Starting prevented", you
must wait for about 5 minutes before
switching on the ignition, without
opening the driver's door, unlocking
the vehicle, introducing the key
into the ignition switch, or placing
the key of the "Keyless Entr y and
Star ting" system inside the vehicle.
Switch on the ignition, then wait for
10 seconds before starting the engine.
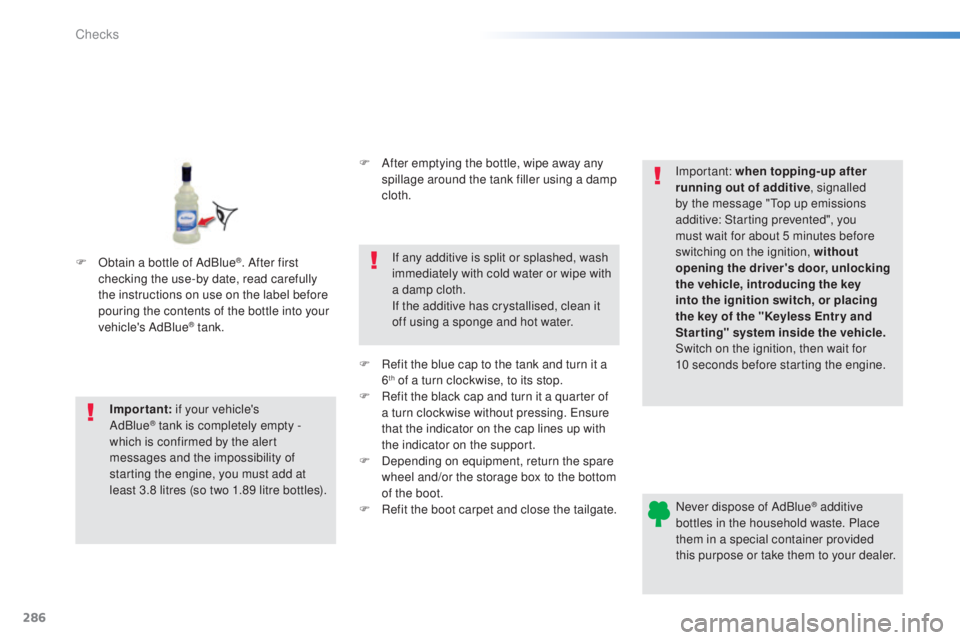
F
O
btain a bottle of AdBlue
®. After first
checking the use-by date, read carefully
the instructions on use on the label before
pouring the contents of the bottle into your
vehicle's AdBlue
® tank.
Checks
Page 297 of 416
295
308_en_Chap09_caracteristiques-techniques_ed01-2015
Affaire version
Number of seats: 2 persons.useable boot volume: 1.31 m3
In metres ( m)
Load floor length 1.4 5 8
Load width at the wheel arches 1.03 6
Load width at the centre 1.07 7
Load height
-
a
t the centre 0.916
-
a
t the load aperture 0.831
-
b
elow the luggage cover 0.5
9
technical data
Page 298 of 416

296
308_en_Chap09_caracteristiques-techniques_ed01-2015
Identification markingsVarious visible markings for the identification of your vehicle.
A.
V
ehicle Identification Number (VIN)
under the bonnet.
t
h
is number is engraved on the chassis
near the right hand front wheel arch.
th
e tyre pressures must be checked
when the tyres are cold, at least once
a month.
If the tyre pressures are too low, this
increases fuel consumption.
B.
V
ehicle Identification Number (VIN) on
the windscreen lower cross member.
t
h
is number is indicated on a self-
adhesive label which is visible through the
windscreen. C.
M
anufacturer's label.
t
h
is self-destroying label on the middle
door pillar, right or left hand side, contains
the following information:
-
t
he manufacturer's name,
-
t
he e
u
ropean whole vehicle type
approval number,
-
t
he vehicle identification number (VIN),
-
t
he maximum authorised weight (gross
vehicle weight),
-
t
he maximum authorised weight with
trailer (gross train weight),
-
t
he maximum front axle weight,
-
t
he maximum rear axle weight.D.
T
yre/paint label.
t
h
is label on the middle door pillar, driver's
side, contains the following information:
-
t
he tyre inflation pressures, laden and
unladen,
-
t
he tyre sizes (including the tyre load
index and speed rating),
-
t
he inflation pressure for the spare
wheel,
-
t
he paint colour code.
technical data
Page 388 of 416
06
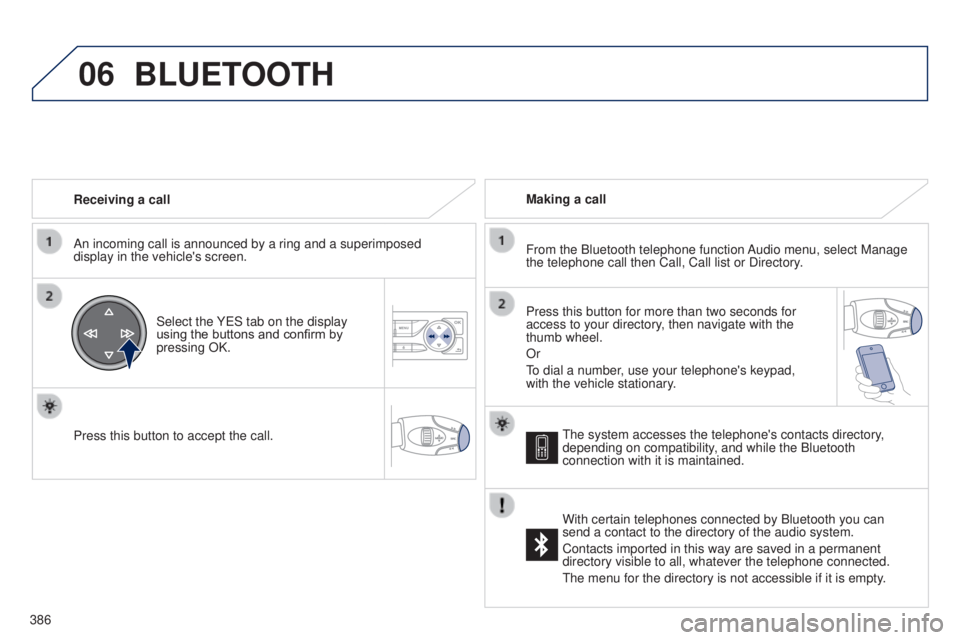
386Receiving a call
An incoming call is announced by a ring and a superimposed
display in the vehicle's screen.
Select the Y e S tab on the display
using the buttons and confirm by
pressing OK.
Press this button to accept the call. Making a call
From the Bluetooth telephone function Audio menu, select Manage
the telephone call then Call, Call list or Directory.
Press this button for more than two seconds for
access to your directory, then navigate with the
thumb wheel.
Or
to dial a number
, use your telephone's keypad,
with the vehicle stationary.
BLUETOOTH
the system accesses the telephone's contacts directory,
depending on compatibility , and while the Bluetooth
connection with it is maintained.
With certain telephones connected by Bluetooth you can
send a contact to the directory of the audio system.
Contacts imported in this way are saved in a permanent
directory visible to all, whatever the telephone connected.
t
he menu for the directory is not accessible if it is empty.