Page 56 of 416

54
308_en_Chap02_ouvertures_ed01-2015
Electronic engine immobiliser
the key contains an electronic chip which has
a special code. When the ignition is switched
on, this code must be recognised in order for
starting to be possible.
th
is electronic engine immobiliser locks the
engine management system a few minutes
after the ignition is switched off and prevents
starting of the engine by anyone who does not
have the key.
F
P
ress the closed padlock on the
remote control.
Locating your vehicle
this will switch on the courtesy lamps and
the direction indicators will flash for around
ten
seconds.
Remote operation of lighting
A short press this button switches
on the lighting remotely (sidelamps,
dipped beam headlamps and number
plate lamps).
A second press before the end of the timed
period cancels the remote lighting.
Anti-theft protection
In the event of a fault, you are
informed by illumination of this
warning lamp, an audible signal and
a message in the screen.
Keep safely, away from your vehicle,
the label attached to the keys given to
you on acquisition of the vehicle.
In this case, your vehicle will not start; contact
a P
e
uge
Ot
dealer as soon as possible.
th
is function allows you to identify your vehicle
from a distance, particularly in poor light. Your
vehicle must be locked.
Access
Page 58 of 416
56
308_en_Chap02_ouvertures_ed01-2015
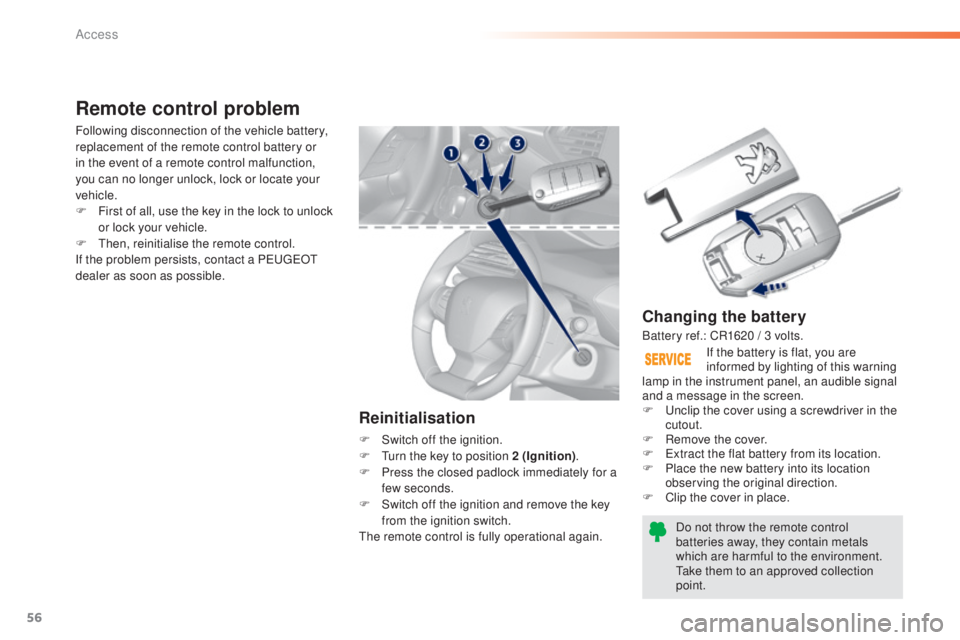
Changing the battery
Do not throw the remote control
batteries away, they contain metals
which are harmful to the environment.
ta
ke them to an approved collection
point. If the battery is flat, you are
informed by lighting of this warning
lamp in the instrument panel, an audible signal
and a message in the screen.
F
u
n
clip the cover using a screwdriver in the
cutout.
F
R
emove the cover.
F
e
x
tract the flat battery from its location.
F
P
lace the new battery into its location
observing the original direction.
F
C
lip the cover in place.
Remote control problem
Reinitialisation
F Switch off the ignition.
F
tu rn the key to position 2 (Ignition) .
F
P
ress the closed padlock immediately for a
few seconds.
F
S
witch off the ignition and remove the key
from the ignition switch.
th
e remote control is fully operational again.
Following disconnection of the vehicle battery,
replacement of the remote control battery or
in the event of a remote control malfunction,
you can no longer unlock, lock or locate your
vehicle.
F
F
irst of all, use the key in the lock to unlock
or lock your vehicle.
F
t
hen
, reinitialise the remote control.
If the problem persists, contact a P
e
uge
Ot
dealer as soon as possible.
Battery ref.: CR1620 / 3 volts.
Access
Page 76 of 416
74
308_en_Chap02_ouvertures_ed01-2015
Reinitialising the electric
windows
Always remove the key when leaving
the vehicle, even for a short time.
In the event of contact during operation
of the windows, you must reverse the
movement of the window. t
o d
o this,
press the switch concerned.
When operating the passenger electric
window switches, the driver must
ensure that no one is preventing correct
closing of the windows.
th
e driver must ensure that the
passengers use the electric windows
c o r r e c t l y.
Be aware of children when operating
the windows.
Following reconnection of the battery, the
safety anti-pinch function must be reinitialised.
th
e safety anti-pinch is not active during these
operations:
-
l
ower the window completely, then raise
it, it will rise in steps of a few centimetres
each time the switch is pressed. Repeat
the operation until the window closes
completely,
-
p
ress and hold the switch upwards for
at least one second after reaching this
position, window closed.
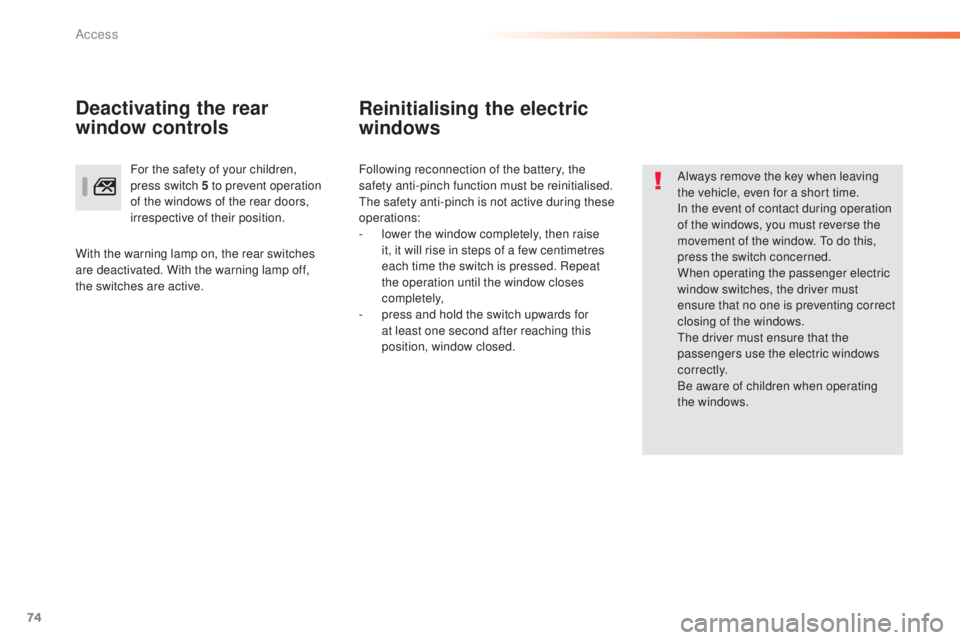
For the safety of your children,
press switch 5 to prevent operation
of the windows of the rear doors,
irrespective of their position.
Deactivating the rear
window controls
With the warning lamp on, the rear switches
are deactivated. With the warning lamp off,
the switches are active.
Access
Page 79 of 416
77
308_en_Chap02_ouvertures_ed01-2015
Low fuel level
When the low fuel level in the tank is
reached, this warning lamp comes on
in the instrument panel, accompanied
by an audible warning and a message.
Fuel supply cut-off
Your vehicle is equipped with a safety device
which cuts off the fuel supply in the event of a
collision.It is still possible to use a fuel can to fill
the tank but this must be done slowly.
In order to ensure a good flow of fuel,
do not place the nozzle of the fuel can
in direct contact with the flap of the
misfuel prevention device.
Diesel misfuel prevention
Mechanical device which prevents filling the tank of a Diesel vehicle with petrol. It avoids the risk of
engine damage that can result from filling with the wrong fuel.
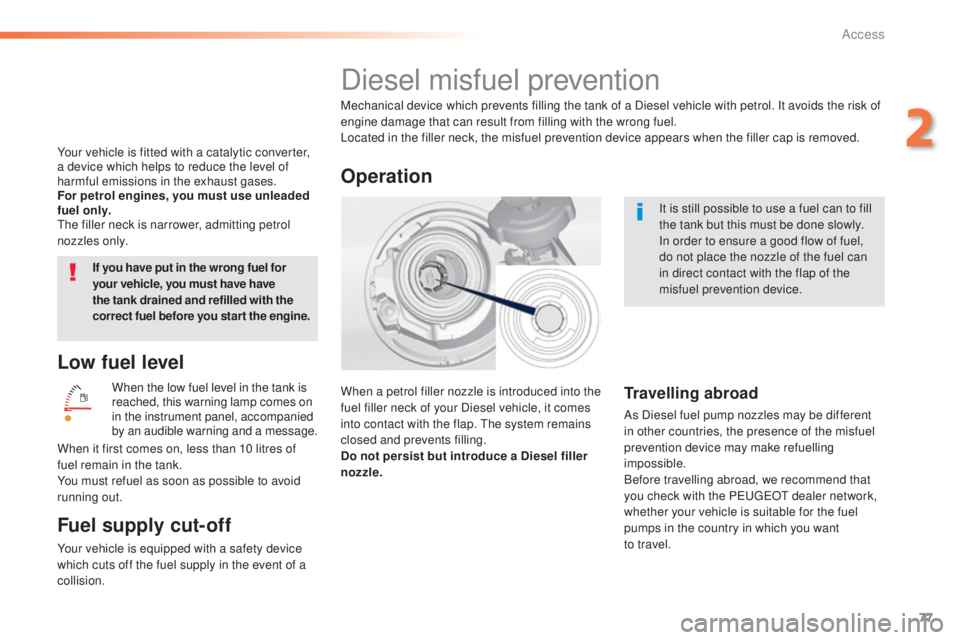
Located in the filler neck, the misfuel prevention device appears when the filler cap is removed.
When a petrol filler nozzle is introduced into the
fuel filler neck of your Diesel vehicle, it comes
into contact with the flap.
t
h
e system remains
closed and prevents filling.
Do not persist but introduce a Diesel filler
nozzle.
Operation
Travelling abroad
As Diesel fuel pump nozzles may be different
in other countries, the presence of the misfuel
prevention device may make refuelling
impossible.
Before travelling abroad, we recommend that
you check with the P
e
uge
Ot
dealer network,
whether your vehicle is suitable for the fuel
pumps in the country in which you want
to
travel.
When it first comes on, less than 10 litres of
fuel remain in the tank.
You must refuel as soon as possible to avoid
running out. If you have put in the wrong fuel for
your vehicle, you must have have
the tank drained and refilled with the
correct fuel before you star t the engine.
Your vehicle is fitted with a catalytic converter,
a device which helps to reduce the level of
harmful emissions in the exhaust gases.
For petrol engines, you must use unleaded
fuel only.
th
e filler neck is narrower, admitting petrol
nozzles only.
2
Access
Page 94 of 416
92
308_en_Chap03_confort_ed01-2015
230 V / 50 Hz power socket
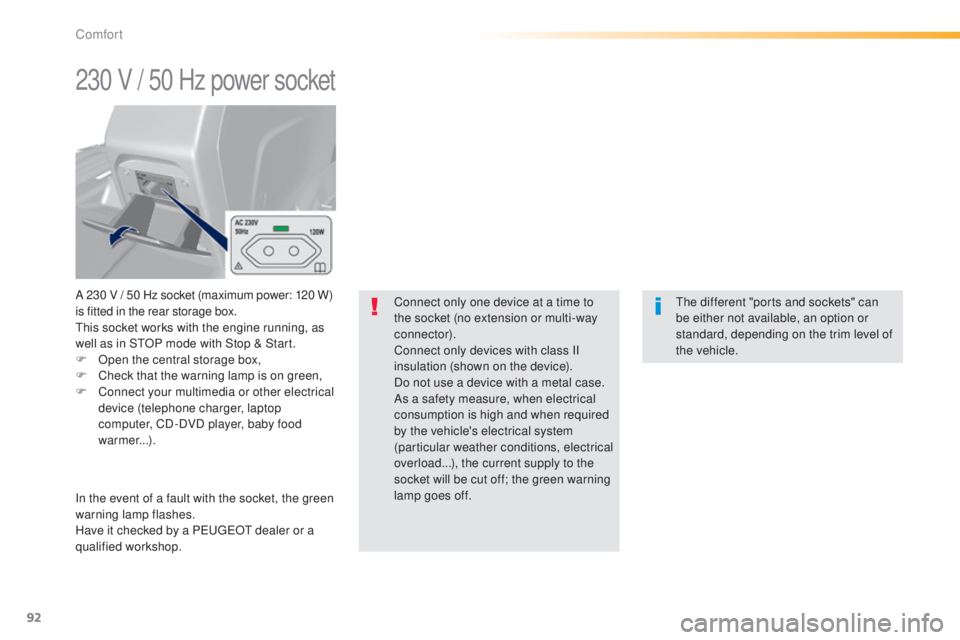
A 230 V / 50 Hz socket (maximum power: 120 W)
i s fitted in the rear storage box.
th
is socket works with the engine running, as
well as in S
tO
P mode with Stop & Start.
F
O
pen the central storage box,
F
C
heck that the warning lamp is on green,
F
C
onnect your multimedia or other electrical
device (telephone charger, laptop
computer, CD-DVD player, baby food
warmer...).
In the event of a fault with the socket, the green
warning lamp flashes.
Have it checked by a P
e
uge
Ot
dealer or a
qualified workshop. Connect only one device at a time to
the socket (no extension or multi-way
connector).
Connect only devices with class II
insulation (shown on the device).
Do not use a device with a metal case.
As a safety measure, when electrical
consumption is high and when required
by the vehicle's electrical system
(particular weather conditions, electrical
overload...), the current supply to the
socket will be cut off; the green warning
lamp goes off.th
e different "ports and sockets" can
be either not available, an option or
standard, depending on the trim level of
the vehicle.
Comfort
Page 100 of 416
98
308_en_Chap03_confort_ed01-2015
Warning triangle (stowing)
Before getting out of your vehicle to
assemble the triangle and place it on
the road, put on your high visibility vest.
th
e maximum dimensions of the triangle (once
folded) or its storage box must be:
-
A
: l
ength = 44
cm,
-
B
: h
eight = 4 cm,
-
C
: w
idth = 6.5
cm.
th
e location for a folded triangle is under the
boot floor.
Placing the triangle in the
road
Distance from your vehicle (in metres)
Road Motor way
Day Night
50 m 80 m 150 m
th
ese are the internationally
recognised values.
us
e the triangle in line with local driving
regulations.
th
e triangle is available as an accessory,
contact a P
e
uge
Ot
dealer or a qualified
workshop. F
P
lace the triangle at a distance behind
the vehicle, as shown in the table below,
according to the type of road and the level
of ambient light.
Refer to the manufacturer's instructions
for use of the triangle.
Comfort
Page 116 of 416
114
308_en_Chap04_conduite_ed01-2015
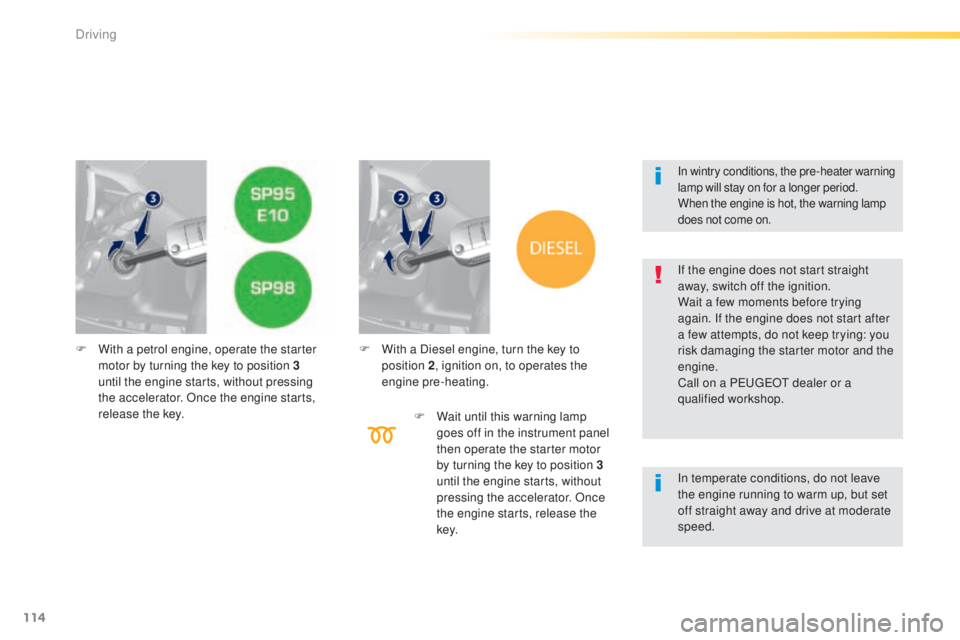
F With a petrol engine, operate the starter motor by turning the key to position 3
until the engine starts, without pressing
the accelerator. Once the engine starts,
release the key. F
W ith a Diesel engine, turn the key to
position 2 , ignition on, to operates the
engine pre-heating.
F
W
ait until this warning lamp
goes off in the instrument panel
then operate the starter motor
by turning the key to position 3
until the engine starts, without
pressing the accelerator. Once
the engine starts, release the
key.
In wintry conditions, the pre-heater warning
lamp will stay on for a longer period.
When the engine is hot, the warning lamp
does not come on.
In temperate conditions, do not leave
the engine running to warm up, but set
off straight away and drive at moderate
speed. If the engine does not start straight
away, switch off the ignition.
Wait a few moments before trying
again. If the engine does not start after
a few attempts, do not keep trying: you
risk damaging the starter motor and the
engine.
Call on a P
e
uge
Ot
dealer or a
qualified workshop.
Driving
Page 118 of 416
116
308_en_Chap04_conduite_ed01-2015
For Diesel vehicles, in sub-
zero temperatures the engine
will not start until the pre-heater
warning lamp has gone off.
If this warning lamp comes on
after pressing the "S
tA
R
t/
StO
P" button, press down on
the brake or clutch pedal until
the warning lamp goes off,
without pressing the "S
tA
R
t/
StO
P" button again, until the
engine starts and runs.
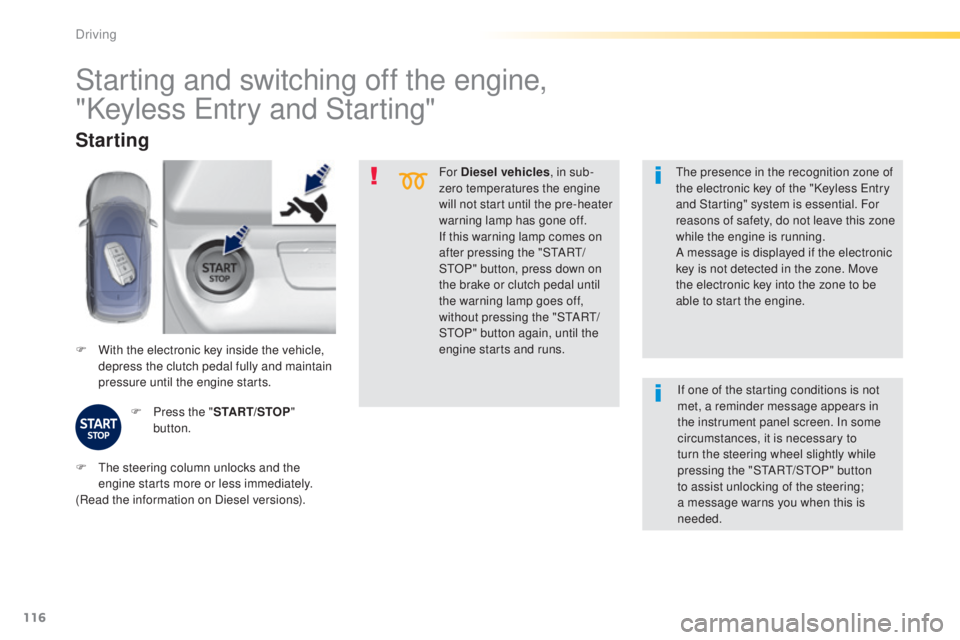
F
W
ith the electronic key inside the vehicle,
depress the clutch pedal fully and maintain
pressure until the engine starts.
Starting
F Press the " START/STOP"
button.
th
e presence in the recognition zone of
the electronic key of the "Keyless e
n
try
and Starting" system is essential. For
reasons of safety, do not leave this zone
while the engine is running.
A message is displayed if the electronic
key is not detected in the zone. Move
the electronic key into the zone to be
able to start the engine.
Starting and switching off the engine,
"Keyless e
n
try and Starting"
F the steering column unlocks and the
engine starts more or less immediately.
(Read the information on Diesel versions). If one of the starting conditions is not
met, a reminder message appears in
the instrument panel screen. In some
circumstances, it is necessary to
turn the steering wheel slightly while
pressing the "StA
Rt/ StO P" button
to assist unlocking of the steering;
a message warns you when this is
needed.
Driving