2015 Peugeot 308 ignition
[x] Cancel search: ignitionPage 255 of 416
253
308_en_Chap07_info-pratiques_ed01-2015
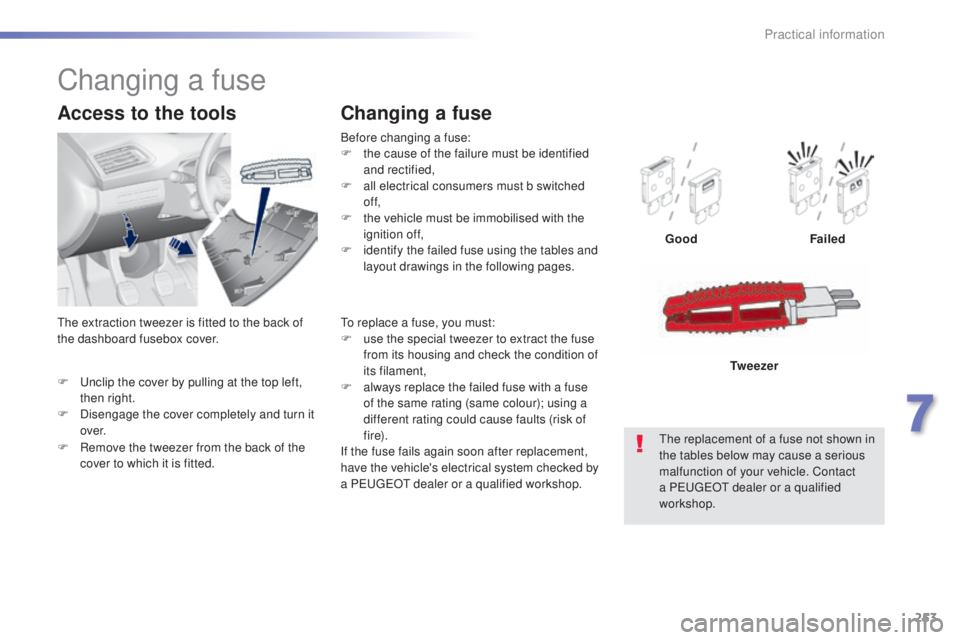
F unclip the cover by pulling at the top left, then right.
F
D
isengage the cover completely and turn it
ove r.
Access to the tools
Before changing a fuse:
F t he cause of the failure must be identified
and rectified,
F
a
ll electrical consumers must b switched
of f,
F
t
he vehicle must be immobilised with the
ignition off,
F
i
dentify the failed fuse using the tables and
layout drawings in the following pages.
Changing a fuse
Good Failed
th
e replacement of a fuse not shown in
the tables below may cause a serious
malfunction of your vehicle. Contact
a P
e
uge
Ot
dealer or a qualified
workshop. Tw e e z e r
Changing a fuse
to replace a fuse, you must:
F
u se the special tweezer to extract the fuse
from its housing and check the condition of
its filament,
F
a
lways replace the failed fuse with a fuse
of the same rating (same colour); using a
different rating could cause faults (risk of
f i r e).
If the fuse fails again soon after replacement,
have the vehicle's electrical system checked by
a P
e
uge
Ot
dealer or a qualified workshop.
F
R
emove the tweezer from the back of the
cover to which it is fitted.th
e extraction tweezer is fitted to the back of
the dashboard fusebox cover.
7
Practical information
Page 261 of 416
259
308_en_Chap07_info-pratiques_ed01-2015
12 V battery
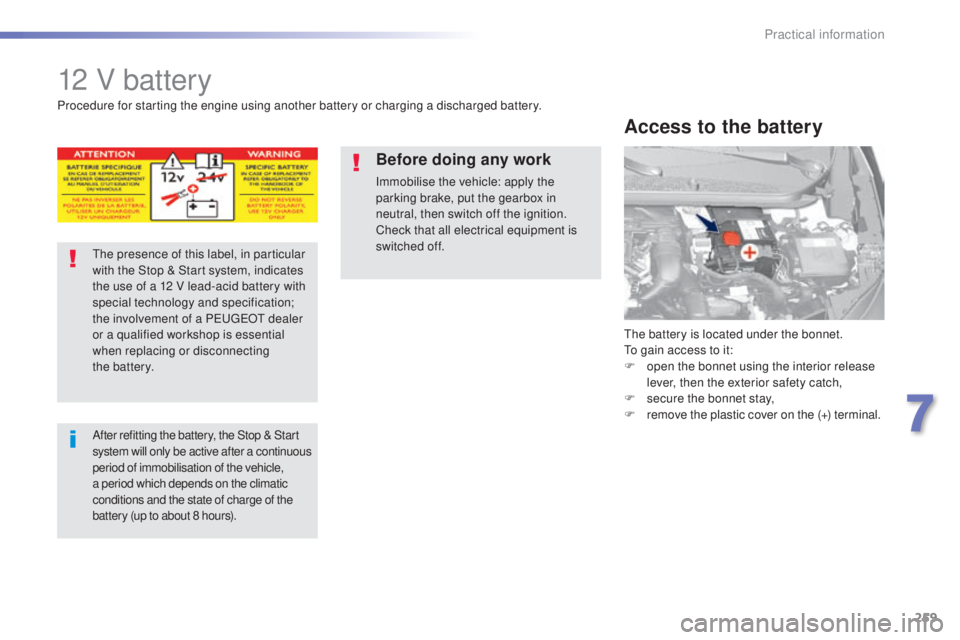
the battery is located under the bonnet.to gain access to it:
F
o
pen the bonnet using the interior release
lever, then the exterior safety catch,
F
s
ecure the bonnet stay,
F
r
emove the plastic cover on the (+) terminal.
Access to the battery
Procedure for starting the engine using another battery or charging a discharged battery.
th
e presence of this label, in particular
with the Stop & Start system, indicates
the use of a 12 V lead-acid battery with
special technology and specification;
the involvement of a P
e
uge
Ot
dealer
or a qualified workshop is essential
when replacing or disconnecting
the
battery.
After refitting the battery, the Stop & Start
s ystem will only be active after a continuous
period of immobilisation of the vehicle,
a period which depends on the climatic
conditions and the state of charge of the
battery (up to about 8 hours).
Before doing any work
Immobilise the vehicle: apply the
parking brake, put the gearbox in
neutral, then switch off the ignition.
Check that all electrical equipment is
switched off.
7
Practical information
Page 263 of 416
261
308_en_Chap07_info-pratiques_ed01-2015
Starting using another
battery
First check that the slave battery has a
nominal voltage of 12 V and a capacity
at least equal to that of the discharged
battery.
Do not try to start the engine by
connecting a battery charger.
Do not disconnect the (+) terminal when
the engine is running.
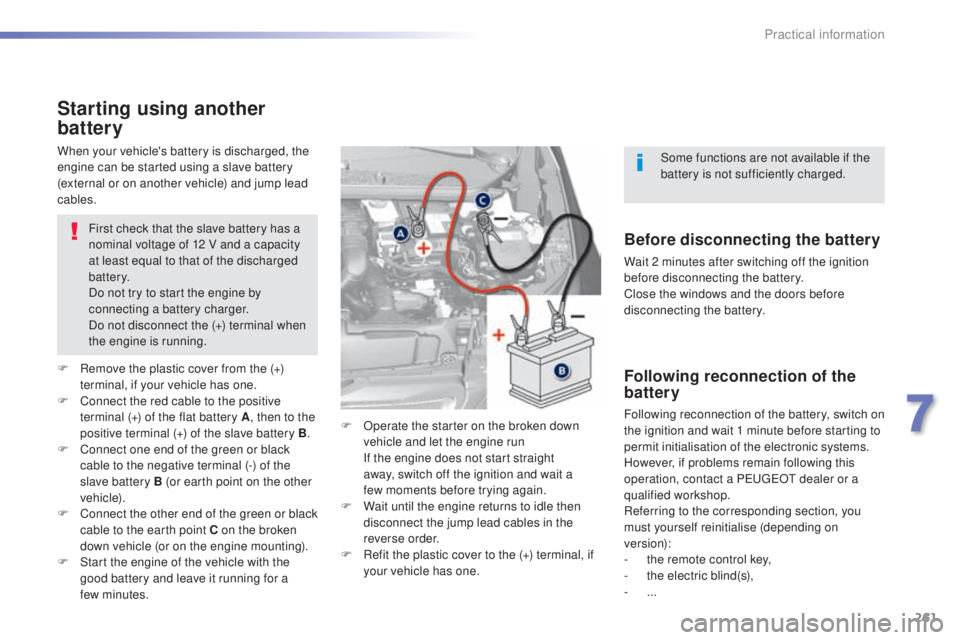
F
R
emove the plastic cover from the (+)
terminal, if your vehicle has one.
F
C
onnect the red cable to the positive
terminal (+) of the flat battery A , then to the
positive terminal (+) of the slave battery B.
F
C
onnect one end of the green or black
cable to the negative terminal (-) of the
slave battery B (or earth point on the other
vehicle).
F
C
onnect the other end of the green or black
cable to the earth point C on the broken
down vehicle (or on the engine mounting).
F
S
tart the engine of the vehicle with the
good battery and leave it running for a
few
minutes. F
O
perate the starter on the broken down
vehicle and let the engine run
I
f the engine does not start straight
away, switch off the ignition and wait a
few
moments before trying again.
F
W
ait until the engine returns to idle then
disconnect the jump lead cables in the
reverse order.
F
R
efit the plastic cover to the (+) terminal, if
your vehicle has one.
When your vehicle's battery is discharged, the
engine can be started using a slave battery
(external or on another vehicle) and jump lead
cables.Before disconnecting the battery
Wait 2 minutes after switching off the ignition
before disconnecting the battery.
Close the windows and the doors before
disconnecting the battery.
Following reconnection of the
battery
Following reconnection of the battery, switch on
the ignition and wait 1 minute before starting to
permit initialisation of the electronic systems.
However, if problems remain following this
operation, contact a P
e
uge
Ot
dealer or a
qualified workshop.
Referring to the corresponding section, you
must yourself reinitialise (depending on
version):
-
t
he remote control key,
-
t
he electric blind(s),
-
...Some functions are not available if the
battery is not sufficiently charged.
7
Practical information
Page 266 of 416
264
308_en_Chap07_info-pratiques_ed01-2015
Changing a wiper blade
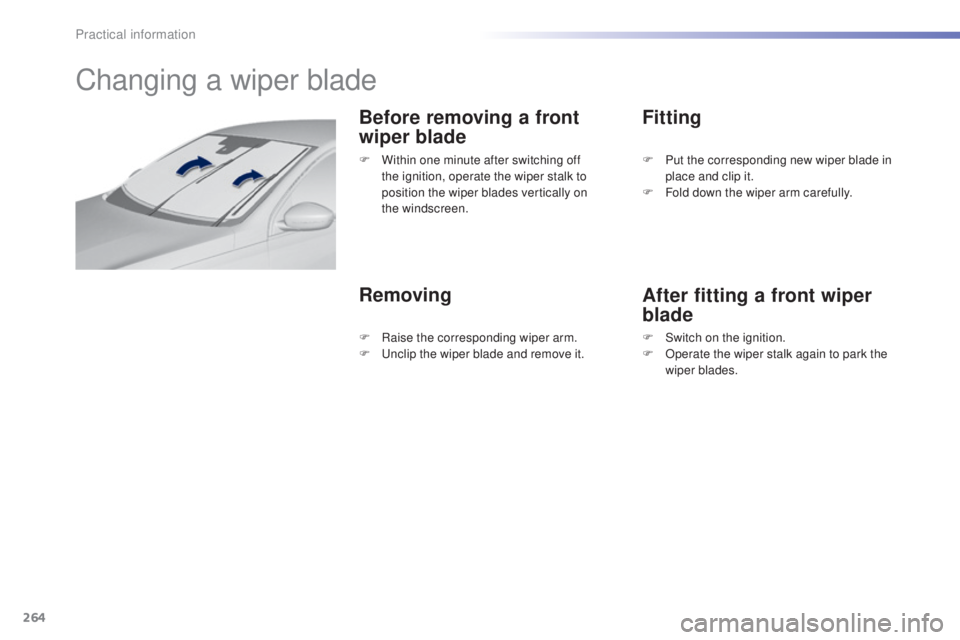
Before removing a front
wiper blade
RemovingFitting
After fitting a front wiper
blade
F Within one minute after switching off
the ignition, operate the wiper stalk to
position the wiper blades vertically on
the
windscreen. F
P ut the corresponding new wiper blade in
place and clip it.
F
F
old down the wiper arm carefully.
F
Ra
ise the corresponding wiper arm.
F
u
n
clip the wiper blade and remove it. F
S
witch on the ignition.
F
O
perate the wiper stalk again to park the
wiper blades.
Practical information
Page 268 of 416
266
308_en_Chap07_info-pratiques_ed01-2015
General recommendations
Observe the legislation in force in your country.ensure that the weight of the towing vehicle is higher than that of the towed vehicle.
th
e driver must remain at the wheel of the towed vehicle and must have a valid driving licence.
When towing a vehicle with all four wheels on the ground, always use an approved towing
arm; rope and straps are prohibited.
th
e towing vehicle must move off gently.
When towing a vehicle with the engine off, there is no longer any power assistance for
braking or steering.
In the following cases, you must always call on a professional recovery service:
-
v
ehicle broken down on a motor way or fast road,
-
f
our-wheel drive vehicle,
-
w
hen it is not possible to put the gearbox into neutral, unlock the steering, or release
the parking brake,
-
t
owing with only two wheels on the ground,
-
w
here there is no approved towing arm available...
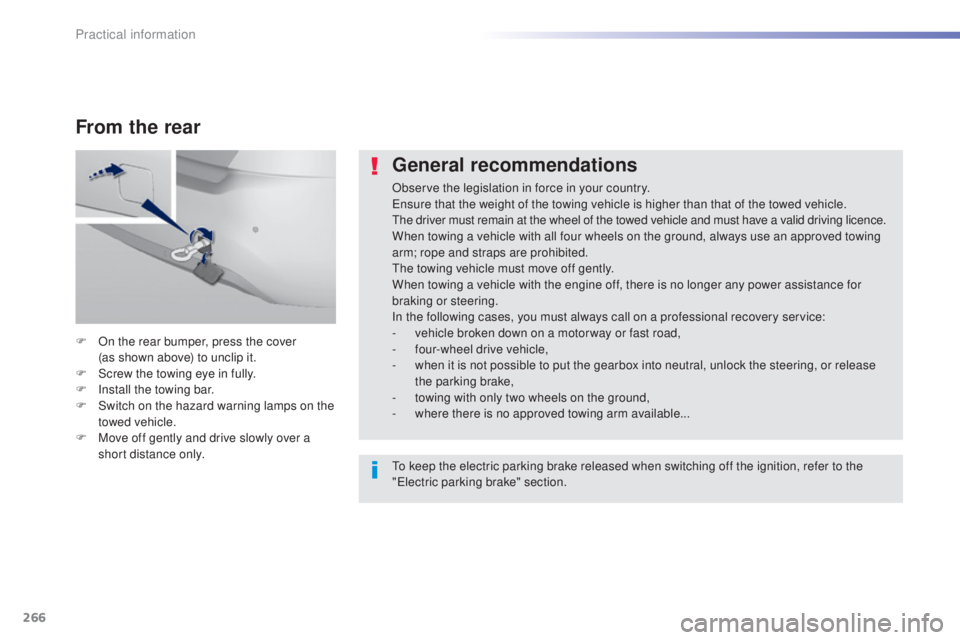
F
O
n the rear bumper, press the cover
(as shown above) to unclip it.
F
S
crew the towing eye in fully.
F
I
nstall the towing bar.
F
S
witch on the hazard warning lamps on the
towed vehicle.
F
M
ove off gently and drive slowly over a
short distance only.
From the rear
to keep the electric parking brake released when switching off the ignition, refer to the
"el ectric parking brake" section.
Practical information
Page 282 of 416
280
308_en_Chap08_verifications_ed01-2015
Range indicators
When switching on the ignition, an indicator
gives an estimate of the distance that can
be travelled with your vehicle before engine
starting is automatically prevented, once the
vehicle starts using the reserve of AdBlue
® or
after a fault is detected with the SCR system.
In the event of simultaneous system fault and
low AdBlue
® level, the shortest range is the one
displayed.
In the event of the risk of non-starting related to a lack of AdBlue®
the engine start prevention system
required by regulations is activated
automatically once the AdBlue
® tank is
e m pt y.
Remaining range greater than 1 500 miles (2 400 km )
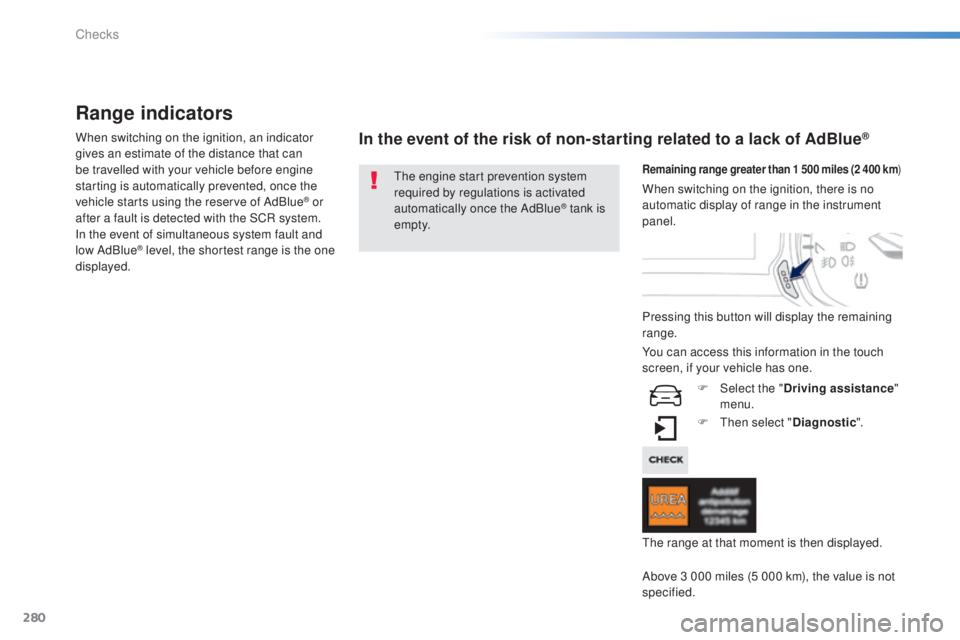
Pressing this button will display the remaining
range.
F
t
hen
select "Diagnostic ".
Above 3 000 miles (5 000 km), the value is not
specified. When switching on the ignition, there is no
automatic display of range in the instrument
panel.
th
e range at that moment is then displayed.
You can access this information in the touch
screen, if your vehicle has one.
F
Sel
ect the "Driving assistance "
menu.
Checks
Page 283 of 416
281
308_en_Chap08_verifications_ed01-2015
Remaining range between 350 and 1500 miles (600 and 2 400 km)
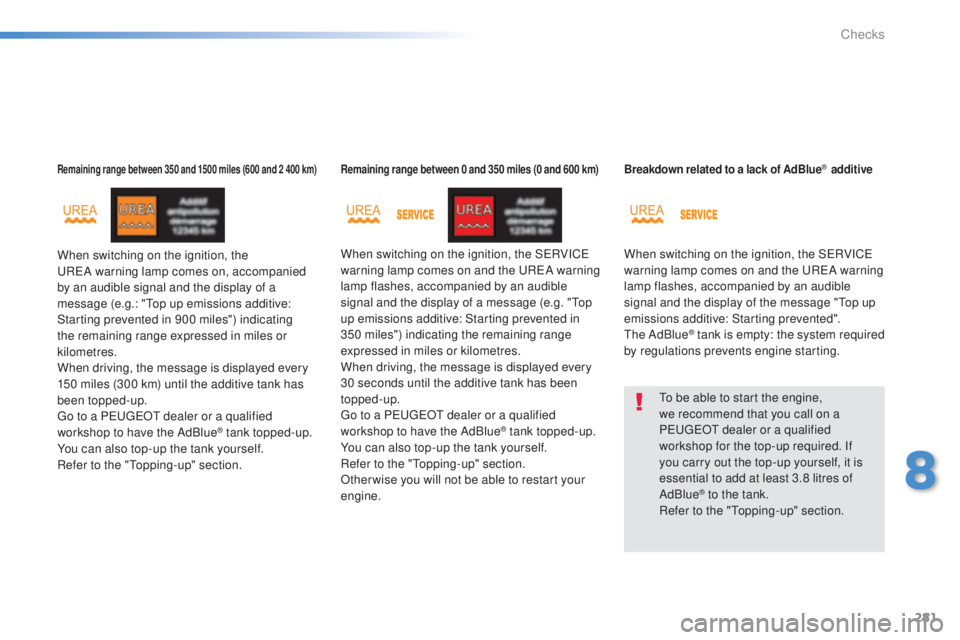
When switching on the ignition, the uReA warning lamp comes on, accompanied
by an audible signal and the display of a
message (e.g.: "
to
p up emissions additive:
Starting prevented in 900 miles") indicating
the remaining range expressed in miles or
kilometres.
When driving, the message is displayed every
150 miles (300 km) until the additive tank has
been topped-up.
go t
o a P
e
uge
Ot
dealer or a qualified
workshop to have the AdBlue
® tank topped-up.
You can also top-up the tank yourself.
Refer to the "
to
pping-up" section.
Remaining range between 0 and 350 miles (0 and 600 km)
When switching on the ignition, the SeR VICe
warning lamp comes on and the uReA w arning
lamp flashes, accompanied by an audible
signal and the display of a message (e.g. "
to
p
up emissions additive: Starting prevented in
350 miles") indicating the remaining range
expressed in miles or kilometres.
When driving, the message is displayed every
30 seconds until the additive tank has been
topped-up.
go t
o a P
e
uge
Ot
dealer or a qualified
workshop to have the AdBlue
® tank topped-up.
You can also top-up the tank yourself.
Refer to the "
to
pping-up" section.
Other wise you will not be able to restart your
engine.
Breakdown related to a lack of AdBlue® additive
When switching on the ignition, the SeR VICe
warning lamp comes on and the uReA w arning
lamp flashes, accompanied by an audible
signal and the display of the message "
to
p up
emissions additive: Starting prevented".
th
e AdBlue
® tank is empty: the system required
by regulations prevents engine starting.
to b
e able to start the engine,
we recommend that you call on a
P
e
uge
Ot
dealer or a qualified
workshop for the top-up required. If
you carry out the top-up yourself, it is
essential to add at least 3.8 litres of
AdBlue
® to the tank.
Refer to the "to pping-up" section.
8
Checks
Page 284 of 416
282
308_en_Chap08_verifications_ed01-2015
In the event of a fault with the the SCR emissions control system
A system that prevents engine starting
is activated automatically from
650 miles (1 100 km) after confirmation
of a fault with the SCR emissions
control system. Have the system
checked by a P
e
uge
Ot
dealer or a
qualified workshop as soon as possible.
If it is a temporary fault, the alert
disappears during the next journey,
after self-diagnosis of the SCR system.
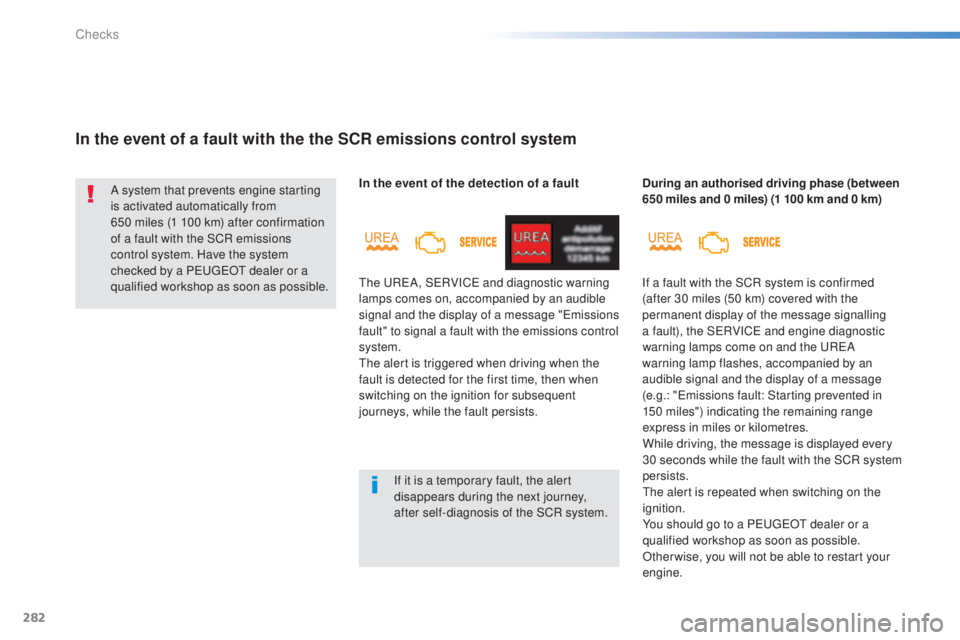
In the event of the detection of a fault
th
e u
ReA
, S
eR
VIC
e
and diagnostic warning
lamps comes on, accompanied by an audible
signal and the display of a message "
em
issions
fault" to signal a fault with the emissions control
system.
the
alert is triggered when driving when the
fault is detected for the first time, then when
switching on the ignition for subsequent
journeys, while the fault persists. During an authorised driving phase (between
650 miles and 0 miles) (1 100 km and 0 km)
If a fault with the SCR system is confirmed
(after 30 miles (50 km) covered with the
permanent display of the message signalling
a fault), the S
eR
VIC
e
and engine diagnostic
warning lamps come on and the
u
ReA
w
arning lamp flashes, accompanied by an
audible signal and the display of a message
(e.g.: "
em
issions fault: Starting prevented in
150
miles") indicating the remaining range
express in miles or kilometres.
While driving, the message is displayed every
30 seconds while the fault with the SCR system
persists.
the
alert is repeated when switching on the
ignition.
You should go to a P
e
uge
Ot
dealer or a
qualified workshop as soon as possible.
Other wise, you will not be able to restart your
engine.
Checks