Page 153 of 341
151
208_en_Chap06_Feux-Signalisations_ed01-2015
Temporarily keeping the dipped beam
headlamps on after the vehicle's ignition has
been switched off makes the driver's exit easier
when the light is poor.
Manual guide-me-home
lighting
Switching on
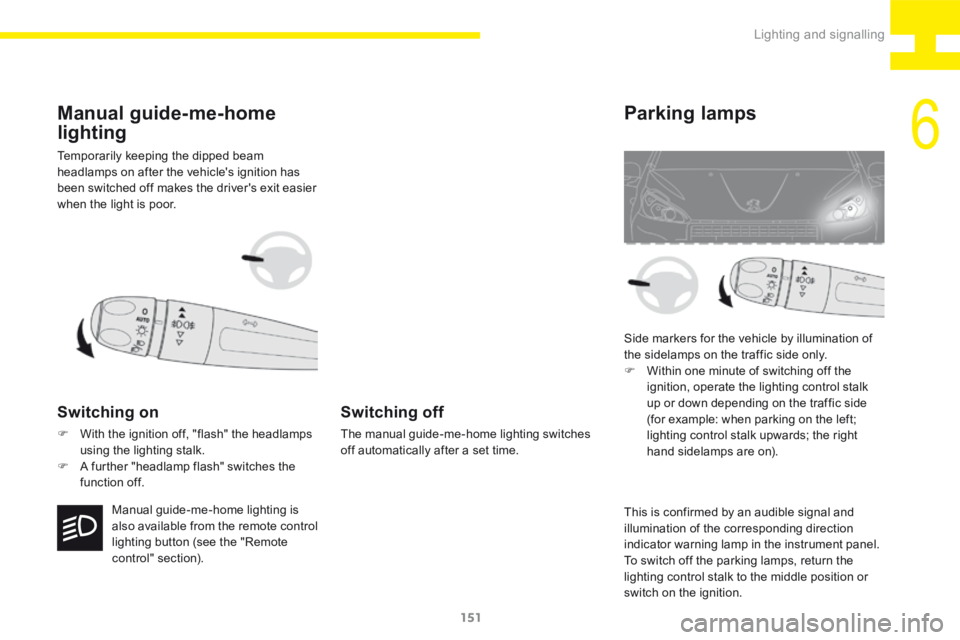
F With the ignition off, "flash" the headlamps
using the lighting stalk.
F A further "headlamp flash" switches the
function off.
Switching off
The manual guide-me-home lighting switches
off automatically after a set time.
Parking lamps
Side markers for the vehicle by illumination of
the sidelamps on the traffic side only.
F Within one minute of switching off the
ignition, operate the lighting control stalk
up or down depending on the traffic side
(for example: when parking on the left;
lighting control stalk upwards; the right
hand sidelamps are on).
Manual guide-me-home lighting is
also available from the remote control
lighting button (see the "Remote
control" section). This is confirmed by an audible signal and
illumination of the corresponding direction
indicator warning lamp in the instrument panel.
To switch off the parking lamps, return the
lighting control stalk to the middle position or
switch on the ignition.
6
Lighting and signalling
Page 170 of 341
168
208_en_Chap07_ Amenagements_ed01-2015
Being towedTowing another vehicle
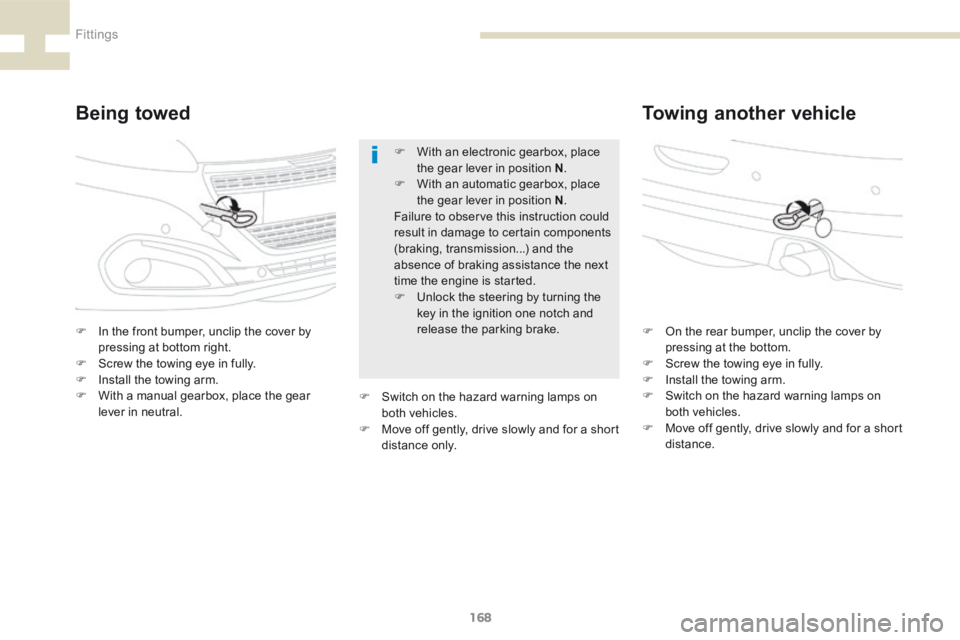
F In the front bumper, unclip the cover by
pressing at bottom right.
F Screw the towing eye in fully.
F Install the towing arm.
F With a manual gearbox, place the gear
lever in neutral. F
On the rear bumper, unclip the cover by
pressing at the bottom.
F Screw the towing eye in fully.
F Install the towing arm.
F Switch on the hazard warning lamps on
both vehicles.
F Move off gently, drive slowly and for a short
distance.
F
With an electronic gearbox, place
the gear lever in position N .
F With an automatic gearbox, place
the gear lever in position N .
Failure to observe this instruction could
result in damage to certain components
(braking, transmission...) and the
absence of braking assistance the next
time the engine is started.
F Unlock the steering by turning the
key in the ignition one notch and
release the parking brake.
F Switch on the hazard warning lamps on
both vehicles.
F Move off gently, drive slowly and for a short
distance only.
Fittings
Page 178 of 341
176
208_en_Chap08_Informations-pratiques_ed01-2015
The various caps and covers allow access for
checking the levels of the various fluids and for
replacing certain components.
Petrol
1. Screenwash reservoir.
2. Coolant header tank.
3. Brake fluid reservoir.
4. Battery / Fuses.
5. Fusebox.
6. A i r f i l t e r.
7. Engine oil dipstick.
8. Engine oil filler cap.
Take care when working under the
bonnet, as certain areas of the engine
may be extremely hot (risk of burns) and
the cooling fan could start at any time
(even with the ignition off).
Checking levels
Check the levels regularly, in line with the
manufacturer's service schedule. Top them up
if necessary, unless otherwise indicated.
If a level drops significantly, have the
corresponding system checked by a PEUGEOT
dealer or a qualified workshop.
Practical information
Page 179 of 341
177
208_en_Chap08_Informations-pratiques_ed01-2015
The various caps and covers allow access for
checking the levels of the various fluids, for
replacing certain components and for priming
the fuel system.
Diesel
1. Screenwash reservoir.
2. Coolant header tank.
3. Brake fluid reservoir.
4. Battery / Fuses.
5. Fusebox.
6. A i r f i l t e r.
7. Engine oil dipstick.
8. Engine oil filler cap.
9. Priming pump (depending on engine).
The AdBlue
® additive tank filler is located in the
boot below the spare wheel.
Take care when working under the
bonnet, as certain areas of the engine
may be extremely hot (risk of burns) and
the cooling fan could start at any time
(even with the ignition off).
Checking levels
Check the levels regularly, in line with the
manufacturer's service schedule. Top them up
if necessary, unless otherwise indicated.
If a level drops significantly, have the
corresponding system checked by a PEUGEOT
dealer or a qualified workshop.
8
Practical information
Page 182 of 341
180
208_en_Chap08_Informations-pratiques_ed01-2015
Low fuel level
When the low fuel level is reached
this warning lamp comes on in the
instrument panel. There remains
approximately 5 litres of fuel in
the tank. When the warning lamp
flashes, there is ver y little fuel left .
The key cannot be removed from the
lock until the cap is refitted.
Removing the filler cap may cause an
inrush of air. This vacuum is per fectly
normal and results from the sealing of
the system.
Fuel tank
Fuel
Fuel tank capacity: approximately 50 litres.Refuelling
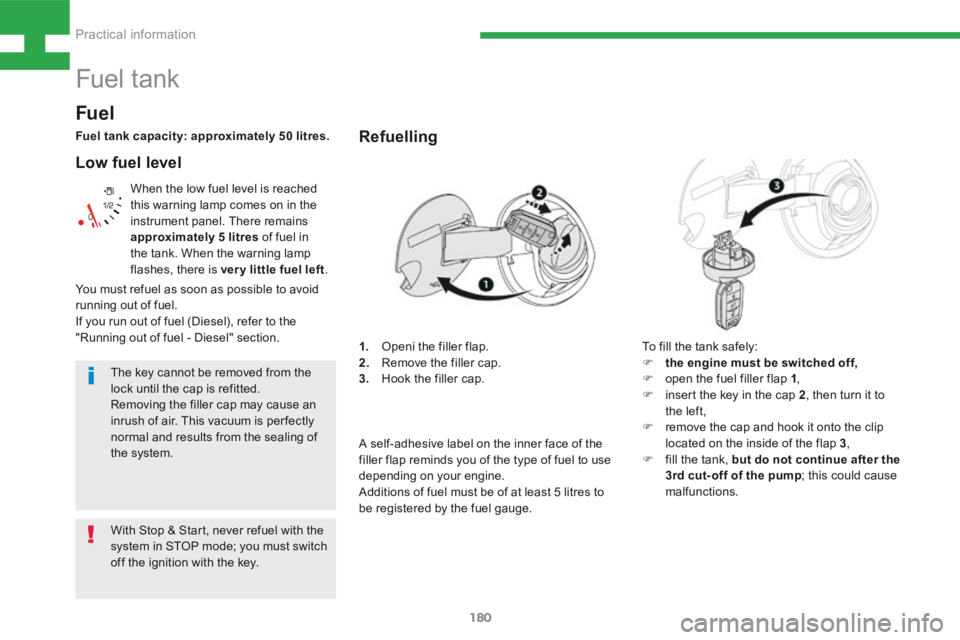
To fill the tank safely:
F the engine must be switched off,
F open the fuel filler flap 1 ,
F insert the key in the cap 2 , then turn it to
the left,
F remove the cap and hook it onto the clip
located on the inside of the flap 3 ,
F fill the tank, but do not continue after the
3rd cut- off of the pump ; this could cause
malfunctions.
With Stop & Start, never refuel with the
system in STOP mode; you must switch
off the ignition with the key.
You must refuel as soon as possible to avoid
running out of fuel.
If you run out of fuel (Diesel), refer to the
"Running out of fuel - Diesel" section.
A self-adhesive label on the inner face of the
filler flap reminds you of the type of fuel to use
depending on your engine.
Additions of fuel must be of at least 5 litres to
be registered by the fuel gauge.
1.
Openi the filler flap.
2. Remove the filler cap.
3. Hook the filler cap.
Practical information
Page 186 of 341
184
208_en_Chap08_Informations-pratiques_ed01-2015
On vehicle fitted with HDi engines, the fuel
system must be primed if you run out of fuel.
For versions with a manual priming pump,
refer to the drawing of the corresponding
underbonnet view.
If the tank on your vehicle is fitted with
a misfuel prevention device, refer to the
corresponding section.
Running out of fuel (Diesel)
If the engine does not start first time,
don't keep trying. Start the procedure
again from the beginning.
1.4 HDi engine
F Add at least five litres of Diesel fuel to the
tank.
F Open the bonnet.
F Press and release the priming pump until
resistance is felt (there may be resistance
on the first press).
F Operate the starter motor to start the
engine.
F Close the bonnet.
1.6 HDi engine
(except BlueHDi version)
F Add at least five litres of Diesel fuel to the
tank.
F Open the bonnet.
F If necessary, unclip the styling cover for
access to the priming pump.
F Squeeze and release the priming pump
repeatedly until resistance is felt (there
may be resistance at the first press).
F Operate the starter to start the engine
(if the engine does not start at the first
attempt, wait around 15 seconds before
trying again).
F If the engine does not start after a few
attempts, operate the priming pump again
then start the engine.
F Refit the styling cover and clip it in place.
F Close the bonnet.
1.6 HDi engine
(BlueHDi version)
F Add at least five litres of Diesel fuel to the
tank.
F Switch the ignition on (without starting the
engine).
F Wait around 6 seconds and switch off the
ignition.
F Repeat the operation 10 times.
F Operate the starter motor to start the
engine.
Practical information
Page 189 of 341
187
208_en_Chap08_Informations-pratiques_ed01-2015
To p p i n g - u p
If any AdBlue® fluid is split or splashed
on to you, wash immediately with cold
water or wipe yourself with a clean
damp cloth.
If the additive has crystallised, clean it
off using a sponge and hot water.
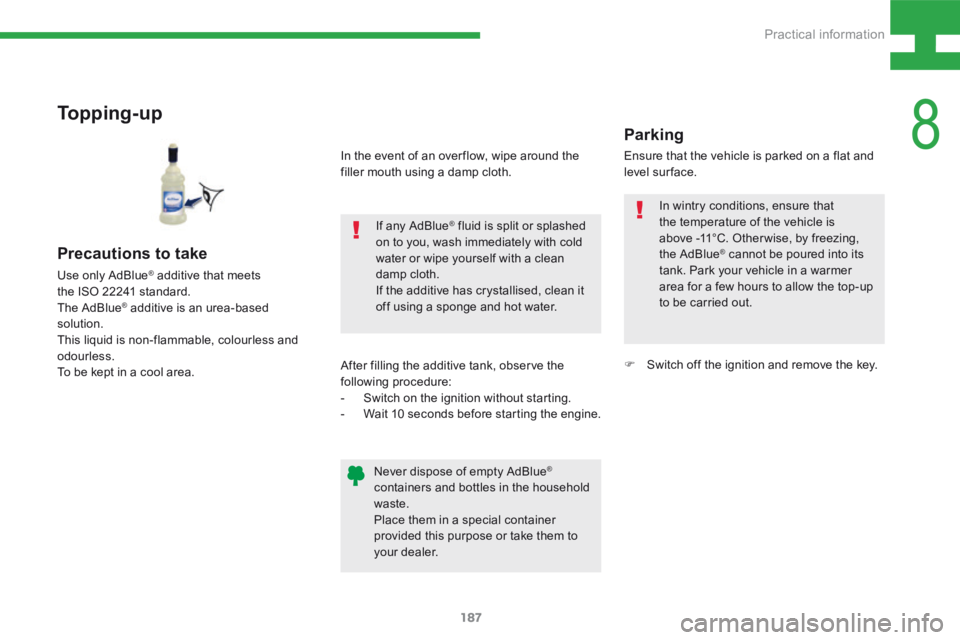
Precautions to take
Use only AdBlue® additive that meets
the ISO 22241 standard.
The AdBlue
® additive is an urea-based
solution.
This liquid is non-flammable, colourless and
odourless.
To be kept in a cool area. After filling the additive tank, observe the
following procedure:
-
Switch on the ignition without starting.
- Wait 10 seconds before starting the engine.
Never dispose of empty AdBlue
®
containers and bottles in the household
waste.
Place them in a special container
provided this purpose or take them to
your dealer. Ensure that the vehicle is parked on a flat and
level surface.
Parking
F
Switch off the ignition and remove the key.
In the event of an over flow, wipe around the
filler mouth using a damp cloth.
In wintry conditions, ensure that
the temperature of the vehicle is
above -11°C. Other wise, by freezing,
the AdBlue
® cannot be poured into its
tank. Park your vehicle in a warmer
area for a few hours to allow the top-up
to be carried out.
8
Practical information
Page 191 of 341
189
208_en_Chap08_Informations-pratiques_ed01-2015
Important: in the event of a top-up
after a breakdown because of a lack
of additive , signalled by the message
"Top up emissions additive: Starting
prevented", you must wait around
5 minutes before switching on the ignition,
without opening the driver's door,
locking the vehicle or introducing the
key into the ignition switch .
Switch on the ignition, then, after
10 seconds, start the engine.
Keep AdBlue
® out of the reach of
children, in its original container.
Never transfer AdBlue
® to another
container: it would loose its purity.
Never dilute the additive with water.
Never pour the additive into the Diesel
fuel tank.
Never store containers or bottles of
AdBlue
® in your vehicle.
Recommendations on
storage
The SCR system includes an AdBlue®
tank heater that ensures operation of
the vehicle in normal conditions.
In exceptional situations, such as when
the vehicle is kept at temperatures
below -15°C (5°F) for a long period,
there may be an emission fault alert
related to freezing of the AdBlue
®
additive.
Park the vehicle in an area at a more
moderate temperature for a few hours
until the additive becomes a liquid
again.
The emissions warning lamp does not
go off immediately, but does so after a
few miles of driving.
Freezing of the AdBlue®
additive
AdBlue® freezes at about -11°C (12.2°F)
and deteriorates above 25°C (77°F).
It is recommended that containers and
bottles be stored in a cool area and
protected from direct sunlight.
Under these conditions, the additive
can be kept for at least a year.
Additive that has been frozen can be
used once it has thawed out in ambient
a i r.
Advice
8
Practical information