Page 72 of 271

70
108_en_Chap05_conduite_ed01-2015
If you use the accessories for a
prolonged period, the vehicle will
automatically switch to "OFF" mode
after about 20 minutes.
Be aware in order to avoid discharging
the battery.
Starting - switching off the engine with
the Keyless e
n
try and Starting system
Changing the mode of the
vehicle
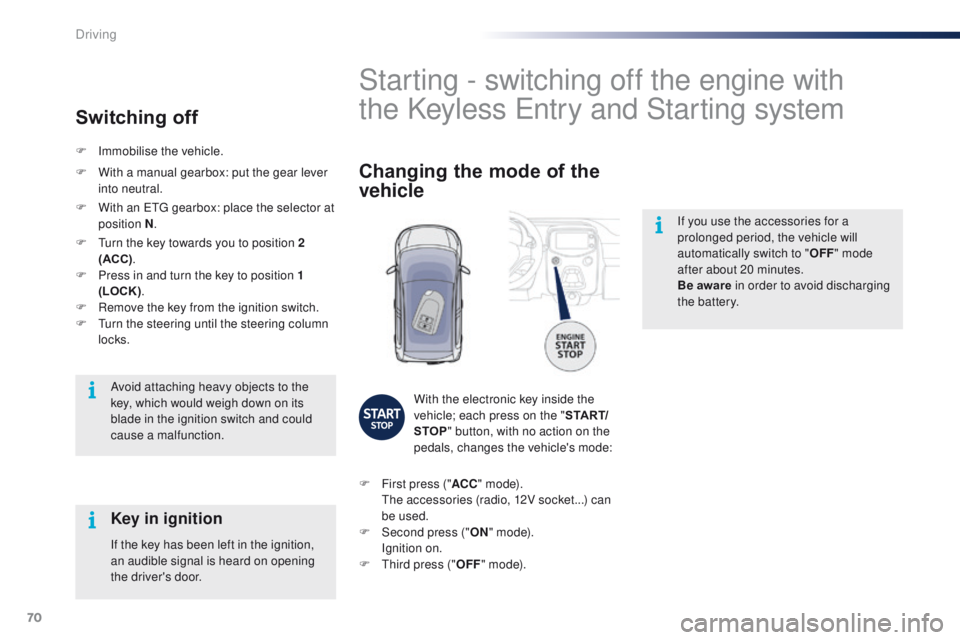
With the electronic key inside the
vehicle; each press on the " S TA R T/
STOP " button, with no action on the
pedals, changes the vehicle's mode:
F
F
irst press (" ACC" m o d e).
t
h
e accessories (radio, 12V socket...) can
be used.
F
Sec
ond press (" ON" m o d e).
I
gnition on.
F
t
h
ird press (" OFF" m o d e).
Avoid attaching heavy objects to the
key, which would weigh down on its
blade in the ignition switch and could
cause a malfunction.
Key in ignition
If the key has been left in the ignition,
an audible signal is heard on opening
the driver's door.
F
Imm
obilise the vehicle.
Switching off
F With a manual gearbox: put the gear lever
into neutral.
F
W
ith an etg gearbox: place the selector at
position N .
F
t
u
rn the key towards you to position 2
(ACC) .
F
P
ress in and turn the key to position 1
(LOCK) .
F
R
emove the key from the ignition switch.
F
t
u
rn the steering until the steering column
locks.
Driving
Page 73 of 271

71
108_en_Chap05_conduite_ed01-2015
Starting using
the electronic key
With the first press on the " S TA R T/
STOP " button, this indicator lamp
flashes slowly in the instrument panel. Depending on the ambient temperature,
each attempt at starting can take up to
around 30 seconds. During this period,
do not press the "
START/STOP" button
again, or release the clutch pedal or
brake pedal (depending on the type of
gearbox).
After this period, if the engine has not
started, press the " START/STOP"
button again for another attempt at
starting. If one of the starting conditions is
not met, the "Keyless
e
n
try and
Starting" system indicator lamp flashes
in the instrument panel. In some
circumstances, it is necessary to
turn the steering wheel slightly while
pressing the " START/STOP " button to
assist unlocking of the steering.
For vehicles fitted with a manual gearbox:
F
W
ith the electronic key inside the vehicle,
put the gear lever into neutral and fully
depress the clutch pedal.th e presence of the electronic key in
the vehicle is essential for switching
on the ignition and starting only. Once
the engine has started,
make sure
that the electronic key remains with
the vehicle until the end of the journey:
other wise you would not be able to lock
the vehicle.
F
P
ress and release the " S TA R T/
STOP " button.
th
is indicator lamp comes on in the
instrument panel. For vehicles fitted with an ETG gearbox
:
F
W
ith the electronic key inside the vehicle,
put the gear selector at N and press the
brake pedal.
th
is indicator lamp comes on in the
instrument panel.
F
P
ress and release the "
S TA R T/
STOP " button.
5
Driving
Page 74 of 271

72
108_en_Chap05_conduite_ed01-2015
there is an audible signal when the driver's
door is opened and the vehicle is not in "OFF"
mode. If the vehicle is not immobilised, the
engine will not stop.
Switching off using
the electronic key
F Immobilise the vehicle.
F
W ith a manual gearbox: put the gear lever
into neutral.
F
W
ith an etg gearbox: place the gear
selector at N .
F
W
ith the electronic key inside
the vehicle, press the " S TA R T/
STOP " button.
the
engine stops.
th
e steering locks when a door is opened or on
locking the vehicle.
F
P
ress the "START/STOP " button
again to change to " OFF" mode.
Emergency starting
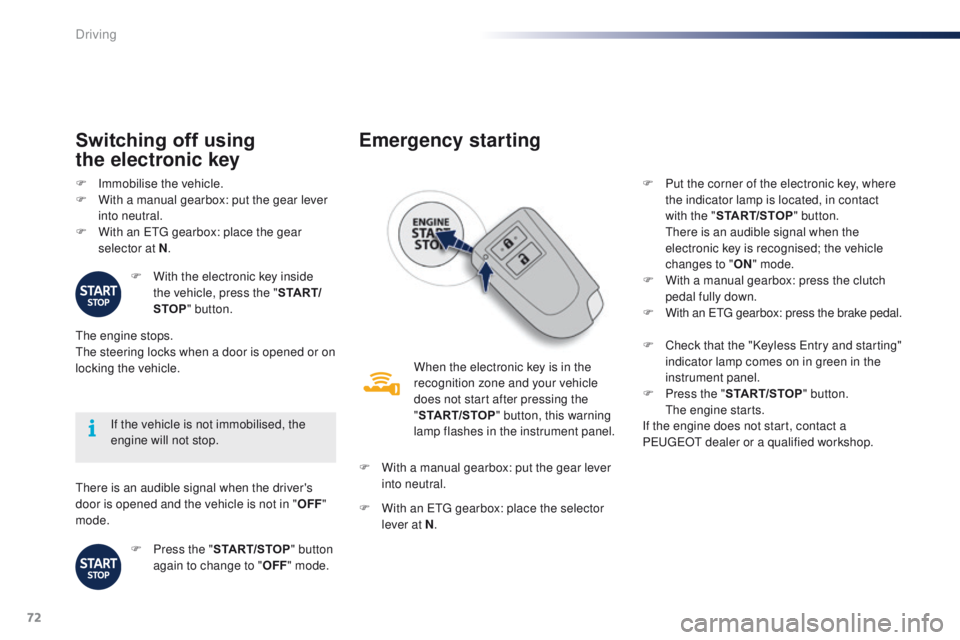
When the electronic key is in the
recognition zone and your vehicle
does not start after pressing the
"START/STOP " button, this warning
lamp flashes in the instrument panel.
F
W
ith a manual gearbox: put the gear lever
into neutral.
F
W
ith an etg gearbox: place the selector
lever at N . F
P
ut the corner of the electronic key, where
the indicator lamp is located, in contact
with the " START/STOP " button.
t
h
ere is an audible signal when the
electronic key is recognised; the vehicle
changes to " ON" mode.
F
W
ith a manual gearbox: press the clutch
pedal fully down.
F
W
ith an etg gearbox: press the brake pedal.
F
C
heck that the "Keyless e
n
try and starting"
indicator lamp comes on in green in the
instrument panel.
F
P
ress the "START/STOP " button.
t
h
e engine starts.
If the engine does not start, contact a
P
e
uge
Ot
dealer or a qualified workshop.
Driving
Page 145 of 271
143
108_en_Chap09_info-pratiques_ed01-2015
Changing a wheel
F As far as possible, immobilise the vehicle on level, stable, non-slippery ground.
F
A
pply the parking brake.
F
S
witch off the ignition (" OFF" mode for
vehicles fitted with "Keyless
e
n
try and
Starting").
F
e
n
gage first gear or reverse for a manual
gearbox, position N for an
etg electronic
gearbox.
Parking the vehicle
Procedure for replacing a wheel by the spare wheel using the tools supplied with the vehicle.
F
I
f necessary, chock the wheel diagonally
opposite the wheel to be changed.
F
Y
ou must ensure that the occupants leave
the vehicle and wait in a safe location.
9
Practical information
Page 159 of 271
157
108_en_Chap09_info-pratiques_ed01-2015
FuseN° Rating
(A) Functions
11 5Steering lock - Fuel injection system -
ele
ctronic gearbox
12 7. 5Airbags
13 5Instrument panel - Display Screen - Stop & Start
14 15
**
Steering - Fuel injection system - Brake lamps
7. 5 *
15 7. 5 * *
Fuel injection system - Stop & Start
10*
16 7. 5
en
gine diagnosis
17 10Brake lamps -
t
h
ird brake lamp - Fuel injection system - ABS
system - VSC system -
e
l
ectronic gearbox - Keyless e
n
try and
Starting system
18 10Sidelamps - Number plate lamps - Rear foglamp - Front
foglamps - Rear lamps - Lighting dimmer
19 40Air conditioning
* Pure
te
ch 82 engine.
** V
ti 6
8 engine.
9
Practical information
Page 160 of 271
158
108_en_Chap09_info-pratiques_ed01-2015
FuseN° Rating
(A) Functions
20 40Air conditioning -
e
n
gine self-diagnosis - Sidelamps - Number
plate lamps - Rear foglamp - Front foglamps - Rear lamps
-
Lighting dimmer - Brake lamps -
t
h
ird brake lamp - Fuel
injection system - ABS system - VSC system -
e
l
ectronic
gearbox - Keyless
e
n
try and Starting system - e
l
ectric windows
21 30Fuel injection system - Stop & Start -
Main distribution unit
22** 7. 5Fuel injection system
23** 20Fuel injection system - Stop & Start
24 25Main distribution unit
25 30
el
ectric windows
26 25
el
ectric windows
27 10Air conditioning
28 5Rear foglamp
** V
ti 6
8 engine.
Practical information
Page 162 of 271
160
108_en_Chap09_info-pratiques_ed01-2015
** Vti 68 engine.Fuse
N° Rating
(A) Functions
13 10Horn
14 30Distribution units
15 ** 7. 5
ele
ctronic gearbox
16 7. 5Fuel injection system
17 7. 0Keyless e
n
try and Starting system
18 ** 7. 5Battery
19 25Fuel injection system - Cooling fan
20 30Starter motor
21 7. 5Steering lock
22 25Front lamps
23 7. 5Fuel injection system
24 7. 5Fuel injection system - Starter motor - e
l
ectronic gearbox -
Stop & Start
25 15Audio system - "Keyless e
n
try and Starting" system
26 7. 5Instrument panel - Display screen
Practical information
Page 168 of 271

166
108_en_Chap09_info-pratiques_ed01-2015
electrical energy economy mode*
System which manages the duration of use of certain functions to conserve a sufficient level of
charge in the battery.
After the engine has stopped, you can still use functions such as the audio system, windscreen
wipers, dipped beam headlamps,
courtesy lamps, etc. for a maximum combined duration of
twenty
minutes.
th
is period may be greatly reduced if the battery is not fully charged. Let the engine run for the duration
specified to ensure that the battery
charge is sufficient.
Do not repeatedly and continuously
restart the engine in order to charge the
battery.
A flat battery prevents the engine from
starting.
Refer to the "Battery" section.
Switching to economy mode
Once this time has elapsed the active functions
are put on standby.
Exiting economy mode
these functions are reactivated automatically
next time the vehicle is driven.
to r
estore the use of these functions
immediately, start the engine and let it run for at
least 5 minutes.
Changing a wiper
blade
Removing the front wiper blade
F Raise the wiper arm.
F R emove the wiper blade, sliding it towards
the outside.
Fitting the front wiper blade
F Put the corresponding new wiper blade in place and fix it.
F
F
old down the wiper arm carefully.
to c
onserve the effectiveness of
the flat-blade type wiper blades, we
recommend that they are:
-
han
dled with care,
-
c
leaned regularly with soapy water,
-
n
ot used to hold a cardboard sheet
against the windscreen,
-
r
eplaced at the first signs of wear.
*
O
nly on vehicles with the "Keyless
e
n
try and
Starting" system.
Practical information