Page 201 of 253
Vehicle care199
No.Circuit1Engine control module2Lambda sensor3Fuel injection, ignition system4Fuel injection, ignition system5–6Mirror heating7Fan control8Lambda sensor, engine cooling9Rear window sensor10Vehicle battery sensor11Trunk release12Adaptive forward lighting, auto‐
matic light control13ABS Valves14–15Engine control module16StarterNo.Circuit17Transmission control module18Heated rear window19Front power windows20Rear power windows21Rear eletrical centre22Left high beam (Halogen)23Headlamp washer system24Right low beam (Xenon)25Left low beam (Xenon)26Front fog lights27Diesel fuel heating28Start stop system29Electric parking brake30ABS pump31–32AirbagNo.Circuit33Adaptive forward lighting, auto‐
matic light control34Exhaust gas recirculation35Power windows, rain sensor,
exterior mirror36Climate control37–38Vacuum pump39Fuel system control module40Windscreen washer system41Right high beam (Halogen)42Radiator fan43Windscreen wiper44–45Radiator fan46–47Horn
Page 202 of 253
200Vehicle care
No.Circuit48Radiator fan49Fuel pump50Headlamp levelling, adaptive
forward lighting51–52Auxiliary heater, diesel engine53Transmission control module,
Engine control module54Vacuum pump, instrument
panel cluster, heating ventila‐
tion, air conditioning system
After having changed defective fuses,
close the fuse box cover and press
until it engages.
If the fuse box cover is not closed
correctly, malfunctions may occur.
Instrument panel fuse box
In left-hand drive vehicles, the fuse
box is behind the storage
compartment in the instrument panel.
Open the compartment and push it to the left to unlock. Fold the
compartment down and remove it.
In right-hand drive vehicles, the fuse
box is located behind a cover in the
glovebox. Open the glovebox, then
open the cover and fold it down.
Page 203 of 253
Vehicle care201
No.Circuit1Displays2Body control unit, exterior lights3Body control unit, exterior lights4Infotainment system5Infotainment system, instru‐
ment6Power outlet, cigarette lighter7Power outlet8Body control module, left low
beam9Body control module, right low
beam10Body control module, door locks11Interior fan12Driver power seat13Passenger power seat14Diagnostic connector15AirbagNo.Circuit16Boot lid relay17Air conditioning system18Service diagnose19Body control module, brake
lights, tail lights, interior lights20-21Instrument panel22Ignition system23Body control module24Body control module25–26Trunk power outlet accessory
Load compartment fuse
box
The fuse box is on the left side of the
load compartment behind a cover.
Remove the cover.
Fuse assignments
Page 204 of 253
202Vehicle care
No.Circuit1Soft top control module, power
rail right2–3Parking assist4–5–6–7Power seat8Soft top control module9–10–11Trailer module, tire pressure
monitor and rear view camera12Soft top control module, tail
lights13–14Rear seat electrical folding15–No.Circuit16Seat ventilation, rear view
camera, soft top control module17–18–19Steering wheel heating20–21Seat heating22–23Soft top control module, power
rail left24–25–26Jumper fuse for non logistic
mode27Passive entry28–29Hydraulic unit30–No.Circuit31–32Flex Ride
Page 205 of 253
Vehicle care203Vehicle tools
Tools Vehicles with spare wheel
A label on the jack indicates the
vehicles for which the jack can be
used.
Open the load floor cover. The jack,
the tools and a strap for securing a
damaged wheel are in the tool box
below the spare wheel in the load
compartment. The wheel wrench and
the towing eye are in the tool bag
located in the spare wheel well near
the tool box. Spare wheel 3 216.
Vehicles with tyre repair kit
Some tools and the towing eye are
located together with the tyre repair
kit in a tool box in the load
compartment below the floor cover.
Vehicles with tyre repair kit and
flat load compartment floor
Some tools and the towing eye are
located together with the tyre repair
kit in a bag, which is fixed at the front left lashing eye in the load
compartment.
Page 206 of 253

204Vehicle careWheels and tyres
Wheels
On vehicles with Diesel engines no
steel rims and only special, for this
vehicle approved alloy wheels are
permitted.
Tyre condition, wheel condition
Drive over edges slowly and at right
angles if possible. Driving over sharp
edges can cause tyre and wheel
damage. Do not trap tyres on the kerb when parking.
Regularly check the wheels for
damage. Seek the assistance of a
workshop in the event of damage or
unusual wear.
Winter tyres Winter tyres improve driving safety attemperatures below 7 °C and should
therefore be fitted on all wheels.
All tyre sizes are permitted as winter
tyres 3 239.Use tyre size 225/55 R17 only as
winter tyres.
On vehicles with Diesel engines, no
steel rims and only special, vehicle-
approved alloy wheels are permitted.
In accordance with country-specific
regulations, affix the speed sticker in
the driver's field of view.
Tyre designationsE.g. 235/55 R 17 99 V235=Tyre width, mm55=Cross-section ratio (tyre height
to tyre width), %R=Belt type: RadialRF=Type: RunFlat17=Wheel diameter, inches99=Load index e.g. 99 is
equivalent to 775 kgV=Speed code letter
Speed code letter:
Q=up to 160 km/hS=up to 180 km/hT=up to 190 km/hH=up to 210 km/hV=up to 240 km/hW=up to 270 km/hDirectional tyres
Fit directional tyres such that they roll in the direction of travel. The rolling
direction is indicated by a symbol
(e.g. an arrow) on the sidewall.
Tyre pressure Check the pressure of cold tyres atleast every 14 days and before any
long journey. Do not forget the spare
wheel. This also applies to vehicles
with tyre pressure monitoring system.
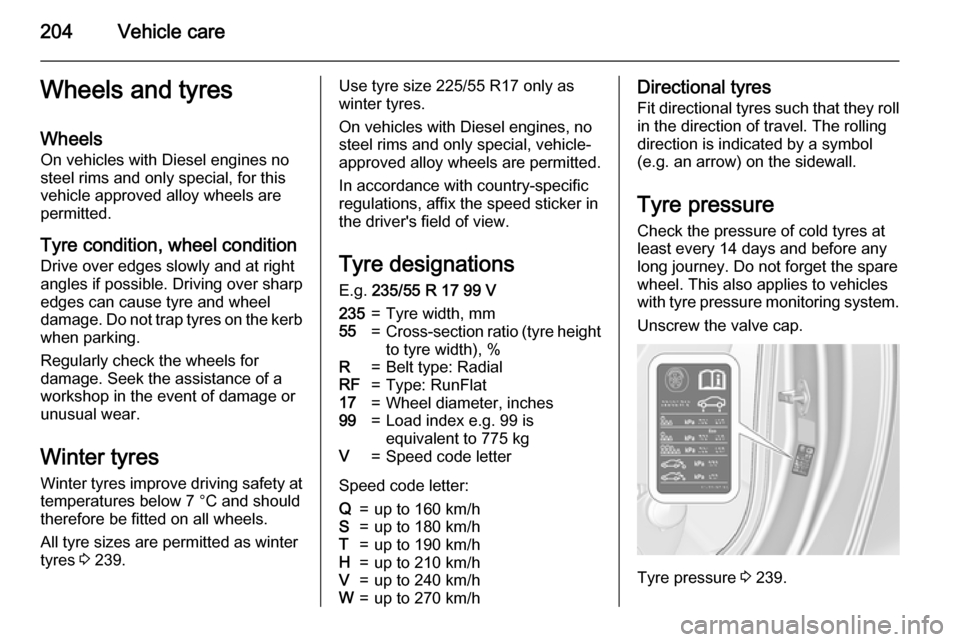
Unscrew the valve cap.
Tyre pressure 3 239.
Page 207 of 253

Vehicle care205
The tyre pressure information label
on the left door frame indicates the
original equipment tyres and the
correspondent tyre pressures.
The tyre pressure data refers to cold
tyres. It applies to summer and winter tyres.
Always inflate the spare tyre to the
pressure specified for full load.
The ECO tyre pressure serves to achieve the smallest amount of fuel
consumption possible.
Incorrect tyre pressures will impair
safety, vehicle handling, comfort and fuel economy and will increase tyre
wear.
Tyre pressures differ depending on
various options. For the correct tyre
pressure value, follow the procedure
below:
1. Identify the engine identifier code.
Engine data 3 234.
2. Identify the respective tyre.
The tyre pressure tables show all possible tyre combinations 3 239.For the tyres approved for your
vehicle, refer to the EEC Certificate of Conformity provided with your vehicle
or other national registration
documents.
The driver is responsible for correct
adjustment of tyre pressure.9 Warning
If the pressure is too low, this can
result in considerable tyre warm-
up and internal damage, leading to tread separation and even to tyre
blow-out at high speeds.
If the tyre pressure must be reduced
or increased on a vehicle with tyre
pressure monitoring system, switch
off ignition. After adjusting tyre
pressure switch on ignition and select the relevant setting on the page Tyre
load on the Driver Information Centre,
3 96.
Tyre pressure monitoring
system The tyre pressure monitoring system
(TPMS) checks the pressure of all
four wheels once a minute when
vehicle speed exceeds a certain limit.Caution
Tyre pressure monitoring system
warns only about low tyre pressure
condition and does not replace
regular tyre maintenance by the
driver.
All wheels must be equipped with pressure sensors and the tyres must
have the prescribed pressure.
Note
In countries where the tyre pressure
monitoring system is legally
required, the use of wheels without
pressure sensors will invalidate the
vehicle type approval.
Page 208 of 253
206Vehicle care
The current tyre pressures can be
shown in the Vehicle Information
Menu in the Driver Information Centre
(DIC).
The menu can be selected by the
buttons on the turn signal lever.
Press the MENU button to select the
Vehicle Information Menu X.
Turn the adjuster wheel to select the
tyre pressure monitoring system.
System status and pressure warnings
are displayed by a message with the
corresponding tyre flashing in the
DIC.A detected low tyre pressure
condition is indicated by the control
indicator w 3 94.
If w illuminates, stop as soon as
possible and inflate the tyres as
recommended 3 239.
If w flashes for 60-90 seconds and
then illuminates continuously, there is a fault in the system. Consult a
workshop.
After inflating, driving may be
required to update the tyre pressure
values in the DIC. During this time w
may illuminate.