2015 NISSAN VERSA SEDAN start stop button
[x] Cancel search: start stop buttonPage 117 of 374
Press thebutton on the key fob again
within five seconds.
● All doors unlock.
● The hazard warning lights flash once if all
doors are completely closed.
The interior lights can be turned off without wait-
ing a period of time by inserting the key into the
ignition switch and placing the ignition switch in
the ON or START position, locking the doors with
the key fob, power door lock switch or pushing
the interior light switch to the off position.
Auto relock
When thebutton on the key fob is
pressed, all doors will lock automatically within
1 minute unless one of the following operations is
performed:
● Any door is opened.
● A key is inserted into the ignition switch and
the switch is cycled from OFF to ON.
● Press key fob
button.
Releasing the trunk lid
Press thebutton on the key fob for longer
than 0.5 seconds to open the trunk lid. The trunk
release button on the key fob will not operate
when the ignition switch is placed in the ON
position.
Using the panic alarm
If you are near your vehicle and feel threatened,
you may activate the panic alarm to call attention
by pressing and holding the
button on the
key fob for longer than 0.5 seconds.
The panic alarm and headlights will stay on for a
period of time.
The panic alarm stops when:
● it has run for a period of time, or
● any button is pressed on the key fob.
LPD2030LPD2031
3-10Pre-driving checks and adjustments
Page 130 of 374
TROUBLESHOOTING GUIDE
SymptomPossible CauseRemedy
When pushing the ignition switch to stop
the engine The P (Park) warning light in the instrument
panel illuminates and the inside chime
sounds continuously. The shift lever is not in the P (Park) position. Make sure that the shift lever is in the P
(Park) position.
When placing the shift lever in the P (Park)
position The inside warning chime sounds
continuously. The ignition switch is in the “ACC” or “ON”
position.Place the ignition switch in the “OFF”
position.
When opening the driver’s door A warning chime sounds continuously. The ignition switch is in the “ACC” position. Place the ignition switch in the “OFF”
position.
When pushing the door handle request
switch to lock the door The outside chime sounds for approximately
a few seconds. The Intelligent Key is inside the vehicle. Be sure to carry the Intelligent Key with you.
A door is not closed securely.
Close the door securely.
When closing the doors The key warning light in the instrument
panel blinks in yellow, the outside chime
sounds 3 times and the inside warning
chime sounds for approximately 3 seconds.
The ignition switch is in the “ACC” or “ON”
position.
Place the ignition switch in the “OFF”
position.
The P (Park) warning light in the instrument
panel illuminates and the outside chime
sounds continuously. The ignition switch is in the “ACC” or “OFF”
position and the shift lever is not in the P
(Park) position.Make sure that the shift lever is in the P
(Park) position and place the ignition switch
in the “OFF” position.
The outside chime sounds for approximately
3 seconds and all doors unlock. The Intelligent Key is in the vehicle or trunk. Be sure to carry the Intelligent Key with you.
When closing the trunk lid The outside chime sounds for approximately
10 seconds and the trunk lid opens. The Intelligent Key is inside the trunk.Be sure to carry the Intelligent Key with you.
When stopping the engine The P (Park) position warning light in the
instrument panel blinks in red. The shift lever is not in the P (Park) position. Make sure that the shift lever is in the P
(Park) position and place the ignition switch
in the LOCK position.
When starting the engine The key warning light in the instrument
panel blinks in green. The battery charge is low.
Replace the battery with a new one. For
additional information, refer to “Battery re-
placement” in the “Maintenance and do-it-
yourself” section.
When pushing the request switch or the
LOCK button on the Intelligent Key to the
lock the door The outside chime sounds for a few sec-
onds and all the doors unlock.
The Intelligent Key is inside the trunk. Be sure to carry the Intelligent Key with you.
The Intelligent Key is inside the vehicle. Be sure to carry the Intelligent Key with you.
A door is not closed securely.
Close the doors securely.
Pre-driving checks and adjustments3-23
Page 171 of 374
Press the FM button to change the band as
follows:
FM1→FM2 →FM1
If another audio source is playing when the FM
button is pressed, the audio source playing will
automatically be turned off and the last radio
station played will begin playing.
The FM stereo indicator (ST) illuminates during
FM stereo reception. When the stereo broadcast
signal is weak, the radio automatically changes
from stereo to monaural reception.
SEEK and TRACK (tuning) buttons
Press the SEEK button
to tune from low to
high frequencies and stop at the next broadcast-
ing station.
Press the TRACK button
to tune from high
to low frequencies and stop at the next broad-
casting station.
Press and hold either button to seek at a faster
speed.
SCAN (tuning) button
Press the SCAN button. SCAN illuminates in the
display window. Scan tuning begins from low to
high frequencies. Scan tuning stops for 5 sec-
onds at each broadcasting station that has suffi-
cient signal strength. When scanning, SCAN blinks in the display. Pressing the SCAN button
again during this 5 second period stops scan
tuning and the radio remains tuned to that station.
1 to 6 Station memory operations
Twelve stations can be set for the FM band (6 for
FM1, 6 for FM2) and six stations can be set for
the AM band.
1. Choose the radio band AM, FM1 or FM2 using the AM or FM button.
2. Tune to the desired station using manual, SEEK or SCAN tuning. Press and hold any
of the desired station memory buttons (1 –
6) until a beep sound is heard.
3. The channel indicator will then come on and the sound will resume. Programming is now
complete.
4. Other buttons can be set in the same man- ner.
If the battery cable is disconnected or if the fuse
opens, the radio memory will be canceled. In that
case, reset the desired stations.
Compact disc (CD) player operation
Place the ignition switch in the ACC or ON
position, and carefully insert the compact disc into the slot with the label side up. The compact
disc is automatically pulled into the slot and starts
to play.
If the radio is already operating, it automatically
turns off and the compact disc begins to play.
CD button
When the CD button is pressed with a compact
disc loaded and the radio playing, the radio turns
off and the last used compact disc starts to play.
SEEK and TRACK (Fast
Forward, Rewind) buttons
When the SEEK button
or TRACKbutton is pressed while the compact disc is play-
ing, the compact disc plays at an increased
speed while fast forwarding or rewinding. When
the button is released, the compact disc returns
to normal play speed.
SEEK and TRACK buttons
When the SEEK
button is pressed while
the compact disc is playing, the next track follow-
ing the present one starts to play from the begin-
ning. Press the SEEK
button several times
to skip several tracks. Each time the button is
pressed, the CD advances one additional track.
The track number appears in the display window.
4-32Monitor, climate, audio, phone and voice recognition systems
Page 176 of 374
TUNE/MENU control knob/Enter button:
Turn the TUNE/MENU control knob to the left or
right to scroll and then press ENTER to select
desired item.
A–Z button:
When listening to music via USB or iPod®,
pressing the A-Z button will launch a quick
search function in music browser that will allow
user to search for music alphabetically using the
TUNE/MENU control knob.
RDM and RPT button:
When listening to music via USB or iPod®,
pressing the RDM button will shuffle the songs
being played. Pressing the RPT button will repeat
the song being played.
(back) button:
Pressing the
(back) button will return the
user to the previous menu.
FM/AM radio operation
FM-AM button:
Press the FM·AM button to change the band as
follows:
AM →FM1 →FM2 →AM
If another audio source is playing when the
FM·AM button is pressed, the audio source play- ing will automatically be turned off and the last
radio station played will begin playing.
If the FM-AM button is pressed for more than
1.5 seconds, the AUTOSTORE function will be
initiated. The “AST” icon will appear and “AU-
TOSTORE” may appear on the display screen, a
beep is heard and the radio mutes. The system
will then automatically detect the 6 stations with
the strongest frequency and save them as pre-
sets. Once AUTOSTORE is complete, the “AST”
icon will disappear and “AUTOSTORE COM-
PLETE” may appear on the display screen.
TUNE/MENU control knob (Tuning):
Turn the TUNE/MENU control knob to the left or
right for manual tuning.
SEEK tuning:
Press the SEEK/TRACK button
orto tune from low to high or high to low frequen-
cies and to stop at the next broadcasting station.
Hold either button to tune continuously. Then
release button once desired frequency is
reached.
Station select (1 to 6) memory operations:
Twelve stations can be set for the FM band (6 for
FM1, 6 for FM2) and six stations can be set for
the AM band. 1. Choose the radio band AM, FM1 or FM2
using the AM or FM button.
2. Tune to the desired station using manual or SEEK tuning. Press and hold any of the
desired station memory buttons (1 – 6) until
a beep sound is heard.
3. The station memory position (P1–P6) will now be displayed next to the band. Pro-
gramming is now complete.
4. Other buttons can be set in the same man- ner.
If the battery cable is disconnected or if the fuse
opens, the radio memory will be canceled. In that
case, reset the desired stations.
Compact disc (CD) player operation
If the radio is already operating, it automatically
turns off and the compact disc begins to play.
CD button
When the CD button is pressed with the system
off and the compact disc loaded, the system will
turn on and the compact disc will start to play.
When the CD button is pressed with a compact
disc loaded and the radio playing, the radio will
automatically be turned off and the compact disc
will start to play.
Monitor, climate, audio, phone and voice recognition systems4-37
Page 215 of 374
10. The system will announce that voice adap-tation has been completed and the system is
ready.
The VA mode will stop if:
● The
button is pressed for more than
5 seconds in VA mode.
● The vehicle begins moving during VA mode.
● The ignition switch is placed in the OFF or
LOCK position.
Training phrases
During the VA mode, the system instructs the
trainer to say the following phrases. The system
will prompt you for each phrase.
● phonebook transfer entry
● dial three oh four two nine
● delete call back number
● incoming
● transfer entry
● eight pause nine three two pause seven
● delete all entries
● call seven two four zero nine
● phonebook delete entry
● next entry ●
dial star two one seven oh
● yes
● no
● select
● missed
● dial eight five six nine two
● Bluetooth on
● outgoing
● call three one nine oh two
● nine seven pause pause three oh eight
● cancel
● call back number
● call star two zero nine five
● delete phone
● dial eight three zero five one
● record name
● four three pause two nine pause zero
● delete redial number
● phonebook list names
● call eight oh five four one ●
correction
● connect phone
● dial seven four oh one eight
● previous entry
● delete
● dial nine seven two six six
● call seven six three oh one
● go back
● call five six two eight zero
● dial six six four three seven
MANUAL CONTROL
While using the voice recognition system, it is
possible to select menu options by using the
steering wheel controls instead of speaking voice
commands. The manual control mode does not
allow dialing a phone number by digits. The user
may select an entry from the Phonebook or Re-
cent Calls lists. To re-activate voice recognition,
exit the manual control mode by pressing and
holding the PHONE/END (
) button. At that
time, pressing the PHONE/SEND (
) button
will start the Hands Free Phone System.
4-76Monitor, climate, audio, phone and voice recognition systems
Page 231 of 374
2. this device must accept any interference,including interference that may cause unde-
sired operation of the device.
IC Regulatory information
– Operation is subject to the following two con- ditions: (1) this device may not cause interfer-
ence, and (2) this device must accept any
interference, including interference that may
cause undesired operation of the device.
– This Class B digital apparatus meets all re- quirements of the Canadian Interference-
Causing Equipment Regulations.
BLUETOOTH® is a
trademark owned by
Bluetooth SIG, Inc.
and licensed to
Bosch.
VOICE COMMANDS
You can use voice commands to operate various
Bluetooth® Hands-Free Phone System features
using the NISSAN Voice Recognition system. For
additional information, refer to “NISSAN Voice
Recognition System” in this section.
Voice Prompt Interrupt
While using the voice recognition system, the
system voice can be interrupted to allow the user
to speak commands. While the system is speak-
ing, press the
button on the steering
wheel. The system voice will stop and a tone will
be heard. After the tone, speak desired command
(displayed on the touch-screen) .
One Shot Call
To use the system faster, you may speak the
second level commands with the main menu
command on the main menu. For example, press
the
button and after the tone say, “Call
Redial”.
CONNECTING PROCEDURE
NOTE:
The connecting procedure must be per-
formed when the vehicle is stationary. If the
vehicle starts moving during the procedure,
the procedure will be cancelled.
1. Press the [
] button on the control
panel.
2. Touch the “Settings” key.
3. Touch the “Phone & Bluetooth” key.
4. Touch the “Connect New Device” key.
LHA2773
4-92Monitor, climate, audio, phone and voice recognition systems
Page 252 of 374
WARNING
Do not operate the push-button ignition
switch while driving the vehicle except in
an emergency. (The engine will stop when
the ignition switch is pushed 3 consecu-
tive times in quick succession or the igni-
tion switch is pushed and held for more
than 2 seconds.) If the engine stops while
the vehicle is being driven, this could lead
to a crash and serious injury.
When the ignition switch is pushed without de-
pressing the brake pedal or the clutch pedal
(MT) , the ignition switch position will illuminate as
follows: Push center
● once to change to ACC.
● two times to change to ON.
● three times to return to OFF.
The ignition switch will automatically return to the
LOCK position when any door is either opened or
closed with the switch in the OFF position.
The ignition lock is designed so that the ignition
switch position cannot be switched to OFF until
the shift lever is moved into the P (Park) position
or N (Neutral) position (MT) .
When the ignition switch cannot be pushed to-
ward the OFF position, proceed as follows: 1. Move the shift lever into the P (Park) position or N (Neutral) position (MT) .
2. Push the ignition switch. The ignition switch position will change to the ON position.
3. Push the ignition switch again to the OFF position.
The shift lever can be moved from the P
(Park) position if the ignition switch is in
the ON position and the brake pedal is
depressed. If the battery of the vehicle is discharged,
the push-button ignition switch cannot be
moved from the LOCK position.
Some indicators and warnings for operation are
displayed in the meter. For additional information,
refer to “Warning/indicator lights and audible
reminders” in this section.
LSD2014
PUSH-BUTTON IGNITION SWITCH (if
so equipped)
Starting and driving5-11
Page 254 of 374
EMERGENCY ENGINE SHUT OFF
To shut off the engine in an emergency situation
while driving, perform the following procedure:
– Rapidly push the push-button ignition switchthree consecutive times in less than 1.5 sec-
onds, or
– Push and hold the push-button ignition switch for more than 2 seconds.
NISSAN INTELLIGENT KEY®
BATTERY DISCHARGE
If the battery of the NISSAN Intelligent Key® is
discharged, or environmental conditions interfere
with the Intelligent Key operation, start the engine
according to the following procedure:
1. Move the shift lever to the P (Park) or N (Neutral) position.
2. Firmly apply the foot brake.
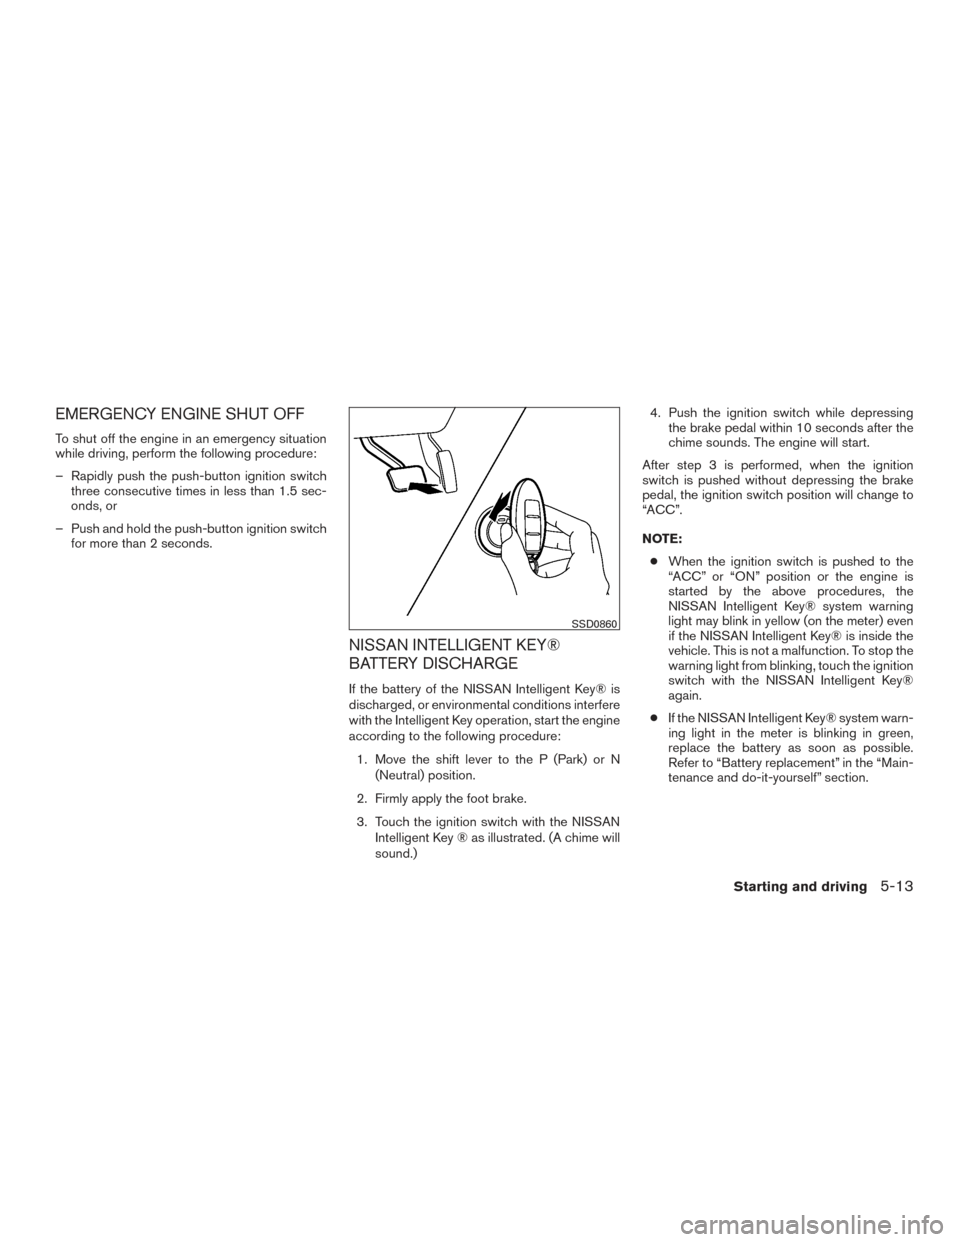
3. Touch the ignition switch with the NISSAN Intelligent Key ® as illustrated. (A chime will
sound.) 4. Push the ignition switch while depressing
the brake pedal within 10 seconds after the
chime sounds. The engine will start.
After step 3 is performed, when the ignition
switch is pushed without depressing the brake
pedal, the ignition switch position will change to
“ACC”.
NOTE: ● When the ignition switch is pushed to the
“ACC” or “ON” position or the engine is
started by the above procedures, the
NISSAN Intelligent Key® system warning
light may blink in yellow (on the meter) even
if the NISSAN Intelligent Key® is inside the
vehicle. This is not a malfunction. To stop the
warning light from blinking, touch the ignition
switch with the NISSAN Intelligent Key®
again.
● If the NISSAN Intelligent Key® system warn-
ing light in the meter is blinking in green,
replace the battery as soon as possible.
Refer to “Battery replacement” in the “Main-
tenance and do-it-yourself” section.
SSD0860
Starting and driving5-13