Page 9 of 24
7
STARTING/STOPPING THE ENGINE
Depress the brake pedal.
Move the shift lever to the P (PARK) position.
Turn the ignition switch to the START position.
TURNING THE ENGINE OFF
Move the shift lever to the P (PARK) position,
apply the parking brake and turn the ignition switch to the LOCK position.
For more information, refer to the “Starting and driving (section 5)” of your Owner’s Manual.
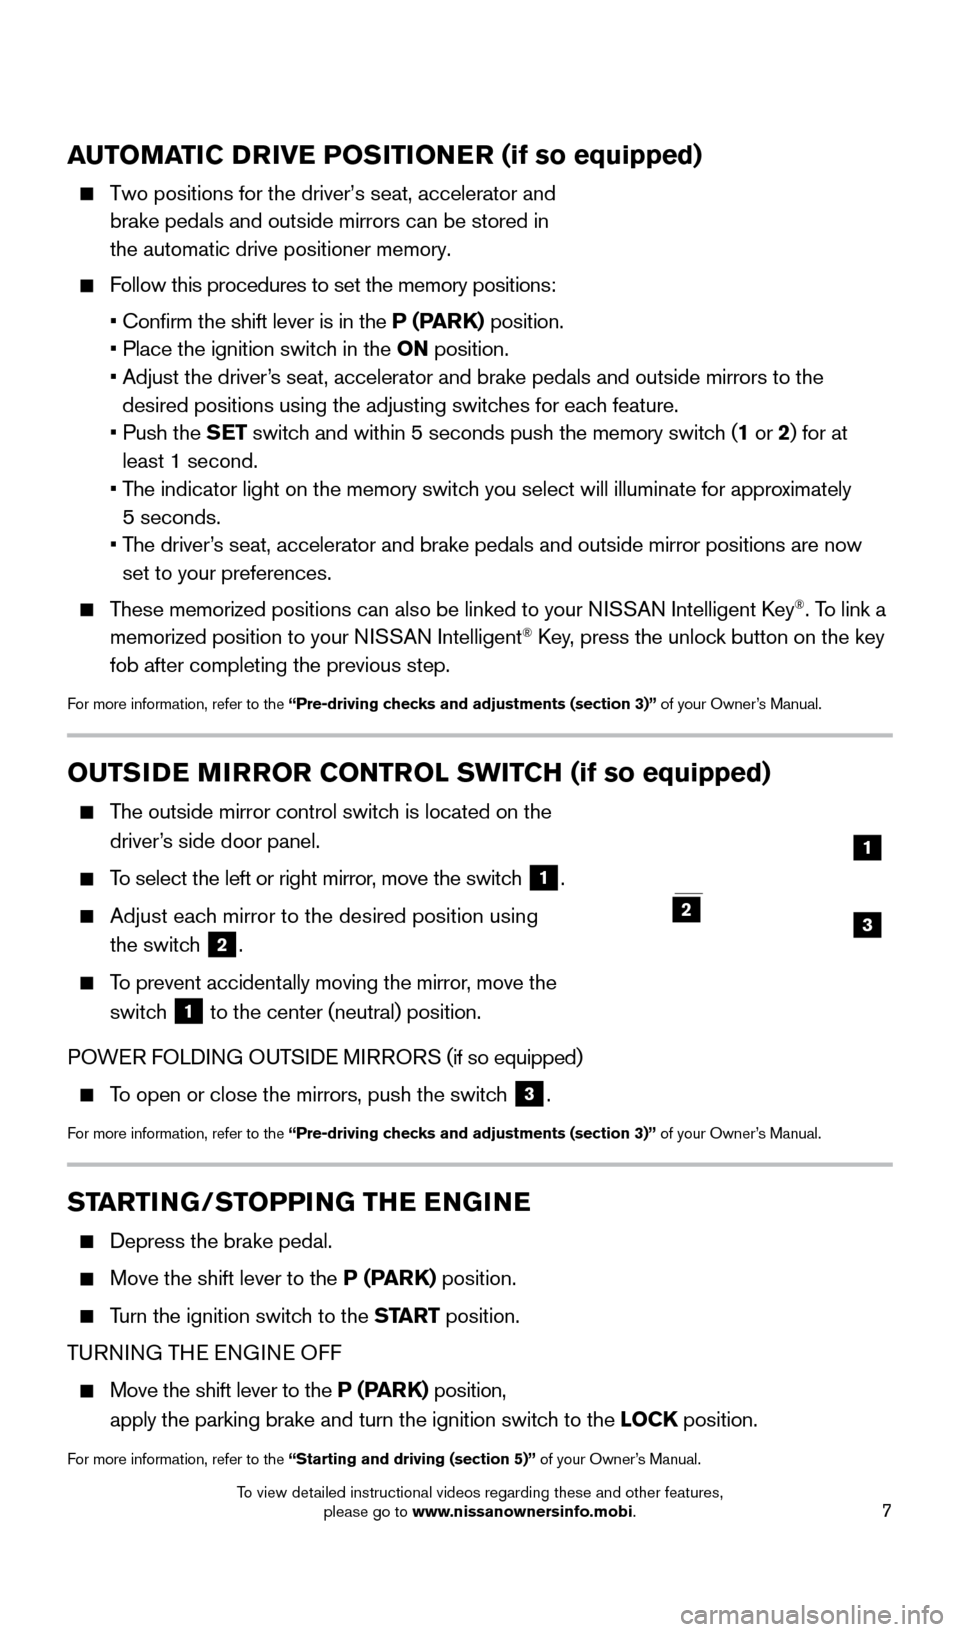
OUTSIDE MIRROR CONTROL SWITCH (if so equipped)
The outside mirror control switch is located on the
driver’s side door panel.
To select the left or right mirror, move the switch 1.
Adjust each mirror to the desired position using
the switch
2.
To prevent accidentally moving the mirror, move the
switch
1 to the center (neutral) position.
POWER FOLDING OUTSIDE MIRRORS (if so equipped)
To open or close the mirrors, push the switch 3.
For more information, refer to the “Pre-driving checks and adjustments (section 3)” of your Owner’s Manual.
2
1
23
AUTOMATIC DRIVE POSITIONER (if so equipped)
Two positions for the driver’s seat, accelerator and
brake pedals and outside mirrors can be stored in
the automatic drive positioner memory.
Follow this procedures to set the memory positions:
• Confirm the shift lever is in the
P (PARK) position.
• Place the ignition switc
h in the ON position.
•
Adjust the driver
’s seat, accelerator and brake pedals and outside mirrors to the
desired positions using the adjusting switches for each feature.
•
Push the
SET switch and within 5 seconds push the memory switch (1 or 2) for at
least 1 second.
•
T
he indicator light on the memory switch you select will illuminate for approximately
5 seconds.
•
T
he driver’s seat, accelerator and brake pedals and outside mirror positions are no\
w
set to your preferences.
These memorized positions can also be linked to your NISSAN Intelligent Key®. To link a
memorized position to your NISSAN Intelligent® Key, press the unlock button on the key
fob after completing the previous step.
For more information, refer to the “Pre-driving checks and adjustments (section 3)” of your Owner’s Manual.
1925624_15b_Titan_QRG_041415.indd 74/14/15 2:33 PM
To view detailed instructional videos regarding these and other features, please go to www.nissanownersinfo.mobi.
Page 10 of 24
8
FIRST DRIVE FEATURES
HEADLIGHT CONTROL SWITCH
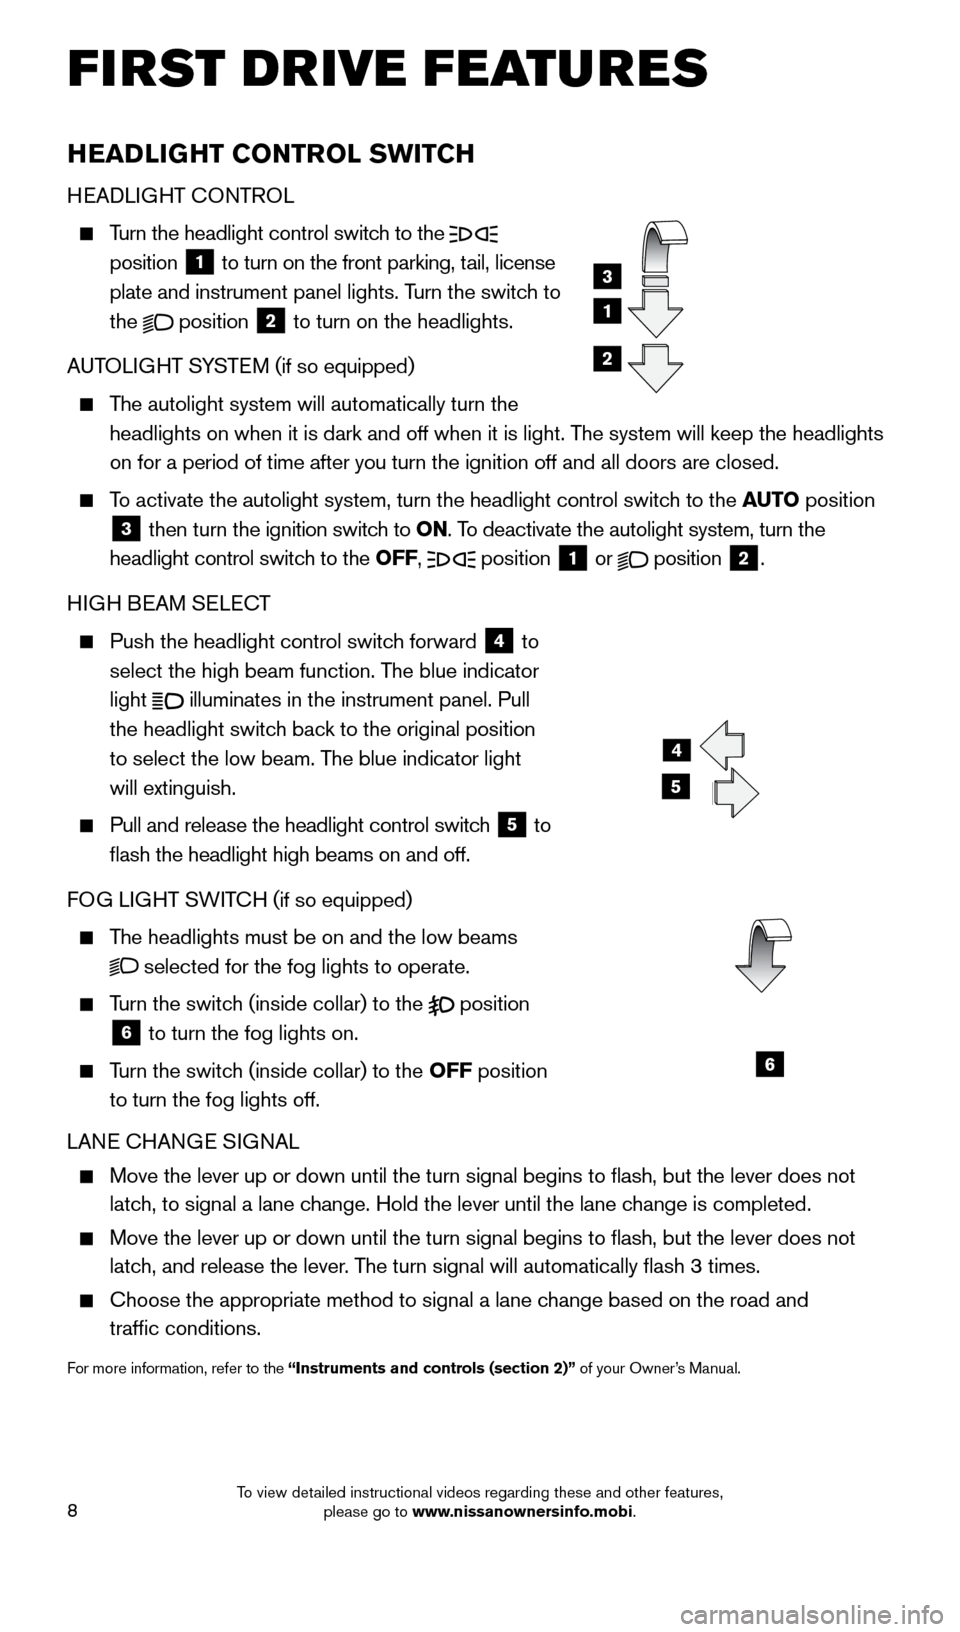
HEADLIGHT CONTROL
Turn the headlight control switch to the
position 1 to turn on the front parking, tail, license
plate and instrument panel lights. Turn the switch to
the
position
2 to turn on the headlights.
AUTOLIGHT SYSTEM (if so equipped)
The autolight system will automatically turn the
headlights on when it is dark and off when it is light. The system will keep the headlights
on for a period of time after you turn the ignition off and all doors ar\
e closed.
To activate the autolight system, turn the headlight control switch to the AUTO position
3 then turn the ignition switch to ON. To deactivate the autolight system, turn the
headlight control switch to the OFF, position 1 or
position
2.
HIGH BEAM SELECT
Push the headlight control switc h forward
4 to
select the high beam function. The blue indicator
light
illuminates in the instrument panel. Pull
the headlight switch back to the original position
to select the low beam. The blue indicator light
will extinguish.
Pull and release the headlight control switc h
5 to
flash the headlight high beams on and off.
FOG LIGHT SWITCH (if so equipped)
The headlights must be on and the low beams
selected for the fog lights to operate.
Turn the switch (inside collar) to the
position
6 to turn the fog lights on.
Turn the switch (inside collar)
to the OFF position
to turn the fog lights off.
LANE CHANGE SIGNAL
Move the lever up or down until the turn signal begins to flash, but t\
he lever does not
latch, to signal a lane change. Hold the lever until the lane change is completed.
Move the lever up or down until the turn signal begins to flash, but t\
he lever does not
latch, and release the lever. The turn signal will automatically flash 3 times.
Choose the appropriate method to signal a lane c hange based on the road and
traffic conditions.
For more information, refer to the “Instruments and controls (section 2)” of your Owner’s Manual.
4
5
6
1
3
2
1925624_15b_Titan_QRG_041415.indd 84/14/15 2:33 PM
To view detailed instructional videos regarding these and other features, please go to www.nissanownersinfo.mobi.
Page 11 of 24
9
WINDSHIELD WIPER AND WASHER SWITCH
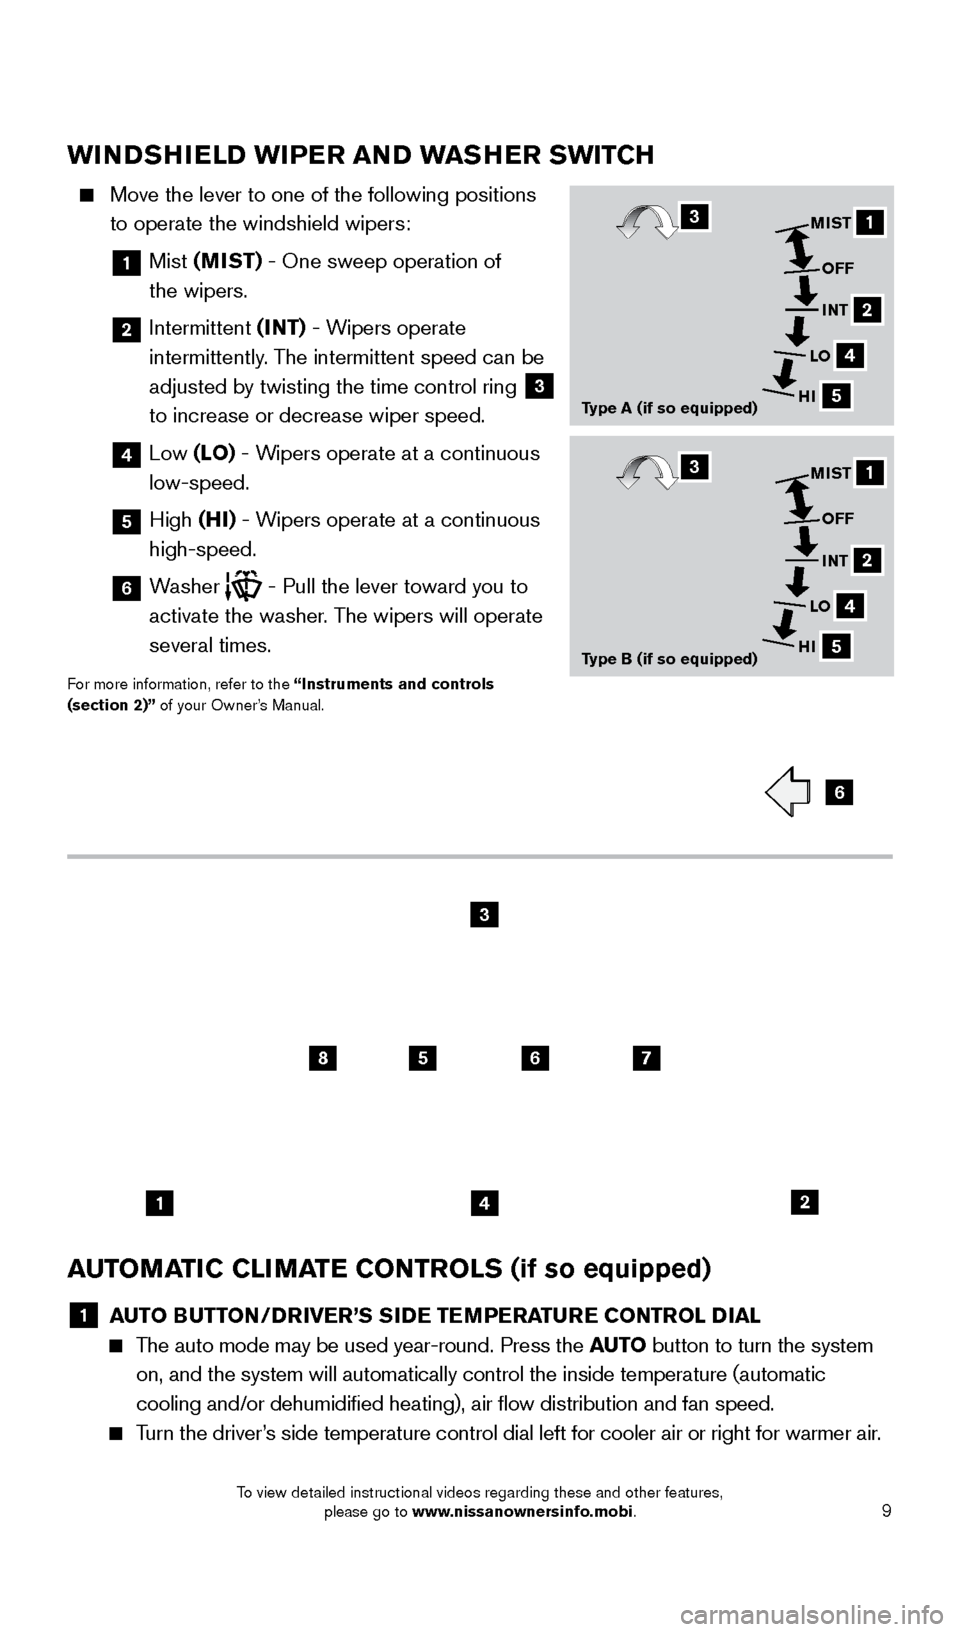
Move the lever to one of the following positions
to operate the windshield wipers:
1 Mist (MIST) - One sweep operation of
the wipers.
2 Intermittent (INT) - Wipers operate
intermittently. The intermittent speed can be
adjusted by twisting the time control ring
3
to increase or decrease wiper speed.
4 Low (LO) - Wipers operate at a continuous
low-speed.
5 High (HI) - Wipers operate at a continuous
high-speed.
6 Washer
- Pull the lever toward you to
activate the washer. The wipers will operate
several times.
For more information, refer to the “Instruments and controls
(section 2)” of your Owner’s Manual.
AUTOMATIC CLIMATE CONTROLS (if so equipped)
1 A UTO BUTTON/DRIVER’S SIDE TEMPERATURE CONTROL DIAL The auto mode may be used year-round. Press the AUTO
button to turn the system
on, and the system will automatically control the inside temperature (a\
utomatic
cooling and/or dehumidified heating), air flow distribution and fan\
speed.
Turn the driver’s side temperature control dial left for cooler air or right for warmer \
air.
6
1
1
2
2
4
4
5
5
MIST
MIST OFF
OFF INT
INT
LO
LO
HI
HI3
3
12
8567
3
4
Type A (if so equipped)
Type B (if so equipped)
1925624_15b_Titan_QRG_041415.indd 94/14/15 2:33 PM
To view detailed instructional videos regarding these and other features, please go to www.nissanownersinfo.mobi.
Page 12 of 24

10
FI RST DRIVE FEATURES
2 DUAL BUTTON/PASSENGER’S SIDE TEMPERATURE CONTROL DIAL Press the
D UAL button to turn the passenger’s side temperature controls on or off.
This will allow the passenger’s side temperature to be adjusted independently from
the driver’s side.
Turn the passenger’s side temperature control dial left for cooler air or right for warmer air.
3 F AN SPEED CONTROL DIAL/OFF BUTTON Turn the dial to the left to decrease fan speed or to the right to increa\
se fan speed.
Push the button to turn the system off.
4 AI R FLOW CONTROL BUTTONS Press one of the air flow control buttons to manually control air fl\
ow
.
Air flows from the center and side vents.
Air flows from the center , side and foot vents.
Air flows mainly from the foot vents.
Air flows from the defroster and foot vents.
5 D EFROSTING/DEFOGGING FRONT AND SIDE WINDOWS Press the front window defroster button
to turn the system on. The A/C
automatically turns on when the defroster mode is selected. This feature removes
humidity from the air.
Set the temperature control dial 1 and the fan speed control dial 3 to their
maximum settings.
6 R EAR WINDOW AND OUTSIDE MIRROR (if so equipped)
D EFROSTER BUTTON
Push the rear window defroster button to turn the system on or off. The rear window defroster automatically turns off after approximately 15 minutes.
7 AI R RECIRCULATION BUTTON Press the air recirculation button
to recirculate air inside the vehicle. The indicator
light on the button will illuminate. This system is used to avoid certain outside odors
and to help adjust the inside vehicle temperature more effectively.
Press the air recirculation button again to turn air recirculation off. This allows
outside air to be drawn into the passenger compartment to prevent foggin\
g in defroster,
floor or defroster/floor modes.
The air recirculation mode cannot be activated when the climate control s\
ystem is in the front defroster mode
or the front defroster and foot vent mode
.
8 A/C BUTTON Press the
A/C button to manually turn the A/C on or off.
For more information, refer to the “Instruments and controls (section 2)” and the “Monitor, climate, audio, phone
and voice recognition systems (section 4)” of your Owner’s Manual.
1925624_15b_Titan_QRG_041415.indd 104/14/15 2:33 PM
To view detailed instructional videos regarding these and other features, please go to www.nissanownersinfo.mobi.
Page 13 of 24
11
FM/AM/SiriusXM®* SATELLITE RADIO WITH CD PLAYER
(if so equipped)
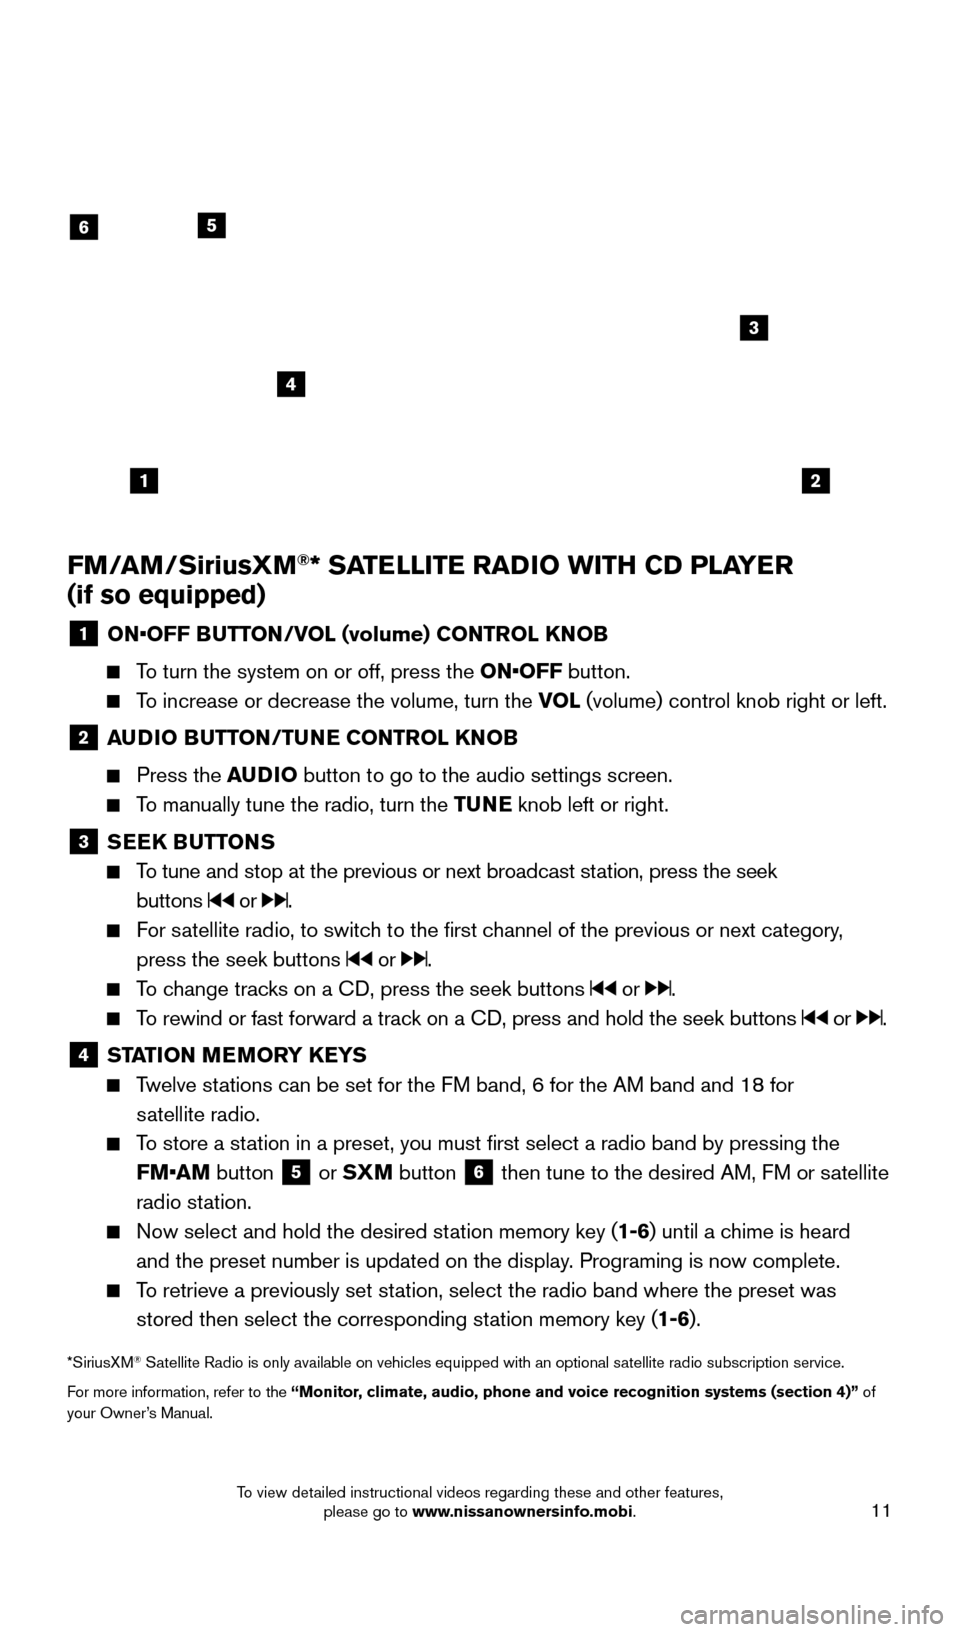
1 ON •OFF BUTTON/VOL (volume) CONTROL KNOB
To turn the system on or off, press the ON•OFF button.
To increase or decrease the volume, turn the VOL
(volume) control knob right or left.
2 AUDIO BUTTON/TUNE CONTROL KNOB
Press the
AUDIO button to go to the audio settings screen.
To manually tune the radio, turn the TUNE knob left or right.
3 SEEK BUTTONS
To tune and stop at the previous or next broadcast station, press the seek
buttons
or .
For satellite radio, to switch to the first channel of the previous or next category, press the seek buttons
or .
To change tracks on a CD, press the seek buttons or .
To rewind or fast forward a track on a CD, press and hold the seek buttons or .
4 ST ATION MEMORY KEYS Twelve stations can be set for the FM band, 6 for the AM band and 18 for
satellite radio.
To store a station in a preset, you must first select a radio band by pressing the FM•AM button
5 or
SXM button
6 then tune to the desired AM, FM or satellite
radio station.
Now select and hold the desired st ation memory key (1-6)
until a chime is heard
and the preset number is updated on the display. Programing is now complete.
To retrieve a previously set station, select the radio band where the preset was stored then select the corresponding station memory key (1-6).
*SiriusXM® Satellite Radio is only available on vehicles equipped with an optional s\
atellite radio subscription service.
For more information, refer to the “Monitor, climate, audio, phone and voice recognition systems (section 4)” of
your Owner’s Manual.
12
6
3
4
5
1925624_15b_Titan_QRG_041415.indd 114/14/15 2:33 PM
To view detailed instructional videos regarding these and other features, please go to www.nissanownersinfo.mobi.
Page 14 of 24
12
FI RST DRIVE FEATURES
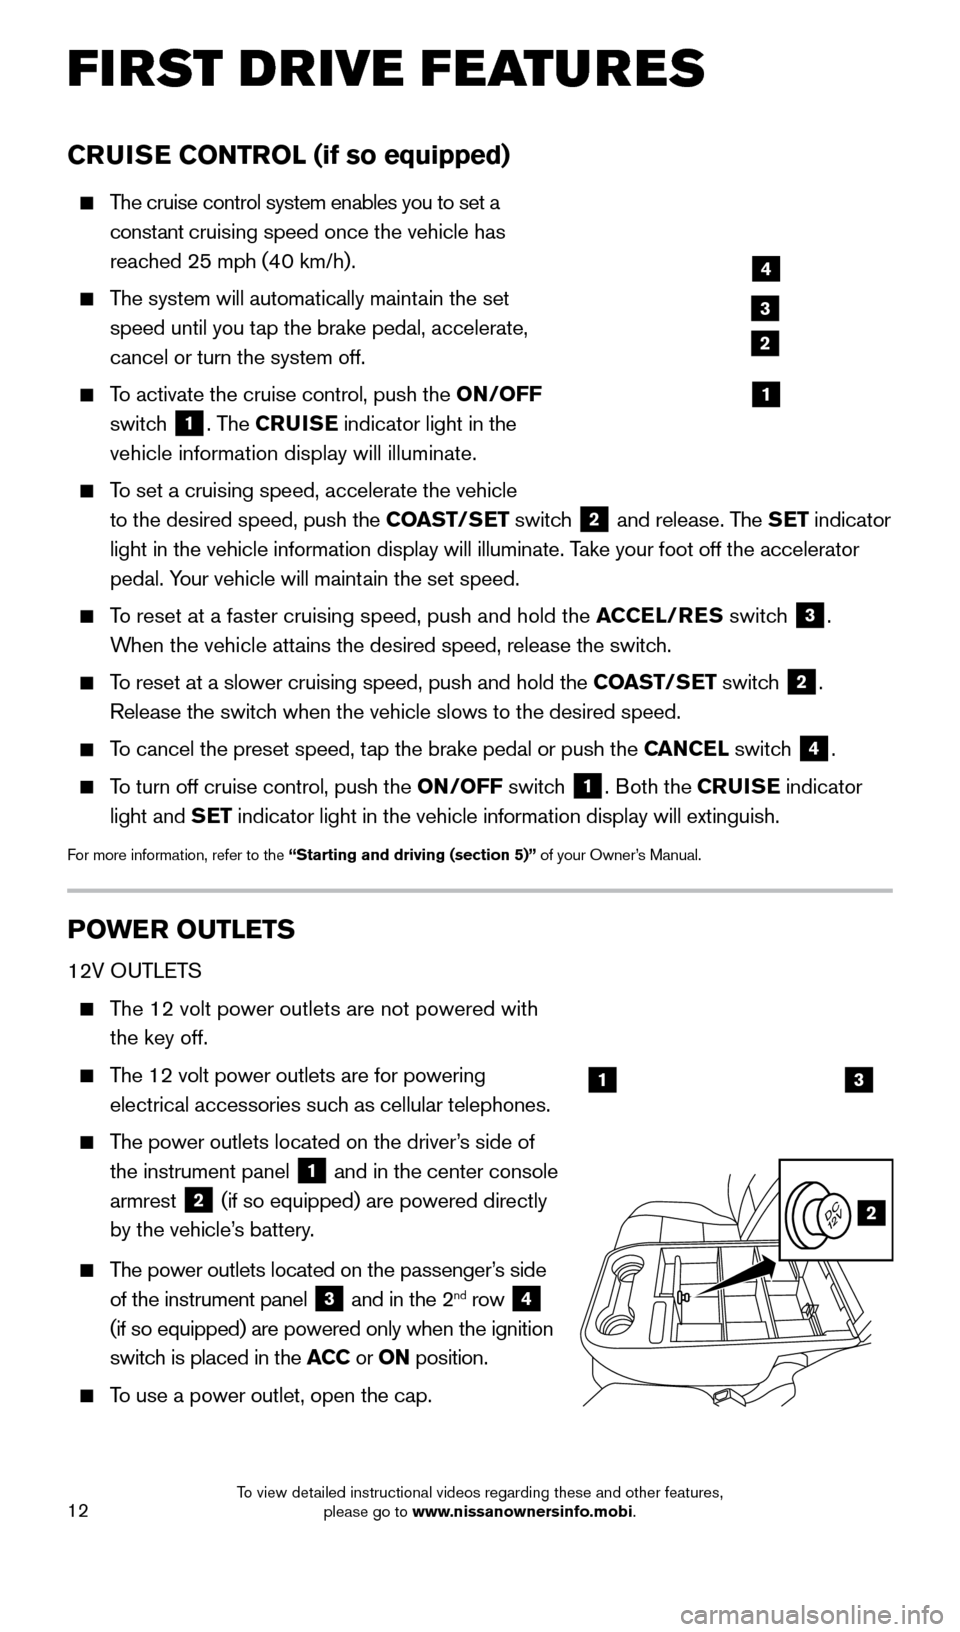
CRUISE CONTROL (if so equipped)
The cruise control system enables you to set a
constant cruising speed once the vehicle has
reached 25 mph (40 km/h).
The system will automatically maintain the set
speed until you tap the brake pedal, accelerate,
cancel or turn the system off.
To activate the cruise control, push the ON/OFF
switch
1. The CRUISE indicator light in the
vehicle information display will illuminate.
To set a cruising speed, accelerate the vehicle
to the desired speed, push the COAST/SET switch
2 and release. The SET indicator
light in the vehicle information display will illuminate. Take your foot off the accelerator
pedal. Your vehicle will maintain the set speed.
To reset at a faster cruising speed, push and hold the ACCEL/RES switch
3.
When the vehicle attains the desired speed, release the switch.
To reset at a slower cruising speed, push and hold the COAST/SET switch 2.
Release the switch when the vehicle slows to the desired speed.
To cancel the preset speed, tap the brake pedal or push the CANCEL switch 4.
To turn off cruise control, push the ON/OFF switch 1. Both the CRUISE indicator
light and SET indicator light in the vehicle information display will extinguish.
For more information, refer to the “Starting and driving (section 5)” of your Owner’s Manual.
POWER OUTLETS
12V OUTLETS
The 12 volt power outlets are not powered with the key off.
The 12 volt power outlets are for powering
electrical accessories such as cellular telephones.
The power outlets located on the driver’s side of
the instrument panel
1 and in the center console
armrest 2 (if so equipped) are powered directly
by the vehicle’s battery.
The power outlets located on the passenger’s side
of the instrument panel
3 and in the 2nd row 4
(if so equipped) are powered only when the ignition
switch is placed in the ACC or ON position.
To use a power outlet, open the cap.
4
3
2
1
13
2
1925624_15b_Titan_QRG_041415.indd 124/14/15 2:33 PM
To view detailed instructional videos regarding these and other features, please go to www.nissanownersinfo.mobi.
Page 15 of 24
13
120V OUTLET (if so equipped)
120 volt power outlets are not powered directly to
the battery and require the key to be on and the
power inverter switch
7 is depressed.
400W mode is only available with the transmission
in the P (PA R K ) position.
The 120 volt power outlets are for powering
electrical devices up to 120 volts.
The power outlets located in the truck box 5 and
the center console 6 are powered directly by
the vehicle’s battery.
For devices that require power of 120V or
more, the vehicle must be placed in the
P (PARK) position.
For powering devices that exceed 120V, first activate the power inverter switch
7.
For more information, refer to the “Instruments and controls (section 2)” of your Owner’s Manual.
4
5
6
7
1925624_15b_Titan_QRG_041415.indd 134/14/15 2:33 PM
To view detailed instructional videos regarding these and other features, please go to www.nissanownersinfo.mobi.
Page 16 of 24

14
SYS T E M GUIDE
TEXT MESSAGING * (if so equipped)
This system allows for sending and receiving text
messages through the vehicle interface.
Using predefined or custom mess ages, send a
text to a name or phone number stored in your
Bluetooth
® Hands-free Phone System.
Once enabled, the text mess age, sender and
delivery time are shown on the control panel display screen.
Text messages have the option of being read aloud. Many phones require special permission to enable Text Messaging. Check the phone’s screen during Bluetooth
pairing or phone Bluetooth Settings to enable messages or notifications.
Text messages are only displayed on the control panel if the vehicle speed is les\
s than 5 mph (8 km/h).
Some phones do not support sending or reading mess ages over Bluetooth Message
Access Profile (MAP). See your cellular phone’s Owner’s Manual for details and also
visit www.nissanusa.com/bluetooth.
*Laws in some jurisdictions may restrict the use of “Text-to-Speech.” Some of the applications and features, such as social
networking and texting may also be restricted. Check local regulations for any requirements before using these features.
For more information, refer to the “Monitor, climate, audio, phone and voice recognition systems (section 4) ” of
your Owner’s Manual.
VEHICLE INFORMATION DISPLAY (if so equipped)
When the INFO button
1 is pressed, the
following modes will appear in the vehicle
information display
2:
• M
PG – Displays the instant fuel economy.
•
RAN
GE – Displays the estimated distance the
vehicle can be driven before refueling.
• W
ARNING – Displays when a warning is present.
Turn the INF O button 1 to highlight the desired
menu within the selected mode.
Press the INF O button 1 to enter the
highlighted menu.
For more information, refer to the “Instruments and controls (section 2)” of your Owner’s Manual.
1
2
1925624_15b_Titan_QRG_041415.indd 144/14/15 2:33 PM
To view detailed instructional videos regarding these and other features, please go to www.nissanownersinfo.mobi.