2015 NISSAN ROGUE SELECT Tail light
[x] Cancel search: Tail lightPage 52 of 322
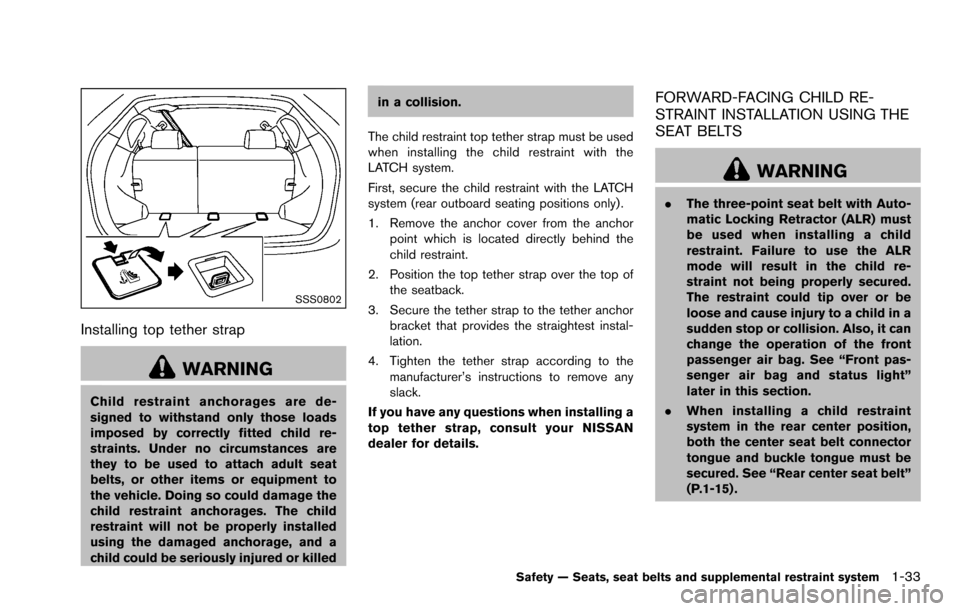
SSS0802
Installing top tether strap
WARNING
Child restraint anchorages are de-
signed to withstand only those loads
imposed by correctly fitted child re-
straints. Under no circumstances are
they to be used to attach adult seat
belts, or other items or equipment to
the vehicle. Doing so could damage the
child restraint anchorages. The child
restraint will not be properly installed
using the damaged anchorage, and a
child could be seriously injured or killedin a collision.
The child restraint top tether strap must be used
when installing the child restraint with the
LATCH system.
First, secure the child restraint with the LATCH
system (rear outboard seating positions only) .
1. Remove the anchor cover from the anchor point which is located directly behind the
child restraint.
2. Position the top tether strap over the top of the seatback.
3. Secure the tether strap to the tether anchor bracket that provides the straightest instal-
lation.
4. Tighten the tether strap according to the manufacturer’s instructions to remove any
slack.
If you have any questions when installing a
top tether strap, consult your NISSAN
dealer for details.
FORWARD-FACING CHILD RE-
STRAINT INSTALLATION USING THE
SEAT BELTS
WARNING
. The three-point seat belt with Auto-
matic Locking Retractor (ALR) must
be used when installing a child
restraint. Failure to use the ALR
mode will result in the child re-
straint not being properly secured.
The restraint could tip over or be
loose and cause injury to a child in a
sudden stop or collision. Also, it can
change the operation of the front
passenger air bag. See “Front pas-
senger air bag and status light”
later in this section.
. When installing a child restraint
system in the rear center position,
both the center seat belt connector
tongue and buckle tongue must be
secured. See “Rear center seat belt”
(P.1-15) .
Safety — Seats, seat belts and supplemental restraint system1-33
Page 66 of 322
NISSAN ADVANCED AIR BAG SYS-
TEM (front seats)
This vehicle is equipped with the NISSAN
Advanced Air Bag System for the driver and
front passenger seats. This system is designed
to meet certification requirements under U.S.
regulations.All of the information, cautions
and warnings in this manual apply and
must be followed.
The driver supplemental front-impact air bag is
located in the center of the steering wheel; the
passenger supplemental front-impact air bag is
mounted in the instrument panel above the glove
box. The front air bags are designed to inflate in
higher severity frontal collisions, although they
may inflate if the forces in another type of
collision are similar to those of a higher severity
frontal impact. They may not inflate in certain
frontal collisions. Vehicle damage (or lack of it) is
not always an indication of proper front air bag
operation.
The NISSAN Advanced Air Bag System has
dual stage air bag inflators. The system monitors
information from the crash zone sensor, satellite
sensor, Air bag Control Unit (ACU) , seat belt
buckle sensors and occupant classification
sensor (pattern sensor) . Inflator operation is
based on the severity of a collision and seat belt
usage for the driver. For the front passenger, the occupant classification sensor is also monitored.
Based on information from the sensors, only one
front air bag may inflate in a crash, depending on
the crash severity and whether the front
occupants are belted or unbelted. Additionally,
the front passenger air bag may be automatically
turned OFF under some conditions, depending
on the information provided by the occupant
classification sensor. If the front passenger air
bag is OFF, the passenger air bag status light
will be illuminated (if the seat is unoccupied, the
light will not be illuminated, but the air bag will
be off) . (See “Front passenger air bag and
status light” (P.1-48) for further details.) One
front air bag inflating does not indicate improper
performance of the system.
If you have any questions about your air bag
system, contact NISSAN or a NISSAN dealer. If
you are considering modification of your vehicle
due to a disability, you may also contact
NISSAN. Contact information is contained in
the front of this Owner’s Manual.
When a front air bag inflates, a fairly loud noise
may be heard, followed by release of smoke.
This smoke is not harmful and does not indicate
a fire. Care should be taken not to inhale it, as it
may cause irritation and choking. Those with a
history of a breathing condition should get fresh
air promptly.
Front air bags, along with the use of seat belts,
help to cushion the impact force on the head
and chest of the front occupants. They can help
save lives and reduce serious injuries. However,
an inflating front air bag may cause facial
abrasions or other injuries. Front air bags do
not provide restraint to the lower body.
Even with NISSAN Advanced Air Bags, seat
belts should be correctly worn and the driver
and passenger seated upright as far as practical
away from the steering wheel or instrument
panel. The front air bags inflate quickly in order
to help protect the front occupants. Because of
this, the force of the front air bag inflating can
increase the risk of injury if the occupant is too
close to, or is against, the air bag module during
inflation.
The front air bags will deflate quickly after a
collision.
The front air bags operate only when the
ignition switch is in the ON position.
After turning the ignition switch to the ON
position, the supplemental air bag warning
light illuminates. The supplemental air bag
warning light will turn off after about 7
seconds if the system is operational.
Safety — Seats, seat belts and supplemental restraint system1-47
Page 72 of 322
.If the vehicle becomes involved in a
collision but a pretensioner is not
activated, be sure to have the pre-
tensioner system checked and, if
necessary, replaced by a NISSAN
dealer.
. No unauthorized changes should be
made to any components or wiring
of the pretensioner system. This is
to prevent damage to or accidental
activation of the pretensioners.
Tampering with the pretensioner
system may result in serious perso-
nal injury.
. Work around and on the preten-
sioner system should be done by a
NISSAN dealer. Installation of elec-
trical equipment should also be
done by a NISSAN dealer. Un-
authorized electrical test equipment
and probing devices should not be
used on the pretensioner system.
. If you need to dispose of a preten-
sioner or scrap the vehicle, contact a
NISSAN dealer. Correct preten-
sioner disposal procedures are set
forth in the appropriate NISSAN
Service Manual. Incorrect disposal
procedures could cause personal injury.
The pretensioner system may activate with the
supplemental air bag system in certain types of
collisions. Working with the seat belt retractor, it
helps tighten the seat belt when the vehicle
becomes involved in certain types of collisions,
helping to restrain front seat occupants.
The pretensioner is encased with the seat belt
retractor. These seat belts are used the same
way as conventional seat belts.
When a pretensioner activates, smoke is re-
leased and a loud noise may be heard. The
smoke is not harmful and does not indicate a
fire. Care should be taken not to inhale it, as it
may cause irritation and choking. Those with a
history of a breathing condition should get fresh
air promptly.
After pretensioner activation, load limiters allow
the seat belt to release webbing (if necessary) to
reduce forces against the chest.
The supplemental air bag warning light
is
used to indicate malfunctions in the pretensioner
system. (See “Supplemental air bag warning
light” (P.1-54) for more details.) If the supple-
mental air bag warning light indicates there is a
malfunction, have the system checked by a
NISSAN dealer. When selling your vehicle, we request that you
inform the buyer about the pretensioner system
and guide the buyer to the appropriate sections
in this Owner’s Manual.
Safety — Seats, seat belts and supplemental restraint system1-53
Page 94 of 322
INDICATORS FOR OPERATION
The design of the warnings and alerts may differ
depending on the model.
1. Door open warning
This warning appears if any of the doors are
open or not closed securely. The vehicle icon
indicates which door is open on the display.
2. Lift gate open warning
This warning appears if the lift gate is open or
not closed securely. When theswitch is
pushed, the lift gate open warning turns off.
3. Loose fuel cap warning
This warning appears when the fuel-filler cap is
not tightened correctly after the vehicle has
been refueled. (See “Fuel-filler cap” (P.3-11) .)
4. Check tire pressure warning
This warning appears when the low tire pressure
warning light in the meter illuminates and low tire
pressure is detected. The warning appears each
time the ignition switch is placed in the ON
position as long as the low tire pressure warning
light remains illuminated. If this warning appears,
stop the vehicle and adjust the tire pressure to
the recommended COLD tire pressure shown
on the Tire and Loading Information label. The
check tire pressure warning turns off after a period of time. (See “Low tire pressure warning
light” (P.2-12) and “Tire Pressure Monitoring
System (TPMS)” (P.5-3) .)
5. Parking brake release warning
This warning appears when the vehicle speed is
above 4 MPH (7 km/h) and the parking brake is
applied.
6. Setting menu operation warning
The warning appears when you try to operate
the setting menu while driving. The setting menu
can only be entered when the vehicle is
stationary.
7. Low outside temperature warning
This warning appears if the outside temperature
drops below 378F(3
8C) with the ignition switch
in the ON position. The outside temperature
display flashes at the same time. These warning
features can be turned off. (See “Trip computer”
(P.2-21) .)
8. Low fuel warning
This warning appears when the fuel level in the
tank is getting low. Refuel as soon as it is
convenient, preferably before the fuel gauge
reaches the empty (0) position.
There is a small reserve of fuel remaining
in the tank when the fuel gauge reaches
the empty (0) position.
9. Driver alert
This warning appears when the previously set
time for a break is reached. You can set the time
for up to 6 hours in the setting menu. (See “Trip
computer” (P.2-21).)
10. Cruise control indicator (if so
equipped)
The cruise main switch indicator (CRUISE) is
displayed when the cruise control main switch is
pushed. When the main switch is pushed again,
the CRUISE indicator disappears. When the
CRUISE indicator is displayed, the cruise
control system is operational.
The cruise control set indicator (SET) is
displayed while the vehicle speed is controlled
by the cruise control system. If the SET indicator
blinks while the engine is running, it may indicate
that the cruise control system is not functioning
properly. Have the system checked by a
NISSAN dealer.
For more details, see “Cruise control” (P.5-17) .
11. Extended storage fuse warning (if so
equipped)
This warning may appear if the extended storage
fuse switch is not pushed in (switched on) .
When this warning appears, push in (switch on)
the extended storage fuse switch to turn off the
Instruments and controls2-19
Page 104 of 322
SIC3480
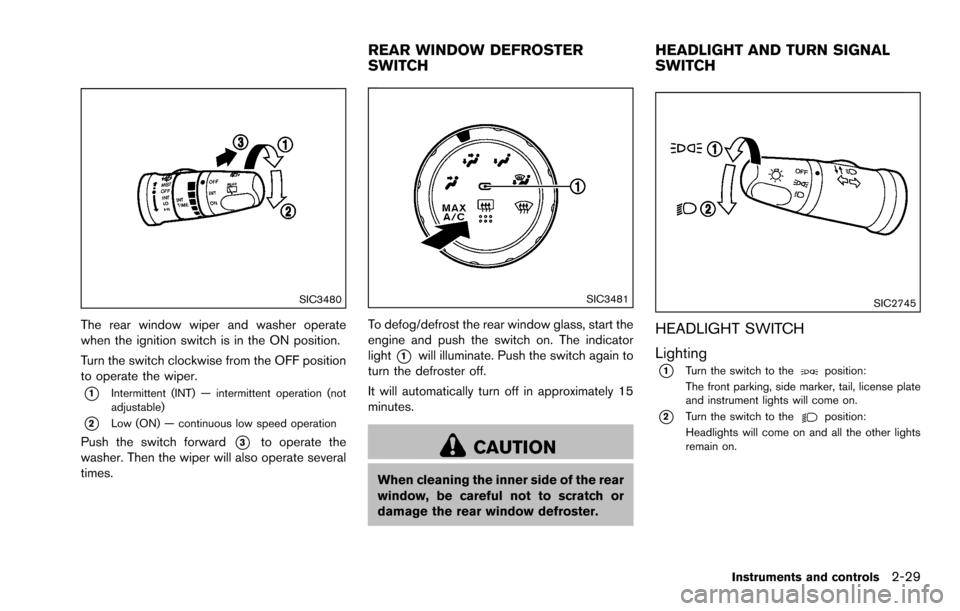
The rear window wiper and washer operate
when the ignition switch is in the ON position.
Turn the switch clockwise from the OFF position
to operate the wiper.
*1Intermittent (INT) — intermittent operation (not
adjustable)
*2Low (ON) — continuous low speed operation
Push the switch forward*3to operate the
washer. Then the wiper will also operate several
times.
SIC3481
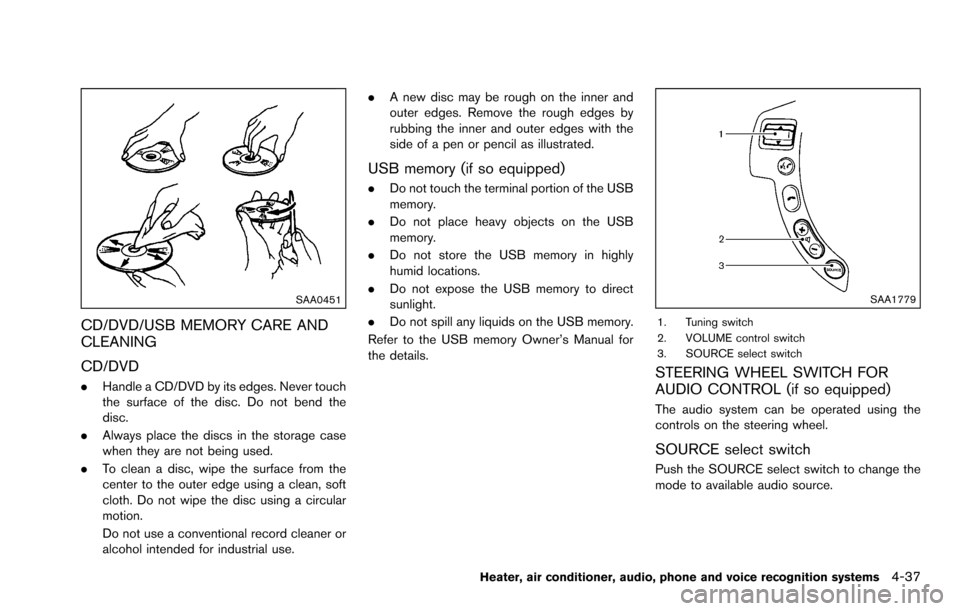
To defog/defrost the rear window glass, start the
engine and push the switch on. The indicator
light
*1will illuminate. Push the switch again to
turn the defroster off.
It will automatically turn off in approximately 15
minutes.
CAUTION
When cleaning the inner side of the rear
window, be careful not to scratch or
damage the rear window defroster.
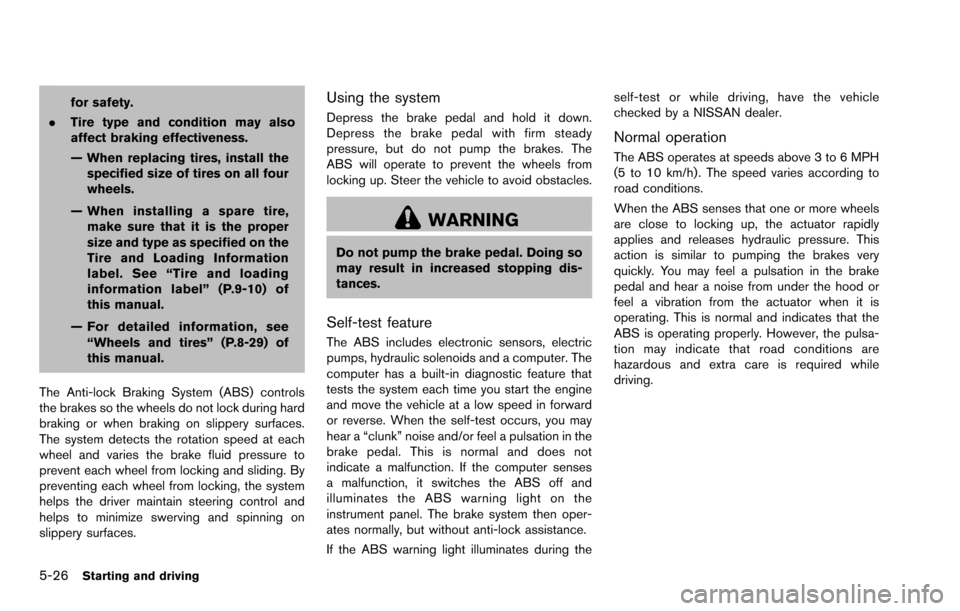
SIC2745
HEADLIGHT SWITCH
Lighting
*1Turn the switch to theposition:
The front parking, side marker, tail, license plate
and instrument lights will come on.
*2Turn the switch to theposition:
Headlights will come on and all the other lights
remain on.
Instruments and controls2-29
REAR WINDOW DEFROSTER
SWITCH HEADLIGHT AND TURN SIGNAL
SWITCH
Page 172 of 322
SAA0451
CD/DVD/USB MEMORY CARE AND
CLEANING
CD/DVD
.Handle a CD/DVD by its edges. Never touch
the surface of the disc. Do not bend the
disc.
. Always place the discs in the storage case
when they are not being used.
. To clean a disc, wipe the surface from the
center to the outer edge using a clean, soft
cloth. Do not wipe the disc using a circular
motion.
Do not use a conventional record cleaner or
alcohol intended for industrial use. .
A new disc may be rough on the inner and
outer edges. Remove the rough edges by
rubbing the inner and outer edges with the
side of a pen or pencil as illustrated.
USB memory (if so equipped)
.Do not touch the terminal portion of the USB
memory.
. Do not place heavy objects on the USB
memory.
. Do not store the USB memory in highly
humid locations.
. Do not expose the USB memory to direct
sunlight.
. Do not spill any liquids on the USB memory.
Refer to the USB memory Owner’s Manual for
the details.
SAA1779
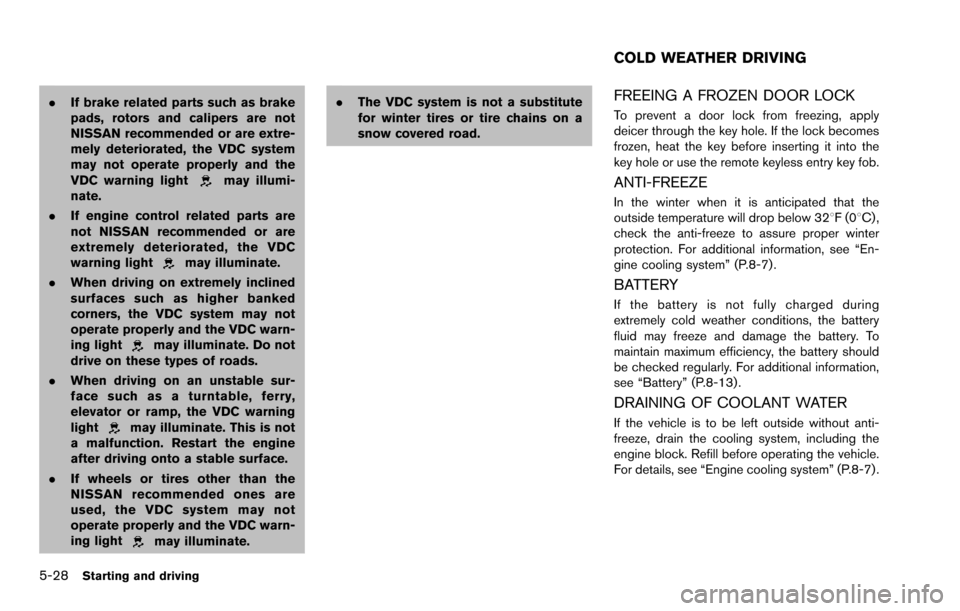
1. Tuning switch
2. VOLUME control switch
3. SOURCE select switch
STEERING WHEEL SWITCH FOR
AUDIO CONTROL (if so equipped)
The audio system can be operated using the
controls on the steering wheel.
SOURCE select switch
Push the SOURCE select switch to change the
mode to available audio source.
Heater, air conditioner, audio, phone and voice recognition systems4-37
Page 213 of 322
5-26Starting and driving
for safety.
. Tire type and condition may also
affect braking effectiveness.
— When replacing tires, install the
specified size of tires on all four
wheels.
— When installing a spare tire, make sure that it is the proper
size and type as specified on the
Tire and Loading Information
label. See “Tire and loading
information label” (P.9-10) of
this manual.
— For detailed information, see “Wheels and tires” (P.8-29) of
this manual.
The Anti-lock Braking System (ABS) controls
the brakes so the wheels do not lock during hard
braking or when braking on slippery surfaces.
The system detects the rotation speed at each
wheel and varies the brake fluid pressure to
prevent each wheel from locking and sliding. By
preventing each wheel from locking, the system
helps the driver maintain steering control and
helps to minimize swerving and spinning on
slippery surfaces.Using the system
Depress the brake pedal and hold it down.
Depress the brake pedal with firm steady
pressure, but do not pump the brakes. The
ABS will operate to prevent the wheels from
locking up. Steer the vehicle to avoid obstacles.
WARNING
Do not pump the brake pedal. Doing so
may result in increased stopping dis-
tances.
Self-test feature
The ABS includes electronic sensors, electric
pumps, hydraulic solenoids and a computer. The
computer has a built-in diagnostic feature that
tests the system each time you start the engine
and move the vehicle at a low speed in forward
or reverse. When the self-test occurs, you may
hear a “clunk” noise and/or feel a pulsation in the
brake pedal. This is normal and does not
indicate a malfunction. If the computer senses
a malfunction, it switches the ABS off and
illuminates the ABS warning light on the
instrument panel. The brake system then oper-
ates normally, but without anti-lock assistance.
If the ABS warning light illuminates during the self-test or while driving, have the vehicle
checked by a NISSAN dealer.
Normal operation
The ABS operates at speeds above 3 to 6 MPH
(5 to 10 km/h) . The speed varies according to
road conditions.
When the ABS senses that one or more wheels
are close to locking up, the actuator rapidly
applies and releases hydraulic pressure. This
action is similar to pumping the brakes very
quickly. You may feel a pulsation in the brake
pedal and hear a noise from under the hood or
feel a vibration from the actuator when it is
operating. This is normal and indicates that the
ABS is operating properly. However, the pulsa-
tion may indicate that road conditions are
hazardous and extra care is required while
driving.
Page 215 of 322
5-28Starting and driving
.If brake related parts such as brake
pads, rotors and calipers are not
NISSAN recommended or are extre-
mely deteriorated, the VDC system
may not operate properly and the
VDC warning light
may illumi-
nate.
. If engine control related parts are
not NISSAN recommended or are
extremely deteriorated, the VDC
warning light
may illuminate.
. When driving on extremely inclined
surfaces such as higher banked
corners, the VDC system may not
operate properly and the VDC warn-
ing light
may illuminate. Do not
drive on these types of roads.
. When driving on an unstable sur-
face such as a turntable, ferry,
elevator or ramp, the VDC warning
light
may illuminate. This is not
a malfunction. Restart the engine
after driving onto a stable surface.
. If wheels or tires other than the
NISSAN recommended ones are
used, the VDC system may not
operate properly and the VDC warn-
ing light
may illuminate. .
The VDC system is not a substitute
for winter tires or tire chains on a
snow covered road.
FREEING A FROZEN DOOR LOCK
To prevent a door lock from freezing, apply
deicer through the key hole. If the lock becomes
frozen, heat the key before inserting it into the
key hole or use the remote keyless entry key fob.
ANTI-FREEZE
In the winter when it is anticipated that the
outside temperature will drop below 328F(0 8C) ,
check the anti-freeze to assure proper winter
protection. For additional information, see “En-
gine cooling system” (P.8-7) .
BATTERY
If the battery is not fully charged during
extremely cold weather conditions, the battery
fluid may freeze and damage the battery. To
maintain maximum efficiency, the battery should
be checked regularly. For additional information,
see “Battery” (P.8-13) .
DRAINING OF COOLANT WATER
If the vehicle is to be left outside without anti-
freeze, drain the cooling system, including the
engine block. Refill before operating the vehicle.
For details, see “Engine cooling system” (P.8-7) .
COLD WEATHER DRIVING