2015 NISSAN PATHFINDER rear view mirror
[x] Cancel search: rear view mirrorPage 3 of 32
NEW SYSTEM FEATURESAround View® Monitor System with Camera Aided Sonar (parking sensor) (if so equipp\
ed) ...........2
NavTraffic and NavWeather (if so equipped) ........................................................................\
.................... 3
Hill Descent Control (HDC) System (if so equipped) ........................................................................\
....4
Blind Spot Warning (BSW) (if so equipped) ........................................................................\
.................. 4
Rear Cross Traffic Alert (RCTA) (if so equipped) ........................................................................\
............ 4
ESSENTIAL INFORMATIONTire Pressure Monitoring System (TPMS) with Easy Fill Tire Alert .....................................................5
Loose Fuel Cap ........................................................................\
...................................................................... 6
Fuel-filler Door ........................................................................\
......................................................................... 6
Towing Your Vehicle ........................................................................\
................................................................ 6
Clock Set/Adjustment ........................................................................\
............................................................ 7
FIRST DRIVE FEATURESNISSAN Intelligent Key® System (if so equipped) ........................................................................\
.......... 8
Power Liftgate (if so equipped) ........................................................................\
............................................. 9
Front Power Seat Adjustments (if so equipped) ........................................................................\
......... 10
2
ND Row Seats ........................................................................\
...................................................................... 10
3RD Row Seats ........................................................................\
...................................................................... 11
Automatic Drive Positioner (if so equipped) ........................................................................\
.................. 11
Outside Mirror Control Switch ........................................................................\
........................................... 12
Starting/Stopping the Engine ........................................................................\
........................................... 12
Headlight Control Switch ........................................................................\
................................................. 13
Windshield Wiper and Washer Switch ........................................................................\
........................... 14
Automatic Climate Controls ........................................................................\
.............................................. 14
Rear Climate Controls ........................................................................\
........................................................ 16
AM/FM/SiriusXM
® Satellite Radio with CD/DVD Player (if so equipped) ..................................... 16
USB (Universal Serial Bus) Connection Port/iPod® Interface (if so equipped) ............................ 17
Cruise Control ........................................................................\
...................................................................... 18
Power Outlets ........................................................................\
....................................................................... 18
SYSTEM GUIDEVehicle Information Display ........................................................................\
................................................20
Bluetooth® Streaming Audio with Navigation (if so equipped) .........................................................21
Bluetooth® Hands-free Phone System (if so equipped) ..................................................................... 22
• System Operating Tips ........................................................................\
.................................................... 22
Bluetooth® System with Navigation (if so equipped) ........................................................................\
.. 23
Bluetooth® System without Navigation (if so equipped) .................................................................... 25
Navigation System (if so equipped) ........................................................................\
................................. 27
Dual Head Restraint DVD System (if so equipped) ........................................................................\
..... 28
HomeLink
® Universal Transceiver (if so equipped) ........................................................................\
...... 29
TAB LE OF CONTE NTS
Please see your Owner’s Manual for important safety information and system operation limitations.
• A cellular telephone should not be used for any purpose while driving so\
full attention may be
given to vehicle operation.
• Always wear your seat belt.
• Supplemental air bags do not replace proper seat belt usage.
• Children 12 and under should always ride in the rear seat properly secur\
ed in child restraints
or seat belts according to their age and weight.
• Do not drink and drive.
For more information, refer to the “Safety –– Seats, seat belts and supplemental restraint system (section 1)”\
,
the “Monitor, climate, audio, phone and voice recognition systems (section 4)” \
and the “Starting and driving
(section 5)” of your Owner’s Manual.
Additional information about your vehicle is also available in your Owne\
r’s Manual, Navigation System
Owner’s Manual and at www.nissanusa.com.
1904703_15c_Pathfinder_QRG_031315.indd 53/13/15 12:51 PM
Page 6 of 32
4
NEW SYSTEM FEATURES
BLIND SPOT WARNING (BSW) (if so equipped)
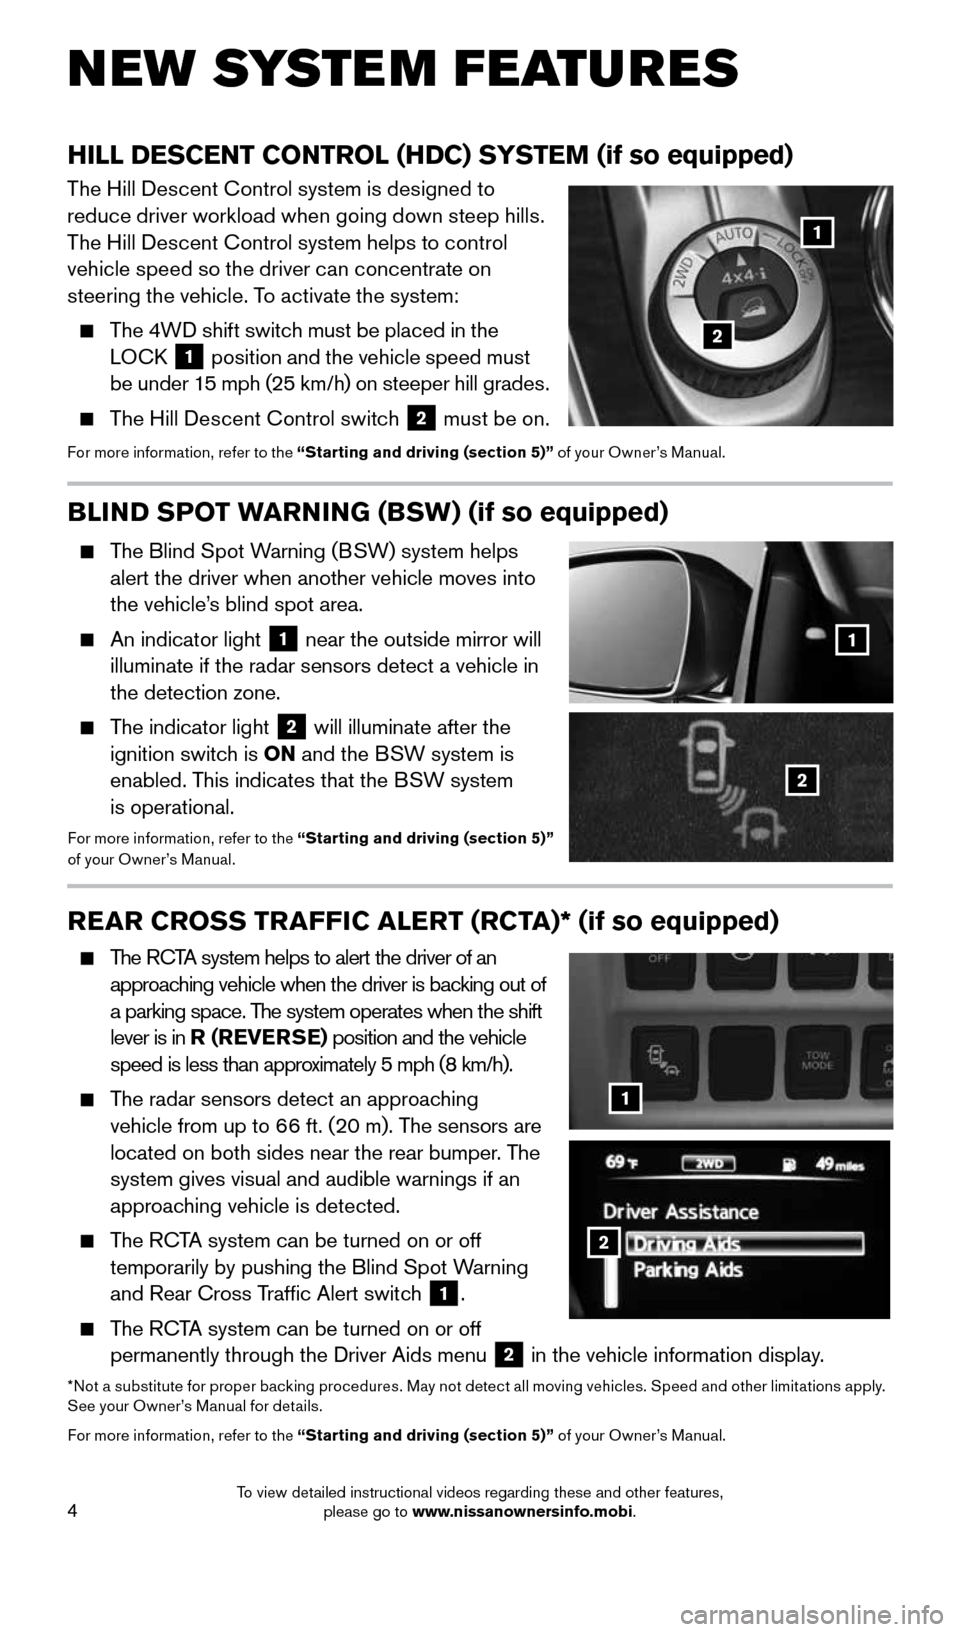
The Blind Spot Warning (BSW) system helps alert the driver when another vehicle moves into
the vehicle’s blind spot area.
An indicator light 1 near the outside mirror will
illuminate if the radar sensors detect a vehicle in
the detection zone.
The indicator light 2 will illuminate after the
ignition switch is ON and the BSW system is
enabled. This indicates that the BSW system
is operational.
For more information, refer to the “Starting and driving (section 5)”
of your Owner’s Manual.
REAR CROSS TRAFFIC ALERT (RCTA)* (if so equipped)
The RCTA system helps to alert the driver of an
approaching vehicle when the driver is backing out of
a parking space. The system operates when the shift
lever is in R (REVERSE) position and the vehicle
speed is less than approximately 5 mph (8 km/h).
The radar sensors detect an approaching
vehicle from up to 66 ft. (20 m). The sensors are
located on both sides near the rear bumper. The
system gives visual and audible warnings if an
approaching vehicle is detected.
The RCTA system can be turned on or off
temporarily by pushing the Blind Spot Warning
and Rear Cross Traffic Alert switch
1.
The RCTA system can be turned on or off
permanently through the Driver Aids menu 2 in the vehicle information display.
*No t a substitute for proper backing procedures. May not detect all moving vehicles. Speed and other limitations apply.
See your Owner’s Manual for details.
For more information, refer to the “Starting and driving (section 5)” of your Owner’s Manual.
HILL DESCENT CONTROL (HDC) SYSTEM (if so equipped)
The Hill Descent Control system is designed to
reduce driver workload when going down steep hills.
The Hill Descent Control system helps to control
vehicle speed so the driver can concentrate on
steering the vehicle. To activate the system:
The 4WD shift switch must be placed in the
LOCK 1 position and the vehicle speed must
be under 15 mph (25 km/h) on steeper hill grades.
The Hill Descent Control switch 2 must be on.For more information, refer to the “Starting and driving (section 5)” of your Owner’s Manual.
1
1
2
2
2
1
1904703_15c_Pathfinder_QRG_031315.indd 43/13/15 12:52 PM
To view detailed instructional videos regarding these and other features, please go to www.nissanownersinfo.mobi.
Page 13 of 32
11
3RD ROW SEATS
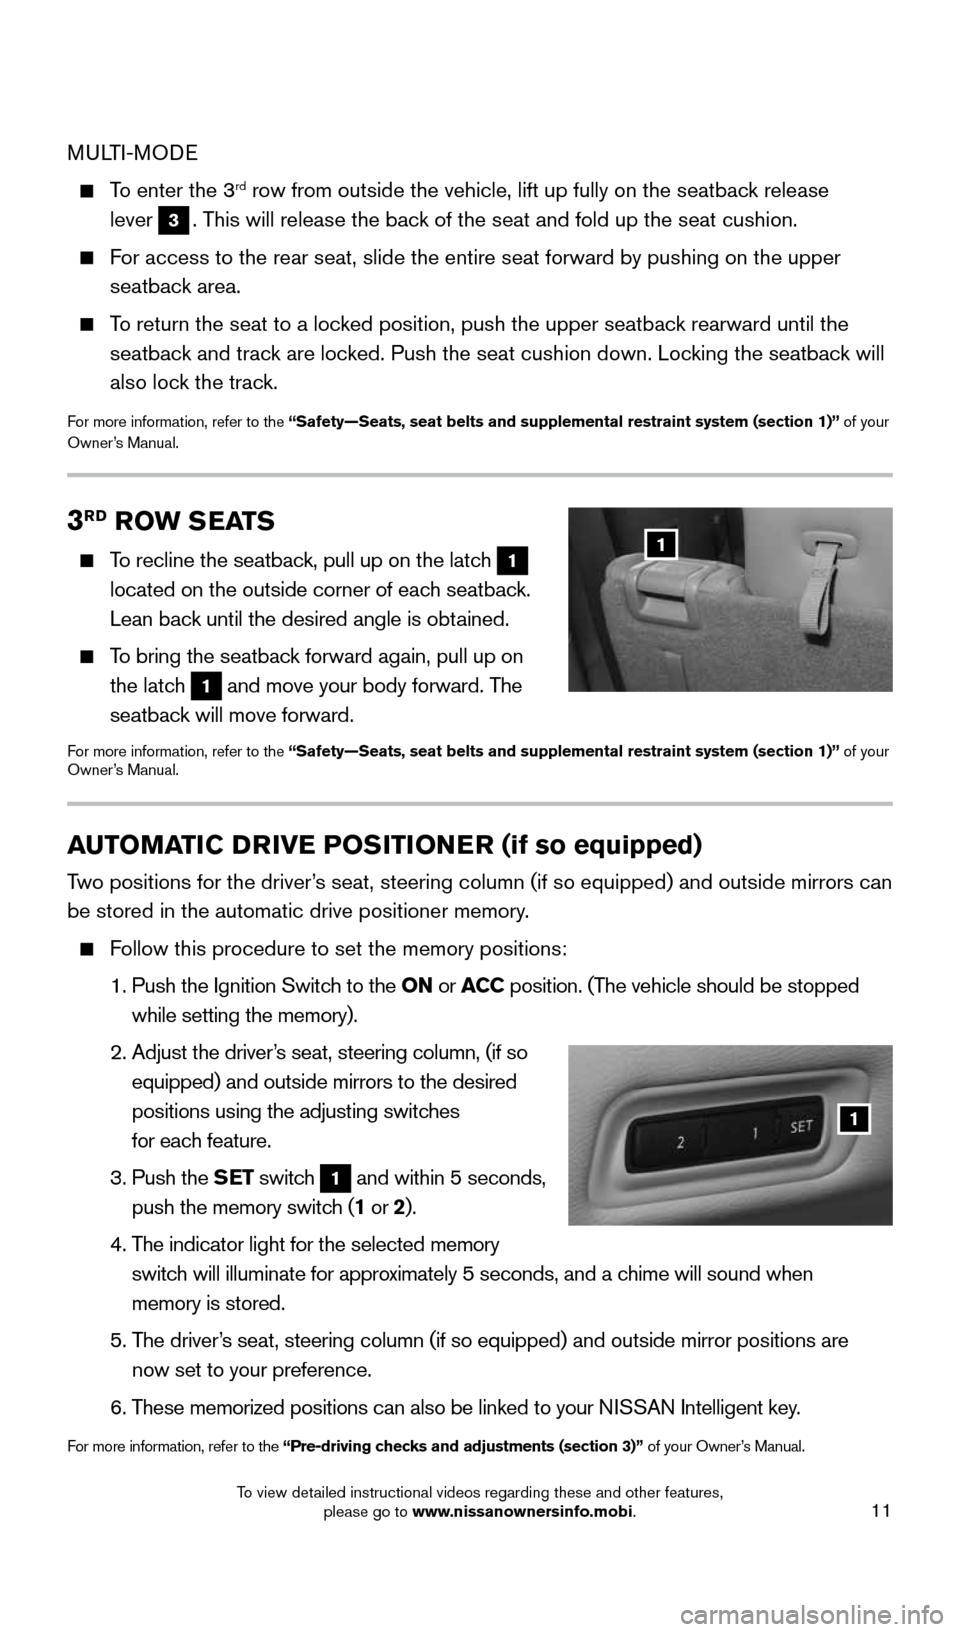
To recline the seatback, pull up on the latch 1
located on the outside corner of each seatback.
Lean back until the desired angle is obtained.
To bring the seatback forward again, pull up on
the latch
1 and move your body forward. The
seatback will move forward.
For more information, refer to the “Safety—Seats, seat belts and supplemental restraint system (sect\
ion 1)” of your
Owner’s Manual.
1
AUTOMATIC DRIVE POSITIONER (if so equipped)
Two positions for the driver’s seat, steering column (if so equipped) and outside mirrors can
be stored in the automatic drive positioner memory.
Follow this procedure to set the memory positions:
1. Push the Ignition Switch to the ON or ACC position. (The vehicle should be stopped
while setting the memory).
2. Adjust the driver’s seat, steering column, (if so
equipped) and outside mirrors to the desired
positions using the adjusting switches
for each feature.
3. Push the SET switch
1 and within 5 seconds,
push the memory switch (1 or 2).
4. The indicator light for the selected memory
switch will illuminate for approximately 5 seconds, and a chime will sound when
memory is stored.
5. The driver’s seat, steering column (if so equipped) and outside mirror positions \
are
now set to your preference.
6. These memorized positions can also be linked to your NISSAN Intelligent key.
For more information, refer to the “Pre-driving checks and adjustments (section 3)” of your Owner’s Manual.
1
MULTI-MODE
To enter the 3rd row from outside the vehicle, lift up fully on the seatback release
lever
3. This will release the back of the seat and fold up the seat cushion.
For access to the rear seat, slide the entire seat forward by pushing on \
the upper
seatback area.
To return the seat to a locked position, push the upper seatback rearward until the
seatback and track are locked. Push the seat cushion down. Locking the seatback will
also lock the track.
For more information, refer to the “Safety—Seats, seat belts and supplemental restraint system (sect\
ion 1)” of your
Owner’s Manual.
1904703_15c_Pathfinder_QRG_031315.indd 113/13/15 12:52 PM
To view detailed instructional videos regarding these and other features, please go to www.nissanownersinfo.mobi.
Page 14 of 32
12
STARTING/STOPPING THE ENGINE
It is important to make sure the NISSAN Intelligent Key®
is with you (that is, in your pocket or purse).
Depress the brake pedal.
Press the ignition switch START/STOP button to
start the engine.
TURNING THE ENGINE OFF
Move the shift lever to the P (PARK) position and apply the parking brake.
Press the ignition switch START/STOP button to turn the engine off.
For more information, refer to the “Starting and driving (section 5)” of your Owner’s Manual.
FIRST DRIVE FEATURES
OUTSIDE MIRROR CONTROL SWITCH
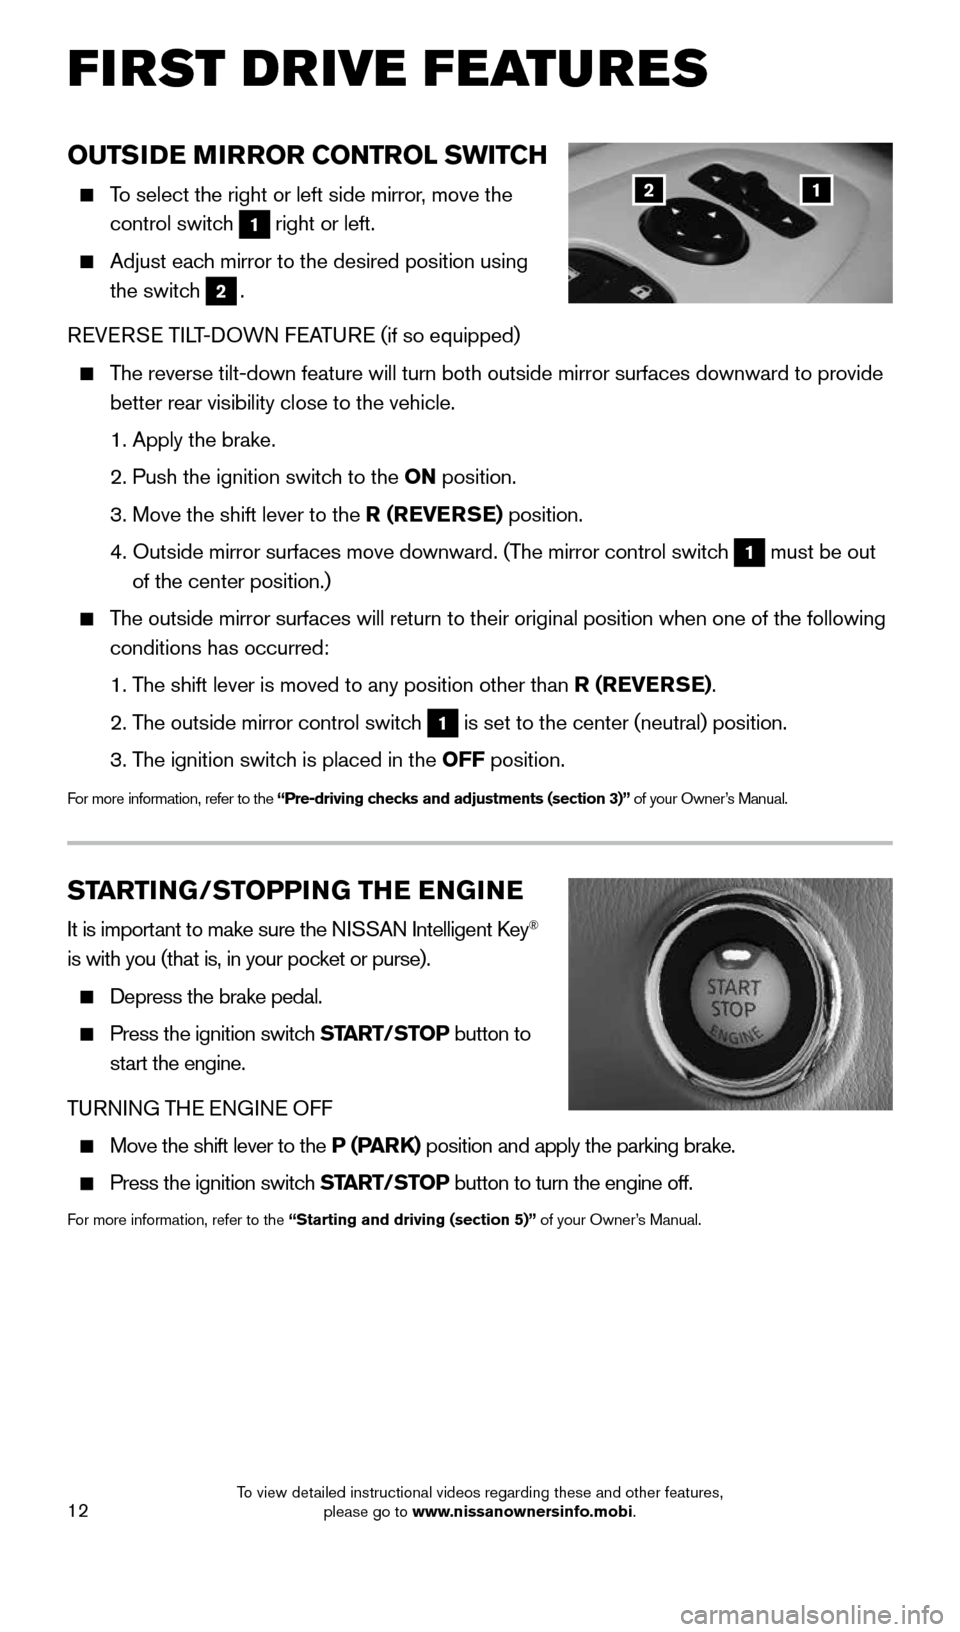
To select the right or left side mirror, move the
control switch
1 right or left.
Adjust each mirror to the desired position using
the switch
2.
REVERSE TILT-DOWN FEATURE (if so equipped)
The reverse tilt-down feature will turn both outside mirror surfaces down\
ward to provide
better rear visibility close to the vehicle.
1. Apply the brake.
2. Push the ignition switch to the ON position.
3. Move the shift lever to the R (REVERSE) position.
4. Outside mirror surfaces move downward. (The mirror control switch
1 must be out
of the center position.)
The outside mirror surfaces will return to their original position when o\
ne of the following
conditions has occurred:
1. The shift lever is moved to any position other than R (REVERSE).
2. The outside mirror control switch
1 is set to the center (neutral) position.
3. The ignition switch is placed in the OFF position.
For more information, refer to the “Pre-driving checks and adjustments (section 3)” of your Owner’s Manual.
12
1904703_15c_Pathfinder_QRG_031315.indd 123/13/15 12:52 PM
To view detailed instructional videos regarding these and other features, please go to www.nissanownersinfo.mobi.
Page 17 of 32
15
3 ON•OFF BUTTON/FAN SPEED CONTROL DIAL
Turn the fan speed control dial left to decrease fan speed or right to in\
crease fan speed.
Push the ON•OFF button to turn the system on or off.
4 MODE BUTTON
Push the MODE button to cycle through the following air flow outlets:
Air flows from the center and side vents.
Air flows from the center, side and foot vents.
Air flows mainly from the foot vents.
Air flows from the defroster and foot vents.
5 AIR RECIRCULATION BUTTON
Press the air recirculation button to recirculate interior air inside the vehicle. The
indicator light on the button will illuminate. This system is used to avoid certain outside
odors and to help adjust the inside vehicle temperature more effectively\
.
The air recirculation mode cannot be activated when the climate control s\
ystem is in the
front defroster mode .
6 REAR AIR CONDITIONER
To control the rear automatic air conditioning
system with the front air conditioner control panel:
• Turn on the front climate control system by
pressing the ON•OFF button.
• Press the REAR button.
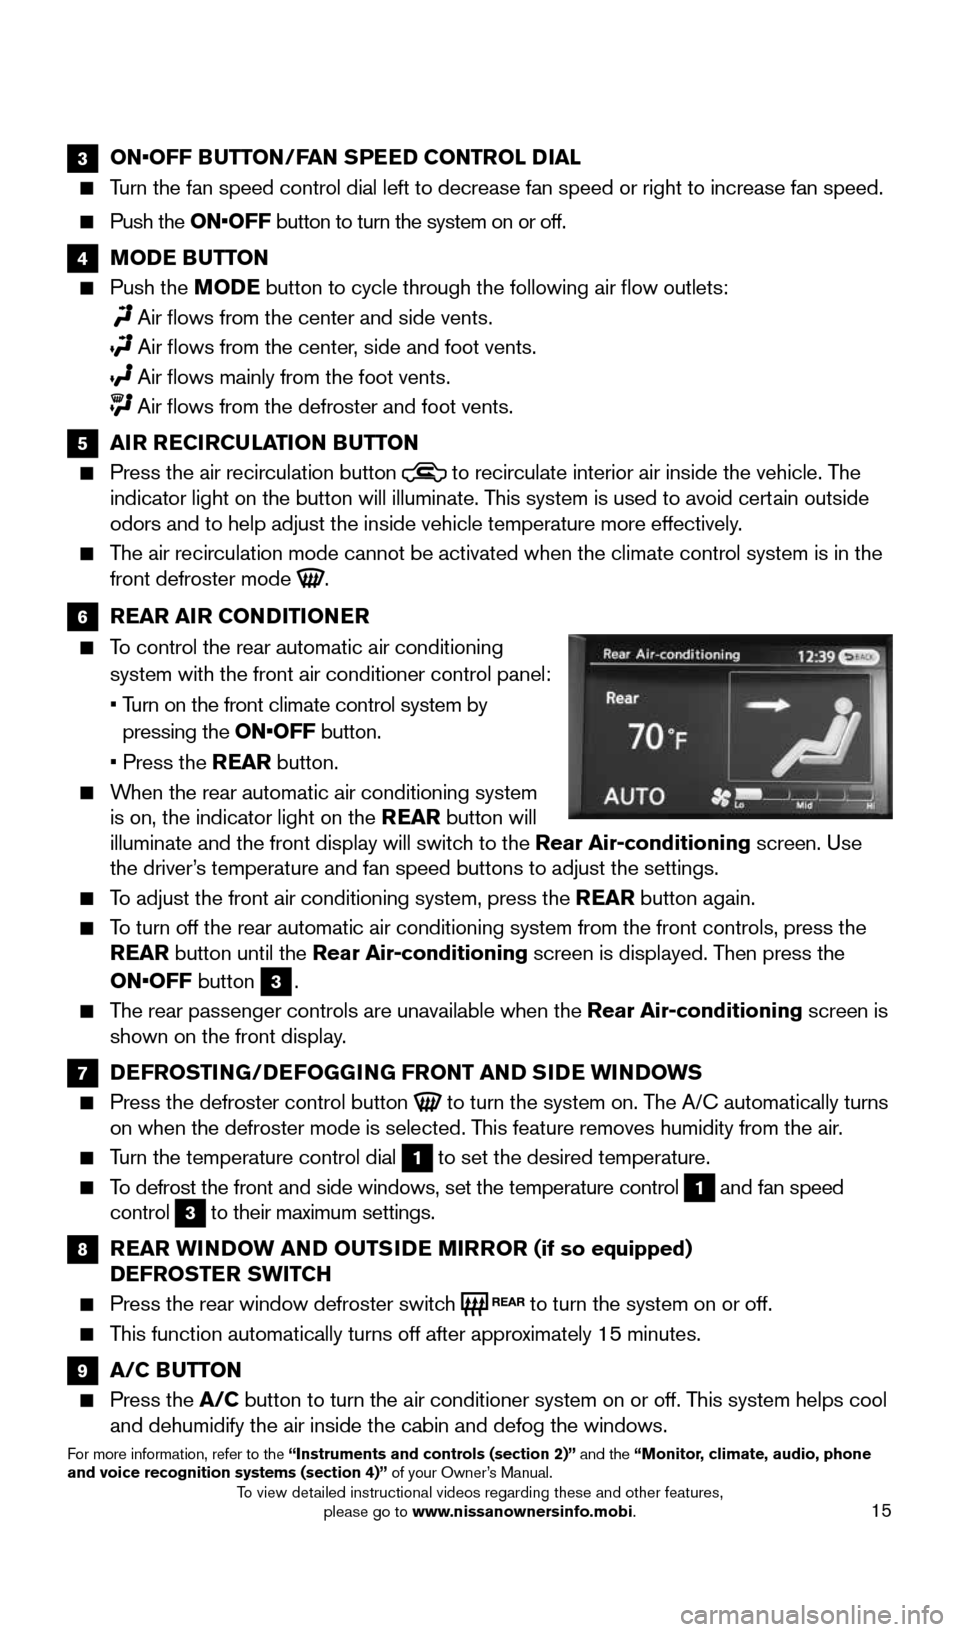
When the rear automatic air conditioning system
is on, the indicator light on the REAR button will
illuminate and the front display will switch to the Rear Air-conditioning screen. Use
the driver’s temperature and fan speed buttons to adjust the settings.
To adjust the front air conditioning system, press the REAR button again.
To turn off the rear automatic air conditioning system from the front con\
trols, press the
REAR button until the Rear Air-conditioning screen is displayed. Then press the
ON•OFF button
3.
The rear passenger controls are unavailable when the Rear Air-conditioning screen is
shown on the front display.
7 DEFROSTING/DEFOGGING FRONT AND SIDE WINDOWS
Press the defroster control button to turn the system on. The A/C automatically turns
on when the defroster mode is selected. This feature removes humidity from the air.
Turn the temperature control dial 1 to set the desired temperature.
To defrost the front and side windows, set the temperature control 1 and fan speed
control 3 to their maximum settings.
8 REAR WINDOW AND OUTSIDE MIRROR (if so equipped)
DEFROSTER SWITCH
Press the rear window defroster switch to turn the system on or off.
This function automatically turns off after approximately 15 minutes.
9 A/C BUTTON
Press the A/C button to turn the air conditioner system on or off. This system helps cool
and dehumidify the air inside the cabin and defog the windows.
For more information, refer to the “Instruments and controls (section 2)” and the “Monitor, climate, audio, phone
and voice recognition systems (section 4)” of your Owner’s Manual.
1904703_15c_Pathfinder_QRG_031315.indd 153/13/15 12:52 PM
To view detailed instructional videos regarding these and other features, please go to www.nissanownersinfo.mobi.