2015 NISSAN MURANO ignition
[x] Cancel search: ignitionPage 15 of 203
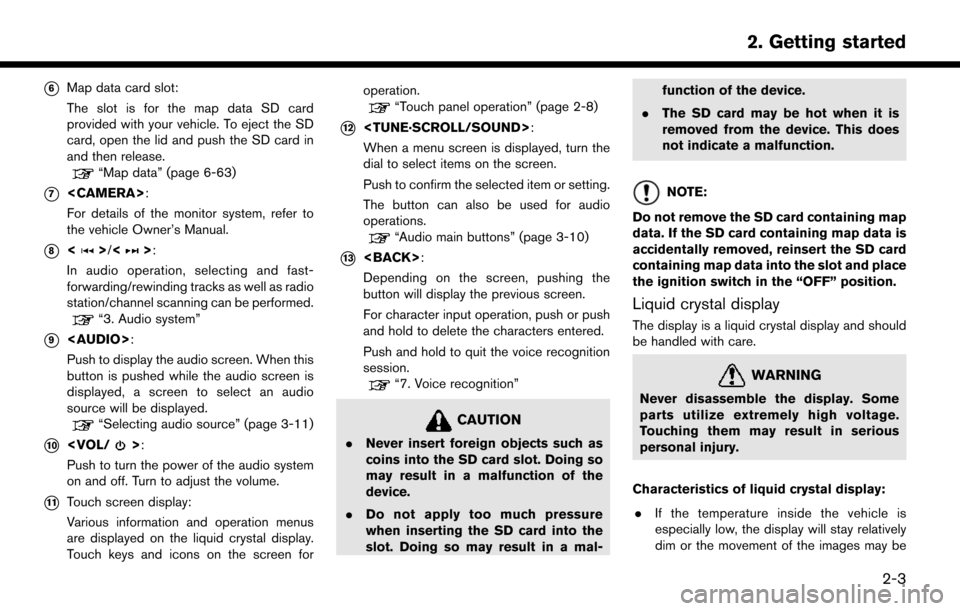
*6Map data card slot:
The slot is for the map data SD card
provided with your vehicle. To eject the SD
card, open the lid and push the SD card in
and then release.
“Map data” (page 6-63)
*7
For details of the monitor system, refer to
the vehicle Owner’s Manual.
*8<>/<>:
In audio operation, selecting and fast-
forwarding/rewinding tracks as well as radio
station/channel scanning can be performed.
“3. Audio system”
*9
Page 16 of 203
2. Getting started
slow. These conditions are normal. The
display will function normally when the
interior of the vehicle has warmed up.
. Some pixels in the display are darker or
brighter than others. This condition is an
inherent characteristic of liquid crystal dis-
plays, and it is not a malfunction.
. A remnant of the previous display image may
remain on the screen. This screen burn is
inherent in displays, and it is not a malfunc-
tion.
. The screen may become distorted by strong
magnetic fields.
Maintenance of display:
CAUTION
. To clean the display screen, use a dry,
soft cloth. If additional cleaning is
necessary, use a small amount of
neutral detergent with a soft cloth.
. Clean the display with the ignition
switch in the “OFF” position. If the
display is cleaned while the ignition
switch is placed in the “ON” position,
unintentional operation may occur. .
To clean the display, never use a
rough cloth, alcohol, benzine, thinner
or any kind of solvent or paper towel
with a chemical cleaning agent. They
will scratch or deteriorate the panel.
. Do not splash any liquid such as
water or car fragrance on the display.
Contact with liquid will cause the
system to malfunction.
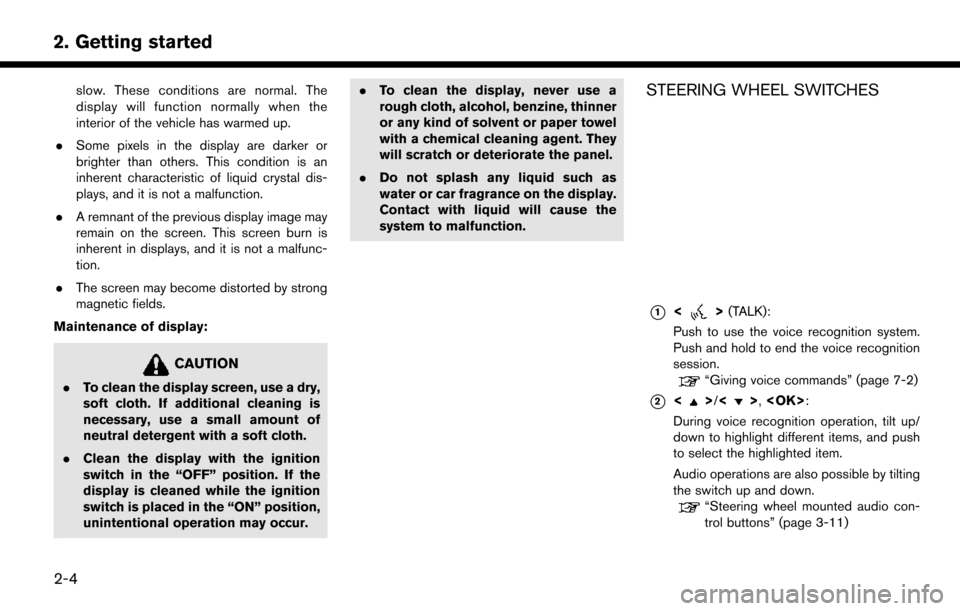
STEERING WHEEL SWITCHES
*1<>(TALK):
Push to use the voice recognition system.
Push and hold to end the voice recognition
session.
“Giving voice commands” (page 7-2)
*2<>/<>,
During voice recognition operation, tilt up/
down to highlight different items, and push
to select the highlighted item.
Audio operations are also possible by tilting
the switch up and down.
“Steering wheel mounted audio con-
trol buttons” (page 3-11)
2-4
Page 18 of 203
2. Getting started
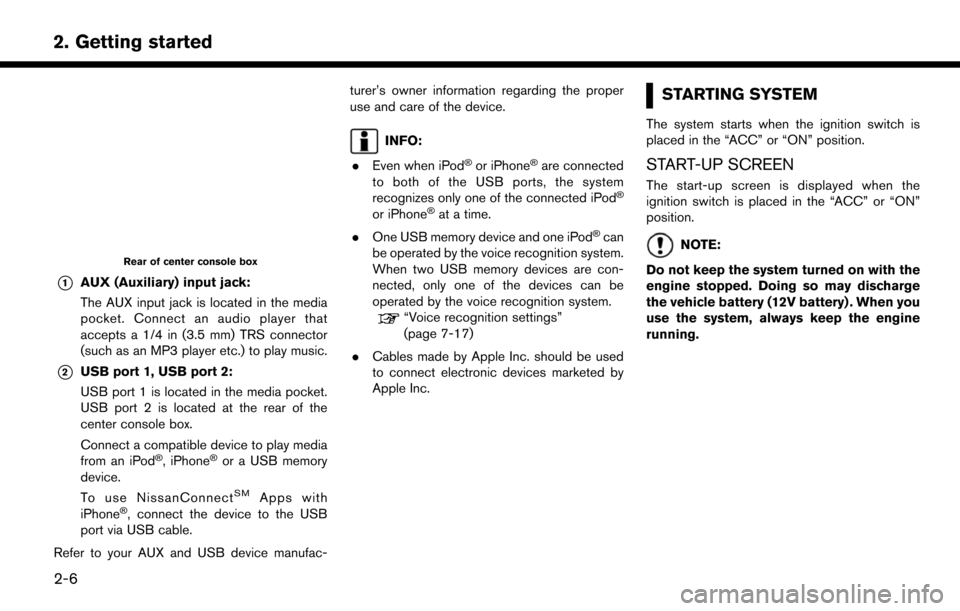
Rear of center console box
*1AUX (Auxiliary) input jack:
The AUX input jack is located in the media
pocket. Connect an audio player that
accepts a 1/4 in (3.5 mm) TRS connector
(such as an MP3 player etc.) to play music.
*2USB port 1, USB port 2:
USB port 1 is located in the media pocket.
USB port 2 is located at the rear of the
center console box.
Connect a compatible device to play media
from an iPod
�Š, iPhone�Šor a USB memory
device.
To use NissanConnect
SMApps with
iPhone�Š, connect the device to the USB
port via USB cable.
Refer to your AUX and USB device manufac- turer’s owner information regarding the proper
use and care of the device.
INFO:
. Even when iPod
�Šor iPhone�Šare connected
to both of the USB ports, the system
recognizes only one of the connected iPod
�Š
or iPhone�Šat a time.
. One USB memory device and one iPod
�Šcan
be operated by the voice recognition system.
When two USB memory devices are con-
nected, only one of the devices can be
operated by the voice recognition system.
“Voice recognition settings”
(page 7-17)
. Cables made by Apple Inc. should be used
to connect electronic devices marketed by
Apple Inc.
STARTING SYSTEM
The system starts when the ignition switch is
placed in the “ACC” or “ON” position.
START-UP SCREEN
The start-up screen is displayed when the
ignition switch is placed in the “ACC” or “ON”
position.
NOTE:
Do not keep the system turned on with the
engine stopped. Doing so may discharge
the vehicle battery (12V battery) . When you
use the system, always keep the engine
running.
2-6
Page 28 of 203
![NISSAN MURANO 2015 3.G LC2 Kai Navigation Manual 2. Getting started
Available setting items
Setting item Action
[Audio Volume] Adjusts the volume level of theaudio system.
[Guidance Vo-
lume] Adjusts the volume level of the
guidance voice and the vo NISSAN MURANO 2015 3.G LC2 Kai Navigation Manual 2. Getting started
Available setting items
Setting item Action
[Audio Volume] Adjusts the volume level of theaudio system.
[Guidance Vo-
lume] Adjusts the volume level of the
guidance voice and the vo](/manual-img/5/436/w960_436-27.png)
2. Getting started
Available setting items
Setting item Action
[Audio Volume] Adjusts the volume level of theaudio system.
[Guidance Vo-
lume] Adjusts the volume level of the
guidance voice and the voice
recognition system voice re-
sponses.
[Ringtone] Adjusts the volume level of the ringtone of incoming calls.
[Incoming Call] Adjusts the incoming call vo- lume.
[Outgoing Call] Adjusts the outgoing call vo- lume.
[NissanConnect
Svcs.] Adjusts the volume level of
“text-to-speech” for text mes-
saging.
[Button Beeps] Turns on/off the button beep sound and alarm for a prohib-
ited operations.
[Guidance Voice] Turns on/off the voice gui- dance.
LANGUAGE AND UNIT SETTINGS
This changes the display language and measure-
ment unit used in the system.
1. Touch [Settings] on the Launch Bar.
2. Touch [Language & Units].
Available setting items
Setting item Action
[Select Lan-
guage]Selects the system language.
The language setting is applied
to the touch screen display,
voice announcements, the
voice recognition system.
It can also be applied to the
vehicle information display.
[Select Units] Selects the system unit. The unit setting can also be applied
to the information vehicle dis-
play.
INFO:
Do not change the position of the ignition switch
while changing the language.
If the selected language is also supported by the
vehicle information display, a confirmation mes-
sage asking if you would like to also change the
language for the vehicle information display is
displayed. Select [Yes] to change the language on the vehicle information display.
CLOCK SETTINGS
Clock settings of the system can be changed.
1. Touch [Settings] on the Launch Bar.
2. Touch [Clock].
Available setting items
Setting item Action
[On-screen
Clock]
Sets the clock display on/off.
When this item is on, the clock
display appears.
[Clock Format
(24h)] Turns on/off the 24-hour display
mode. When turned off, the
clock is set to the 12-hour
mode.
[Offset (hour)] Adjusts the offset value (hour).
[Offset (min)] Adjusts the offset value (min- utes) .
[Daylight Sav-
ings Time] Turns on/off the daylight saving
time setting.
[Time Zone] Select an appropriate time zone from the list. When selecting
[Auto], the system selects the
time zone automatically.
2-16
Page 32 of 203
3. Audio system
AUDIO OPERATION PRECAU-
TIONS
CAUTION
.Operate the audio system only when
the vehicle engine is running. Oper-
ating the audio system for extended
periods of time with the engine
turned off can discharge the vehicle
battery.
. Do not allow the system to get wet.
Excessive moisture such as spilled
liquids may cause the system to
malfunction.
RADIO
Place the ignition switch in the “ACC” or “ON”
position before turning on the radio. If you listen
to the radio with the engine not running, the
ignition switch should be placed in the “ACC”
position.
Radio reception is affected by station signal
strength, distance from radio transmitter, build-
ings, bridges, mountains and other external
influences. Intermittent changes in reception
quality normally are caused by these external
influences. Using a cellular phone in or near the vehicle
may influence radio reception quality.
Radio reception
Your radio system is equipped with state-of-the-
art electronic circuits to enhance radio reception.
These circuits are designed to extend reception
range, and to enhance the quality of that
reception.
However there are some general characteristics
of both FM and AM radio signals that can affect
radio reception quality in a moving vehicle, even
when the finest equipment is used. These
characteristics are completely normal in a given
reception area, and do not indicate any malfunc-
tion in your radio system.
Reception conditions will constantly change
because of vehicle movement. Buildings, terrain,
signal distance and interference from other
vehicles can work against ideal reception.
Described below are some of the factors that
can affect your radio reception.
Some cellular phones or other devices may
cause interference or a buzzing noise to come
from the audio system speakers. Storing the
device in a different location may reduce or
eliminate the noise.
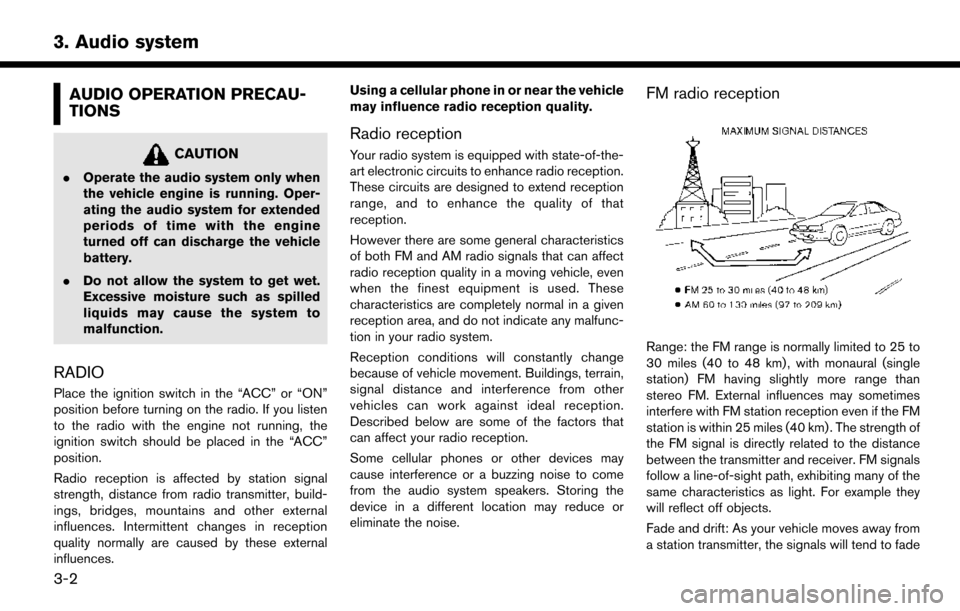
FM radio reception
Range: the FM range is normally limited to 25 to
30 miles (40 to 48 km) , with monaural (single
station) FM having slightly more range than
stereo FM. External influences may sometimes
interfere with FM station reception even if the FM
station is within 25 miles (40 km) . The strength of
the FM signal is directly related to the distance
between the transmitter and receiver. FM signals
follow a line-of-sight path, exhibiting many of the
same characteristics as light. For example they
will reflect off objects.
Fade and drift: As your vehicle moves away from
a station transmitter, the signals will tend to fade
3-2
Page 41 of 203
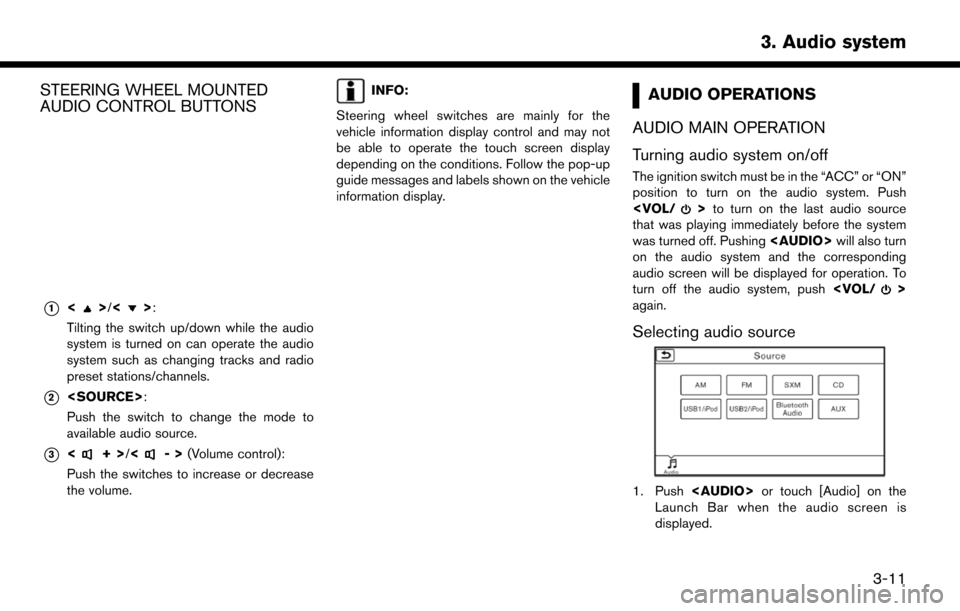
STEERING WHEEL MOUNTED
AUDIO CONTROL BUTTONS
*1<>/<>:
Tilting the switch up/down while the audio
system is turned on can operate the audio
system such as changing tracks and radio
preset stations/channels.
*2
Push the switch to change the mode to
available audio source.
*3<+> /<->(Volume control):
Push the switches to increase or decrease
the volume.
INFO:
Steering wheel switches are mainly for the
vehicle information display control and may not
be able to operate the touch screen display
depending on the conditions. Follow the pop-up
guide messages and labels shown on the vehicle
information display.AUDIO OPERATIONS
AUDIO MAIN OPERATION
Turning audio system on/off
The ignition switch must be in the “ACC” or “ON”
position to turn on the audio system. Push
that was playing immediately before the system
was turned off. Pushing
Page 46 of 203
![NISSAN MURANO 2015 3.G LC2 Kai Navigation Manual 3. Audio system
[Favorite Artists]Touch to display a list of saved artists. Up to 8 artists can be stored. To turn on alerts for a favorite
artist, select the artist and touch [Turn Alerts ON].
[Favor NISSAN MURANO 2015 3.G LC2 Kai Navigation Manual 3. Audio system
[Favorite Artists]Touch to display a list of saved artists. Up to 8 artists can be stored. To turn on alerts for a favorite
artist, select the artist and touch [Turn Alerts ON].
[Favor](/manual-img/5/436/w960_436-45.png)
3. Audio system
[Favorite Artists]Touch to display a list of saved artists. Up to 8 artists can be stored. To turn on alerts for a favorite
artist, select the artist and touch [Turn Alerts ON].
[Favorite Songs] Touch to display a list of saved songs. Up to 8 songs can be stored. To turn on alerts for a favorite
song, select the song and touch [Turn Alerts ON].
[Direct Tune] Touch to display the keypad to enter the frequency and directly tune to the channel.
[Artist Alert History] Touch to display the artist alert history.
[Song Alert History] Touch to display the song alert history.
[Alert Settings] [Alerts for Artists]Touch to turn on/off the alert notice.
Favorite artists and songs can be registered to receive an alert notice when a song of the
registered conditions is on the radio. To tune to the respective channel, touch [Tune] on the alert
screen. The alert can be ignored by touching [Cancel].
[Alerts for Songs]
[Alerts on non-Audio
screens]
[Channel Lock Settings] Touch to select or unselect the channel that you wish to lock out. A passcode is required to
change the settings. The default passcode is “1234” and it can be changed from this menu.
INFO:
. SiriusXM services require a subscription
after trial period and are sold separately or
as a package. The satellite service is avail-
able only in the 48 contiguous USA and DC.
SiriusXM satellite service is also available in
Canada; see www.siriusxm.ca.
. It may take some time to receive the
activation signal after the initiation of the
SiriusXM Satellite Radio subscription. After
receiving the activation signal, an available
channel list will automatically be updated in
the radio. Change the position of the ignition switch from “LOCK” to “ACC” to update the
SiriusXM channel list.
3-16
Page 49 of 203
Ejecting CD:
Push<
>to eject a CD. If the CD is ejected
and left unremoved, it will be reloaded into the
slot for protection.
INFO:
The ignition switch must be placed in the “ACC”
or “ON” position in order for the CD to eject.
CD Menu
Touch [CD Menu] on the CD screen to display
the CD menu screen.
The following items are available.
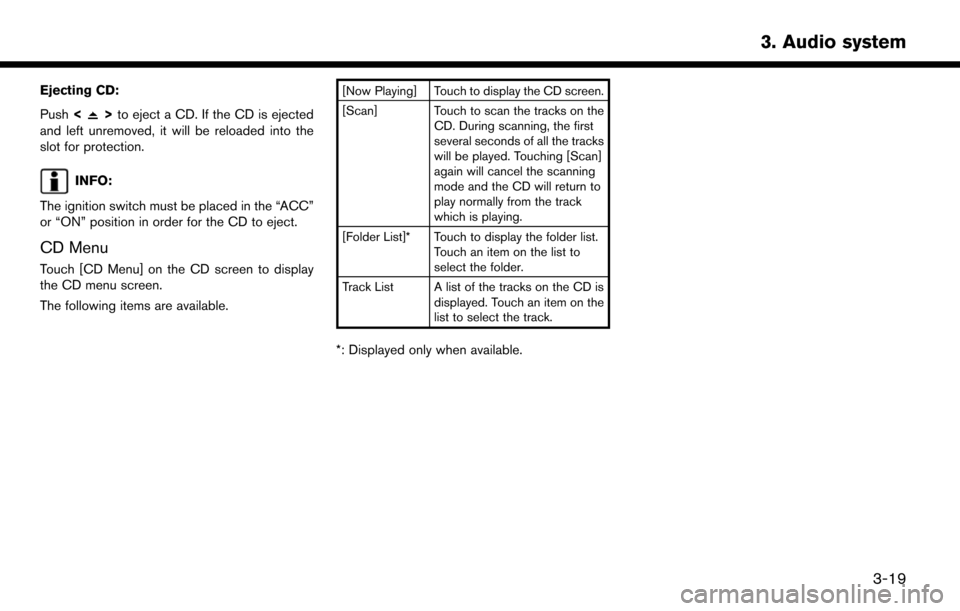
[Now Playing] Touch to display the CD screen.
[Scan] Touch to scan the tracks on the CD. During scanning, the first
several seconds of all the tracks
will be played. Touching [Scan]
again will cancel the scanning
mode and the CD will return to
play normally from the track
which is playing.
[Folder List]* Touch to display the folder list. Touch an item on the list to
select the folder.
Track List A list of the tracks on the CD is displayed. Touch an item on the
list to select the track.
*: Displayed only when available.
3. Audio system
3-19