2015 NISSAN MICRA window
[x] Cancel search: windowPage 136 of 293

Operating tips
●Keep the windows closed while the air con-
ditioner is in operation.
● After parking in the sun, drive for 2 or 3 min-
utes with the windows open to vent hot air
from the passenger compartment. Then,
close the windows. This allows the air con-
ditioner to cool the interior more quickly.
● The air conditioning system should be
operated for approximately 10 minutes
at least once a month. This helps pre-
vent damage to the system due to lack
of lubrication.
● A visible mist may be seen coming from the
ventilators in hot, humid conditions as the air
is cooled rapidly. This does not indicate a
malfunction.
● If the engine coolant temperature
gauge indicates engine coolant tem-
perature over the normal range, turn
the air conditioner off. Refer to “If your
vehicle overheats” in the “In case of
emergency” section of this manual.
AIR FLOW CHARTS
The following charts show the button and dial
positions for MAXIMUM AND QUICK heating,
cooling or defrosting. The air intake lever
should always be in the
position for
heating and defrosting.
Display screen, heater, air conditioner, audio and phone systems4-19
Page 150 of 293

DISP (display) button:
Press the DISP (display) button while a CD is
playing to change the text shown in the audio
display as follows:
For CDs:
Running Time→Album Title: →Artist Name: →
Song Title:
For MP3 CDs:
Running Time →Folder Title: →Album Title: →
Artist Name: →Song Title:
If the text information is too long to fully be dis-
played on the screen, press and hold the DISP
(display) button for longer than 1.5 seconds to
scroll through the rest of the text.
Press the DISP (display) button while the radio is
playing to toggle the audio display between sta-
tion number and RDS.
Clock operation
To turn the clock display on or off, press the
MENU button repeatedly until “Clock” appears
on the display. Turn the TUNE/FOLDER knob to
toggle the setting (ON or OFF) .
Clock set 1. Press the MENU button repeatedly until “Adjust Clock” appears on the display. 2. Press the ENTER button.
3. “Change Hour” will appear on the screen.
Turn the TUNE/FOLDER knob to adjust the
hours and then press ENTER.
4. “Change Minute” will appear on the screen. Turn the TUNE/FOLDER knob to adjust the
minutes and then press ENTER.
The display will return to the regular clock display
after 10 seconds if no further adjustment is per-
formed.
FM/AM radio operation
AM and FM buttons:
Press the AM button to change the band to AM.
If another audio source is playing when the AM
button is pressed, the audio source playing will
automatically be turned off and the last radio
station played will begin playing.
Press the FM button to change the band as
follows:
FM1 →FM2 →FM1
If another audio source is playing when the FM
button is pressed, the audio source playing will
automatically be turned off and the last radio
station played will begin playing.
SEEK and TRACK (tuning) buttons
Press the SEEK button
to tune from low to
high frequencies and stop at the next broadcast-
ing station.
Press the TRACK button
to tune from high
to low frequencies and stop at the next broad-
casting station.
Press and hold either button to seek at a faster
speed.
SCAN (tuning) button
Press the SCAN button. SCAN illuminates in the
display window. Scan tuning begins from low to
high frequencies. Scan tuning stops for 5 sec-
onds at each broadcasting station that has suffi-
cient signal strength. When scanning, SCAN
blinks in the display. Pressing the SCAN button
again during this 5 second period stops scan
tuning and the radio remains tuned to that station.
1 to 6 Station memory operations:
Twelve stations can be set for the FM band (six for
FM1, six for FM2) and six stations can be set for
the AM band.
1. Choose the radio band AM, FM1 or FM2 using the AM or FM button.
Display screen, heater, air conditioner, audio and phone systems4-33
Page 151 of 293

2. Tune to the desired station using manual,SEEK or SCAN tuning. Press and hold any
of the desired station memory buttons (1 –
6) until a beep is heard.
3. The channel indicator will then come on and the sound will resume. Programming is now
complete.
4. Other buttons can be set in the same man- ner.
If the battery cable is disconnected or if the fuse
opens, the radio memory will be canceled. In that
case, reset the desired stations.
Compact disc (CD) player operation
Place the ignition switch in the ACC or ON
position, and carefully insert the compact disc
into the slot with the label side up. The compact
disc is automatically pulled into the slot and starts
to play.
If the radio is already operating, it automatically
turns off and the compact disc begins to play.
CD button
When the CD button is pressed with a compact
disc loaded and the radio playing, the radio turns
off and the last used compact disc starts to play.
SEEK/TRACK (Reverse or Fast Forward) button:
Press and hold the SEEK/TRACK button
orfor 1.5 seconds while the compact disc
is playing to reverse or fast forward the track
being played. The compact disc plays at an in-
creased speed while reversing or fast forwarding.
When the button is released, the compact disc
returns to normal play speed.
SEEK and TRACK
buttons:
When the SEEK button
is pressed while
the compact disc is playing, the next track follow-
ing the present one starts to play from the begin-
ning. Press the SEEK button
several times
to skip several tracks. Each time the button is
pressed, the CD advances one additional track.
The track number appears in the display window.
(When the last track on the compact disc is
skipped, the first track is played.)
When the TRACK button
is pressed, the
track being played returns to the beginning.
Press the TRACK button
several times to
skip back several tracks. Each time the button is
pressed the CD moves back one track. RPT (repeat)/RDM (random) button
Press the RPT/RDM button while a compact disc
is playing to change the play pattern as follows:
CD:
TRACK REPEAT
→DISC RANDOM →DISC
REPEAT
MP3/WMA CD:
FOLDER REPEAT →TRACK REPEAT →DISC
RANDOM →FOLDER RANDOM →DISC RE-
PEAT
TRACK REPEAT: The track that is currently play-
ing will be repeated.
DISC RANDOM: The order of the tracks on the
disc will be mixed during play.
DISC REPEAT: The disc currently playing will be
repeated.
FOLDER REPEAT: The tracks in the current
folder will be repeated.
FOLDER RANDOM: The order of the tracks in
the folder will be mixed during play.
SCAN (CDs) button
Press the SCAN button for less than 1.5 seconds
to scan all tracks of the current disc for 10 sec-
onds per track. The SCAN icon is flashed during
scan mode.
4-34Display screen, heater, air conditioner, audio and phone systems
Page 166 of 293

The command given is picked up by the micro-
phone, and voice feedback is given when the
command is accepted.● If you need to hear the available commands
for the current menu again, say “Help” and
the system will repeat them.
● If a command is not recognized, the system
announces, “Command not recognized.
Please try again.” Make sure the command is
said exactly as prompted by the system and
repeat the command in a clear voice.
● If you want to go back to the previous com-
mand, you can say “Go back” or “Correc-
tion” any time the system is waiting for a
response.
● You can cancel a command when the sys-
tem is waiting for a response by saying,
“Cancel” or “Quit.” The system announces
“Cancel” and ends the VR session. You can
also press and hold the
button on the
steering wheel for 5 seconds at any time to
end the VR session. Whenever the VR ses-
sion is cancelled, a double beep is played to
indicate you have exited the system. ●
If you want to adjust the volume of the voice
feedback, press the volume control switches
(+ or -) on the steering wheel while being
provided with feedback. You can also use
the radio volume control knob.
Voice Prompt Interrupt
In most cases you can interrupt the voice feed-
back to speak the next command by pressing
the
button on the steering wheel. After
interrupting the system, wait for a beep before
speaking your command.
One Shot Call
To use the system faster, you may speak the
second level commands with the main menu
command on the main menu. For example, press
the
button and after the tone say, “Call
Redial”.
Operating tips
To get the best performance out of the system,
observe the following:
● Keep the interior of the vehicle as quiet as
possible. Close the windows to eliminate
surrounding noises (traffic noises, vibration
sounds, etc.) , which may prevent the system
from recognizing voice commands correctly.
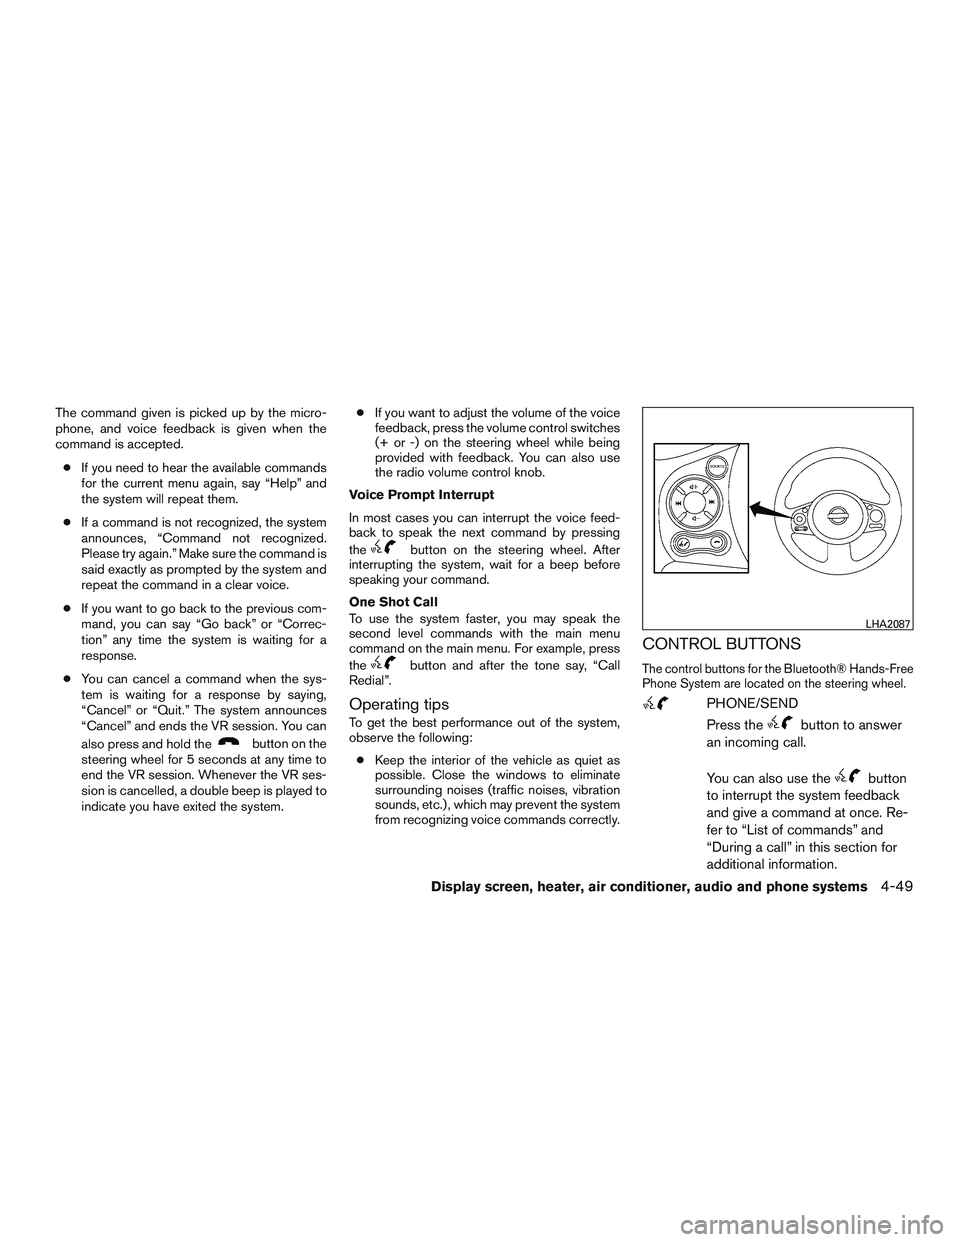
CONTROL BUTTONS
The control buttons for the Bluetooth® Hands-Free
Phone System are located on the steering wheel.
PHONE/SEND
Press the
button to answer
an incoming call.
You can also use the
button
to interrupt the system feedback
and give a command at once. Re-
fer to “List of commands” and
“During a call” in this section for
additional information.
LHA2087
Display screen, heater, air conditioner, audio and phone systems4-49
Page 173 of 293

TROUBLESHOOTING GUIDE
The system should respond correctly to all voice
commands without difficulty. If problems are en-
countered, try the following solutions.
Where the solutions are listed by number, try
each solution in turn, starting with number 1, until
the problem is resolved.
SymptomSolution
System fails to interpret the command correctly. 1. Ensure that the command is valid. Refer to “List of commands” in this section.
2. Ensure that the command is spoken after the tone.
3. Speak clearly without pausing between words and at a level appropriate to the ambient noise level in the vehicle.
4. Ensure that the ambient noise level is not excessive (for example, windows open or defroster on) . NOTE: If it is too
noisy to use the phone, it is likely that the voice commands will not be recognized.
5. If more than one command was said at a time, try saying the commands separately.
The system consistently selects the wrong entry from the
phone book. 1. Ensure that the phone book entry name requested matches what was originally stored. This can be confirmed by
using the “List Names” command. Refer to “Phonebook” in this section.
2. Replace one of the names being confused with a new name.
4-56Display screen, heater, air conditioner, audio and phone systems
Page 175 of 293

WARNING
●Do not leave children or adults who
would normally require the assistance
of others alone in your vehicle. Pets
should also not be left alone. They
could accidentally injure themselves or
others through inadvertent operation of
the vehicle. Also, on hot, sunny days,
temperatures in a closed vehicle could
quickly become high enough to cause
severe or possibly fatal injuries to
people or animals.
● Properly secure all cargo to help pre-
vent it from sliding or shifting. Do not
place cargo higher than the seatbacks.
In a sudden stop or collision, unsecured
cargo could cause personal injury.
EXHAUST GAS (carbon monoxide)
WARNING
● Do not breathe exhaust gases; they
contain colorless and odorless carbon
monoxide. Carbon monoxide is danger-
ous. It can cause unconsciousness or
death. ●
If you suspect that exhaust fumes are
entering the vehicle, drive with all win-
dows fully open, and have the vehicle
inspected immediately.
● Do not run the engine in closed spaces
such as a garage.
● Do not park the vehicle with the engine
running for any extended length of time.
● Keep the rear vent windows, liftgates,
doors and trunk lids (if so equipped)
closed while driving, otherwise exhaust
gases could be drawn into the passen-
ger compartment. If you must drive with
one of these open, follow these
precautions:
1. Open all the windows.
2. Turn the air recirculation mode off and set the fan speed control to the
highest level to circulate the air.
● The exhaust system and body should be
inspected by a qualified mechanic
whenever:
a. The vehicle is raised for service.
b. You suspect that exhaust fumes are entering into the passenger
compartment. c. You notice a change in the sound of
the exhaust system.
d. You have had an accident involving damage to the exhaust system, un-
derbody, or rear of the vehicle.
THREE-WAY CATALYST
The three-way catalyst is an emission control
device installed in the exhaust system. Exhaust
gases in the three-way catalyst are burned at
high temperatures to help reduce pollutants.
WARNING
●The exhaust gas and the exhaust sys-
tem are very hot. Keep people, animals
or flammable materials away from the
exhaust system components.
● Do not stop or park the vehicle over
flammable materials such as dry grass,
waste paper or rags. They may ignite
and cause a fire.
● When parking, ensure that people or
inflammable materials are kept away
from the exhaust pipe.
PRECAUTIONS WHEN STARTING
AND DRIVING
5-2Starting and driving
Page 180 of 293

NISSAN VEHICLE IMMOBILIZER
SYSTEM
The NISSAN Vehicle Immobilizer system will not
allow the engine to start without the use of the
registered key.
If the engine fails to start using a registered key
(for example, when interference is caused by
another registered key, an automated toll road
device or automatic payment device on the key
ring) , restart the engine using the following pro-
cedure:1. Leave the ignition switch in the ON position for approximately 5 seconds.
2. Place the ignition switch in the OFF or LOCK position, and wait approximately
10 seconds.
3. Repeat Steps 1 and 2.
4. Restart the engine while holding the device (which may have caused the interference)
separate from the registered key.
If the no start condition re-occurs, NISSAN rec-
ommends placing the registered key on a sepa-
rate key ring to avoid interference from other
devices. ●
Make sure the area around the vehicle is
clear.
● Check fluid levels such as engine oil, cool-
ant, brake and clutch fluid (if so equipped) ,
and windshield-washer fluid as frequently as
possible, or at least whenever you refuel.
● Check that all windows and lights are clean.
● Visually inspect tires for their appearance
and condition. Also check tires for proper
inflation.
● Lock all doors.
● Position seat and adjust head restraints.
● Adjust inside and outside mirrors.
● Fasten seat belts and ask all passengers to
do likewise.
● Check the operation of warning lights when
the key is turned to the ON position. For
additional information, refer to
“Warning/indicator lights and audible re-
minders” in the “Instruments and controls”
section of this manual. 1. Apply the parking brake.
2.
Automatic transmission:
Move the shift lever to P (Park) or N (Neu-
tral) . P (Park) is recommended.
The shift lever cannot be moved out of
the P (Park) position and into any of
the other gear positions if the ignition
switch is placed in the OFF position or
if the key is removed from the ignition
switch.
The starter is designed not to operate if
the shift lever is in any of the driving
positions.
Manual transmission:
Move the shift lever to N (Neutral) . Depress
the clutch pedal to the floor while cranking
the engine.
3. Crank the engine with your foot off the
accelerator pedal by placing the ignition
switch in the START position. Release the
key when the engine starts. If the engine
starts, but fails to run, repeat the above
procedure.
● If the engine is very hard to start in ex-
tremely cold weather or when restarting,
depress the accelerator pedal a little (ap-
proximately 1/3 to the floor) and hold it
BEFORE STARTING THE ENGINE STARTING THE ENGINE
Starting and driving5-7
Page 190 of 293

The following methods are recommended by
NISSAN to increase fuel economy on NISSAN
vehicles. All these recommendations can help
you to achieve a higher level of fuel economy in
your vehicle.● Accelerate slowly and smoothly. Maintain
cruising speeds with a constant accelerator
position.
● Drive at moderate speeds on the highway.
Driving at high speed lowers fuel economy.
● Avoid unnecessary stopping and braking.
Maintain a safe distance behind other ve-
hicles.
● Use a proper gear range which suits road
conditions. On level roads, shift into high
gear as soon as possible.
● Avoid unnecessary engine idling.
● Keep your engine tuned up.
● Follow the recommended scheduled main-
tenance.
● Keep the tires inflated to the correct pres-
sure. Low tire pressure increases tire wear
and lowers fuel economy.
● Keep the wheels in correct alignment. Im-
proper alignment increases tire wear and
lowers fuel economy. ●
Air conditioner operation lowers fuel
economy. Use the air conditioner only when
necessary.
● When cruising at highway speeds, it is more
economical to use the air conditioner and
leave the windows closed to reduce drag.
● Use the recommended viscosity engine oil.
For additional information, refer to “Engine
oil and oil filter recommendations” in “Tech-
nical and consumer information” in this
manual.
INCREASING FUEL ECONOMY
Starting and driving5-17