2015 NISSAN LEAF change time
[x] Cancel search: change timePage 234 of 412
REARVIEW MONITOR BRIGHTNESS
CONTROL
1. To adjust the brightness of the RearView
monitor, fully depress the foot brake pedal and
move the shift lever to theR (Reverse)posi-
tion. See “Shifting” in the “Starting and driving”
section for more information.
2. Once the vehicle is in the R (Reverse)posi-
tion, with the foot brake pedal fully depressed,
press the Day/Night button on the lower left
hand side of the display screen to adjust the
Brightness of the RearView monitor. See “Day/
Night button” in this section for more informa-
tion.
Note
Do not adjust the Brightness or Contrast of
the RearView monitor while the vehicle is
moving.
When the headlights are in the ON position, the
display screen will automatically default to the
night screen (dark) .
Day/Night button
To turn OFF the display screen, push the
button and hold for two seconds. Push the
button again to turn the display screen ON.
Push the
button to quickly adjust the bright-
ness from any screen except when using the
RearView monitor and/or camera. See “Rear-
View monitor” in this section for more information.
Note
When the headlights are in the ON po-
sition, the display screen will automati-
cally default to the night screen (dark) .
OPERATING TIPS
• When the shift lever is shifted to R (Reverse) , the monitor screen automatically changes to the
RearView Monitor mode. However, the radio
can be heard. • It may take some time until the RearView Moni-
tor is displayed after the shift lever has been
shifted to R (Reverse) . Objects may be dis-
torted momentarily until the RearView Monitor
screen is displayed completely. When the shift
lever is returned to a position other than R
(Reverse) , it may take some time until the
screen changes. Objects on the screen may be
distorted until they are completely displayed.
• When the temperature is extremely high or low, the screen may not clearly display objects. This
is not a malfunction.
• When strong light directly enters the camera, objects may not be displayed clearly.
• Vertical lines may be seen in objects on the screen. This is due to strong reflected light from
the bumper. This is not a malfunction.
• The screen may flicker under fluorescent light. This is not a malfunction.
• The colors of objects on the RearView Monitor may differ somewhat from those of the actual
object.
• When the contrast of objects is low at night, pressing the ENTER/SETTING button may not
change the brightness.
• Objects on the monitor may not be clear in a dark place or at night.
Display screen, heater, air conditioner, audio and phone systems4-7
Page 238 of 412
DISPLAYING CLIMATE CONTROL SYSTEM
STATUS SCREEN (MODELS WITH NAVIGA-
TION SYSTEM)
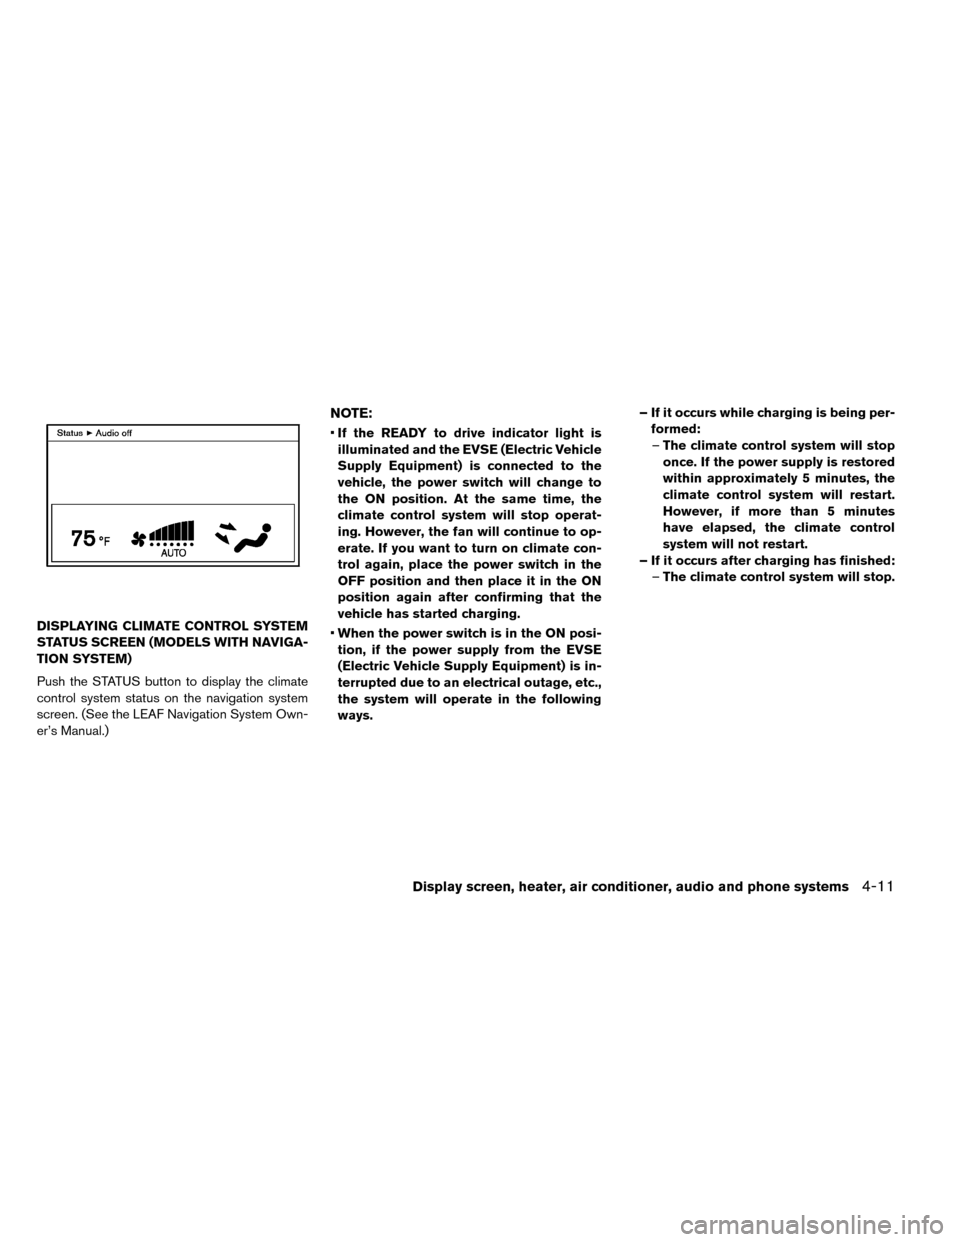
Push the STATUS button to display the climate
control system status on the navigation system
screen. (See the LEAF Navigation System Own-
er’s Manual.)
NOTE:
•If the READY to drive indicator light is
illuminated and the EVSE (Electric Vehicle
Supply Equipment) is connected to the
vehicle, the power switch will change to
the ON position. At the same time, the
climate control system will stop operat-
ing. However, the fan will continue to op-
erate. If you want to turn on climate con-
trol again, place the power switch in the
OFF position and then place it in the ON
position again after confirming that the
vehicle has started charging.
• When the power switch is in the ON posi-
tion, if the power supply from the EVSE
(Electric Vehicle Supply Equipment) is in-
terrupted due to an electrical outage, etc.,
the system will operate in the following
ways. – If it occurs while charging is being per-
formed:– The climate control system will stop
once. If the power supply is restored
within approximately 5 minutes, the
climate control system will restart.
However, if more than 5 minutes
have elapsed, the climate control
system will not restart.
– If it occurs after charging has finished: –The climate control system will stop.
Display screen, heater, air conditioner, audio and phone systems4-11
Page 241 of 412
Air flow control:
Press the MODE button to change the air flow
mode.
— Air flows from the center and sideventilators.
— Air flows from the center and sideventilators and foot outlets.
— Air flows mainly from the footoutlets.
— Air flows from the defroster outletsand foot outlets.
Temperature control:
Turn the temperature control dial to set the de-
sired temperature.
The temperature range is between 60°F (16°C)
and 90°F (32°C) .
Ventilation:
1. Press the AUTO button so that the indicator light turns off.
2. Press the HEAT button and A/C button if the indicator lights are on so that both indicator
lights turn off.
Note
The ventilation mode requires a lower
power consumption, so cruising distance
will increase.
Air recirculation:
Press the intake air control
button to
change the air circulation mode. When the indi-
cator light illuminates, the flowing air is recircu-
lated inside the vehicle.
Outside air circulation:
Press the intake air control
button to
change the air circulation mode. When the indi-
cator light does not illuminate, the flowing air is
drawn from outside the vehicle.
Automatic air intake control:
To set the automatic control mode, press and
hold the
(intake air control) button. The
indicator light will blink twice and the inside/
outside circulation will then be controlled auto-
matically. When in automatic mode, the indicator
light will come on when inside air recirculation is
active.
Note
• Odors from inside and outside the vehicle
can build up in the air conditioner unit.
Odor can enter the passenger compart-
ment through the vents.
• When parking, set the heater and air con-
ditioner controls to turn off air recircula-
tion to allow fresh air into the passenger
compartment. This should help reduce
odors inside the vehicle.
Climate Ctrl. Timer
The air conditioner starts to operate at the time of
day and day of the week specified in the settings.
This pre heats or pre cools the vehicle to a factory
preset temperature in the passenger compart-
ment before driving while the charger is con-
nected to vehicle. This helps reduce power con-
sumption from the Li-ion battery.
As the temperature is set to the factory default
setting, the user cannot adjust the temperature.
The Climate Ctrl. Timer operates the air condi-
tioner using power from the charger. Electric
power from the Li-ion battery is not used.
Once the Climate Ctrl. Timer is set, it automati-
cally starts when the set time is reached. It is
4-14Display screen, heater, air conditioner, audio and phone systems
Page 243 of 412
3. The “Climate Ctrl. Timer” screen is displayed.To change the time of day and the day of the
week that the climate control timer turns on or
off, or to turn the climate control timer on or
off, push the
switch.
4. To turn the timer on or off, use the
switch to highlight “On” or “Off” and then
push the
switch. If “On” is selected, an
additional screen is displayed that allows you
to change the time or the climate control
timer. 5. The hour portion of the time is highlighted on
the screen. Push the
switch to change
the hour field in increments of one hour. Push
and hold the
switch to fast forward the
hours. Push the
switch to move to the
minutes field.
4-16Display screen, heater, air conditioner, audio and phone systems
Page 246 of 412
automatically changes to the ON position. The
climate control system automatically turns off
the heater or air conditioner and switches to the
air recirculation mode. Place the power switch
in the off position to begin charging. Turn on the
desired climate control function.
• The remote climate control or climate control timer may fog up windows depending on the set
temperature or outside temperature.
• When turning on the seat heater switch prior to operating the remote climate control or climate
control timer, the seat heater also will turn on.
The steering wheel heater will turn on automati-
cally when the outside temperature is low.
In-cabin microfilter:
The climate control system is equipped with an
in-cabin microfilter which collects dirt, pollen,
dust, etc. To make sure the air conditioner, heats,
defogs, and ventilates efficiently, replace the filter
regularly. To replace the filter, contact a NISSAN
certified LEAF dealer.
The filter should be replaced if the air flow
decreases significantly or if windows fog
up easily when operating the climate con-
trol system.
Servicing climate control
The climate control system in your NISSAN is
charged with a refrigerant designed with the en-
vironment in mind. This refrigerant will not harm
the earth’s ozone layer. Special charging equip-
ment and lubricant are required when servicing
your NISSAN climate control. Using improper
refrigerants or lubricants will cause severe dam-
age to your climate control system. See “Recom-
mended fluids/lubricants and capacities” in the
“Technical and consumer information” section for
climate control system refrigerant and lubricant
recommendations.
A NISSAN certified LEAF dealer will be able to
service your environmentally friendly climate con-
trol system.
Display screen, heater, air conditioner, audio and phone systems4-19
Page 249 of 412
Air flow control:
Press the MODE button to change the air flow
mode.
— Air flows from the center and sideventilators.
— Air flows from the center and sideventilators and foot outlets.
— Air flows mainly from the footoutlets.
— Air flows from the defroster outletsand foot outlets.
Temperature control:
Press the temperature control
,
button to set the desired temperature.
The temperature range is between 60°F (18°C)
and 90°F (32°C) .
Ventilation:
1. Press the AUTO button so that the indicator light turns off.
2. Press the HEAT button and A/C button if the indicator lights are on so that both indicator
lights turn off.
Note
The ventilation mode requires a lower
power consumption, so cruising distance
will increase.
Air recirculation:
Press the air recirculation
button to
change the air circulation mode. When the indi-
cator light illuminates, the flowing air is recircu-
lated inside the vehicle.
Outside air circulation:
Press the intake air control
button to
change the air circulation mode. When the indi-
cator light does not illuminate, the flowing air is
drawn from outside the vehicle.
Automatic air intake control:
To set the automatic control mode, press and
hold the
(intake air control) button. The
indicator light will blink twice and the inside/
outside circulation will then be controlled auto-
matically. When in automatic mode, the indicator
light will come on when inside air recirculation is
active.
Note
• Odors from inside and outside the vehicle
can build up in the air conditioner unit.
Odor can enter the passenger compart-
ment through the vents.
• When parking, set the heater and air con-
ditioner controls to turn off air recircula-
tion to allow fresh air into the passenger
compartment. This should help reduce
odors inside the vehicle.
Climate Ctrl. Timer
The air conditioner starts to operate at the time of
day and day of the week specified in the settings.
This pre heats or pre cools the vehicle to a set
temperature in the passenger compartment be-
fore driving while the charger is connected to
vehicle. This help reduce power consumption
from the Li-ion battery.
The Climate Ctrl. Timer operates the air condi-
tioner using power from the charger. Electric
power from the Li-ion battery is not used.
The Climate Ctrl. Timer function allows two dif-
ferent timer settings. Each timer charge function
can be set to activate on a different day of the
week.
4-22Display screen, heater, air conditioner, audio and phone systems
Page 252 of 412
8. The indicator of “Timer 1” illuminates after theClimate Ctrl. Timer is set. Use the same pro-
cedure to set the Timer 2 setting.
9. Place the power switch to the OFF position, and then connect the charge connector to the
vehicle.
Operation tips:
• The Climate Ctrl. Timer will only start when the power switch is in the “OFF” position. Always
turn the power switch to the “OFF” position after
the Climate Ctrl. Timer is set.
• Touch “Timer 1” or “Timer 2” to turn off the Climate Ctrl. Timer function. After this operation
has been performed, the indicator turns off and
the Climate Ctrl. Timer function will be turned
off. The start and stop time settings are not
deleted even if the Climate Ctrl. Timer function
is turned off. • If OFF is selected for a day of the week, the
Climate Ctrl. timer will not operate on that day.
The system will wait until the next charging timer
set to perform charging.
• While the Climate Ctrl. Timer operates, the Cli- mate Ctrl. Timer indicator and the charging sta-
tus indicator lights flash. If the Climate Ctrl.
Timer is set to activate, the Climate Ctrl. Timer
indicator illuminates.
• If the timer charge function and the Climate Ctrl. Timer are in operation at the same time due to
an overlap of the timer settings, either function
can be set to be preferentially provided with
electric power. For the details of “Timer Priority”
settings, refer to separate LEAF Navigation
System Owner’s Manual.
• The temperature in the passenger compartment may not be comfortable if entering the vehicle
too soon before or too long after the scheduled
time of departure.
• Air conditioning is limited to the capacity of the electric power when the charge connector is
connected. Therefore, the temperature may not
reach the factory default setting due to limita-
tions in air conditioning performance, if ambient
temperature is excessively high or low, or if the charge connector is connected to a 120V
outlet.
• While the battery is being charged, the Climate Ctrl. Timer cannot be operated until the Li-ion
battery available charge gauge reached the full
mark. When the battery is not being charged,
the Climate Ctrl. Timer can be operated, even if
the Li-ion battery available charge gauge has
not reached the full mark.
• When the climate control is set on first priority, the Climate Ctrl. Timer works regardless of the
remaining battery energy.
• If the Climate Ctrl. Timer starts its operation while the vehicle is being charged, the charging
time will be prolonged.
• Operating the Climate Ctrl. Timer or remote climate control in an environment with low tem-
perature may decrease the rate of battery
charge.
• The Climate Ctrl. Timer settings cannot be modified while it is operating. If timer settings
are modified while the Climate Ctrl. Timer is
operating, these changes will be reflected the
next time the Climate Ctrl. Timer operates.
Display screen, heater, air conditioner, audio and phone systems4-25
Page 255 of 412
Note
•The temperature in the passenger com-
partment may not be comfortable if enter-
ing the vehicle too soon before or too long
after the scheduled time of departure.
• Air conditioning is limited to the capacity
of the electric power when the charge
connector is connected. Therefore, the
temperature may not reach the set tem-
perature due to limitations in air condi-
tioning performance, if ambient tempera-
ture is excessively high or low, or if the
charge connector is connected to a 120 V
plug outlet.
• The Climate Ctrl. Timer operates the cli-
mate control function so that a comfort-
able temperature is provided in the pas-
senger compartment at the scheduled
time of departure. The climate control is
set to stop at the scheduled time of
departure.
RADIO
Push the power switch to the ACC or ON posi-
tion and press the radio band select button to
turn on the radio. If you listen to the radio while
the READY to drive indicator light is off, the
power switch should be pushed to the ACC
position.
Radio reception is affected by station signal
strength, distance from radio transmitter, build-
ings, bridges, mountains and other external influ-
ences. Intermittent changes in reception quality
normally are caused by these external influences.
Using a cellular phone in or near the vehicle
may influence radio reception quality.
Radio reception
Your NISSAN radio system is equipped with
state-of-the-art electronic circuits to enhance ra-
dio reception. These circuits are designed to
extend reception range, and to enhance the qual-
ity of that reception. However, there are some general characteristics
of both FM and AM radio signals that can affect
radio reception quality in a moving vehicle, even
when the finest equipment is used. These char-
acteristics are completely normal in a given re-
ception area and do not indicate any malfunction
in your NISSAN radio system.
Reception conditions will constantly change be-
cause of vehicle movement. Buildings, terrain,
signal distance and interference from other ve-
hicles can work against ideal reception. De-
scribed below are some of the factors that can
affect your radio reception.
Some cellular phones or other devices may
cause interference or a buzzing noise to come
from the audio system speakers. Storing the de-
vice in a different location may reduce or elimi-
nate the noise.
AUDIO SYSTEM (MODELS WITHOUT
NAVIGATION SYSTEM)
4-28Display screen, heater, air conditioner, audio and phone systems