Page 78 of 510
WARNING
●Never let children ride unrestrained or
extend their hands or face out of the
window. Do not attempt to hold them in
your lap or arms. Some examples of
dangerous riding positions are shown
in the illustrations.
Page 81 of 510
WARNING
●The seat belts, the side air bags and
curtain air bags are most effective when
you are sitting well back and upright in
the seat. The side air bag and curtain air
bag inflate with great force. Do not al-
low anyone to place their hand, leg or
face near the side air bag on the side of
the seatback of the front seat or near
the side roof rails. Do not allow anyone
sitting in the front seats or rear out-
board seats to extend their hand out of
the window or lean against the door.
Some examples of dangerous riding
positions are shown in the previous
illustrations.
Page 128 of 510
CAUTION
●Do not operate the washer continuously
for more than 30 seconds.
● Do not operate the washer if the
windshield-washer reservoir is empty.
● Do not fill the windshield-washer reser-
voir with washer fluid concentrates at
full strength. So methyl alcohol based
windshield-washer fluid concentrates
may permanently stain the grille if
spilled with filling the windshield-
washer fluid reservoir.
● Pre-mix windshield-washer fluid con-
centrates with water to the manufactur-
er’s recommended levels before pour-
ing the fluid into the windshield-washer
reservoir. Do not use the windshield-
washer reservoir to mix the windshield-
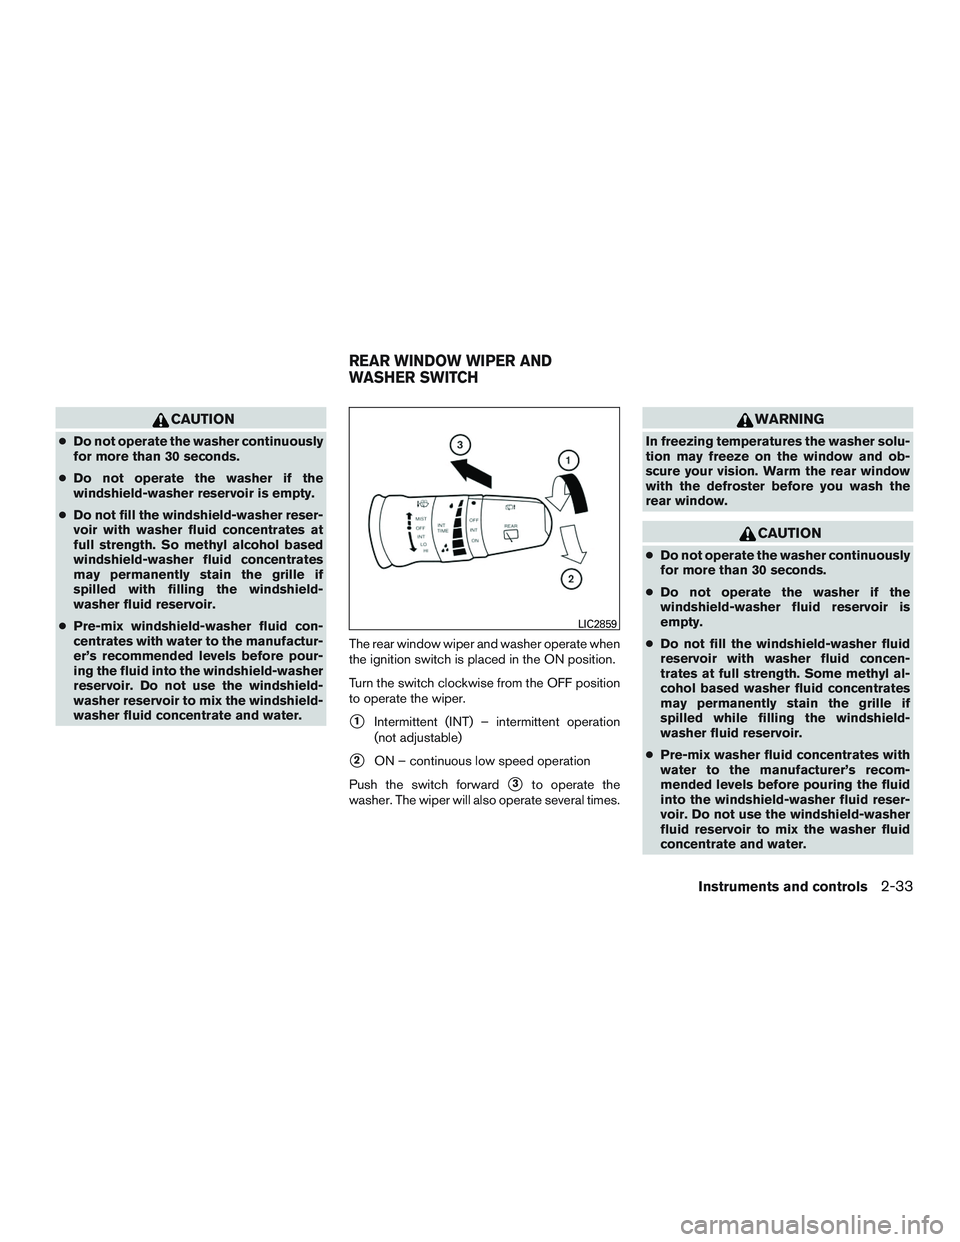
washer fluid concentrate and water. The rear window wiper and washer operate when
the ignition switch is placed in the ON position.
Turn the switch clockwise from the OFF position
to operate the wiper.
�1Intermittent (INT) – intermittent operation
(not adjustable)
�2ON – continuous low speed operation
Push the switch forward
�3to operate the
washer. The wiper will also operate several times.
Page 129 of 510
To defrost the rear window glass and outside
mirrors:
Start the engine and push the rear window de-
froster switch. The rear window defroster indica-
tor light on the display screen comes on. Push the
switch again to turn the defroster off.
The rear window defroster automatically turns off
after approximately 15 minutes.
Page 140 of 510
●Only certain power outlets are designed
for use with a cigarette lighter unit. Do
not use any other power outlet for an
accessory lighter. See a NISSAN dealer
for additional information.
● Do not use with accessories that exceed
a 12 volt, 120W (10A) power draw.
● Do not use double adapters or more
than one electrical accessory.
● Use power outlets with the engine run-
ning to avoid discharging the vehicle
battery.
● Avoid using power outlets when the air
conditioner, headlights or rear window
defroster is on.
● Before inserting or disconnecting a
plug, be sure the electrical accessory
being used is turned OFF.
● Push the plug in as far as it will go. If
good contact is not made, the plug may
overheat or the internal temperature
fuse may open.
● When not in use, be sure to close the
cap. Do not allow water or any other
liquid to contact the outlet.
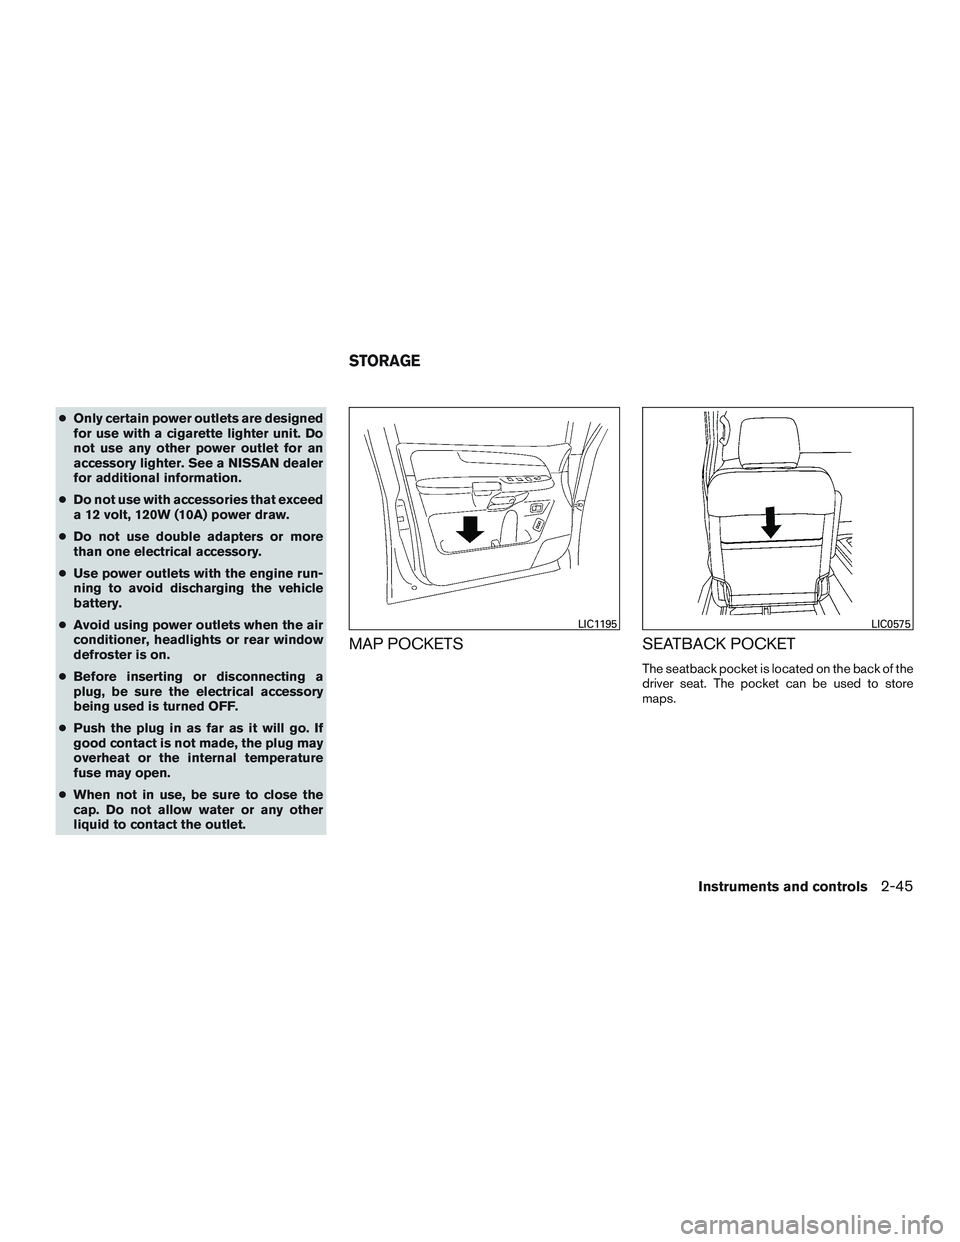
MAP POCKETS SEATBACK POCKET
The seatback pocket is located on the back of the
driver seat. The pocket can be used to store
maps.
Page 151 of 510
Always distribute the luggage evenly on the roof
rack. Do not load more than 200 lbs (91 kg) on
entire roof rack. Be sure load is evenly distributed
across both crossbars. Be careful that your ve-
hicle does not exceed the Gross Vehicle Weight
Rating (GVWR) or its Gross Axle Weight Rating
(GAWR front and rear) . The GVWR and GAWR
are located on the F.M.V.S.S. label (located on
the driver’s door pillar) . For additional information
regarding GVWR and GAWR, refer to “Vehicle
loading information” in the “Technical and con-
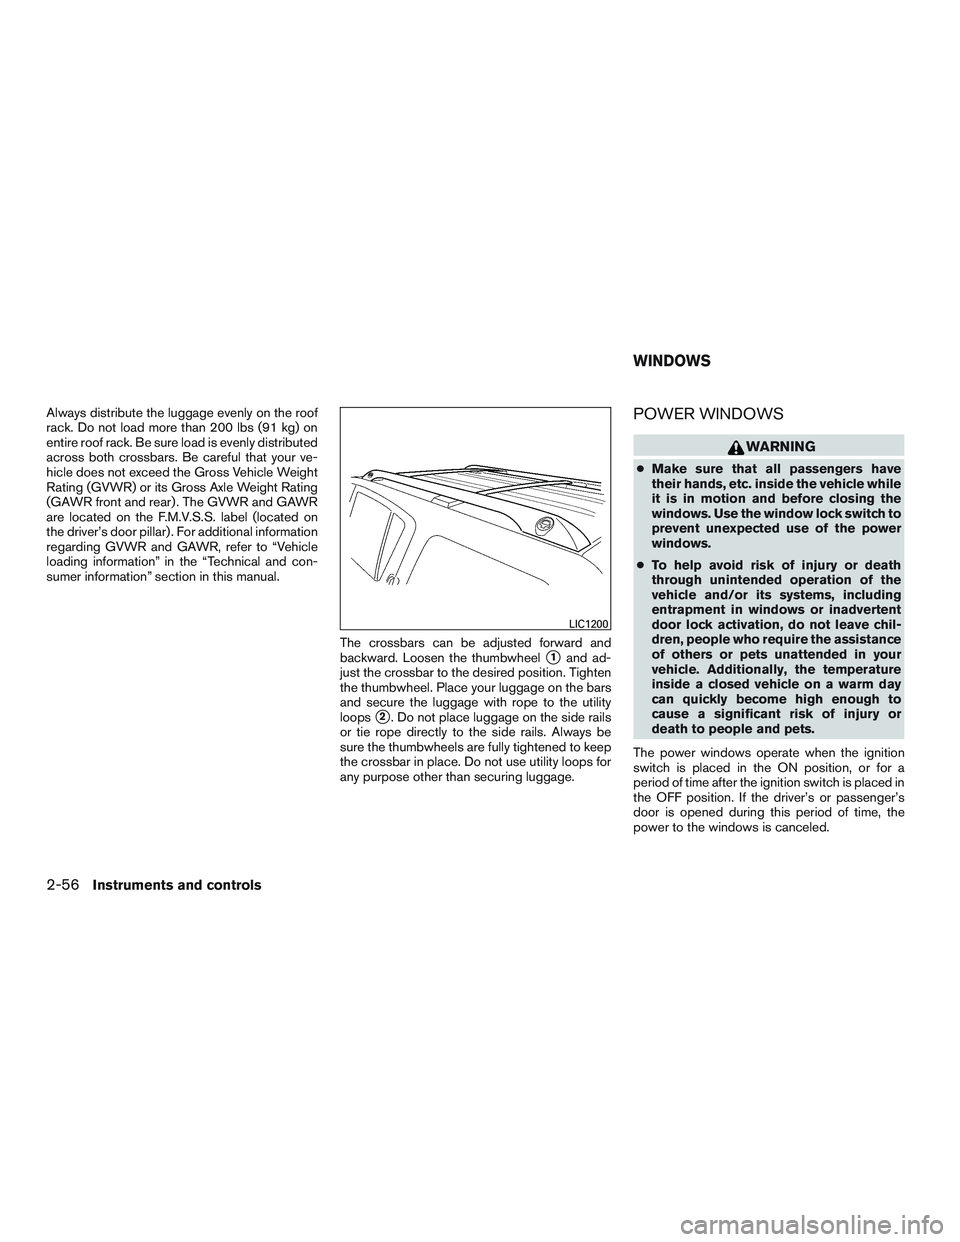
sumer information” section in this manual.The crossbars can be adjusted forward and
backward. Loosen the thumbwheel
�1and ad-
just the crossbar to the desired position. Tighten
the thumbwheel. Place your luggage on the bars
and secure the luggage with rope to the utility
loops
�2. Do not place luggage on the side rails
or tie rope directly to the side rails. Always be
sure the thumbwheels are fully tightened to keep
the crossbar in place. Do not use utility loops for
any purpose other than securing luggage.
POWER WINDOWS
Page 153 of 510
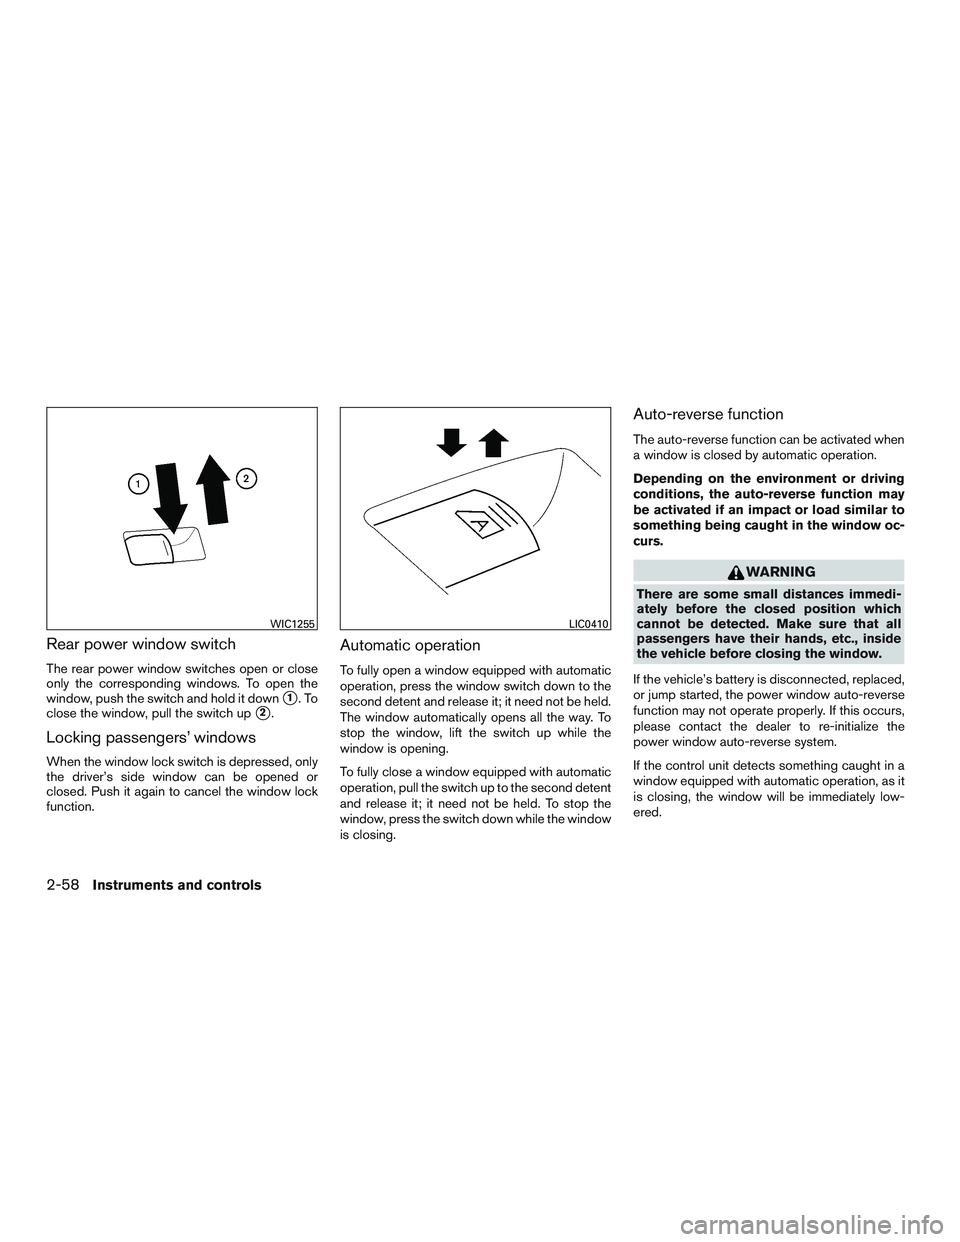
Rear power window switch
The rear power window switches open or close
only the corresponding windows. To open the
window, push the switch and hold it down
�1.To
close the window, pull the switch up
�2.
Locking passengers’ windows
When the window lock switch is depressed, only
the driver’s side window can be opened or
closed. Push it again to cancel the window lock
function.
Automatic operation
To fully open a window equipped with automatic
operation, press the window switch down to the
second detent and release it; it need not be held.
The window automatically opens all the way. To
stop the window, lift the switch up while the
window is opening.
To fully close a window equipped with automatic
operation, pull the switch up to the second detent
and release it; it need not be held. To stop the
window, press the switch down while the window
is closing.
Auto-reverse function
The auto-reverse function can be activated when
a window is closed by automatic operation.
Depending on the environment or driving
conditions, the auto-reverse function may
be activated if an impact or load similar to
something being caught in the window oc-
curs.
Page 283 of 510
AM and FM● Tilt up/down for less than 1.5 seconds to
increase or decrease the preset station.
● Tilt up/down for more than 1.5 seconds to
seek up or down to the next station.
● Press the ENTER button to show the list of
preset stations.
XM ● Tilt up/down for less than 1.5 seconds to
increase or decrease the preset station.
● Tilt up/down for more than 1.5 seconds to
go to the next or previous category.
● Press the ENTER button to show the XM
Menu.
iPod® ● Tilt up/down for less than 1.5 seconds to
increase or decrease the track number.
● Press the ENTER button to show the iPod
Menu. CD
● Tilt up/down for less than 1.5 seconds to
increase or decrease the track number.
● Tilt up/down for more than 1.5 seconds to
increase or decrease the folder number (if
playing compressed audio files) .
● Press the ENTER button to show the CD
Menu.
DVD (if so equipped) ● Tilt up/down for less than 1.5 seconds to
increase or decrease the track number.
● Tilt up/down for more than 1.5 seconds to
increase or decrease the title number.
● Press the ENTER button to select an item
from the DVD display.
● When the transparent operation menu ap-
pears, the switch will control the menu.
USB ● Tilt up/down for less than 1.5 seconds to
increase or decrease the track number.
● Tilt up/down for more than 1.5 seconds to
increase or decrease the folder number.
● Press the ENTER button to show the USB
Menu. Bluetooth® Audio (if so equipped)
● Tilt up/down for less than 1.5 seconds to
increase or decrease the track number.
AUX ● Press the ENTER button to show the AUX
Menu.
ANTENNA
Window antenna
The antenna pattern is printed inside the rear
passenger and driver side windows.