Page 444 of 510

Replace the battery in the keyfob as follows:
�1Open the lid using a coin�A.
�2Remove the battery�B.
�3Install a new battery�Cwith the “+” facing
down.
● Hold the battery")
KEYFOB (if so equipped)
Replace the battery in the keyfob as follows:
�1Open the lid using a coin�A.
�2Remove the battery�B.
�3Install a new battery�Cwith the “+” facing
down.
● Hold the battery by the edges. Holding the
battery across the contact points will seri-
ously deplete the storage capacity. ●
Do not touch the internal circuit and electric
terminals as it could cause a malfunction.
● When changing the battery, do not let dust
or oil get on the keyfob.
● There is danger of explosion if a lithium bat-
tery is incorrectly replaced. Replace only
with the same or equivalent type.
Recommended battery: CR2025 or equivalent.
�4Close the lid securely.
5. Press the
button, then thebutton two or three times to check the key-
fob operation.
If the battery is removed for any reason
other than replacement, perform step 5.
● An improperly disposed battery can
hurt the environment. Always confirm
local regulations for battery disposal.
● The keyfob is water-resistant; how-
ever, if it does get wet, immediately
wipe completely dry.
● The operational range of the keyfob
extends to approximately 33 ft (10 m)
from the vehicle. This range may vary
with conditions.
LDI0484
Maintenance and do-it-yourself8-29
Page 445 of 510
 This device may
not cause harmful interference, and (2) this
device")
FCC Notice:
For USA:
This device complies with Part 15 of the
FCC Rules. Operation is subject to the fol-
lowing two conditions: (1) This device may
not cause harmful interference, and (2) this
device must accept any interference re-
ceived, including interference that may
cause undesired operation.
Note: Changes or modifications not ex-
pressly approved by the party responsible
for compliance could void the user’s au-
thority to operate the equipment.
For Canada:
This device complies with Industry Canada
licence-exempt RSS standards(s) . Opera-
tion is subject to the following two condi-
tions: (1) this device may not cause inter-
ference, and (2) this device must accept any
interference, including interference that
may cause undesired operation of the de-
vice.NISSAN INTELLIGENT KEY® (if so
equipped)
Replace the battery in the Intelligent Key as fol-
lows:1. Remove the mechanical key from the Intelli- gent Key.
2. Insert a small screwdriver
�Ainto the slit�B
of the corner and twist it to separate the
upper part from the lower part. Use a cloth to
protect the casing.
3. Replace the battery with a new one. Recommended battery: CR2025 or equiva-
lent.
●Do not touch the internal circuit and elec-
tric terminals as doing so could cause a
malfunction.
● Hold the battery by the edges. Holding
the battery across the contact points will
seriously deplete the storage capacity.
● Make sure that the + side faces the bot-
tom of the case.
WDI0620
8-30Maintenance and do-it-yourself
Page 446 of 510

4. Close the lid securely as illustrated�C�D.
5. Operate the buttons to check the operation.
See a NISSAN dealer if you need assistance for
replacement.
FCC Notice:
For USA:
This device complies with Part 15 of the
FCC Rules. Operation is subject to the fol-
lowing two conditions: (1) This device may
not cause harmful interference, and (2) this
device must accept any interference re-
ceived, including interference that may
cause undesired operation. Note: Changes or modifications not ex-
pressly approved by the party responsible
for compliance could void the user’s au-
thority to operate the equipment.
For Canada:
This device complies with Industry Canada
licence-exempt RSS standard(s) . Opera-
tion is subject to the following two condi-
tions: (1) this device may not cause inter-
ference, and (2) this device must accept any
interference, including interference that
may cause undesired operation of the de-
vice.
HEADLIGHTS
Replacing the halogen headlight bulb
The headlight is a semi-sealed beam type which
uses a replaceable headlight (halogen) bulb. Be-
cause the headlight assembly must be removed
from the vehicle for bulb replacement, see your
NISSAN dealer.
CAUTION
●
High pressure halogen gas is sealed
inside the halogen bulb. The bulb may
break if the glass envelope is scratched
or the bulb is dropped.
● When handling the bulb, do not touch
the glass envelope.
● DO NOT TOUCH THE BULB WITH BARE
HANDS.
● Do not leave the bulb out of the head-
light reflector for a long period of time
as dust, moisture and smoke may enter
the headlight body and affect the per-
formance of the headlight.
● Aiming is not necessary after replacing
the bulb. When aiming adjustment is
necessary, contact a NISSAN dealer.
WDI0621
LIGHTS
Maintenance and do-it-yourself8-31
Page 447 of 510

NOTE:
Use the same number and wattage as
shown in the chart located in the “Exterior
and interior lights” section of this manual.
Fog may temporarily form inside the lens of the
exterior lights in the rain or in a car wash. A
temperature difference between the inside and
the outside of the lens causes the fog. This is not
a malfunction. If large drops of water collect
inside the lens, contact a NISSAN dealer.
FOG LIGHTS (if so equipped)
Replacing the fog light bulb
CAUTION
●High pressure halogen gas is sealed
inside the halogen bulb. The bulb may
break if the glass envelope is scratched
or the bulb is dropped.
● When handling the bulb, do not touch
the glass envelope.
● Use the same number and wattage as
originally installed as shown in the
chart. ●
Do not leave the bulb out of the fog light
for a long period of time as dust, mois-
ture and smoke may enter the fog light
body and affect the performance of the
fog light.
1. Disconnect the negative (-) battery cable.
2. The fog light is accessible in front of the fronttire and behind the bumper.
3. Disconnect the bulb connector
�1.
4. Rotate the bulb counterclockwise and re- move.
5. Remove by pulling it straight out of the fog light assembly. Do not shake or rotate the
bulb when removing it. Do not touch the
glass envelope.
6. Install in the reverse order of removal.
LDI0382
8-32Maintenance and do-it-yourself
Page 448 of 510

NOTE:
To adjust the fog light vertical aim: Access
the aiming screw from underneath the front
bumper. The aiming screw is located on the
bottom of the fog light housing. Turn the
screw clockwise to raise the pattern. Turn
the screw counterclockwise to lower the
pattern.EXTERIOR AND INTERIOR LIGHTS
ItemWattage (W)Bulb No.
Headlight assembly* High 659005 (HB3)
Low 559006 (HB4)
Park/Turn 28/83457K
Sidemarker 3.8194
Daytime running lights* (if so equipped) 559006 (HB4)
Side turn signal light (if so equipped)* ——
Front fog light (if so equipped) 55H11
Puddle lamp (if so equipped) 9906
Room/map lights 8–
Personal lights 6WXW52
Footwell (if so equipped)* 3.41 58
Glove box light* 3.4158
Vanity mirror light 1.8–
Step light 3.8194
Cargo light 8AL67
High-mounted stop light* ——
Rear combination light Tail/Stop 27/83157KX RD
Backup (reversing) 18921LF
Turn 183156K
License plate light 5W5W
* See a NISSAN dealer for replacement.
Always check with the Parts Department at a NISSAN dealer for the latest parts information.
Maintenance and do-it-yourself8-33
Page 449 of 510
1. Room/map lights
2. Front personal lights
3. Step light
4. Puddle lamp/Side turn signal light (if soequipped)
5. High-mounted stoplight
6. Cargo light
7. License plate light
8. Rear combination light
9. Headlight assembly/ Daytime running
lights* (if so equipped)
10. Front fog light (if so equipped)
Replacement procedures
All other lights are either type A, B, C or D. When
replacing a bulb, first remove the lens, lamp
and/or cover with a suitable tool.
Indicates bulb removal
Indicates bulb installationLDI0383
WDI0263
8-34Maintenance and do-it-yourself
Page 450 of 510
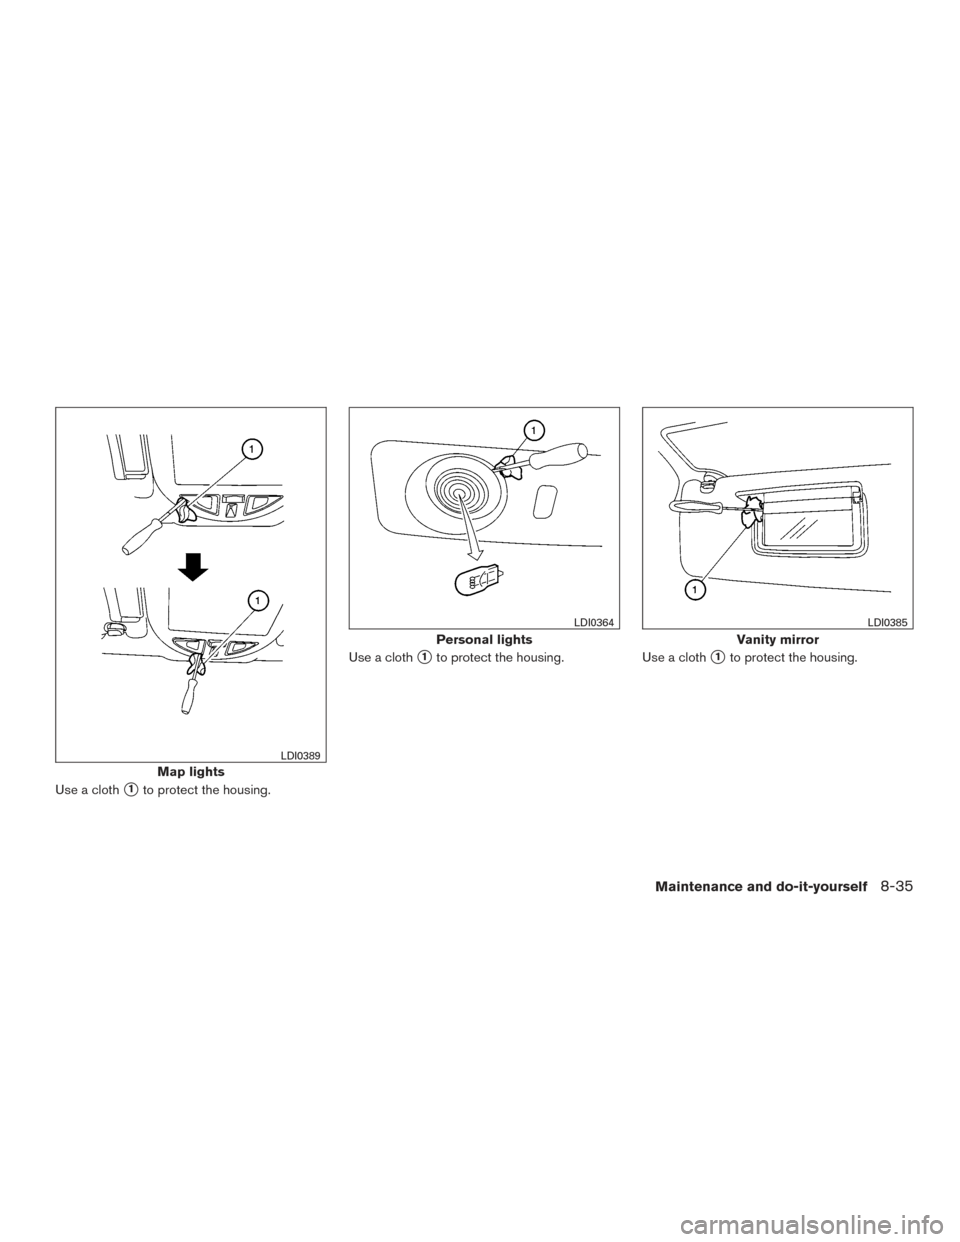
Use a cloth�1to protect the housing.Use a cloth
�1to protect the housing.
Use a cloth�1to protect the housing.
Map lights
LDI0389
Personal lights
LDI0364
Vanity mirror
LDI0385
Maintenance and do-it-yourself8-35
Page 451 of 510
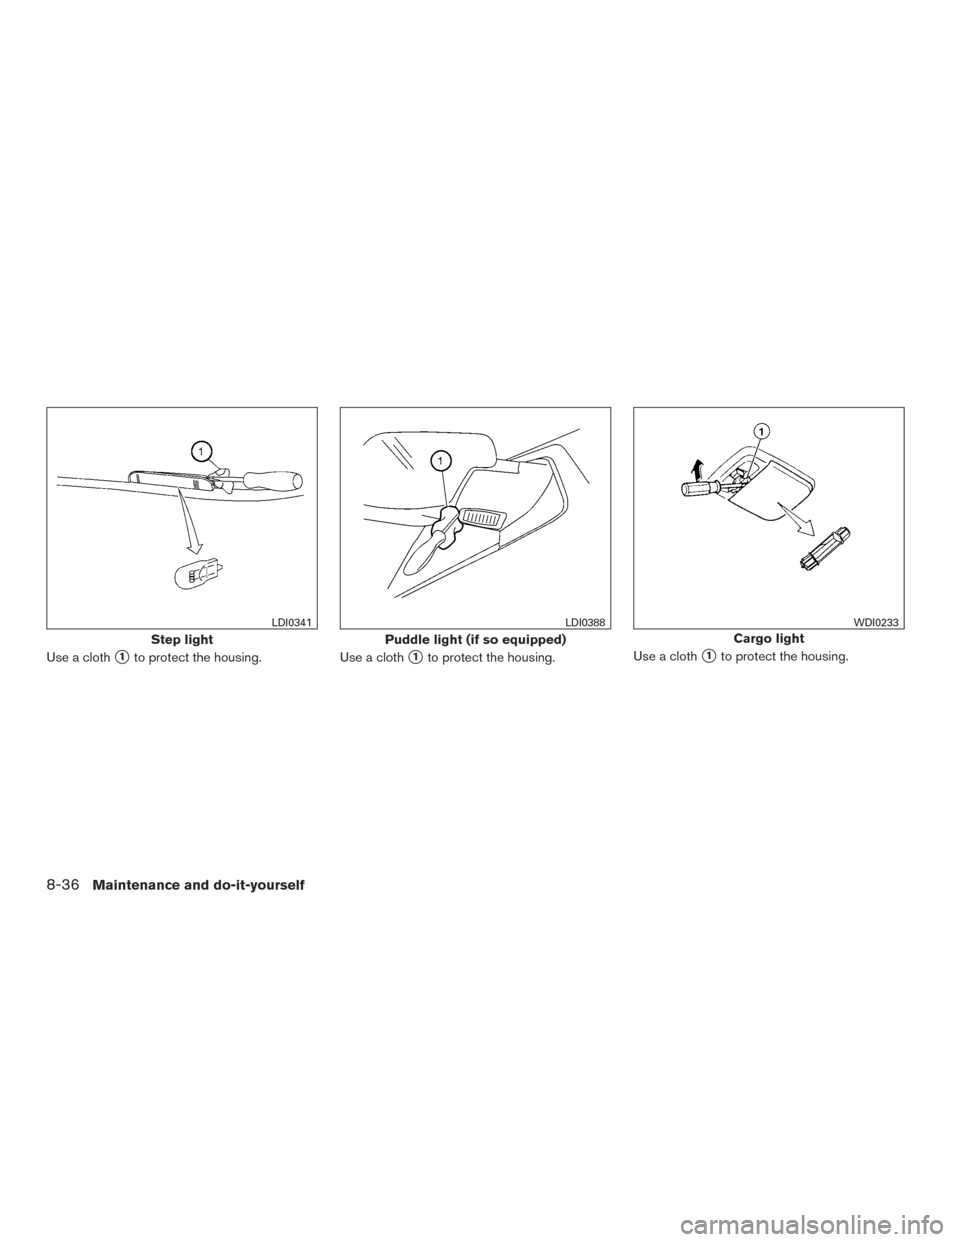
Use a cloth�1to protect the housing.Use a cloth�1to protect the housing.Use a cloth�1to protect the housing.
Step light
LDI0341
Puddle light (if so equipped)
LDI0388
Cargo light
WDI0233
8-36Maintenance and do-it-yourself

5. High-mounted stoplight
6. Cargo light
7. License plate light
8. Rear combination ligh")